jeaton01
Well-known member
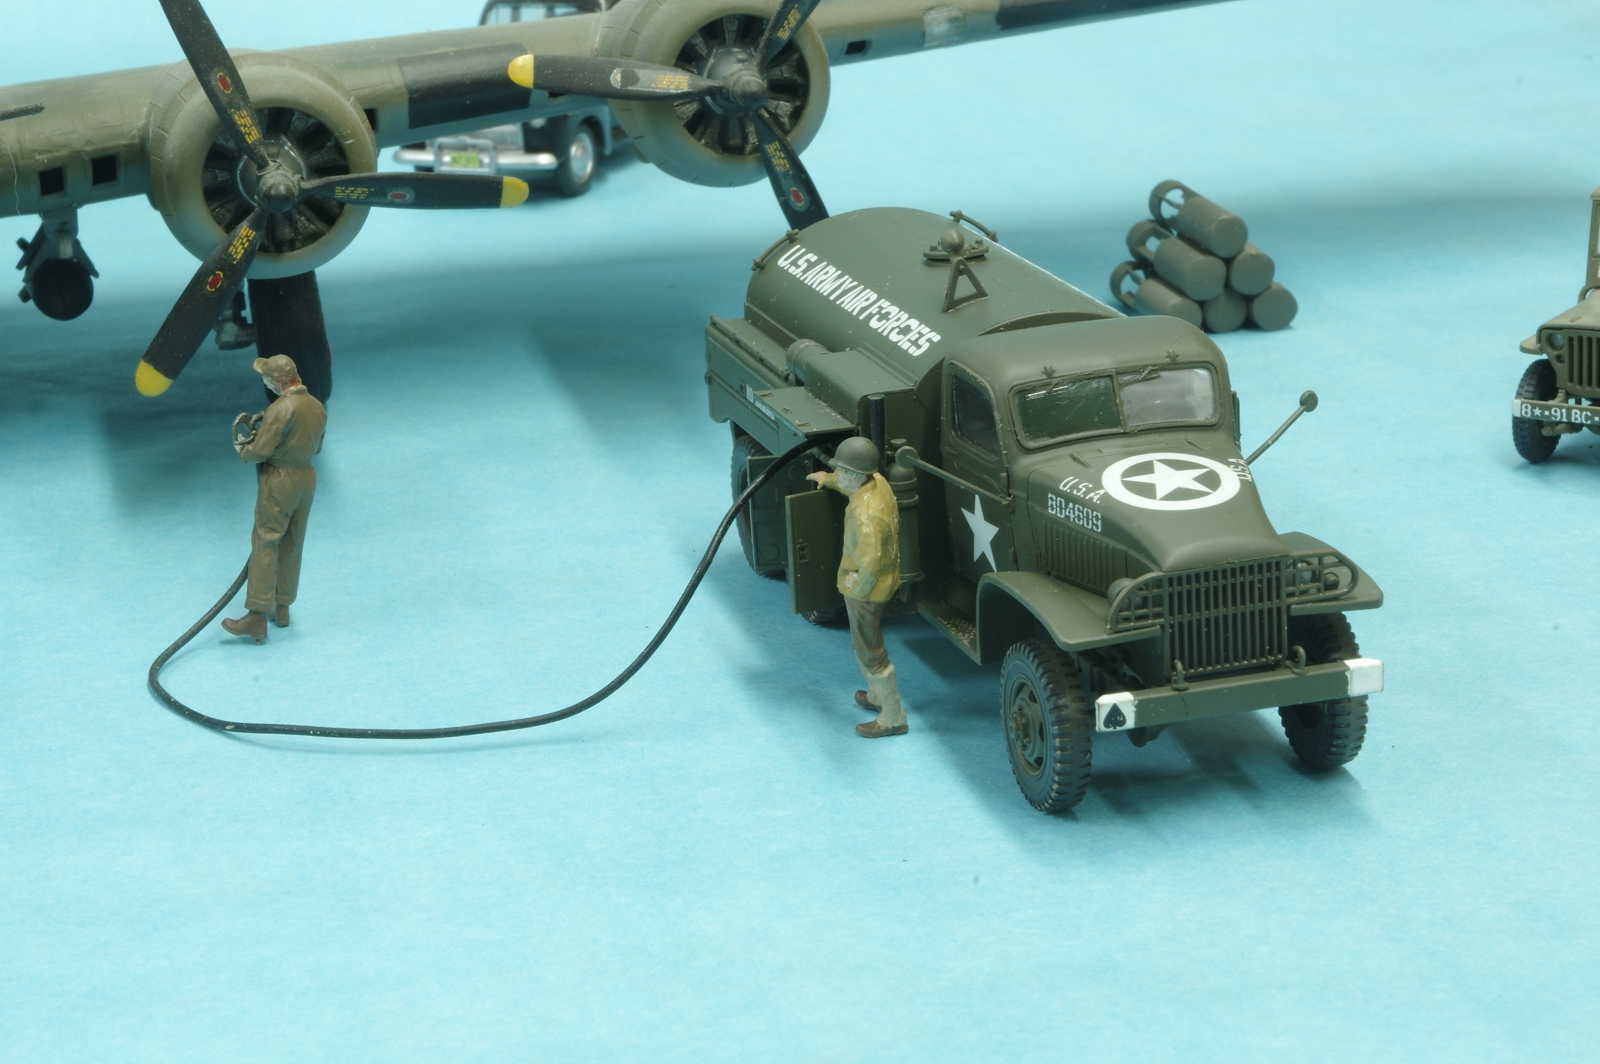
Since I was already painting wheels, I brought this kit to the bench to build along with the bomb truck. Typical Tamiya fit, but I was careful putting all the pieces of the cab together as there is no one part that locks everything together. I also deviated from the instruction's build order pretty often, such as to add the headlights and the blackout lights to the fenders before assembling it to the cab and hood. Much more room to work that way. I'm also leaving off a lot of small parts until I get to where I can get the decals on, to avoid breakage handling. Tamiya supplies a brass wire to insert in the fuel hose, I used a slightly heavier gauge as the supplied wire was not as long as the hose, and the wire is nice because it makes it easy to form the hose into bends that stay put.
Here's where it's at.

The frame is nice enough, but I noticed some details left out that would be better if added, such as brake drums, a steering gear box and drag link, and the cross tube between the rear axle spring assemblies. But it is easy to assemble and will be fine as added detail in a diorama.

There is an instrument panel decal in there if you look hard enough.

The left door is just taped in place to keep parts in alignment while the hood/roof and engine side panel cure. I trimmed the door glass so I could pose it lowered on the driver's door.

One side was done at a time.

The right side dries with the door taped in place.

The hoses have been rolled onto the reels. The reel axle is just set in place to properly position and glue the feed pipe to the axle, and to allow painting all of the interior areas of the reel and pump compartments before the reels are installed.

Tamiya calls for the nozzles to be glued into the hose but instead I drilled out the nozzles to fit the wire, and trimmed the hose back to expose the wire. I took this photo with a 100mm macro lens, worked well for this small detail because of the high magnification.

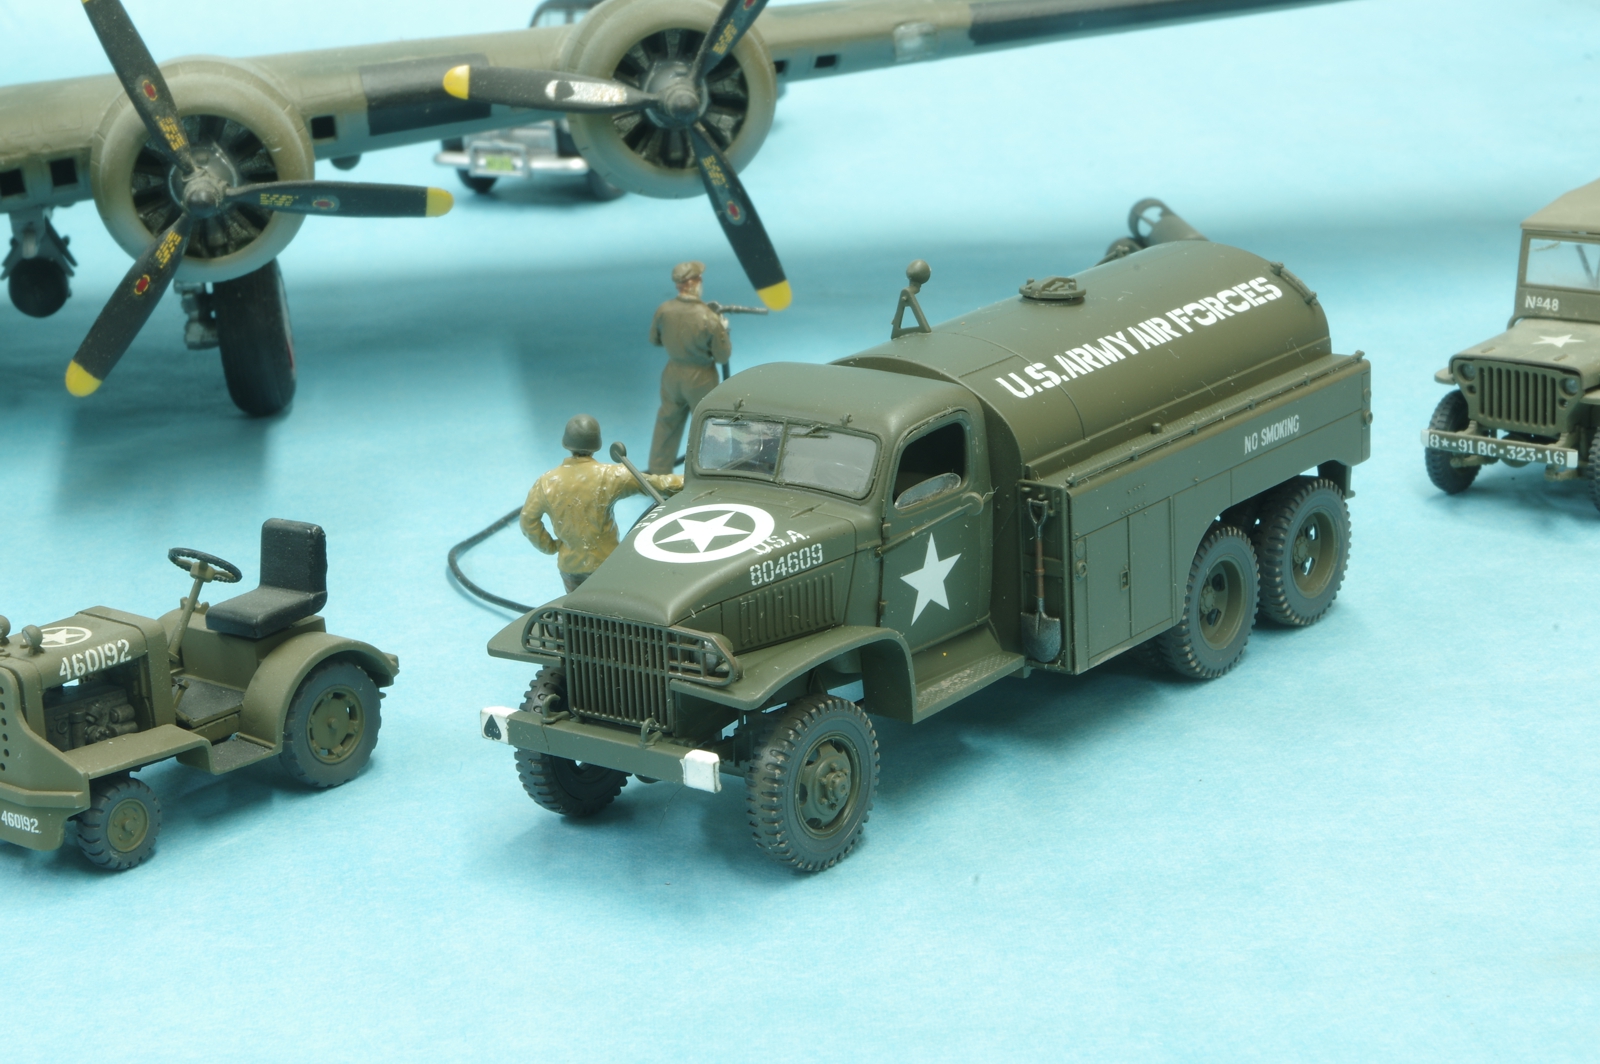
The present state. I will do the decals next on this and the bomb truck. It's probably time to trim the hose to length, I'm thinking a scale 25 feet would be 6 inches, however 8 might be better. I suspect the hose material is a bit over scale in diameter.

The fuel truck's share of tires and wheels.

Here's where it's at.
The frame is nice enough, but I noticed some details left out that would be better if added, such as brake drums, a steering gear box and drag link, and the cross tube between the rear axle spring assemblies. But it is easy to assemble and will be fine as added detail in a diorama.
There is an instrument panel decal in there if you look hard enough.
The left door is just taped in place to keep parts in alignment while the hood/roof and engine side panel cure. I trimmed the door glass so I could pose it lowered on the driver's door.
One side was done at a time.
The right side dries with the door taped in place.
The hoses have been rolled onto the reels. The reel axle is just set in place to properly position and glue the feed pipe to the axle, and to allow painting all of the interior areas of the reel and pump compartments before the reels are installed.
Tamiya calls for the nozzles to be glued into the hose but instead I drilled out the nozzles to fit the wire, and trimmed the hose back to expose the wire. I took this photo with a 100mm macro lens, worked well for this small detail because of the high magnification.
The present state. I will do the decals next on this and the bomb truck. It's probably time to trim the hose to length, I'm thinking a scale 25 feet would be 6 inches, however 8 might be better. I suspect the hose material is a bit over scale in diameter.
The fuel truck's share of tires and wheels.
Last edited: