-
Modelers Alliance has updated the forum software on our website. We have migrated all post, content and user accounts but we could not migrate the passwords.
This requires that you manually reset your password.
Please click here, http://modelersalliance.org/forums/login to go to logon page and use the "Forgot your Password" option.
You are using an out of date browser. It may not display this or other websites correctly.
You should upgrade or use an alternative browser.
You should upgrade or use an alternative browser.
Tamiya's Jeep Willys MB
- Thread starter White_Wolf
- Start date
White_Wolf
Master at Arms
Thanks Mike, I was inclined to think along the same lines 
Glossy they are, the photos I took were on the bench with less than ideal light and setup :smack
They will received a coat of Testor's dullcote which I have only started using recently - that stuff totally stinks the whole place up. The lady of the house was suspicious of that smell :stinker and protests loudly when it's being used but I am holding my ground firmly :fencing
Laurence
White_Wolf
Master at Arms
It's a good stink, could be worse. :stinker
I know
White_Wolf
Master at Arms
Minor update (kind of ...)
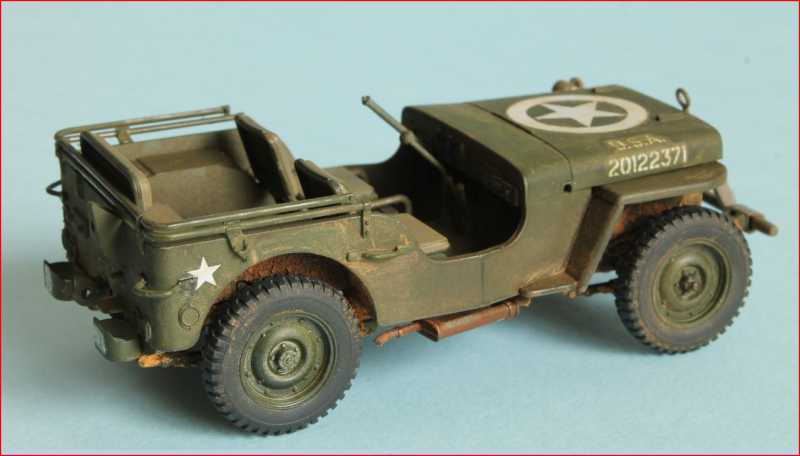
Under carriage weathered with pigments but still a way to go. Wheels in place (obviously :smack ), the body has received a very faint weathering but that was more like a test for me to see what it looks like. Proper stuff will be done later using Humbrol 72 & 155.
At the front I chose the tow bar option that, according to the instructions, was used for towing vehicles and for linking two jeeps to tow the 105mm mortar. Since this one belongs to an artillery unit, thought it would make sense.

Thanks,
Laurence
Under carriage weathered with pigments but still a way to go. Wheels in place (obviously :smack ), the body has received a very faint weathering but that was more like a test for me to see what it looks like. Proper stuff will be done later using Humbrol 72 & 155.
At the front I chose the tow bar option that, according to the instructions, was used for towing vehicles and for linking two jeeps to tow the 105mm mortar. Since this one belongs to an artillery unit, thought it would make sense.


Thanks,
Laurence
Bam! Think I'm going to be ready for this same treatment tomorrow. 
So what colors were used?

So what colors were used?

White_Wolf
Master at Arms
Bam! Think I'm going to be ready for this same treatment tomorrow.
So what colors were used?
Primer - Vallejo Grey Primer 74601
OD - Tamiya XF58 (as per instructions)
Pigments - Vallejo Dark and Light Yellow Ochre and Burnt Umber mixed in various proportions to produce different shades - idea was to simulate dry and dryer mud - something like that.
Next - drybrushing with Humbrol 72 & 155, a pin wash with raw umber + rectified turps.
Laurence
White_Wolf
Master at Arms
Looks excellent.
Ian
Thanks Ian, appreciate it.
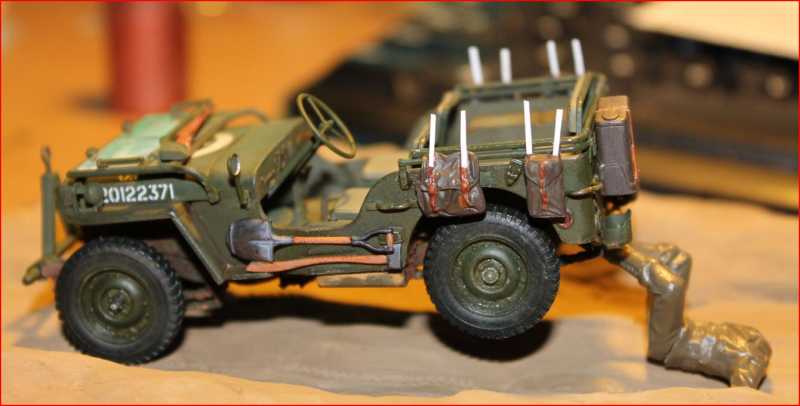
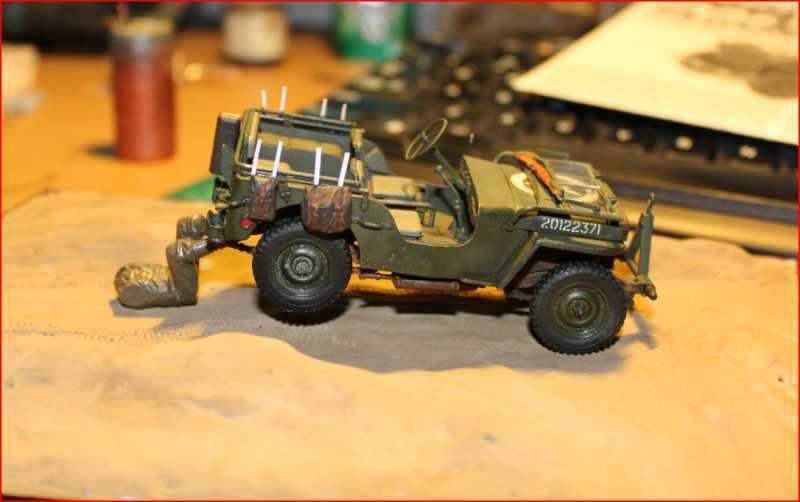
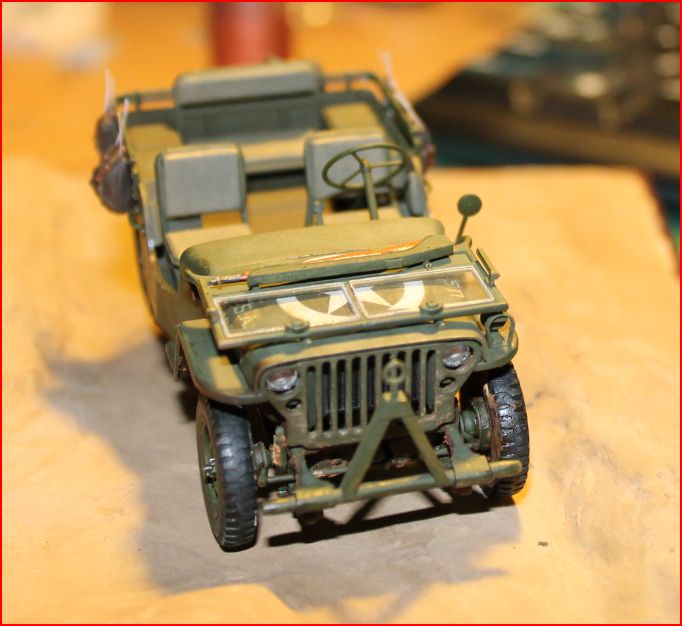
Here's the update - for this week. Everything is pretty much in place, all that is left is the weathering and final touches. Have added some stowage from an older tamiya kit, the white straps will be wrapped around the bars and painted.
This is intended to be a vignette - the driver figure comes with the kit in a "sit and drive" position which works out well for what I want to do.
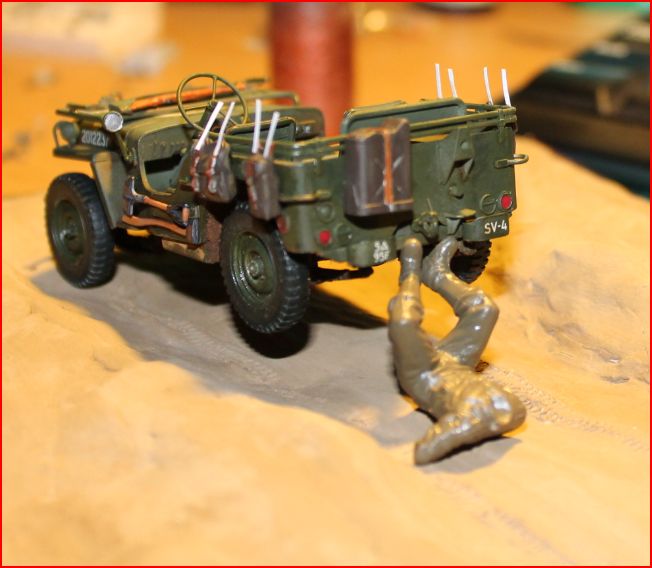
Thanks for looking
Laurence
Plastik Smurff
Well-known member
Lookin sweet mate. 
White_Wolf
Master at Arms
Lookin sweet mate.
Thank you Sir

Quite frankly, I was thinking it would turn out a lot worse, my mind has been on a different planet these past few days so, to see that fellow modellers with hell of a lot more skill than me find it of a decent quality, is really special.
Cheers,
Laurence
Oh that's fun! Reminds me of the stuff we see from time to time recreating Bill Mauldin's Will and Joe series.
Sherman 18
Master at Arms
White_Wolf
Master at Arms
Not being critical, but you might want to straighten his legs like the photo? He might get mistaken for some poor soul who just fell off the wagon. This is a very unique idea and it's been fun to follow.
You're not critical at all, appreciate the feedback and the compliments from everyone here

That's just straight out the sprues sort of speak, there's work to be done on Jack the jack
The difference will probably be in clothing, the guy in the original photo is topless and without a helmet. not sure yet how mine will turn out, but I think a jacket will be present - the scene is in the field out there, there's got to be some decency, one can't roam around in France like that :smack
White_Wolf
Master at Arms
Minor update ...
Looking at photos of the real thing I noticed straps holding the shovel and axe together, missing from the kit. Sticking them to the body with glue doesn't appear to be realistic enough so I added straps and a hook to hold the axe.
The stowage has since change color, it's now a khaki with a raw umber wash. Photos later today. Struggling a bit with the rifle holder, the one on the side (right side as per the kit's instructions) that needs straps as well :vmad
Anyway, here's the pic thanks for watching.
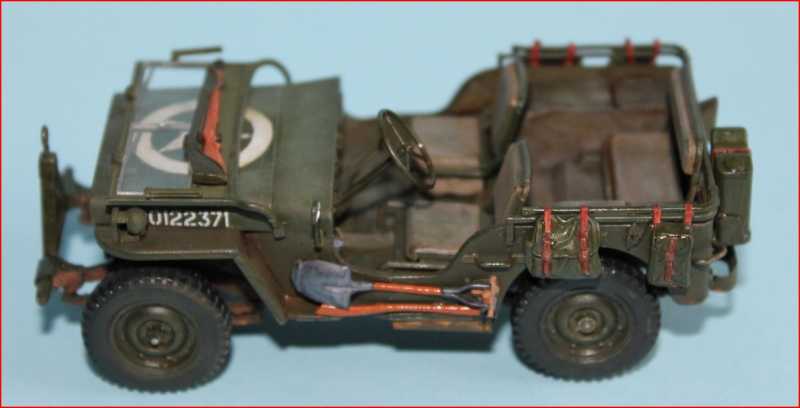
Working on straightening the figure's legs (got a new saw B) ) have also noticed that his bum is flat, he was meant to be seated so I have to read the sculpting threads carefully to learn how to get it right :hmmm
Cheers,
Laurence
Looking at photos of the real thing I noticed straps holding the shovel and axe together, missing from the kit. Sticking them to the body with glue doesn't appear to be realistic enough so I added straps and a hook to hold the axe.
The stowage has since change color, it's now a khaki with a raw umber wash. Photos later today. Struggling a bit with the rifle holder, the one on the side (right side as per the kit's instructions) that needs straps as well :vmad
Anyway, here's the pic thanks for watching.

Working on straightening the figure's legs (got a new saw B) ) have also noticed that his bum is flat, he was meant to be seated so I have to read the sculpting threads carefully to learn how to get it right :hmmm
Cheers,
Laurence
Similar threads
- Replies
- 1
- Views
- 135
- Replies
- 70
- Views
- 5K

