
-
Modelers Alliance has updated the forum software on our website. We have migrated all post, content and user accounts but we could not migrate the passwords.
This requires that you manually reset your password.
Please click here, http://modelersalliance.org/forums/login to go to logon page and use the "Forgot your Password" option.
You are using an out of date browser. It may not display this or other websites correctly.
You should upgrade or use an alternative browser.
You should upgrade or use an alternative browser.
Tamiya Gloster Meteor F1 + V1 Flying Bomb
- Thread starter Phil
- Start date

")
Dave The Chef
Member
Beautiful work as always Phil B)

Ooooh yes!! Are you going to have it chasing the V1 Phil?
SA Dave
Looks great Phil!! Are you going to have the plane chasing down the V1? That would be a cool little diorama
Terry
Damn they are great ideas, have the Meteor's wing tip nudging the V1 into a dive........ hmmmmm!
gloss coat is on so so to be finished - but that dio idea is eating at me!!1
Dave The Chef
Member
Great Phil, nice tip about that front part B)
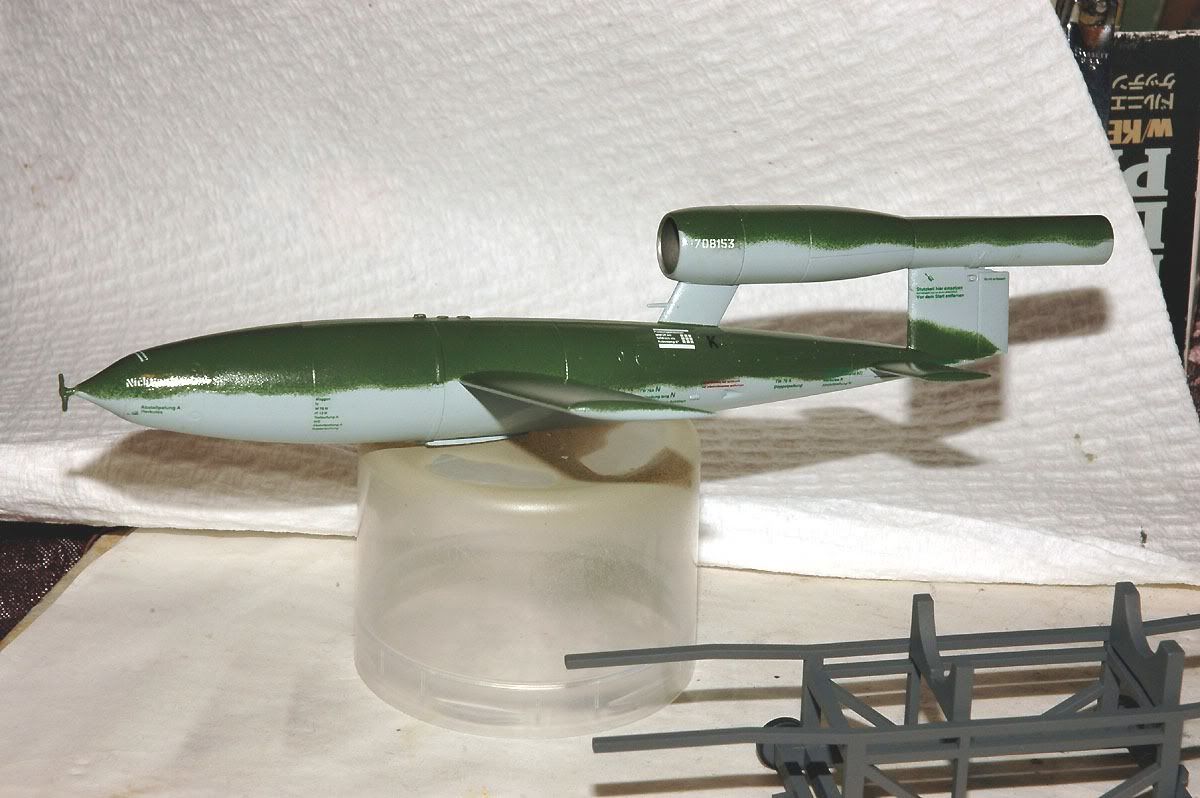
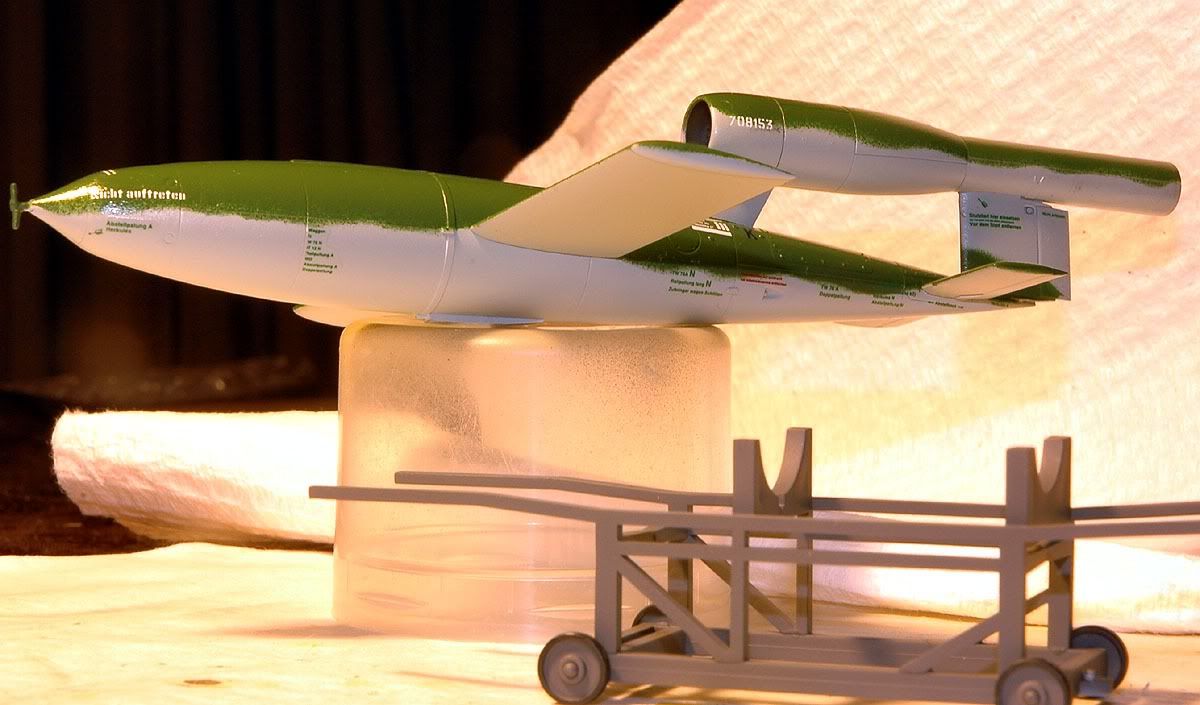
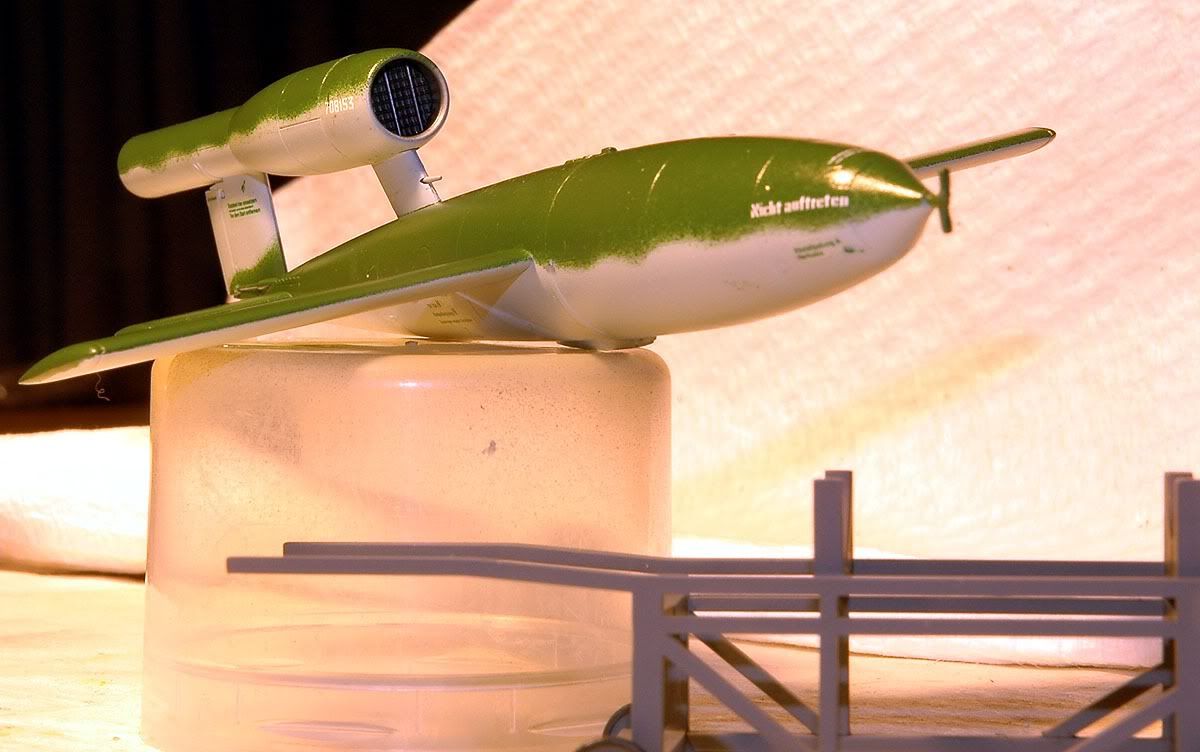
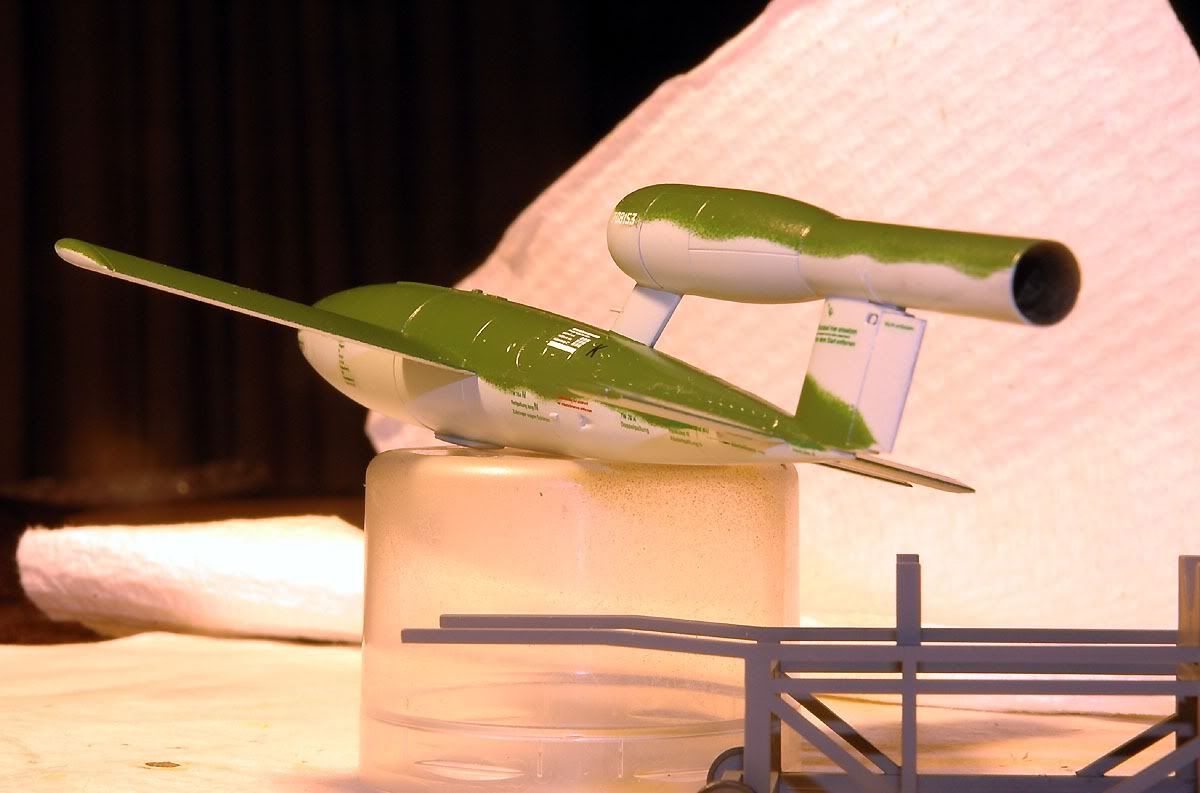
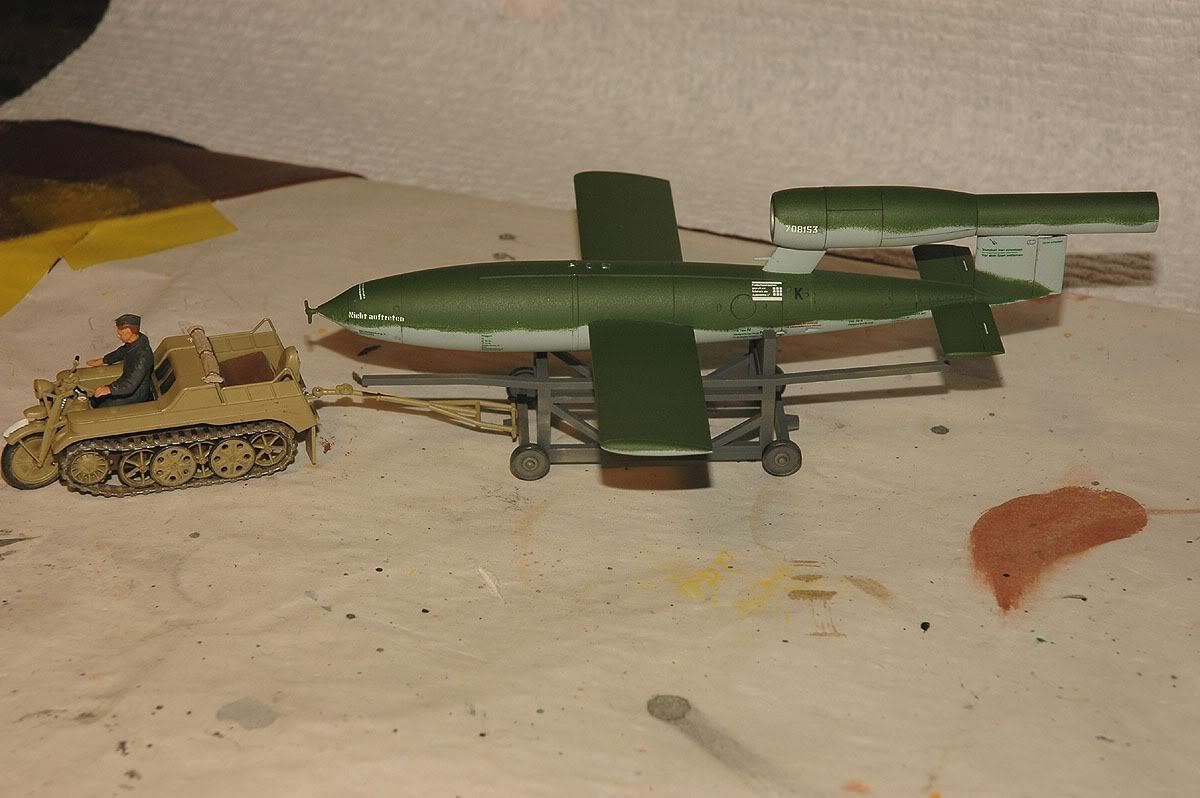
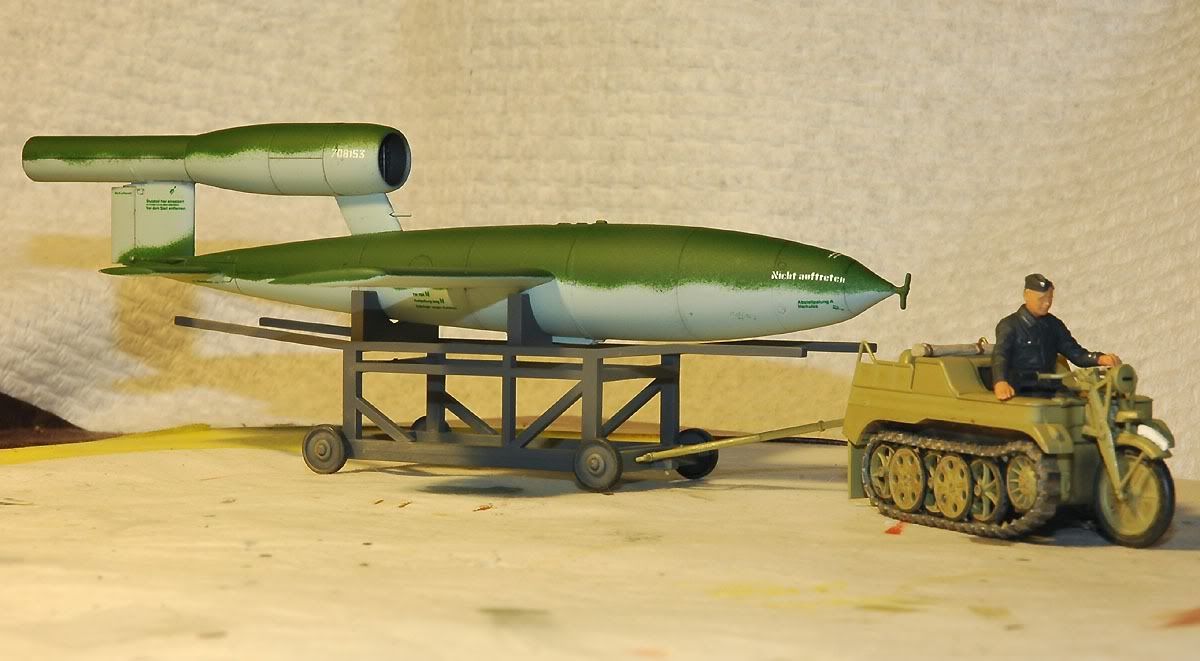
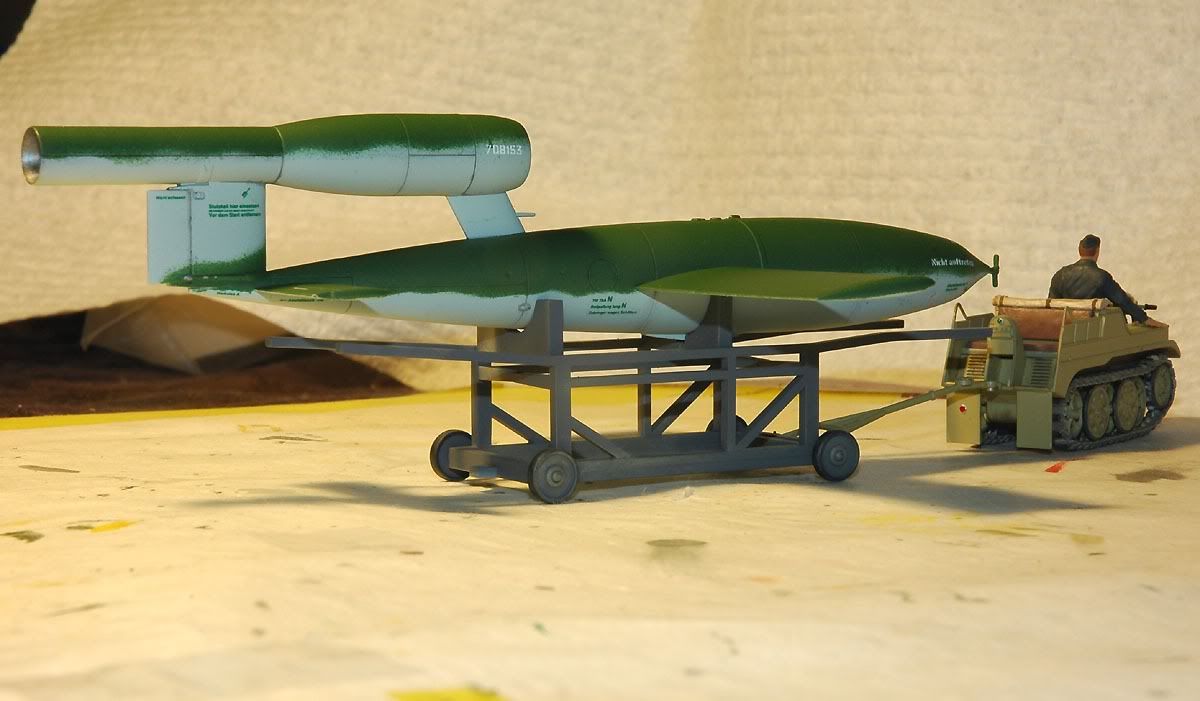
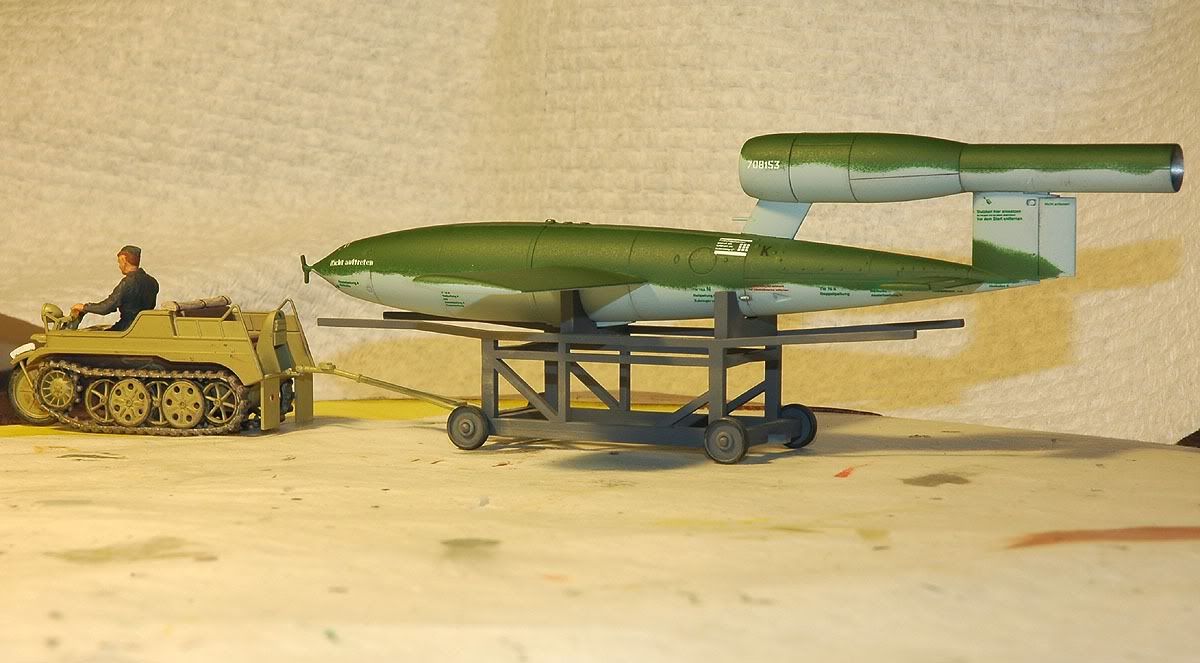
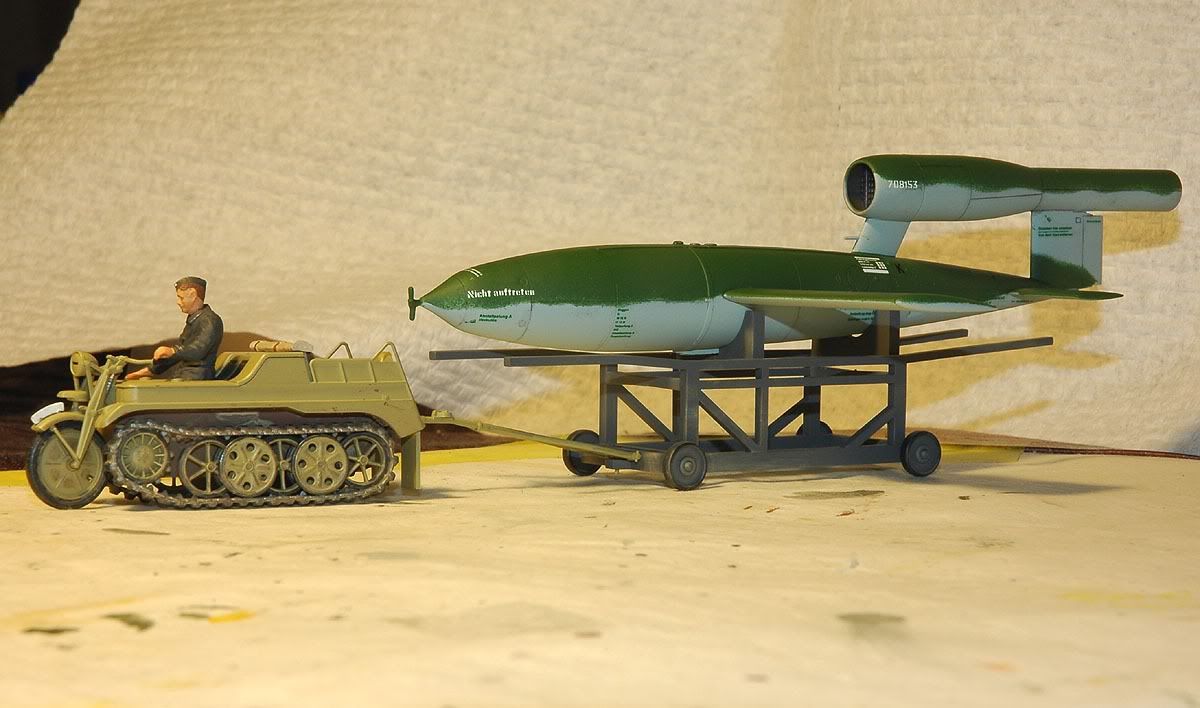
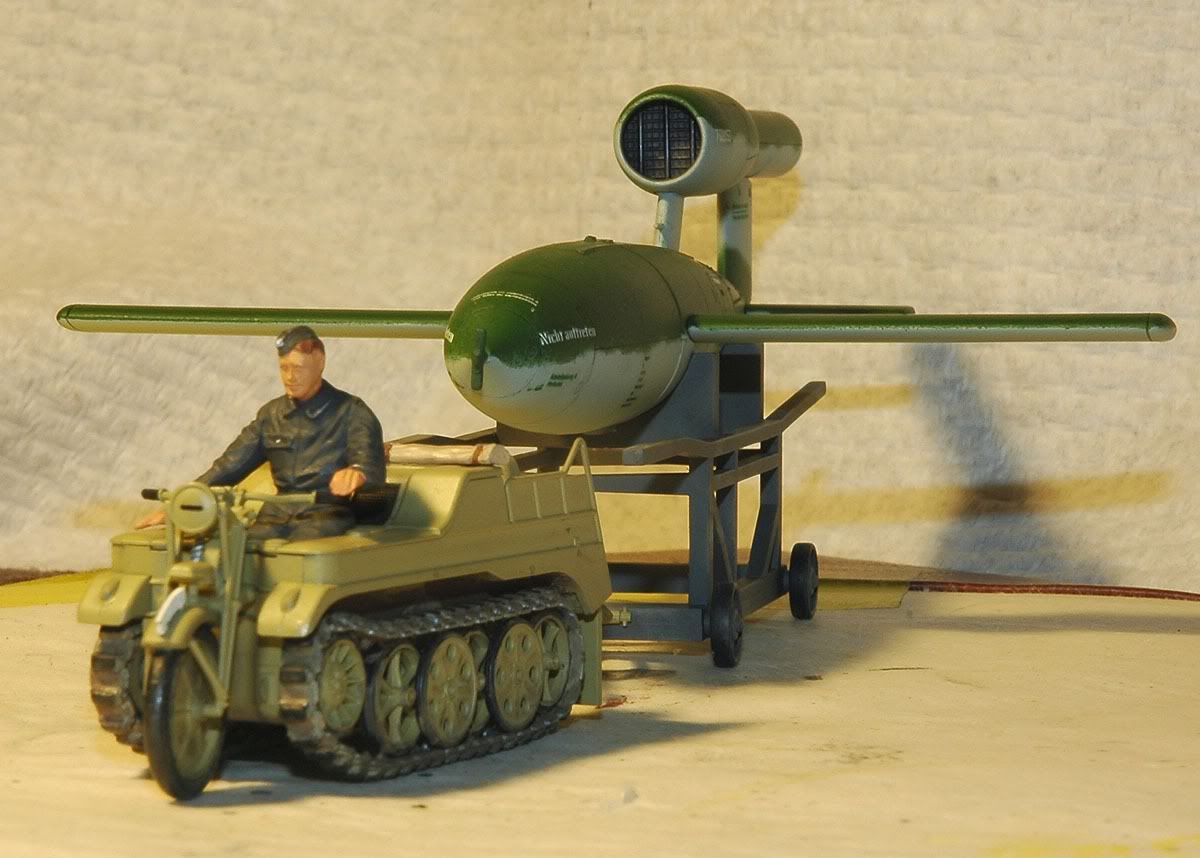
Finished off the V1 tonight, the Testors rattlecan flatcoat went on flawlessly over Tamiya's A/S rattlecan series of synthetic lacquer paint, had an unused aircraft tow link from the Kretten so made up a simple attachment for the V1 cart.
Also tried Tamiya's bottled black panel line accent on some lines which works rather well, it's enamel based and flowed along the lines quite good.
Also thinking that these things most probably petty well pristine as I'm sure they would of been fired off as soon as they were built.
The supplied brush in the bottle is a tad too big for my personal thoughts, so I switched to one of my very fine brushes.
A folded facial tissue was at hand to remove any misplaced accent, and the flatcoat also toned this down very nicely.
phantom II
Master at Arms
Well, there's something I would never like to tow .
I just wonder how good of a job a painter would be incline to do on a one flight item.
I am also thinking that in such a late stage of the war item might have been manufactured in different locations and thus maybe painted separately ?
Looking really good Phil .
Cheers, Christian B)
I just wonder how good of a job a painter would be incline to do on a one flight item.
I am also thinking that in such a late stage of the war item might have been manufactured in different locations and thus maybe painted separately ?
Looking really good Phil .
Cheers, Christian B)

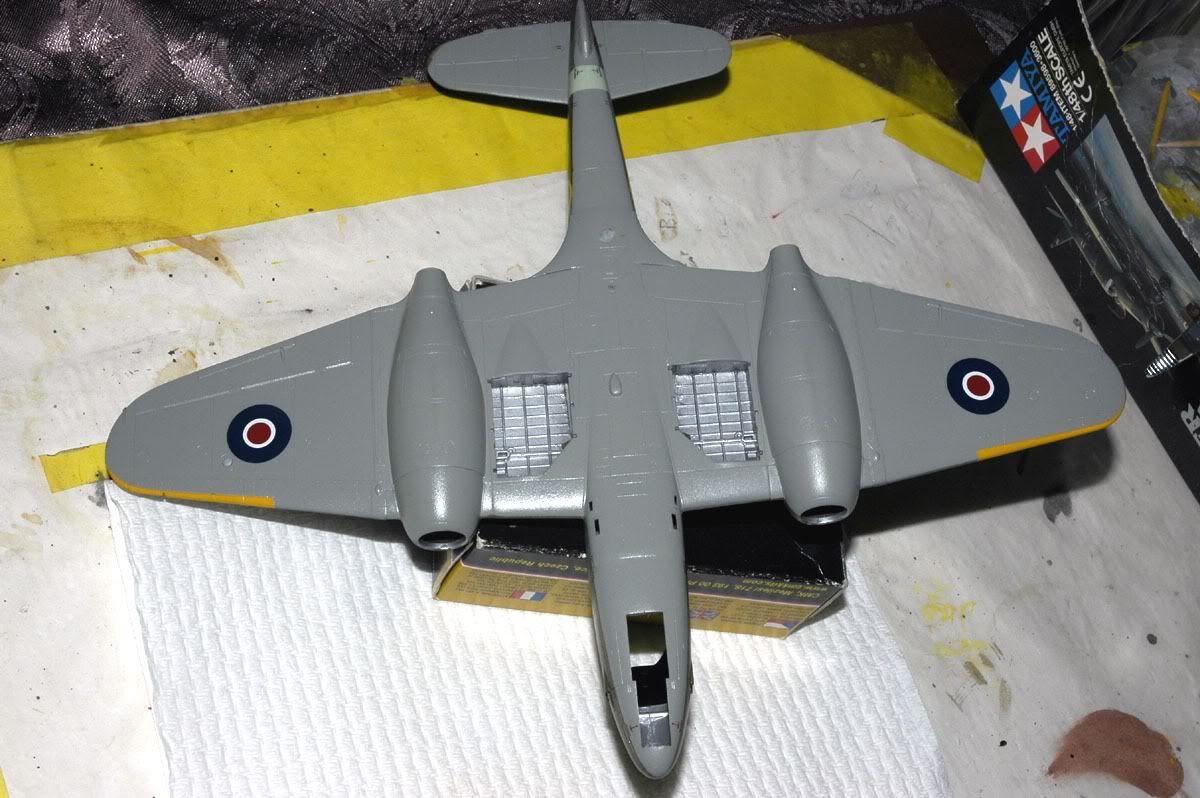
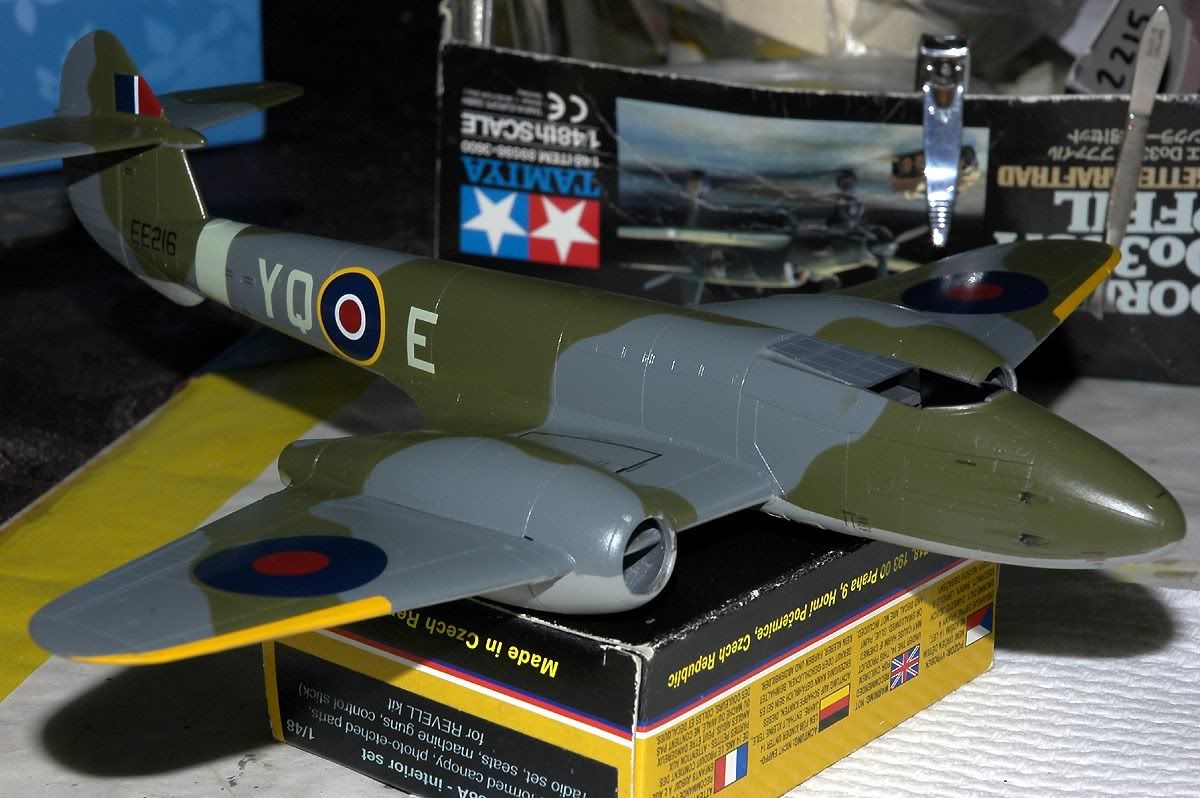
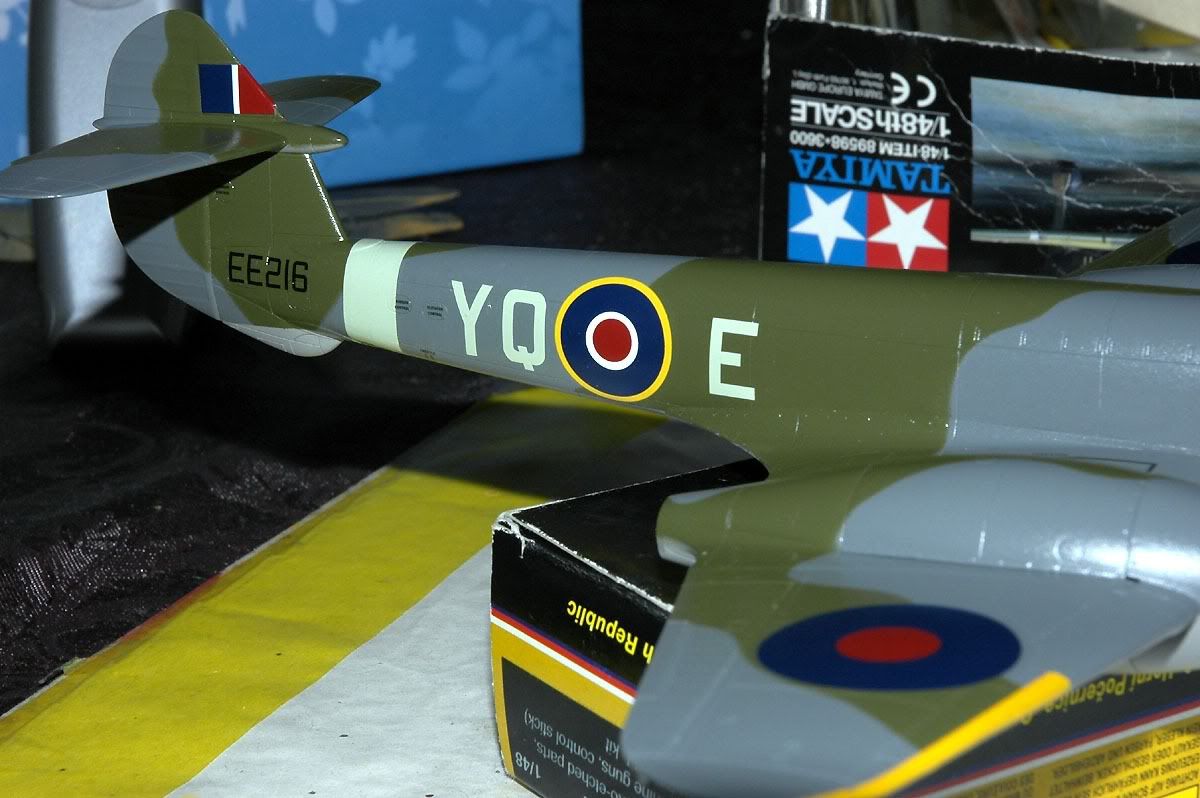
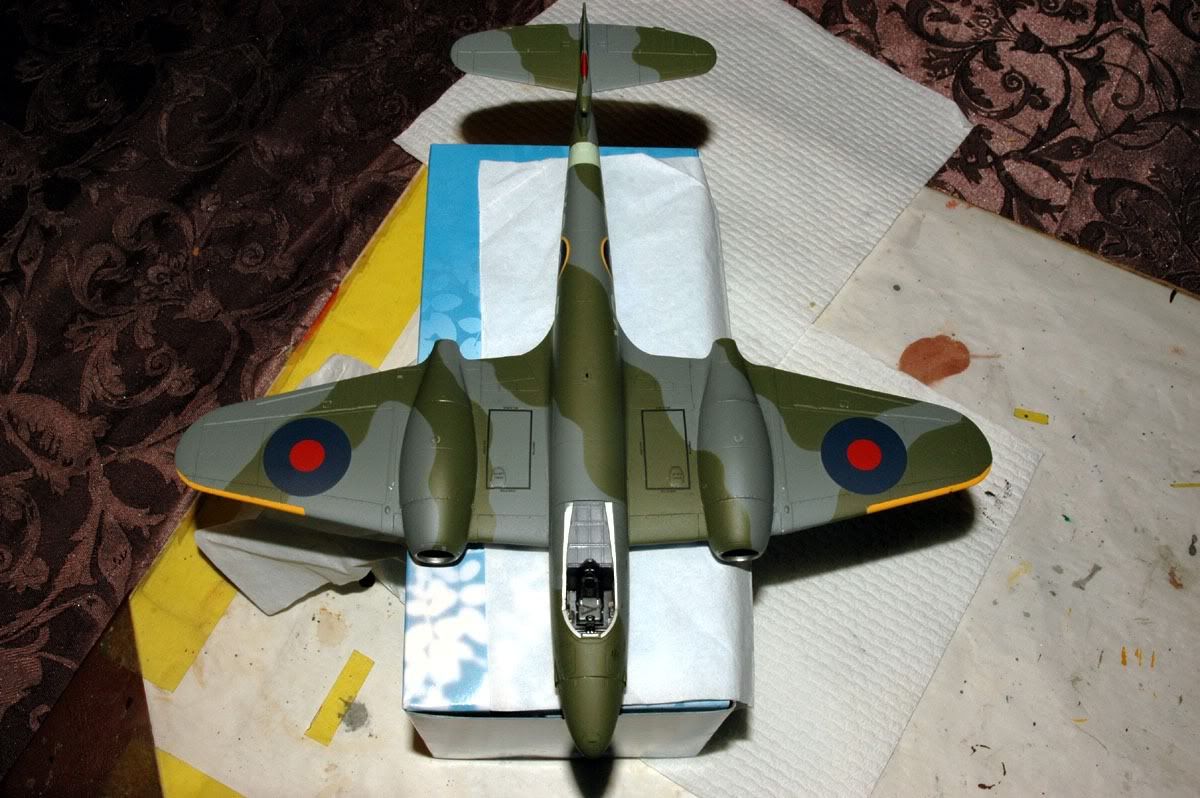
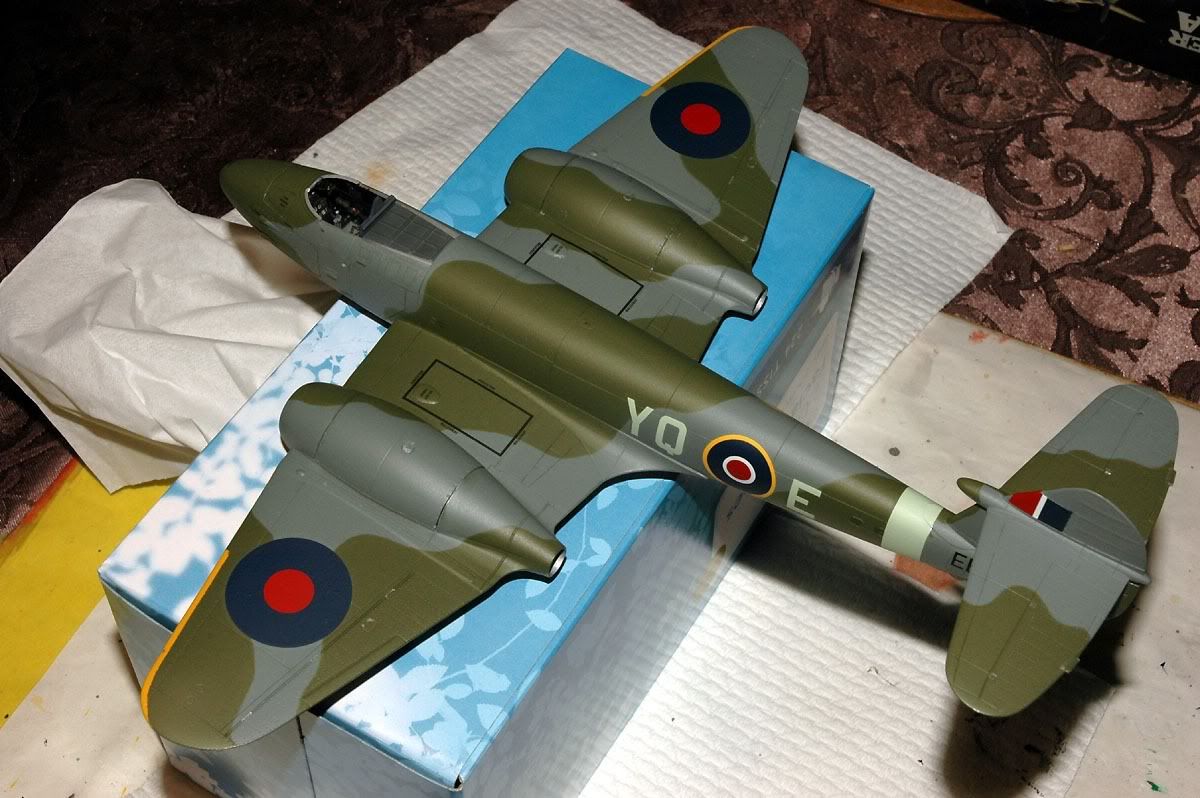
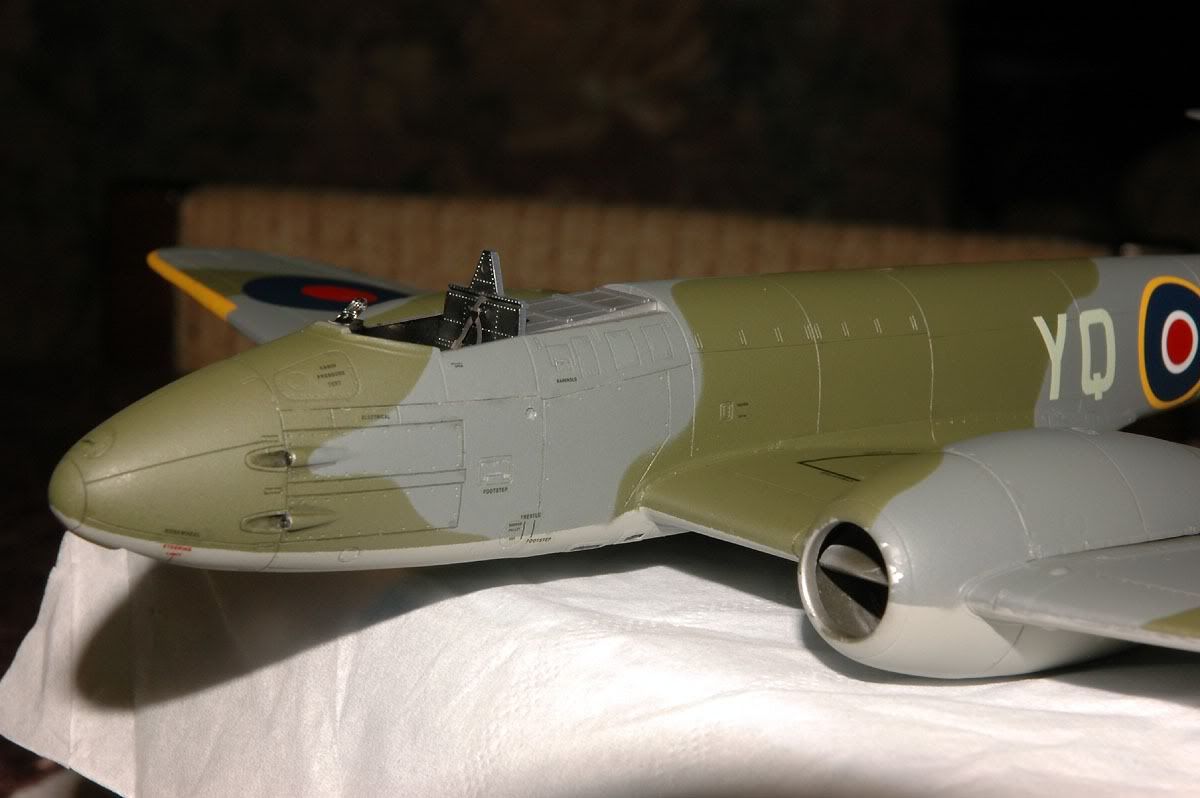
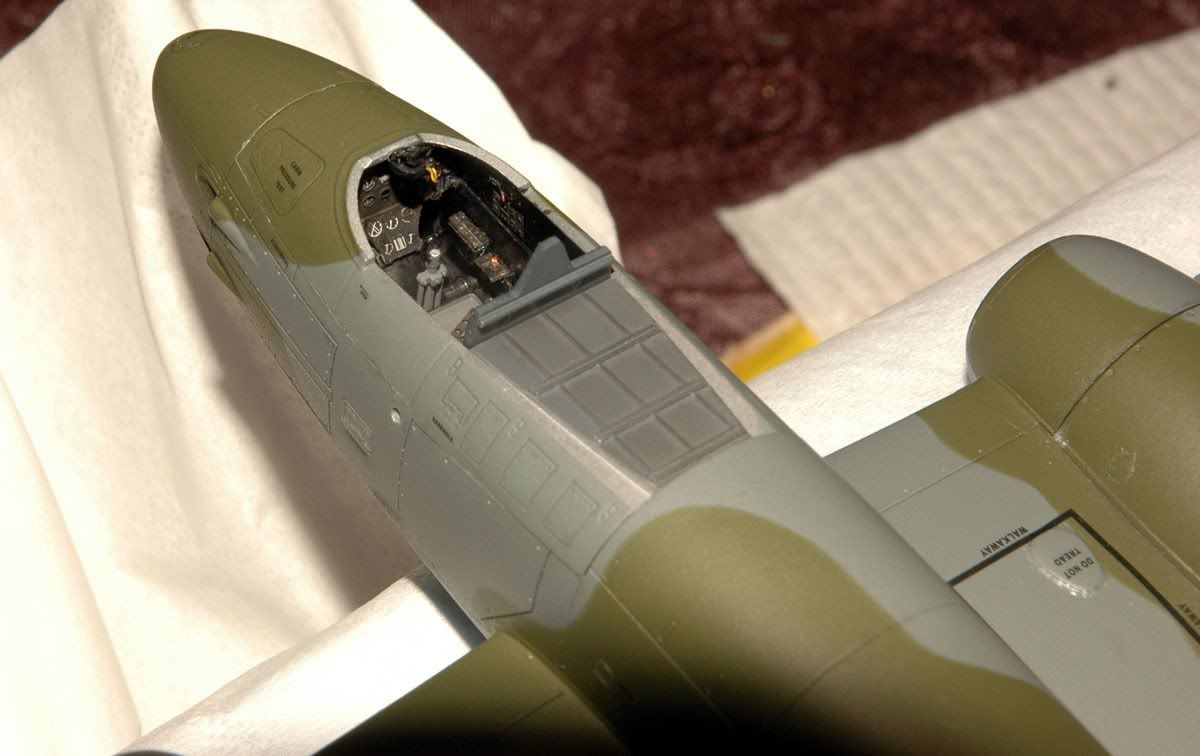
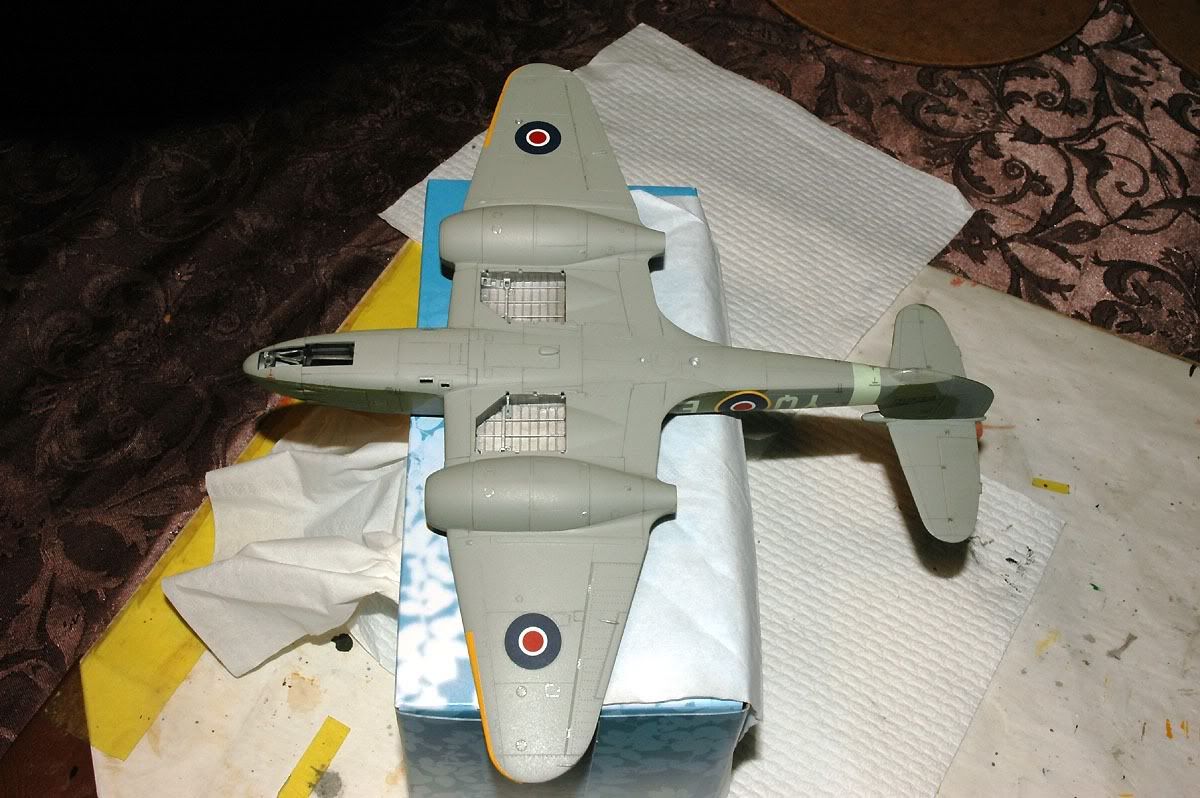
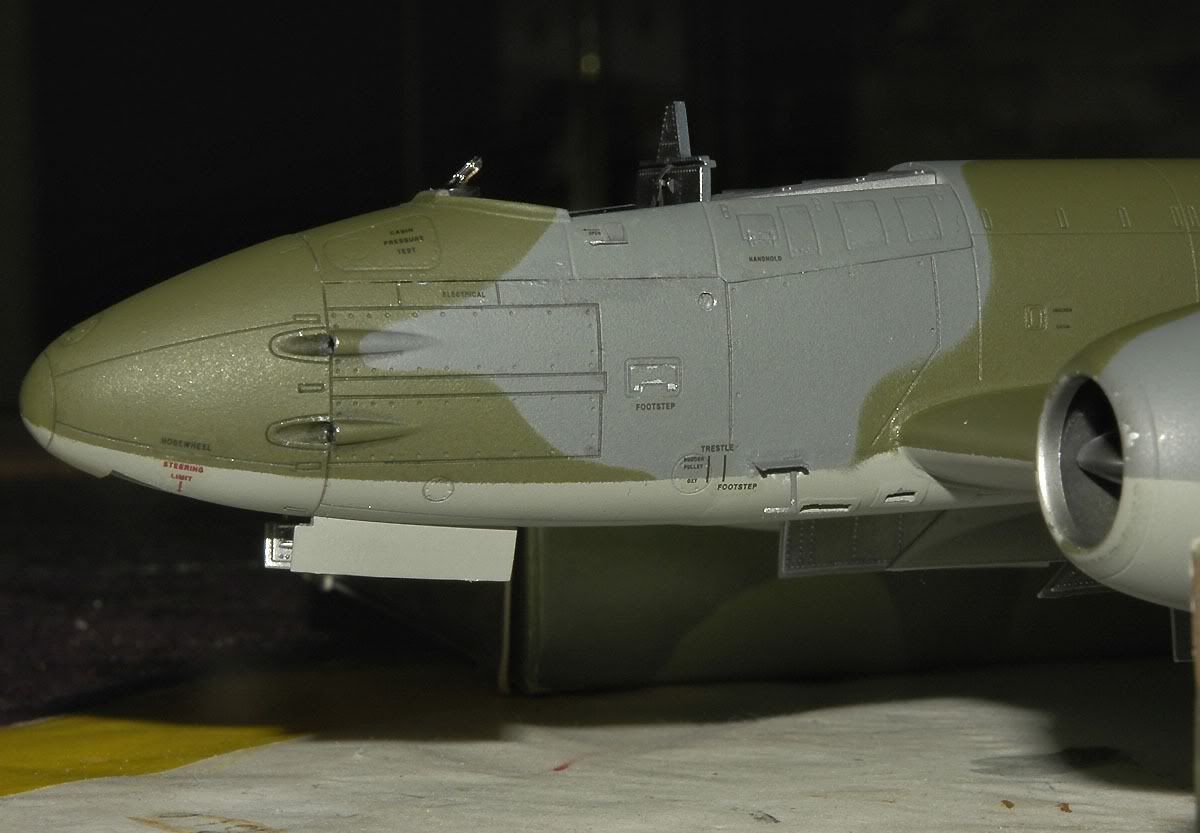
ok here's the Meteor with the decals (futured) just finished - future drying now
since these were taken I have done panel line accents using the Tamia product like on the V1.
From the pice in Squadron Signal the Meteor was a clean looking aircraft - the only one I saw filthy was an Aussie one in Korea.
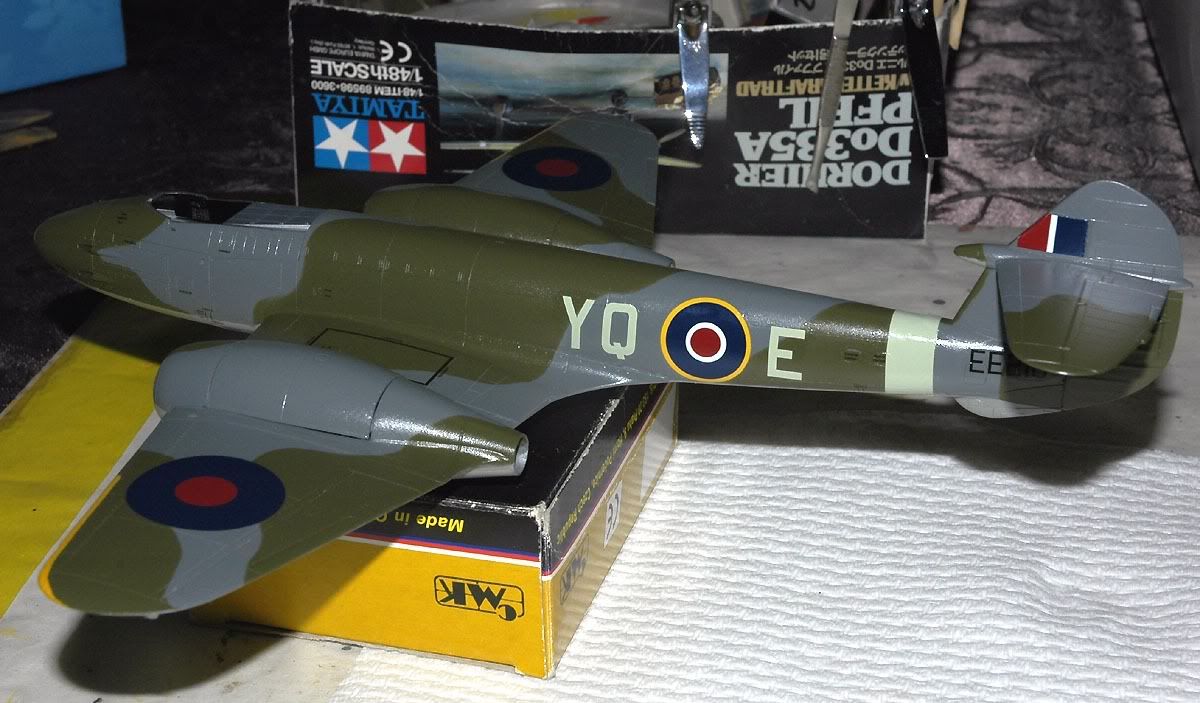
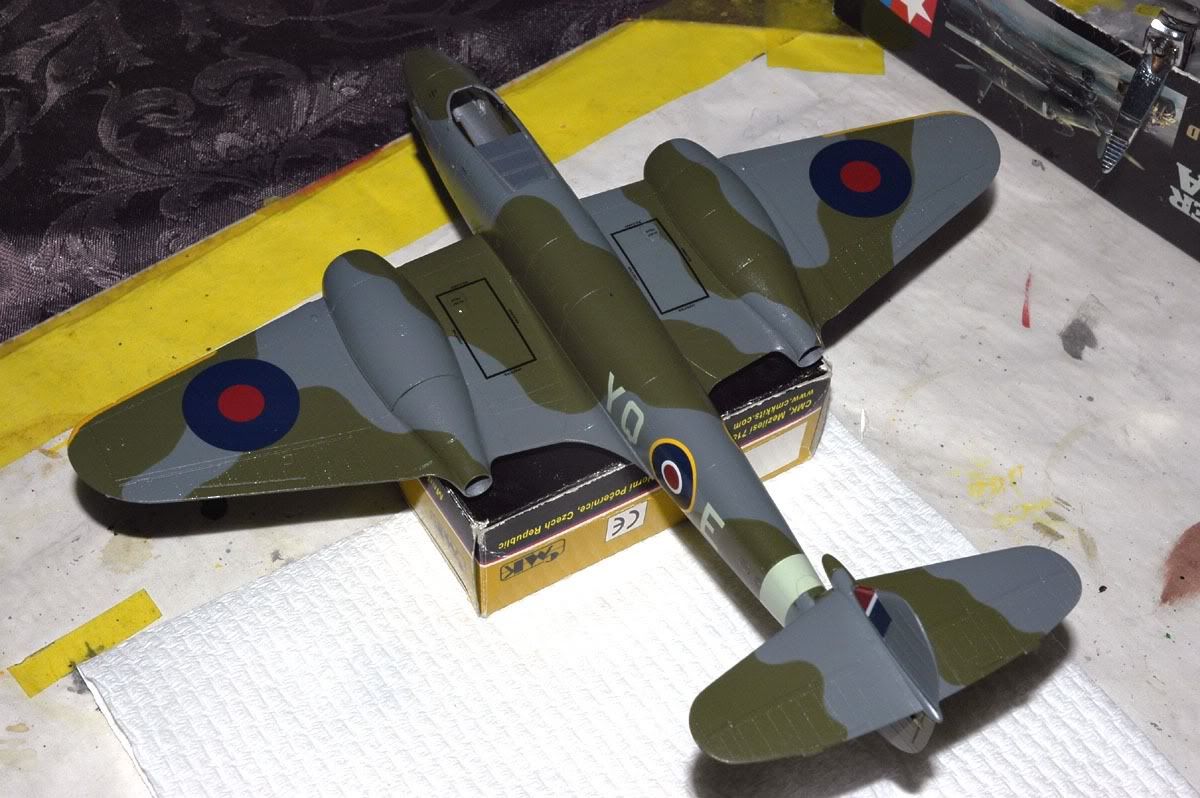
A grand total of 4 decals for the underside!!
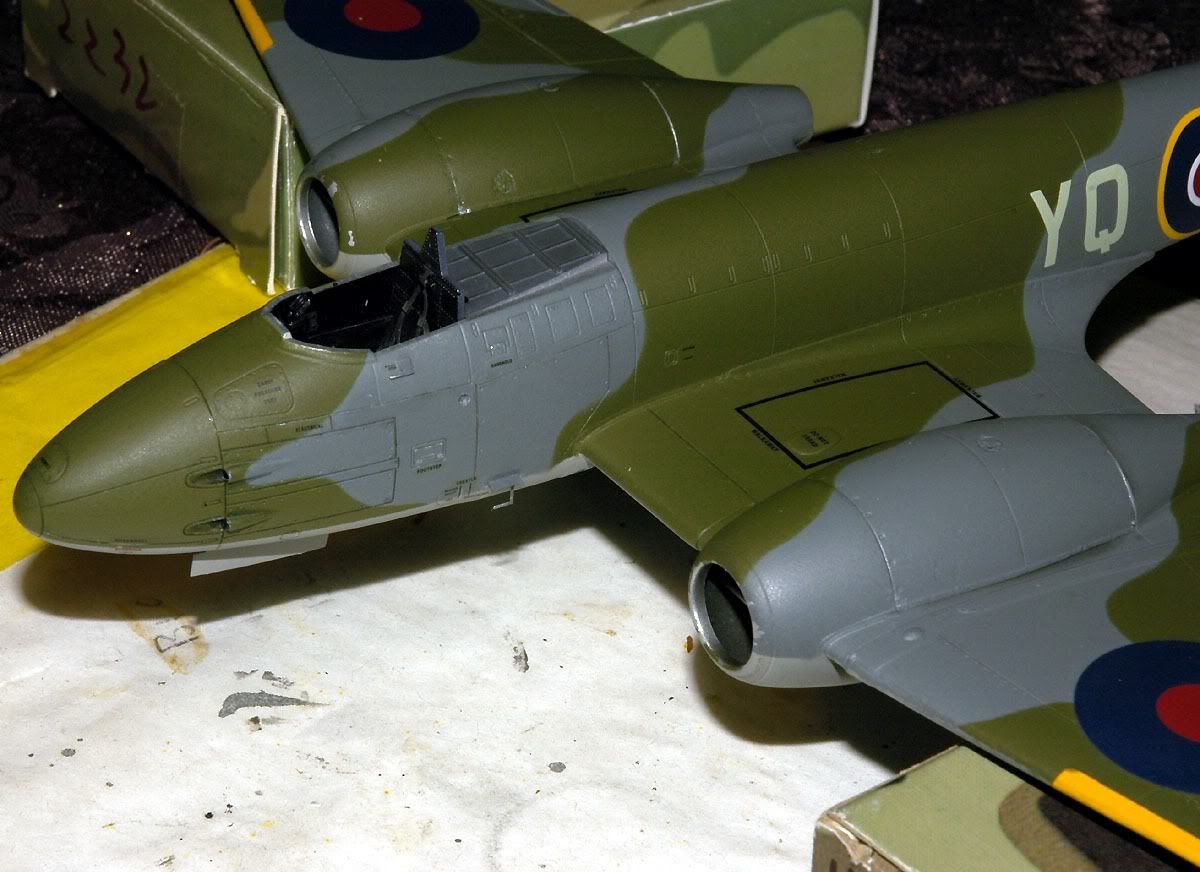
I had a mishap with the Y Q on the starboard side, it ripped on the Y repaired it with much persuasion
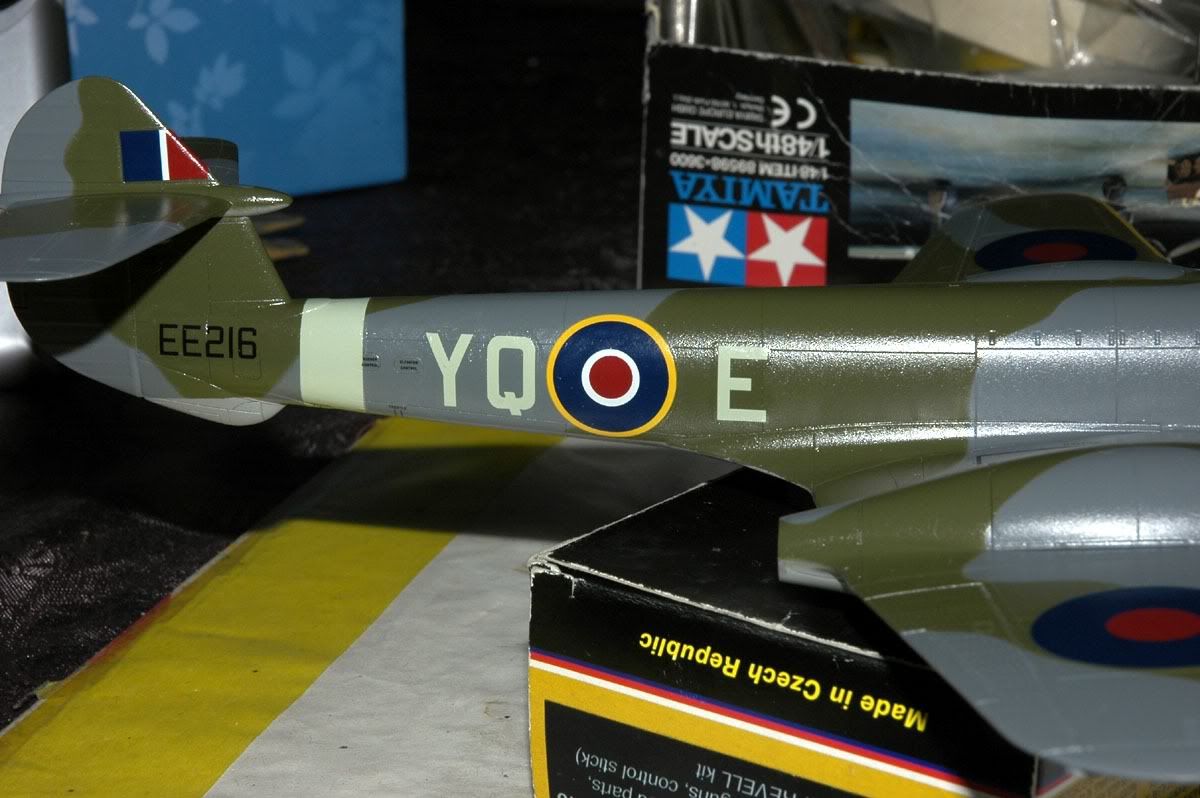
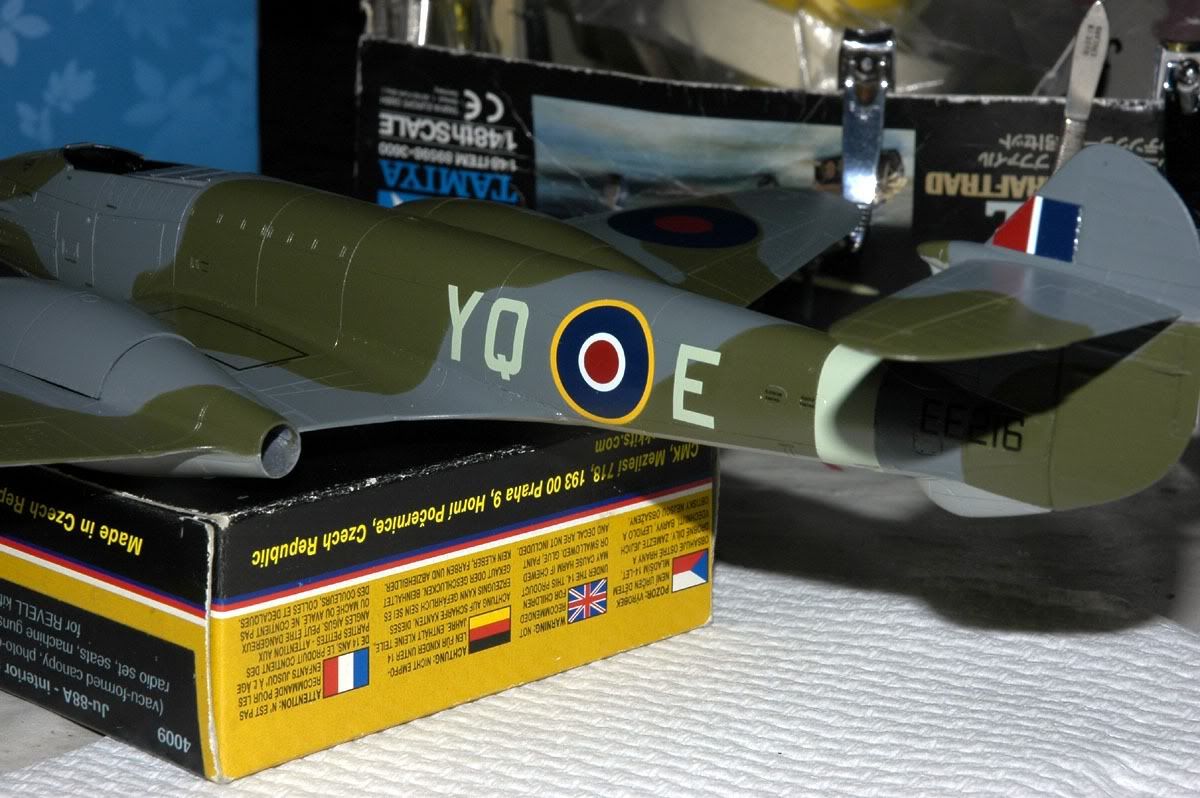
The Tamiya decals needed hot water to separate from the backing paper - I was constantly micro-waving my water dish for 30 seconds at a time to get these to let go.
They did however go on and settle down quite ok (except for my one user mishap!)
Will flatcoat in a day or two then time to finish this one.
since these were taken I have done panel line accents using the Tamia product like on the V1.
From the pice in Squadron Signal the Meteor was a clean looking aircraft - the only one I saw filthy was an Aussie one in Korea.
A grand total of 4 decals for the underside!!
I had a mishap with the Y Q on the starboard side, it ripped on the Y repaired it with much persuasion
The Tamiya decals needed hot water to separate from the backing paper - I was constantly micro-waving my water dish for 30 seconds at a time to get these to let go.
They did however go on and settle down quite ok (except for my one user mishap!)
Will flatcoat in a day or two then time to finish this one.
Flatcoated with Testors rattlecan - pushed my luck and did this in very breezy conditions oputside and not much sun - we have lovely rain now :evil:
my panel line accent didn't work as I had hoped, the flatcoat toned it down nice and in places too nice!!
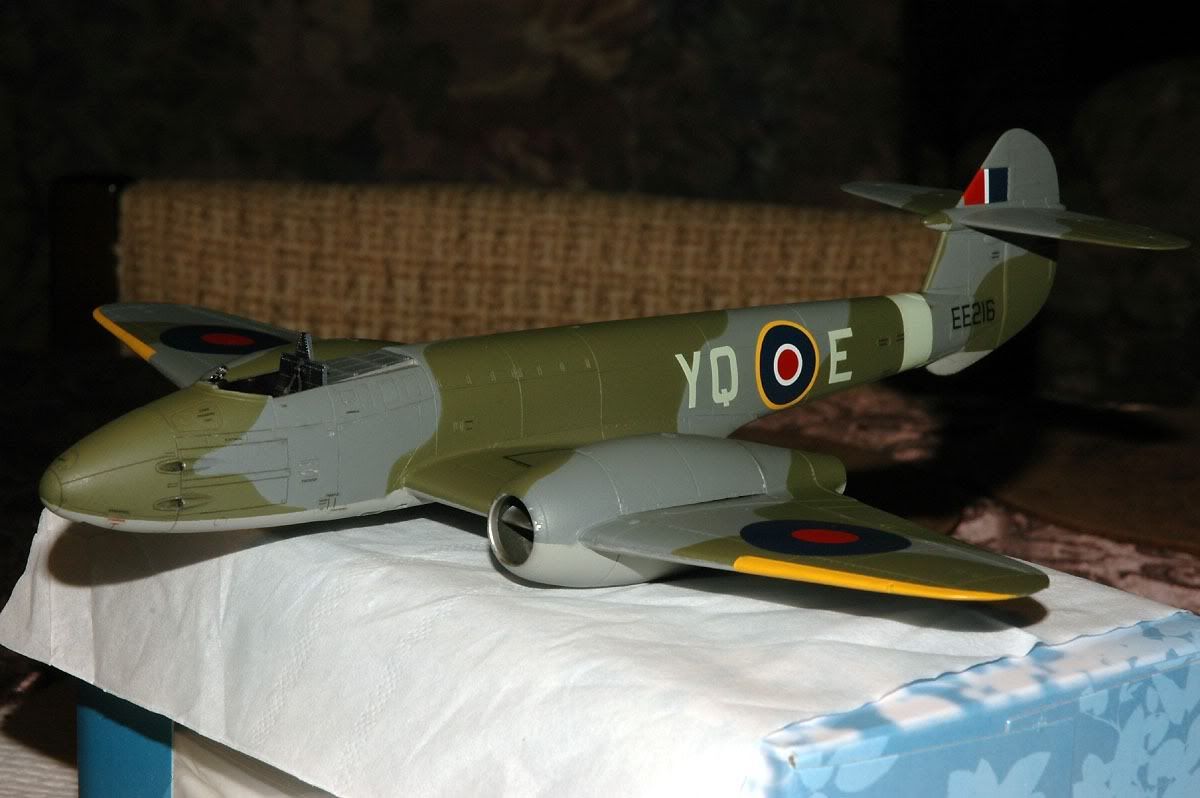
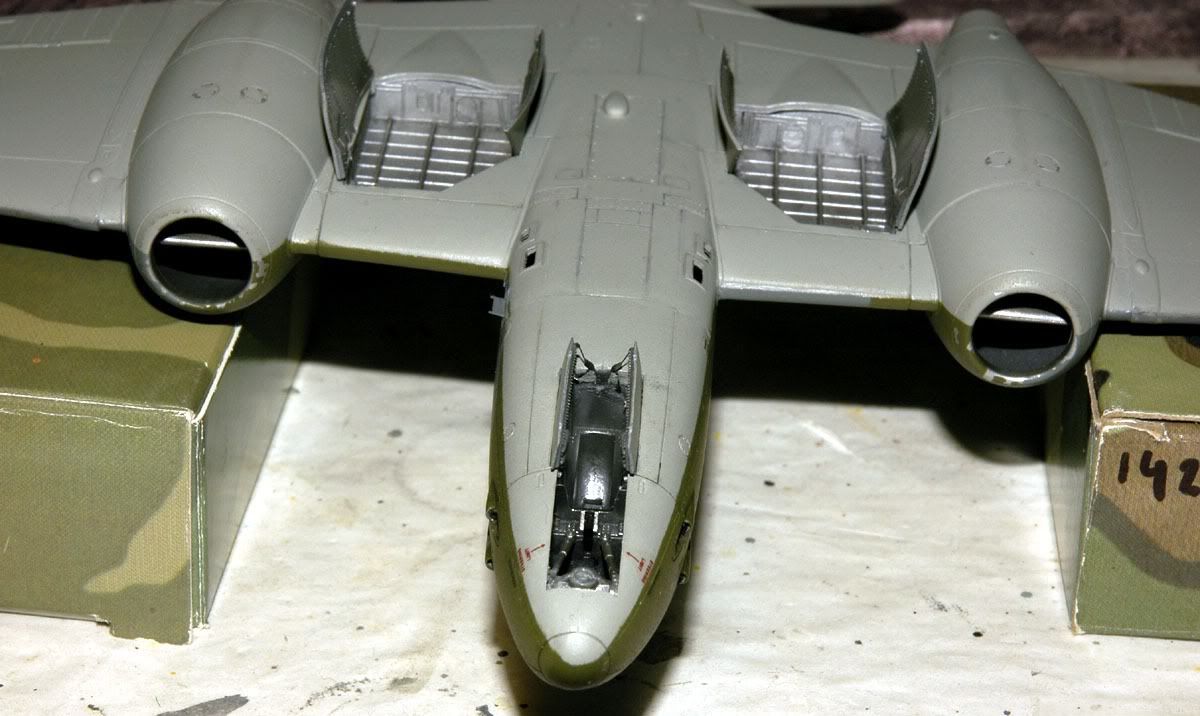
When attaching the gun sight I found that if I placed it as Tamiya's instructions on the kit pit tub, it was BELOW the forward pit frame - line of sight would of been into the nosecone......
I thought at first it was the Pe set that caused this, but all the Pe set did was attach to the plastic IP that has a cutout for the gun sight.
As you can see the kit plastic part - and it has a set attachment point in the nosecone
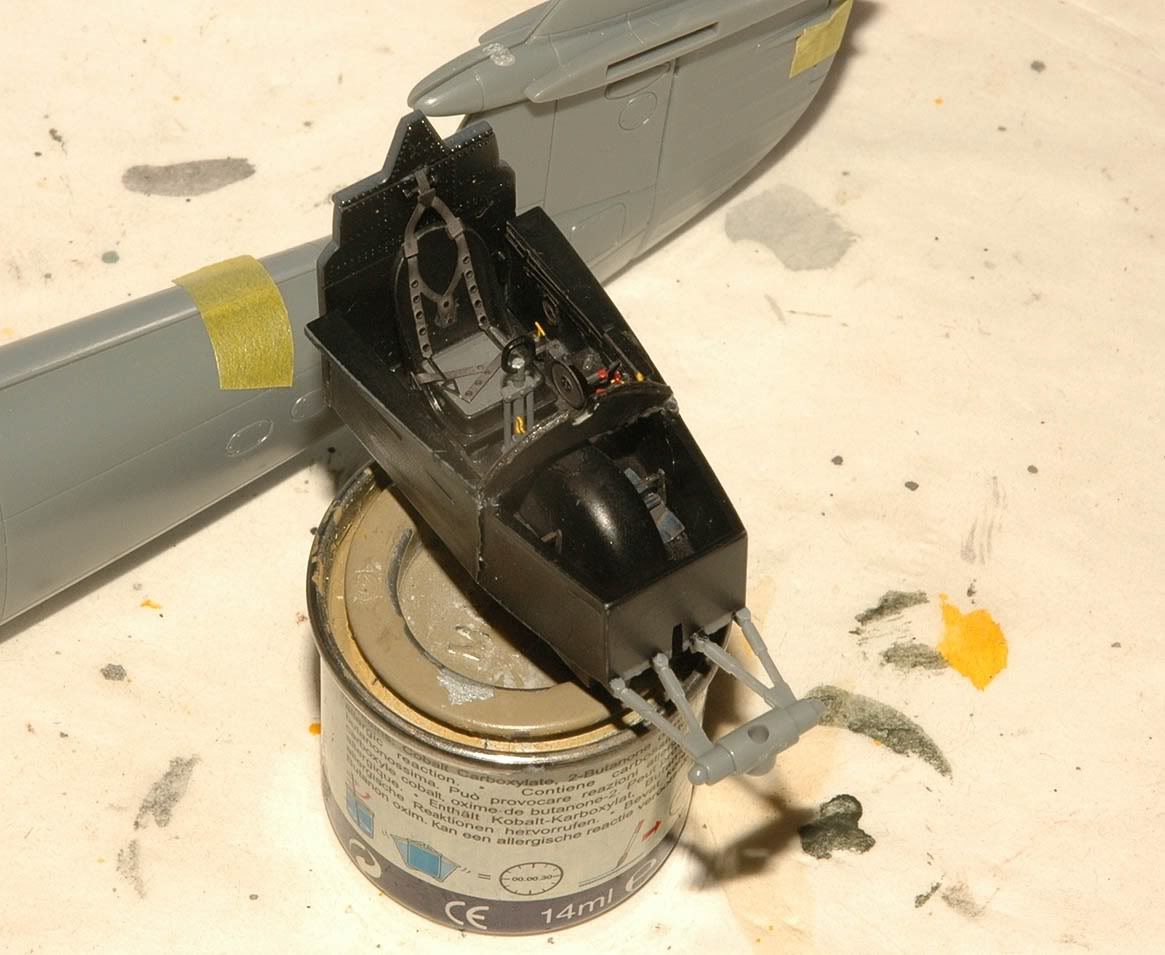
I attached it this way
Tamiya shake and bake?
I don't think so
more like drop and burn...
here is the nosewheel
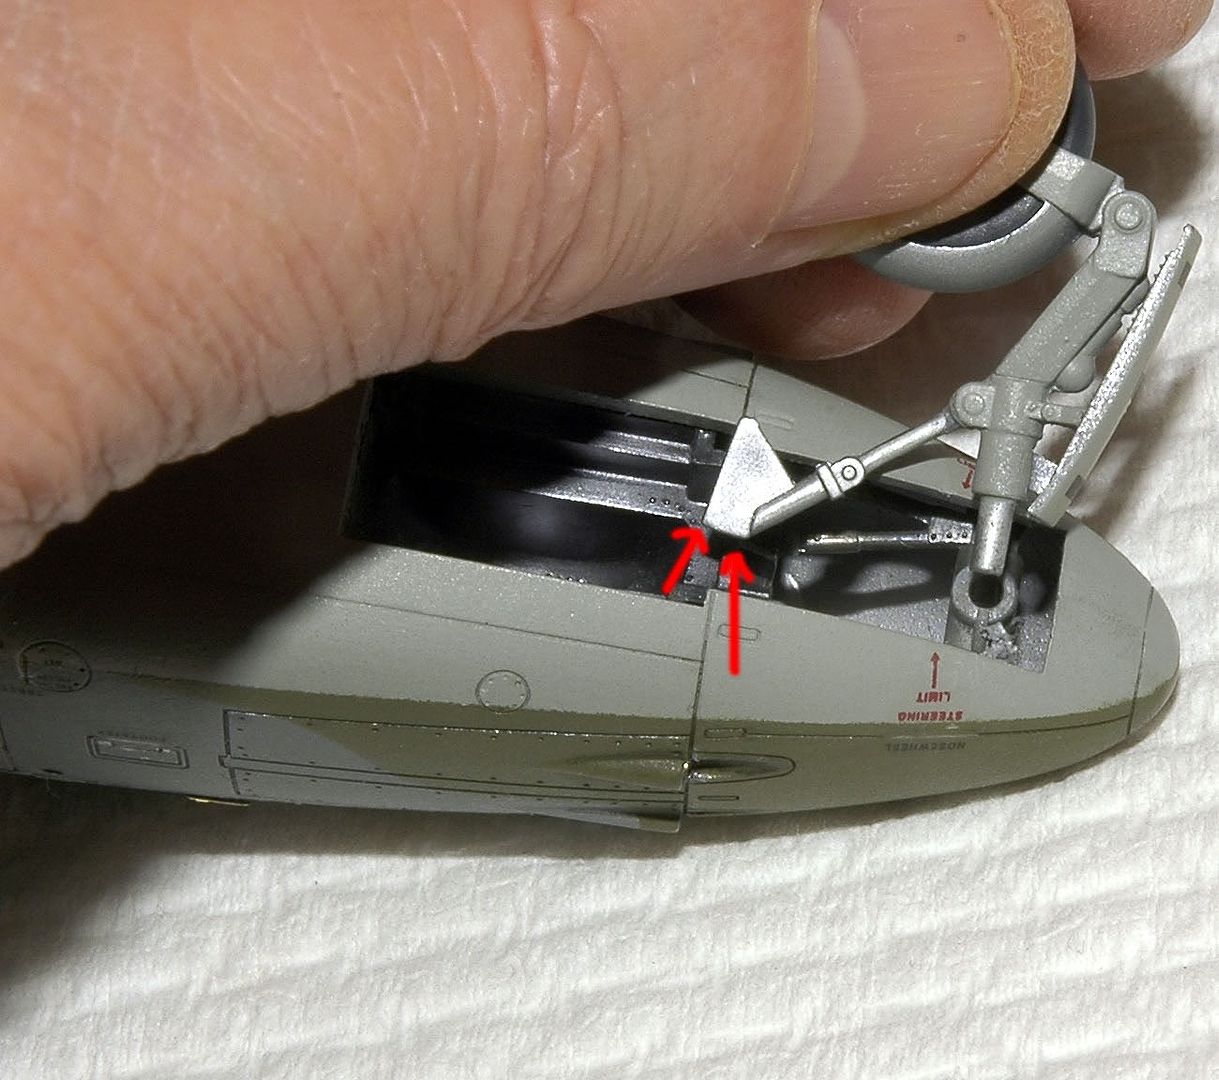
The arrow on the right is the edge of the slot - where the arrow on the left shows the one piece part edge of the gear leg which is supposed to slide into place - Not!
As you can see from this pic you can work out which angle I had to file off to make this slide in
Some Pe detail I forgot about - :bangshead:
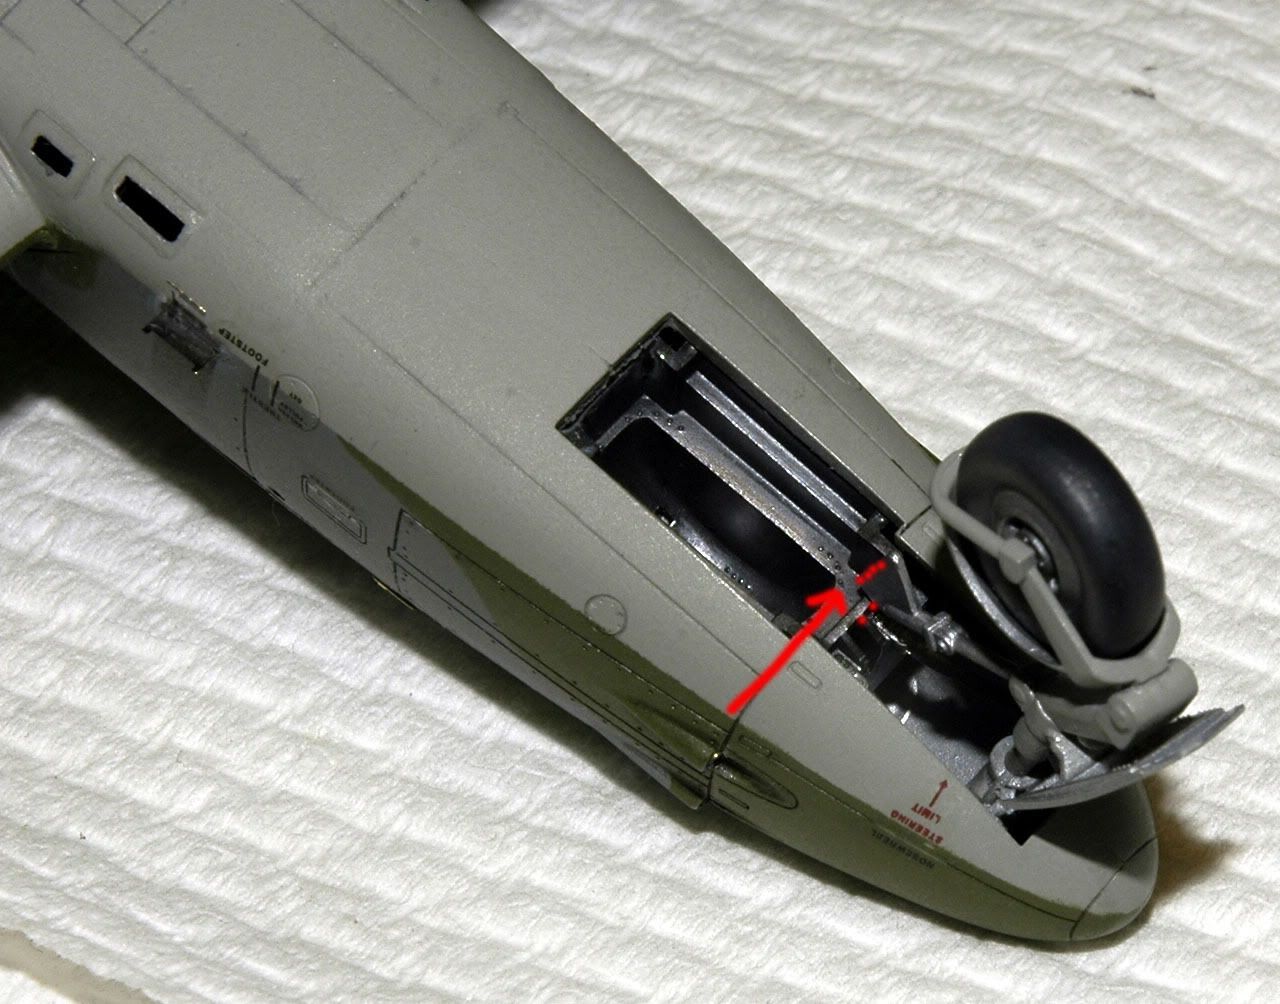
Gear doors on and a piece of Pe for the nose wheel doors that must be the most flimsy piece of all time - yes it does need straightening a bit more!!!
And to top off tonight's efforts I was trying to remove a blockage in the top left gun barrel - which decided to let go and disappear into the now sealed nose section
That's all for now - see you all on the Pe funny farm........... :gogo
my panel line accent didn't work as I had hoped, the flatcoat toned it down nice and in places too nice!!
When attaching the gun sight I found that if I placed it as Tamiya's instructions on the kit pit tub, it was BELOW the forward pit frame - line of sight would of been into the nosecone......
I thought at first it was the Pe set that caused this, but all the Pe set did was attach to the plastic IP that has a cutout for the gun sight.
As you can see the kit plastic part - and it has a set attachment point in the nosecone
I attached it this way
Tamiya shake and bake?
I don't think so
more like drop and burn...
here is the nosewheel
The arrow on the right is the edge of the slot - where the arrow on the left shows the one piece part edge of the gear leg which is supposed to slide into place - Not!
As you can see from this pic you can work out which angle I had to file off to make this slide in
Some Pe detail I forgot about - :bangshead:
Gear doors on and a piece of Pe for the nose wheel doors that must be the most flimsy piece of all time - yes it does need straightening a bit more!!!
And to top off tonight's efforts I was trying to remove a blockage in the top left gun barrel - which decided to let go and disappear into the now sealed nose section
That's all for now - see you all on the Pe funny farm........... :gogo
Similar threads
- Replies
- 6
- Views
- 2K