• Modelers Alliance has updated the forum software on our website. We have migrated all post, content and user accounts but we could not migrate the passwords.
    This requires that you manually reset your password.
    Please click here, http://modelersalliance.org/forums/login to go to logon page and use the "Forgot your Password" option.

Simpatico, A Miniature Mansion for my daughter

Re:Something really different Update October 6, 2010

long answer: i wonder how terry will answer this detail madness in your two "details war" :hmmm

that bathroom is so far beyond anything i could or would be willing to scratchbuild - my brain literally exploded over all those marvellous bits 'n pieces ... and it will be with electric light, that's the peak of madness!

short answer: WOW!
 
Re:Something really different Update October 6, 2010

That is just soooooo amazing so far , I am hoping that the seat will be down on the toilet ;) .

It is really just total madness ! Gail , it is amazing what your Dad does , you should be so very proud :)

Jenny :kiss:
 
Re:Something really different Update October 6, 2010

WOW Bob that's cool!!! What brand of paper Charmin or Angle Soft. :laugh: :laugh: Ok I think the M113 needs an open can of Beans and Franks with a spoon in it.

Really Bob great stuff!!

Boy modeling is fun!

Terry ;)
 
Re:Something really different Update October 6, 2010

Bob,
Truly amazing looking. I love what you've done with the place... :laugh: ;)
Great looking modernized bathroom.
Thanks for sharing your wisdom.
Shawn
 
Re:Something really different Update October 6, 2010

Wes2010 wrote:
WHEW !! I had to wait till almost the last picture to see the toilet. I don't think I could wait any longer....lol. Bob, this is amazing, just wish I could shrink to 1/35th scale and take a shower.

Seriously, Alexis has a place all picked out for her Pickwick mansion. One problem I see, you'll have to make all the marble pink...for her. But since you already almost have this one finished,you could easily have Alexis' ready by May or June...(her birthday is July 6th, just so you know).


Looking great !!

Wes

(I'm kidding about a second house for my daughter, I hope you know)

Wes, thank God you made it on time!!

As I said, You're my buddy, Alexis is my buddy, After this, I want to get back to military modeling. This is enough of this kind of modeling to last me a lifetime!

How about I give her one of my tanks out in the museum? I could paint it pink. :D :D :D :D :D :D

Bob

jknaus wrote:
Wow. This is just awesome Every time I look I'm amazed. Moon Pup I think we should enter this thread in William Shatners "Is that weird or what" Imagine building in modules with no plan and it still goes together. :laugh:

James

James, don't encourage junior!

He's on Ritalin, you know! :D :D :D :D :D :D

He doesn't need more excitement!

Bob

moon puppy wrote:
James, that's what makes Bob Letterman...Dad...The Master of the Masters.

All Hail the Master!
:notworthy :notworthy :notworthy :notworthy :notworthy :notworthy :notworthy

See what I mean!!!! :laugh: :laugh: :laugh: :laugh:

Bob
 
Re:Something really different Update October 6, 2010

andyfettes wrote:
Truley amazing even down to the tiny bog roll holder !! :D

Bob I take it the interior is purely from within the artistic mind and you havnt been doing sneaky peaks through the patios doors again ? LOL

Hey Andy, you big time modeler of the month, you!

Actually, I've been hanging out at a Ritz-Carlton, taking measurements! :laugh:

Thanks buddy,

Bob

Kreighshoer wrote:
long answer: i wonder how terry will answer this detail madness in your two "details war" :hmmm

that bathroom is so far beyond anything i could or would be willing to scratchbuild - my brain literally exploded over all those marvellous bits 'n pieces ... and it will be with electric light, that's the peak of madness!

short answer: WOW!

Thanks Laura,

I don't get it??? It seems everybody thinks the electrical part of dioramas is the third rail or something. Adding lights is really simple. NO BIG DEAL! I was wiring dios back in 1970! Oh, forgot. Was anybody on here alive back then????

Bob

Dioramix wrote:
Wonderful crazy man! :laugh:

Bob, great detailing!

Hey Johnny,

Strange, that isn't the first time somebody has called me that! Hmmmmmm. :hmmm :hmmm :hmmm :hmmm :hmmm

Thanks,

Bob
 
Re:Something really different Update October 6, 2010

jenny croft wrote:
That is just soooooo amazing so far , I am hoping that the seat will be down on the toilet ;) .

It is really just total madness ! Gail , it is amazing what your Dad does , you should be so very proud :)

Jenny :kiss:

Thanks Boss,

Don't listen to Jenny, Gail. I remember a diorama she made that had detail down to the goat poop!

Now that's detailing! :D :D :D :D

Bob

MrT wrote:
WOW Bob that's cool!!! What brand of paper Charmin or Angle Soft. :laugh: :laugh: Ok I think the M113 needs an open can of Beans and Franks with a spoon in it.

Really Bob great stuff!!

Boy modeling is fun!

Terry ;)

Thanks Terry,

Actually, I picked up an off brand at Costco! :D :D

That will have to be Campbell's Beans and Franks, right? You know, if I tried hard, I could probably make a connection with our two builds. :hmmm :hmmm :hmmm

Go for it Dude!

Boy, Modeling is on this web site!

Bob

shawngehling wrote:
Bob,
Truly amazing looking. I love what you've done with the place... :laugh: ;)
Great looking modernized bathroom.
Thanks for sharing your wisdom.
Shawn

Thank you Shawn!

As you know, this one's special!!

Bob
 
Re: Something really different Update October 6, 2010

I was going to post an update and I began thinking about the tools I have bought, made, converted or acquired over all these years. Many of these I have had for 20 to 40 years. Many of them most modelers could go a lifetime and never have a need. However, maybe some of you can possibly find a use. So, I'll start this post with weird tools that I use!

This is one I couldn't live without. It is a miniature radius cutter. It is a little like a simple compass except it is tiny and one tip that normally has a pencil lead holder, has a sharp blade. I believe I bought this in an art store in London, and have used it in every single project I have ever built. Sometimes for the holes, sometimes for the discs. I use it similar to a punch and die set, except for discs and holes larger than possible with a punch and die set.

CIMG1912.jpg


These aren't a tool, but they have served me well for many, many projects. Japanese toothpicks. Think toothpicks turned on a lathe. Beautifully sculpted, I have used them in many railings from wooden ones to concrete or marble spindles. I have had this bundle since 1984, when I used them for twin balconies on the Hotel Metropole in Legacies.

CIMG1916.jpg


I have about 50 boxes of these. They are microscope slips. Not slides. Slips are micro thin, real glass, and that little tube with a diamond phonograph needle attached at one end, will score the glass and you can then break it into any square or rectangular size you wish. For buildings, vehicles or any other project that requires sheet glass. You can make the windows, affix them in place, then shatter them exactly like the real thing for a shattered appearance. If you look closely, you can see a pane leaning against the center box. I also use these in every softskin I make. They are truly scale glass and far superior to the thick plastic "glass" that comes with the kits.

CIMG1918.jpg


Lots of drafting compasses and dividers for measuring and dividing.

CIMG1920.jpg


I stay friends with my dentist as he gives me his old, (And sometimes new), dental tools. They are great for sculpting figures as well as filling and leveling putty and epoxies.

CIMG1921.jpg


These things have come in handy many times. Brass tubing is nearly impossible to bend without kinks. These little tools fit snugly over the brass tubing, then you can slowly bend it to many different shapes. No kinks!

CIMG1922.jpg


I use a lot of spatulas to apply plaster, putty, artist's paste, and so on. Here are two.

CIMG1923.jpg


I always keep a large supply of chisels to shape and carve plaster, epoxy putty, green stuff, etc.

CIMG1924.jpg


Testor's markets these little things that are excellent for mixing colors of paint, applying some adhesives, etc.

CIMG1925.jpg


I always have a syringe to inject paints, glues and other liquids into hard to get places.

CIMG1926.jpg


Here is a weird one that gets plenty of use at my place. Pinking shears. You can take either very thin styrene or even paper, cut a length across, it will leave two parts with a sawtooth cut. Then take a normal scissors or a ruler and exacto, cut the sharp tips away and then draw vertical lines in between each cut, leaving a really realistic row of shingles. Glue them to your roof surface, then directly above add another row staggered like brick work and you have a realistic roof surface. Note the ones I have both cut and scored on the large sheet.

CIMG1928.jpg


I use tiny wood screws a lot, so I made this countersinking tool with a pin vise and can countersink all those tiny screws so they don't show on the veneered surface laid on top.

CIMG1929.jpg


I always keep two levels in both my workshops to check buildings, components, even larger vehicles when scratch-building.

CIMG1930.jpg


I probably have a thousand clips, all the way from the little electrical ones, (Alligators) all the way up to bag clips and even the heavy duty clamps which I use for holding the larger building parts together while the adhesive dries. These are the ones I use the most.

CIMG1937.jpg


As I wrote this, I thought of many more tools that would have been appropriate here. Maybe later.

OK, I had two round mirrors that go over the vanity in the bathroom. Here is one.

CIMG1914.jpg


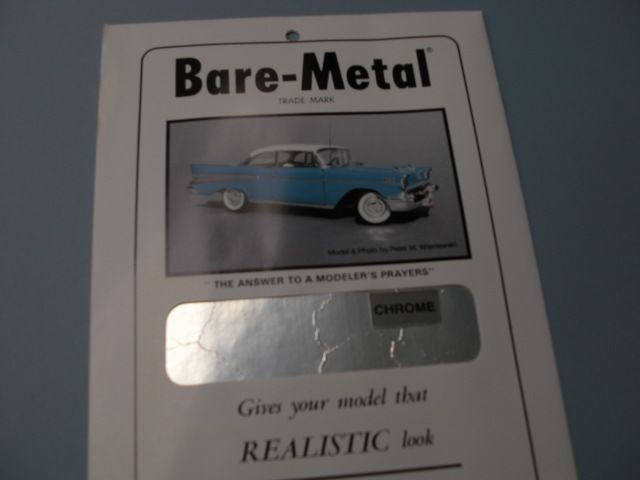
For mirrors, I use a plastic disc cut with the aforementioned radius cutter, then using Chrome Bare metal foil, give it the mirrored finish. Then affix to the center of the gold frames and, Viola!

CIMG1912.jpg


CIMG1911.jpg


Then, the opposite two walls are veneered with the marble, the framed mirrors glued in place. See, I really do use those great clamps! All three windows have yet to be framed.

CIMG1911.jpg


I cut to shape some clear plastic, thick, but flexible and carefully using superglue, attached it to the rear of the shower frame, then glued the frame in place in the corner. BTW, you can see the room with the toilet and the roll of paper. Everything you see here is now glued in place. The next step is permanently gluing the module into the building component. I have decided to put large skylights in the roof areas where the highly detailed rooms are, making it easier to view.

CIMG1935.jpg


CIMG1910.jpg


CIMG1933.jpg


Till next time!

Bob
 
Re: Something really different Update October 14, 2010

almost missed this update! :blush:

thanks for showing us the tools you do the unbelievable magic with! it's great to actually see with what you are working!

thanks for this very informative and interesting update! ... heading to the garden shed now, searching all tool bins for useful stuff!

:mpup
 
Re: Something really different Update October 14, 2010

I meant to comment last night, this could be an interesting thread by itself. I like the stylist glass cutter, neat idea. I WANT one of those dividers, I've tried working with standard ones but just can't get in close enough.
 
Re: Something really different Update October 14, 2010

almost missed this update! :blush:

thanks for showing us the tools you do the unbelievable magic with! it's great to actually see with what you are working!

thanks for this very informative and interesting update! ... heading to the garden shed now, searching all tool bins for useful stuff!

:mpup

Thanks Laura,

Since posting that, I have thought of dozens of other "weird" tools I have laying around.

Bob

I meant to comment last night, this could be an interesting thread by itself. I like the stylist glass cutter, neat idea. I WANT one of those dividers, I've tried working with standard ones but just can't get in close enough.

You can use a soldering iron, just buy a diamond tip phonograph stylus and solder it to a brass tube. The dividers are available in any art store.

Bob
 
Re: Something really different Update October 14,

I just visited this thread now and ........ what an incredible, fantastic, beautiful story!!!

I'm sure that you are dong this project with the outmost love! Well done!

I'll be following the progress of the build.

Best regards
Noel
 
Re: Something really different Update October 14, 2010

Thanks Noel,

Yeah, it means a lot to me and it is definitely a labor of love.

Still have a lot to do in the next month.

Bob
 
Re: Something really different Update October 14, 2010

A humongeous dolls house! Gail is so lucky! :D You have such talent

Mel
 
Re: Something really different Update October 14, 2010

Thanks Mel,

How have you been? Haven't heard from you in awhile!

Bob
 
Re: Something really different Update October 14, 2010

Hi all!

Well, after all the uproar, I'm finally ready to start posting on this build! I am moving along quickly as the deadline is approaching! I will finish this on time!

Ken Jones views the components.

Simpatico.jpg


I got all the lighting working on the right extension of the building.

CIMG1992.jpg


I made a typical modern bathroom light over the vanities with sheet brass folded into a rectangular box and adding 6 bulbs. A light in the toilet allows viewers to see it and another at the apex of the ceiling. Several others are placed to light up the windows that won't have rooms. I also made a large window that will be filled with glass so the viewer will be able to see the detail of both rooms at either end of the building.

CIMG1995.jpg


CIMG2029.jpg


CIMG2031.jpg


Then the windows with curtains need curtains, Right? About 30 years ago, I bought this simple device at a doll house store. I have never seen them since. All you need for curtains is a starched and ironed handkerchief. Mix some while glue and water very well, dip the material into the solution, then stretch it out, lay it on the corrugated rubber mats, slide the plastic card down each slot, set aside to dry and viola! Pleated curtains. Just cut the ragged bottoms square, then you measure each window for width and cut to size. Then glue the edges to the inside window frames with Fabric glue!

CIMG1998.jpg


CIMG2008.jpg


Attach the prepared window frames with glass on the exterior of the building and you have a window with curtains.

[
CIMG2011.jpg


CIMG2012.jpg


CIMG2013.jpg


Then, the sunroom needed a dramatic ceiling light. We had a home in Lake St. Louis about 10 years ago that had this fantastic fan/light. I decided to use it as an idea for another one in this sunroom.

LSL07jpg.jpg


I first made a form, then used it to cut six fan blades.

CIMG2000.jpg


CIMG2001.jpg


CIMG2005.jpg


I edged each blade with Evergreen strip, (A real pain!), then put a seam down the middle. the bottom was reinforced wit Evergreen strips and then they were all painted on both sides. I needed an ace of spades general shape for the attaching brackets. Photo etched maple leaves came to mind, so, I cut the bottoms square and affixed two per blade on each side.

CIMG2007.jpg


Then it was time for the fan frame. I used various sizes of brass tubing to create this. It had to be capable of running tiny wiring to the light at the bottom'

CIMG2017.jpg


Then I embellished it with plastic discs punched out of heavy sheet styrene. That would represent the twin motors on each side.

CIMG2015.jpg


By then, the paint was dry on the blades, I attached the modified maple leaves and then attached each blade to a one third circumference position with a pre=determined angle.

[
CIMG2036.jpg


CIMG2038.jpg


CIMG2024.jpg


And a shot of the completed fan through the viewing glass opening in the roof of the sunroom!

CIMG2021.jpg


The front of the house has several leaded glass windows. They are made with a dark gray diamond pattern mesh
I discovered a trick many years ago on how to make leaded glass. After painting the grid, use a toothpick and some Elmer's white glue. Dip the toothpick into the glue, then touch it to the inside of the tiny diamond pattern and it will fill it in with a white liquid. When the liquid dries, it will be crystal clear. Then I give it a coat of clear gloss polyurethane and it is a dead bang on replica for the leaded glass. I use the old Tech Star diamond patterned mesh for all the windows.

CIMG2040.jpg


CIMG2041.jpg


The portico over the front door had to be made. I made the interior wall and cut out the door and side lights.

CIMG2043.jpg


I cut the brass for the sidelights.

CIMG2044.jpg


CIMG2050.jpg


Then the door was very plain, and needed to be ornate. I used photo etch from the scrap box.

CIMG2057.jpg


I carved a header from bass wood, added scrap PE to it and attached it above the door.

CIMG2061.jpg


I then gave it a coat of flesh acrylic paint. I used the wood painting system I did an SBS on elsewhere in this forum.

CIMG2066.jpg


Here it is in dark walnut.

CIMG2070.jpg


CIMG2072.jpg


I am making the upper deck furniture out of an old Tech Star PE Brass. I will make a patio umbrella from this cocktail umbrella.

CIMG2068.jpg


Here is another leaded glass window I am working on.

[
CIMG2046.jpg


Here is the finished bay window that will enable the viewer to see the master bedroom.

CIMG2054.jpg


OK, that's it for now!

Bob
 
Re: Something really different Update October 14, 2010

That house is amazing...and I remember that fan...looks just like it. Thanks for the updated photos ~!!!! (y) (y) :mpup :Hiay

Wes
 
Re: Something really different Update November 17/2010

Poppy, this is just INCREDIBLE. Wes is right; that fan looks exactly like the photos you've sent me. I still can't believe you're doing this for me. I feel unworthy, and I'm not joking about that. :notworthy

Beautiful!
 
Re: Something really different Update November 17/2010

I just love to see the Master at work. It all looks just so easy, I know it's a lot of work but, labor of love I'm sure. But still, just Masterful!
 
Back
Top