• Modelers Alliance has updated the forum software on our website. We have migrated all post, content and user accounts but we could not migrate the passwords.
    This requires that you manually reset your password.
    Please click here, http://modelersalliance.org/forums/login to go to logon page and use the "Forgot your Password" option.

Silverwings Curtis P6-E Hawk Build

moon puppy

Administrator
Staff member
I know everyone remembers Gary's excellent review of the Curtis P6-E Hawk from Silverwings.

https://www.modelersalliance.com/reviews-and-news/217-kits/910-curtiss-p-6e-hawk-1-32-silver-wings

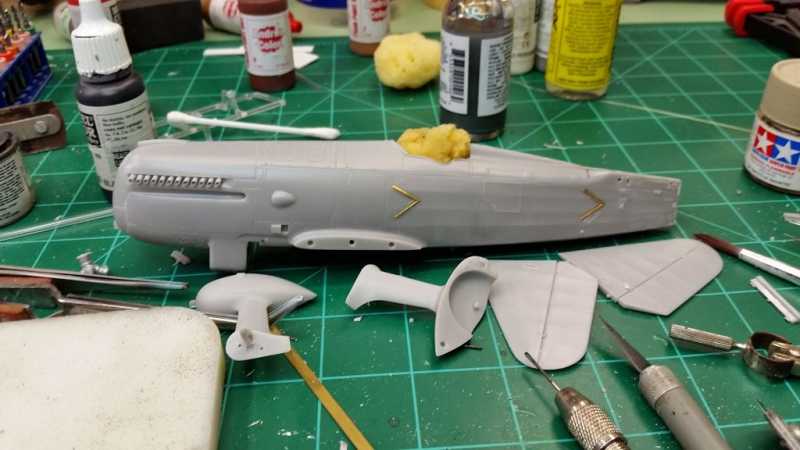
Well I started mine the other week and have been making slow and steady process.

h20af562.jpg


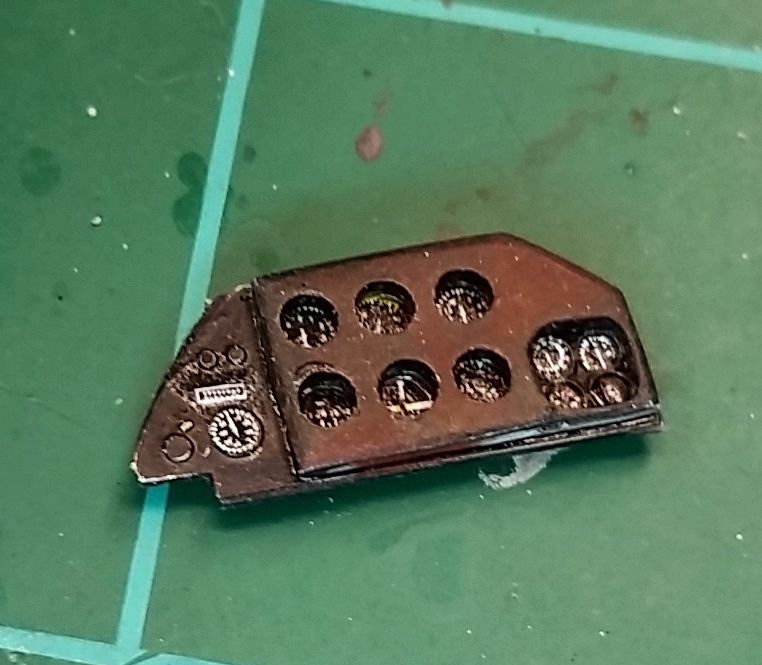
The IP is the standard sandwich assembly. I stole some IP decals from another set and just used best guess with what goes where. There is leather padding on the front of it so I gave it a little brown treatment after the black Vallejo. Biggest problem I had with this was figuring out how to mate it inside the cockpit, finally got it wedge between some tubing structure, not sure it's correct but it's in there.
hfbf969d.jpg


hf95544a.jpg


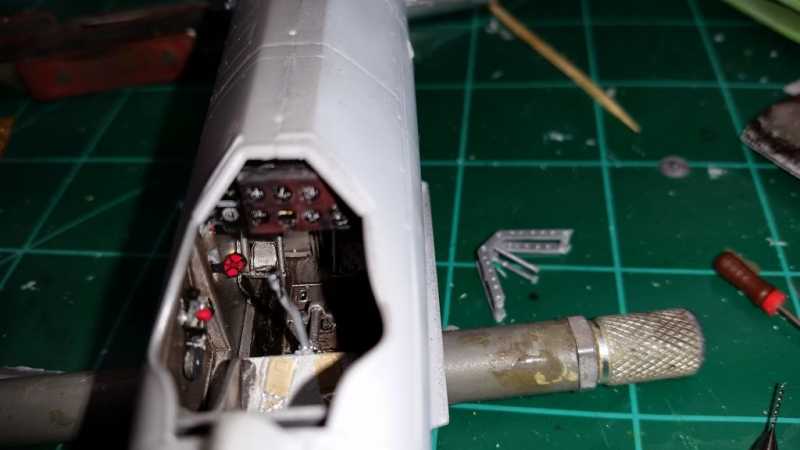
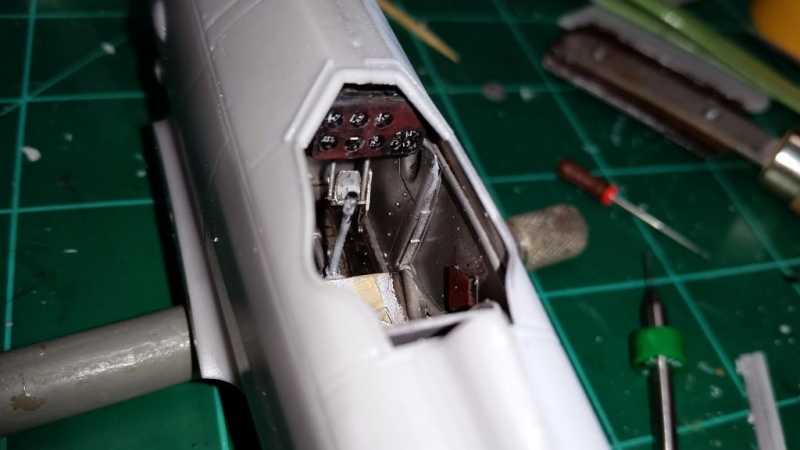
I sealed up the fuselage last night and now am looking at the issue with the landing gear and how they will mate to the aircraft. Got some seam work to do all the way around then I'll prime it up and may even get some paint done prior to installing wings and stuff.

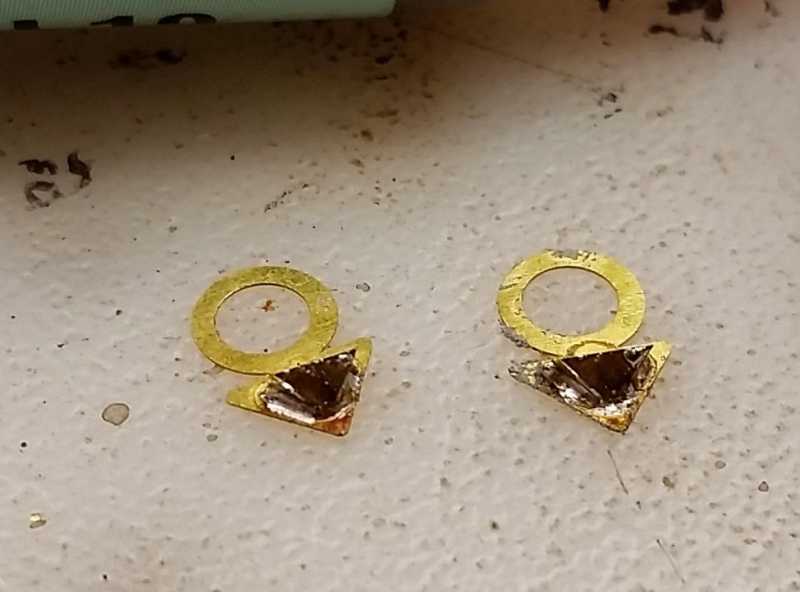
I have drilled out the ports where control cables pass through so that should look nice when done. Just debating about using the resin bits for control horns or carving out some brass. I bet you know which way i'll go. :coolio
 
:popcorn That looks really good.
SilverWings kits are too rich for my budget, but, I'll enjoy watching you build yours.
 
They are too rich for me also but I fell victim to a talented salesman. :facepalm

I'm really surprised how well it's going together. Test fitting the wings looks like they are at the correct angle. I have to figure out how to measure correctly to make sure they are true because if they are not it will just show up even worse when I put the top wing on.
 
I think that if he had been truly talented , he should have been able to make the price smaller .

Don't you ? Nice looking kits though :D

Cheers, Christian B)
 
Paul it's not much to it. Most sidewall detail is molded in. I primed it with Tamiya primer then AlcladII White Aluminum then a wash of Migs dark wash. Picked out some details, wish I had some good RB seatbelts but the last set I have is Luftwaffe type.
 
Great progress so far (y) (y) For a resin kit it's about as close to an injection molded kit as you will ever get. The only issue I have is that some of the very tiny parts are extremely fragile and difficult to clean up for that reason.
 
You're right Gary, have to be light with the touch, a with good fresh razor saw some parts have come off pour slabs ready to go.

My biggest concern right now is mating the landing gear with the fuselage. You can see in your instructions that they call for a 1.5mm gap on the lower side. What I didn't realize cleaning up was there is a locator pin on the mounting face of the gear strut, well there was. I can see the shadow of it, I'm thinking now that I drill out through the strut flaring and have a solid brass rod going all the way through to mate both struts. The shock absorbor mount looks strictly cosmetic.
 
Fantastic so far Bob!

Correct me if I'm wrong though, I thought you didn't care for resin kits?
 
Fantastic so far Bob!

Correct me if I'm wrong though, I thought you didn't care for resin kits?

Warren, sorry I didn't see your question.

That's a fact, I really don't care for resin kits because the ones I've had in the past required far more work than I was capable of at the time. This Silverwings Kit is very high quality, the fuselage was almost snap together. The gear are tripping me up right now but I have a plan. :good:

Here's where we sit now.
h0e90a7c.jpg


The PE that comes with it is nice but I don't like how they perforated this airflow diverted thing as oppose to scoring it.
he709b16.jpg

These go on the underside of the aircraft, two holes that would appear to be flare dispensers I guess. Not really sure. I decided to solder these for a more secure joint really just to test out my soldering station behind me regular workstation. :geek I've cleaned up the joints since taking this shot.

I need to get the fat finger glue spots cleaned up and then I"m going to prime the fuselage and paint it. Think Paint in progress is in order for this build. :hmmm
 
talking about those two I soldered Chris?
There are two holes on the underside, side by side and to the rear of the cockpit, it would appear that these are somesort of vanes to divert wind from going up in the holes. What comes out of those holes I have no idea, still thinking it's flare port.

I'll get a shot of them tonight.


Well yes Bob but even the spear head brass on the fuselage has me wondering what the purpose might be for some thing that large.

Just not familiar with this bird :idonno

Cheers, Christian B)
 
Back
Top