ausf
Master at Arms
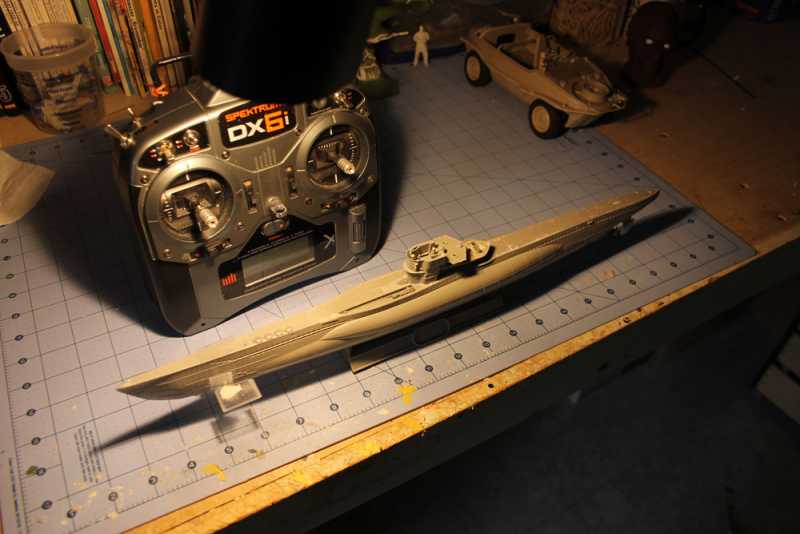
I'm making some progress on the Revell 1/144 U-boat type VII conversion. Progress meaning two steps back for every forward step, but hopefully it'll make it better in the end.
As background info:
I had this kit in the stash for years, my son cracked the box and lost some parts and the directions a while back. I grabbed it for salvage to use in the movie campaign, but it turns out to have the larger flak wintergarten that Das Boat didn't have, so back in the pile t went. While cleaning up, I came across some old RC plane parts that I no longer had use for and the 'ol lightbulb went off in me head...fulfill a childhood dream of a RC U-boat.
This isn't really the way to go about it, but it was relatively free. The only expense this time around was I needed 6 NiMH cells to make a rechargeable battery pack for it.
Here's a shot of the motherboard going into the conning tower before closing up. This chip is the receiver, motor control as well as housing a pair of servos. I'm glad I had this photo, because it was a one way trip, to make the model watertight, everything needs to be permanently sealed. I eventually needed to find the location of that plug seen in the middle, but more on that later..
Here's after glueing. I went a bit nuts with both the Testors blue and then Tamiya thin. I really need this to be welded shut. Looking at this photo, there's a wealth of space to work compared to later. On top is the battery charge port and switch, a cover will be held in place by those neo-magnets.

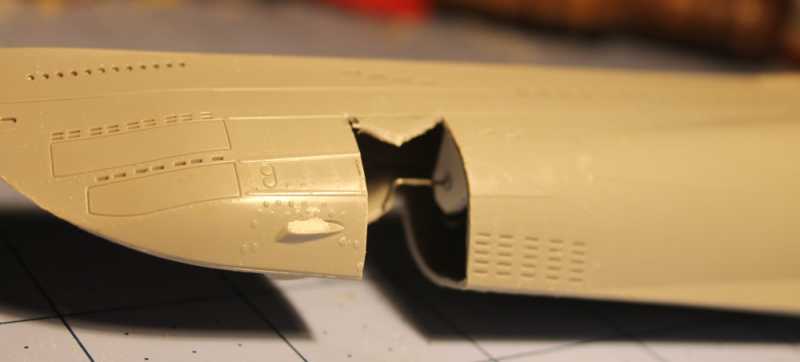
After a few sea trials, I found some seepage through the dive plane pivot, so I needed to redesign. I originally had the bow as a separately sealed chamber, but any seepage will eventually fill the chamber setting up the final dive this model would see. I decided to fabricate a small chamber that surrounds the whole dive plane setup of which I could pack with grease to keep the water from becoming an issue.
That meant sawing a chunk of hull:
I made a gasket from scrap silicone mat and styrene for the pushrod to pass through. This'll be sandwiched between two styrene walls.
Here's the plane shafts installed, I also went for larger planes of plexi this time intend of brass. My thought is I can paint a scale like dive plane in the middle and the clear plane will be invisible underwater:
While messing around with the dive planes, I accidently yanked the pushrod free from the servo, so I needed to saw off the coning tower to access it. I was kind of pissed at first, but this allowed me to address something else I thought of after assembly.
Being an aircraft setup, there's no reverse. At first I didn't think it would be an issue, but after a while I was getting concerned over it. As a U-boat, it needs a good amount of speed over the dive plane to submerge, so I'll need a lot of space to operate. Since it'll have to be in a pond or lake, there's a lot of potential for me screwing up enough to need to back out of a tangle.
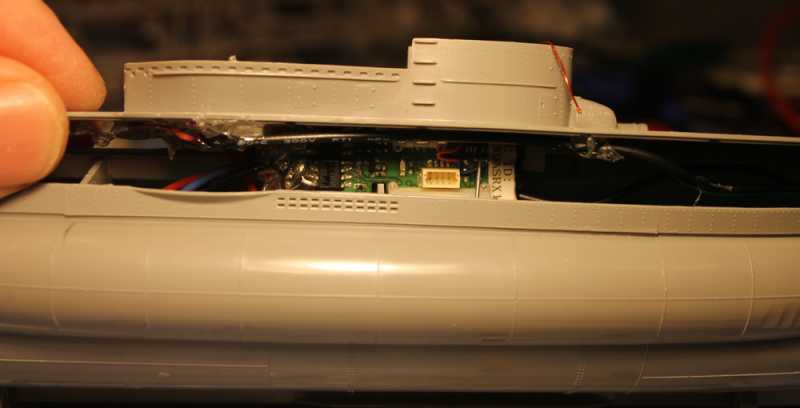
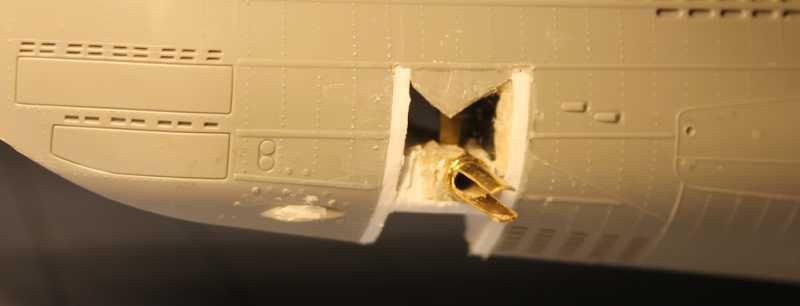
This is a 6 channel setup, and I was only using 3 (rudder, dive planes and throttle) so I dediced to try to reverse the motor using the landing gear channel. That brings us back to the first photo. That plug is the langing gear servo spot and I needed to get to it and plug in a line completely blind to it. Here's the opening I was dealing with, the plug is about an inch below, between two servos:

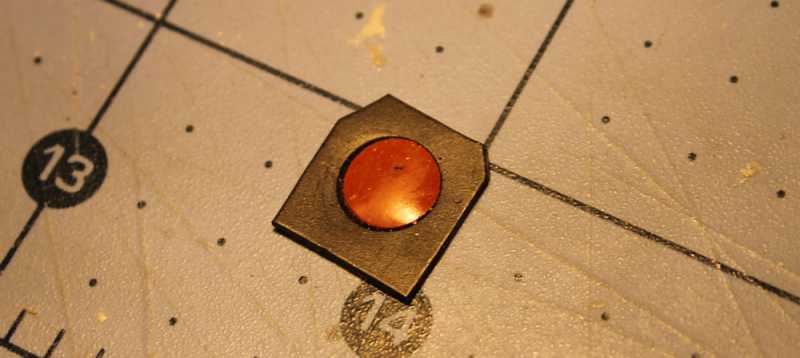
Finally, my favorite part of the conversion so far, the motor reverse. I was trying to wrap my head around what to do to make a mechanical current reverse. After trying a few things, I remembered some type of rotating switch in that ancient motorized Tamiya Yamato that Chuck donated to MA. Sure enough, a closer look showed that it was exactly what I needed, a mechanical reverse. So I shamelessly copied the design (much smaller and uglier) and installed. The servo pivots a lever that touches 4 brass contacts wired so one way is the reverse or the other:

So, that's where I am. I need to fill in the bow section and do some final water/bouyancy trials before sealing her up for good. Then it's real waer trials and paint. Trials first because what's the point in painting if it doesn't come back?
As background info:
I had this kit in the stash for years, my son cracked the box and lost some parts and the directions a while back. I grabbed it for salvage to use in the movie campaign, but it turns out to have the larger flak wintergarten that Das Boat didn't have, so back in the pile t went. While cleaning up, I came across some old RC plane parts that I no longer had use for and the 'ol lightbulb went off in me head...fulfill a childhood dream of a RC U-boat.
This isn't really the way to go about it, but it was relatively free. The only expense this time around was I needed 6 NiMH cells to make a rechargeable battery pack for it.
Here's a shot of the motherboard going into the conning tower before closing up. This chip is the receiver, motor control as well as housing a pair of servos. I'm glad I had this photo, because it was a one way trip, to make the model watertight, everything needs to be permanently sealed. I eventually needed to find the location of that plug seen in the middle, but more on that later..
Here's after glueing. I went a bit nuts with both the Testors blue and then Tamiya thin. I really need this to be welded shut. Looking at this photo, there's a wealth of space to work compared to later. On top is the battery charge port and switch, a cover will be held in place by those neo-magnets.
After a few sea trials, I found some seepage through the dive plane pivot, so I needed to redesign. I originally had the bow as a separately sealed chamber, but any seepage will eventually fill the chamber setting up the final dive this model would see. I decided to fabricate a small chamber that surrounds the whole dive plane setup of which I could pack with grease to keep the water from becoming an issue.
That meant sawing a chunk of hull:
I made a gasket from scrap silicone mat and styrene for the pushrod to pass through. This'll be sandwiched between two styrene walls.
Here's the plane shafts installed, I also went for larger planes of plexi this time intend of brass. My thought is I can paint a scale like dive plane in the middle and the clear plane will be invisible underwater:
While messing around with the dive planes, I accidently yanked the pushrod free from the servo, so I needed to saw off the coning tower to access it. I was kind of pissed at first, but this allowed me to address something else I thought of after assembly.
Being an aircraft setup, there's no reverse. At first I didn't think it would be an issue, but after a while I was getting concerned over it. As a U-boat, it needs a good amount of speed over the dive plane to submerge, so I'll need a lot of space to operate. Since it'll have to be in a pond or lake, there's a lot of potential for me screwing up enough to need to back out of a tangle.
This is a 6 channel setup, and I was only using 3 (rudder, dive planes and throttle) so I dediced to try to reverse the motor using the landing gear channel. That brings us back to the first photo. That plug is the langing gear servo spot and I needed to get to it and plug in a line completely blind to it. Here's the opening I was dealing with, the plug is about an inch below, between two servos:
Finally, my favorite part of the conversion so far, the motor reverse. I was trying to wrap my head around what to do to make a mechanical current reverse. After trying a few things, I remembered some type of rotating switch in that ancient motorized Tamiya Yamato that Chuck donated to MA. Sure enough, a closer look showed that it was exactly what I needed, a mechanical reverse. So I shamelessly copied the design (much smaller and uglier) and installed. The servo pivots a lever that touches 4 brass contacts wired so one way is the reverse or the other:
So, that's where I am. I need to fill in the bow section and do some final water/bouyancy trials before sealing her up for good. Then it's real waer trials and paint. Trials first because what's the point in painting if it doesn't come back?