• Modelers Alliance has updated the forum software on our website. We have migrated all post, content and user accounts but we could not migrate the passwords.
    This requires that you manually reset your password.
    Please click here, http://modelersalliance.org/forums/login to go to logon page and use the "Forgot your Password" option.

Sicily 1943 (spring)

Kreighshoer wrote:
YagoHLD wrote:
cartelesitalianos-2.jpg

it's ristorante not ristoranti, not even in sicily!


Hi yago, fantastic project... ;)

It's not correct the flag of commercial sign "La grotta del formaggio". This was the correct italian royal flag:


800px-Flag_of_Italy_1861-1946svg.png


Also eliminates "Pizza", since that time there were non pizza restaurants, and replace the word "Hotel" with "Albergo" because foreign words were banned in Italy at that time...


Cheers :cheer:
Massimo
 
Massimo, grazie per tutte le informazioni. Devo progettare nuove schede per una strada e cogliere l'opportunità di cambiare i segni della albergo e ristorante. Una domanda: Che cosa è Vico Capodarso?

http://maps.google.es/maps?f=q&source=s_q&hl=es&geocode=&q=Vico+Capodarso,+Piazza+armerina&sll=37.383811,14.365784&sspn=0.009582,0.026071&ie=UTF8&hq=&hnear=Vico+Capodarso,+94015+Piazza+Armerina+Enna,+Sicilia,+Italia&t=h&z=16

Quando hai finito, quello che ti insegnano.

Ciao e ci vediamo.

Yago.
 
Massimo, I hope you like it more this design...

example.jpg


I have change Ristoranti per Ristorante; I have added new placards; I have done new posters for walls; and I have duplicated the propaganda...

I have to do more posters for another shops.

See you!

Yago.
 
YagoHLD wrote:
Massimo, grazie per tutte le informazioni. Devo progettare nuove schede per una strada e cogliere l'opportunità di cambiare i segni della albergo e ristorante. Una domanda: Che cosa è Vico Capodarso?

http://maps.google.es/maps?f=q&source=s_q&hl=es&geocode=&q=Vico+Capodarso,+Piazza+armerina&sll=37.383811,14.365784&sspn=0.009582,0.026071&ie=UTF8&hq=&hnear=Vico+Capodarso,+94015+Piazza+Armerina+Enna,+Sicilia,+Italia&t=h&z=16

Quando hai finito, quello che ti insegnano.

Ciao e ci vediamo.

Yago.


Ciao Yago, "Vico Capodarso" is a street of Piazza Armerina...

Massimo :cheer:
 
YagoHLD wrote:
Massimo, I hope you like it more this design...

example.jpg


I have change Ristoranti per Ristorante; I have added new placards; I have done new posters for walls; and I have duplicated the propaganda...

I have to do more posters for another shops.

See you!

Yago.


Now all is perfect... ;) This one can serve you ("Il nemico vi ascolta" means "The enemy is listening"):

manifasc31.jpg


I will stay tune fo sure, your diorama will be outstanding like your other works... (y) :notworthy

Cheers :cheer:

Massimo
 
Thanks for your "propaganda".
I have found a new TTF for the decals of restaurant and "albergo".
This evening I'll change it.

Thanks.

Yago.
 
After speaking with Massimo, I have changed some of the elements of the plate of calcas that I will extract for the diorama.
Really there were several things that they were bad and others that I was lacking and that I lack for doing. At the moment this is what I take fact...

example.jpg


example-2.jpg


Good so, after dedicating one evening to the topic of the calcas and to the search of materials ... I have begun the part of the interior of the houses...

I have realized the base on which there will go the columns of wood and the girders of the floors of the building of the hotel and the adjacent one.

l000-4.jpg
l001-4.jpg


l002-4.jpg
l003-4.jpg


The base that it appreciates to the right in the last photo, will receive a cut more or less to the half, since I want to do a difference in this soil and the access by means of steps to a species of warehouse (only it departs from the access, since there is no site for any more).

l003-4B.jpg


While I make prepared the pieces of the frame of the base of the diorama, have added one more height to the building of the right completely...

l033.jpg


l034.jpg


De esa manera me aproximo más a la forma original de la foto...

plano-3.jpg


I will try to show new things this weekend.

See you guys!

Yago.
 
Yago,

This looks great! I have been offline for several months. I assume you finished your railroad dio, but I can't find it. Where should I look?

Bob
 
bob letterman wrote:
Yago,

This looks great! I have been offline for several months. I assume you finished your railroad dio, but I can't find it. Where should I look?

Bob

Friend Bob. I have not finished still the railroad dio.
I'm working in this project. It wanted to disconnect a bit and to make something different during the rest.
But I will not leave this great diorama.

See you!

Yago.
 
Legio Italica wrote:
Fantastic buildings Yago.... A very very good start ;) Did you used plaster to make them ?

Massimo :)

Massimo, I'm working with dejuguete.es buildings. The buildings are made in resin, and their quality is very good. Clean and very well finished pieces. I recommend this new Spanish brand.

http://www.dejuguete.es

See you!

Yago.
 
Another HUGE dio! I love it!

I notice your buildings are quite deep (as opposed to just the buildings fronts), so will you be constructing full interiors for them?

Rudi
 
Rudi Richardson wrote:
Another HUGE dio! I love it!

I notice your buildings are quite deep (as opposed to just the buildings fronts), so will you be constructing full interiors for them?

Rudi

Yeah! I'll be constructing full interiors for them. With interior walls, floor, furnitures, stairs, doors, etc etc.

I like that you like it Rudi.
Thanks for all.

Yago.
 
Hi kids:

I have been working in virous steps of the dio.
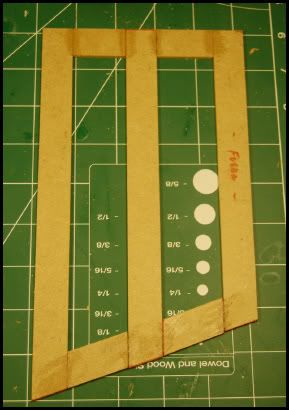
1º. First, I have fixed again the polyexpan to the base. ya que The glue that I used in a beginning did not do his function and it was attacking the poliexpan, not allowing that it should fix. Once done this, I placed the lateral walls of the diorama with plywood of 4mm of thickness.
2º. After making the lateral walls fixed, I revised some points of the poliexpan that were not convincing me and got squarely into the correct location of the buildings into the diorama. Placing angles and calibres in order that the walls were remaining straight.
3º. Though a section of wall is absent for doing, which I will try to do during this week if the time frees allows it to me, I have been placing the trowel for the whole area, that way I will make the surface ready then to fix the cobbles and sidewalks in his corresponding positions.

:X 
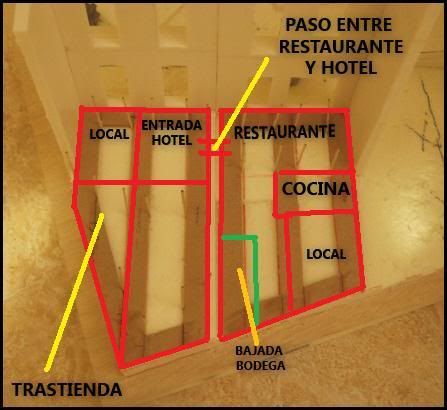
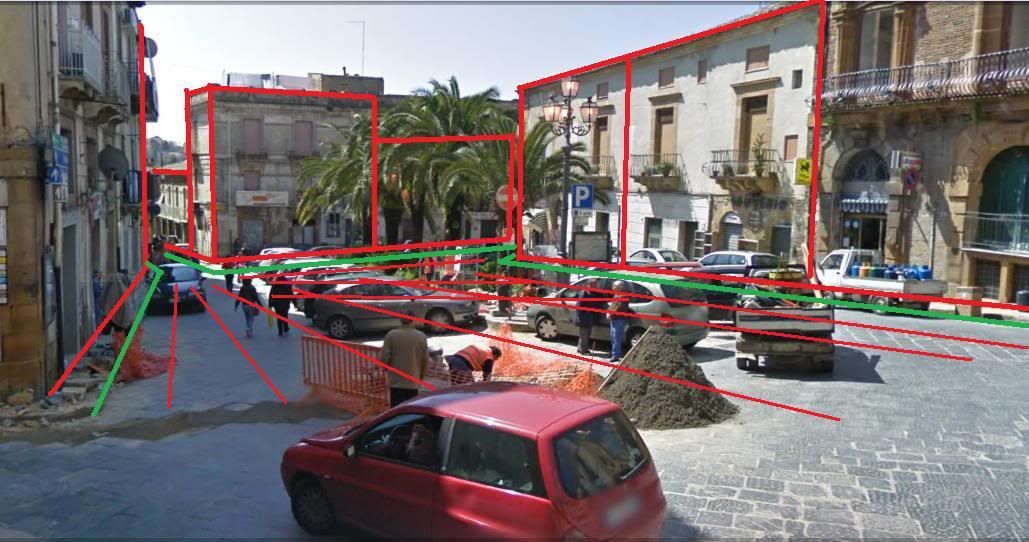
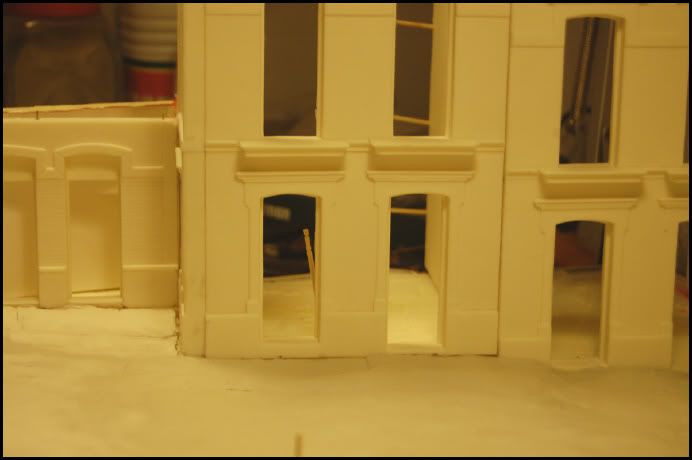
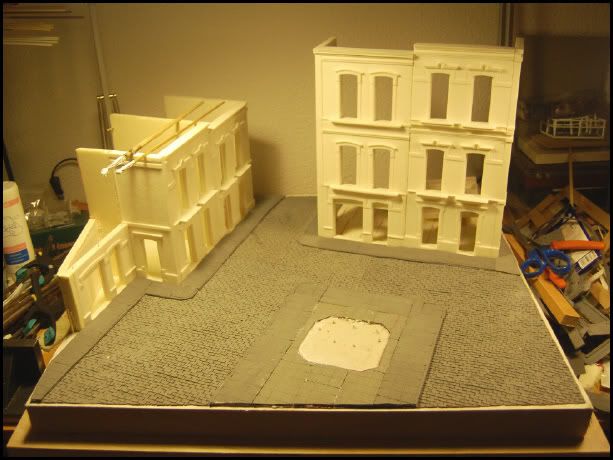
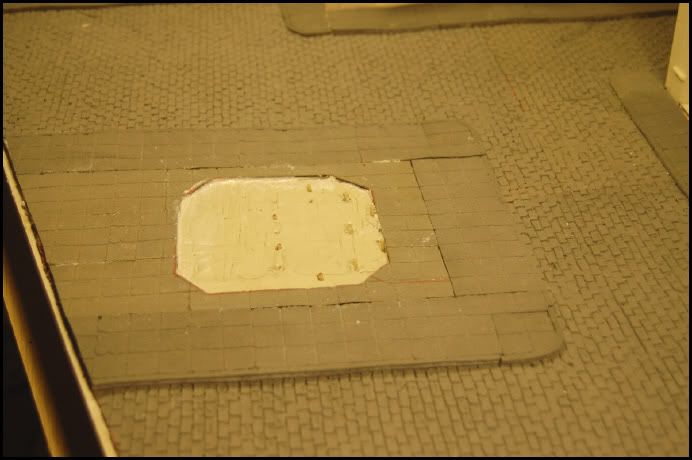
As sample, before the diorama was like that...

l033-3.jpg


:X 
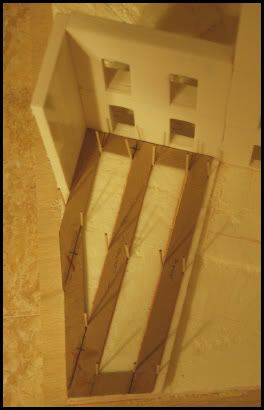
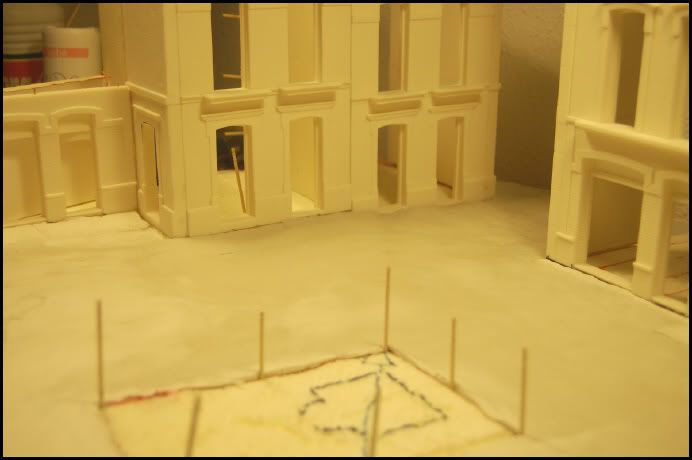
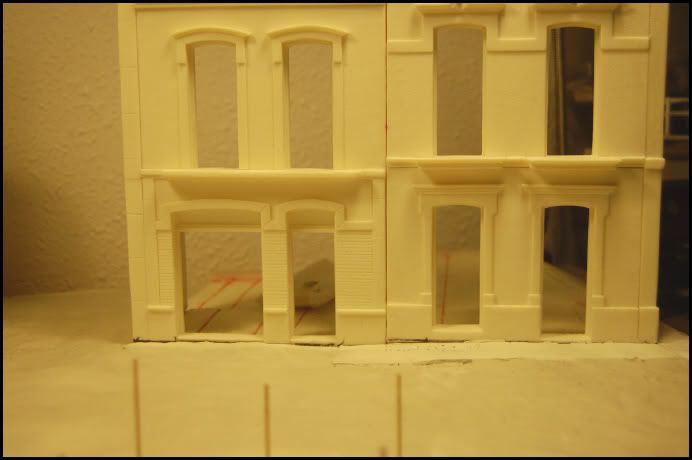
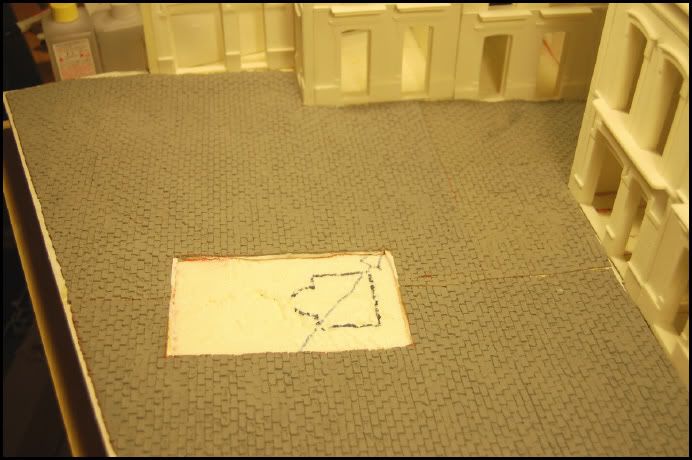
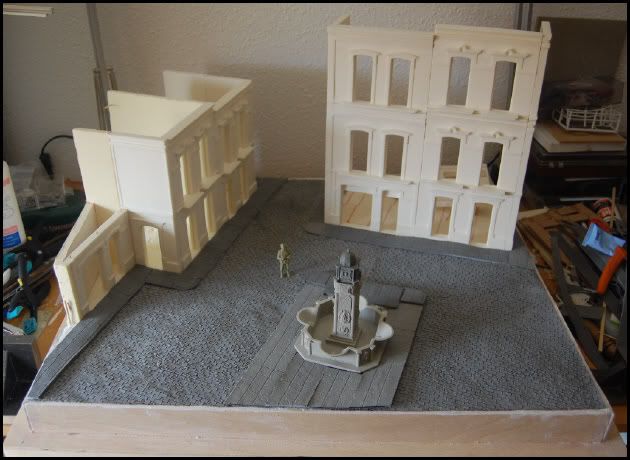
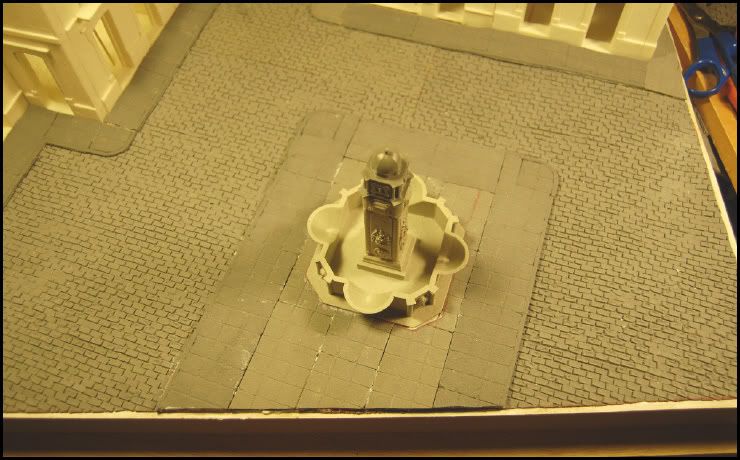
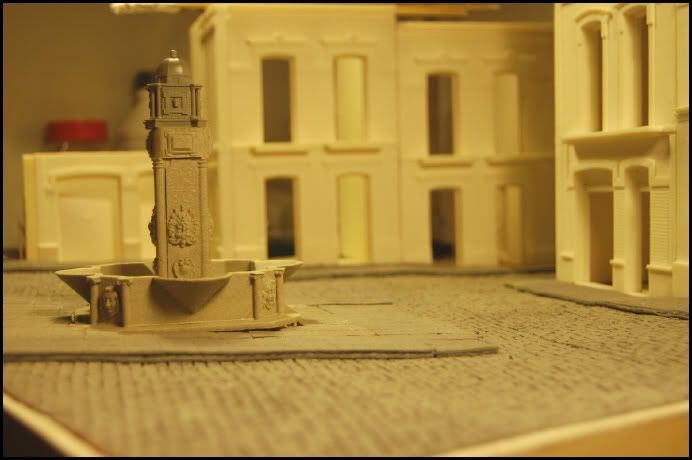
And now it is in this point...

l035-2.jpg


l036-2.jpg


l037-2.jpg


l038-2.jpg


l039-2.jpg


In some points they can appreciate small hollows in the base of the buildings. But it will be corrected when they remain concentrated on his definitive positions and the cobbles and the sidewalks have been placed.
At the moment I will stop to dry DAS the whole night, and today on Friday, if it is totally dry, I will do a general review of the surface (for if it had to add more pasta of shaping in some point) to begin to place the paved one.
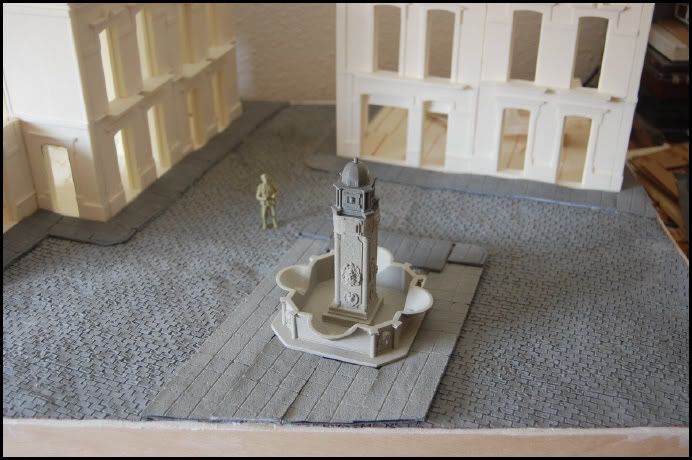
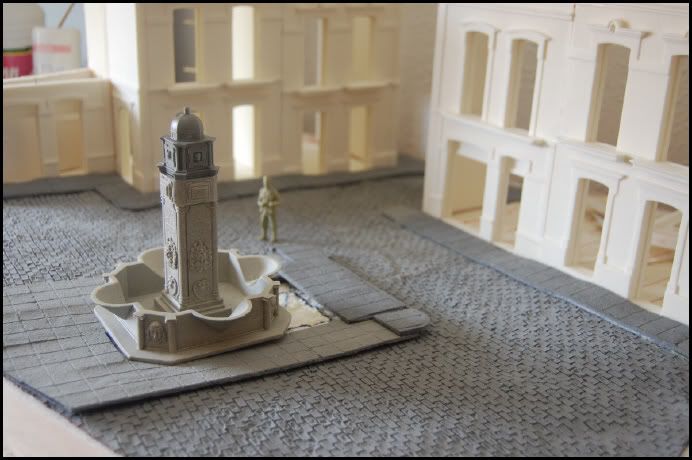
I have not covered the central part of the square with DAS, since this part will be independent to the rest of the zone of traffic of the square. There will go the source and a couple of palmtrees.

:X 
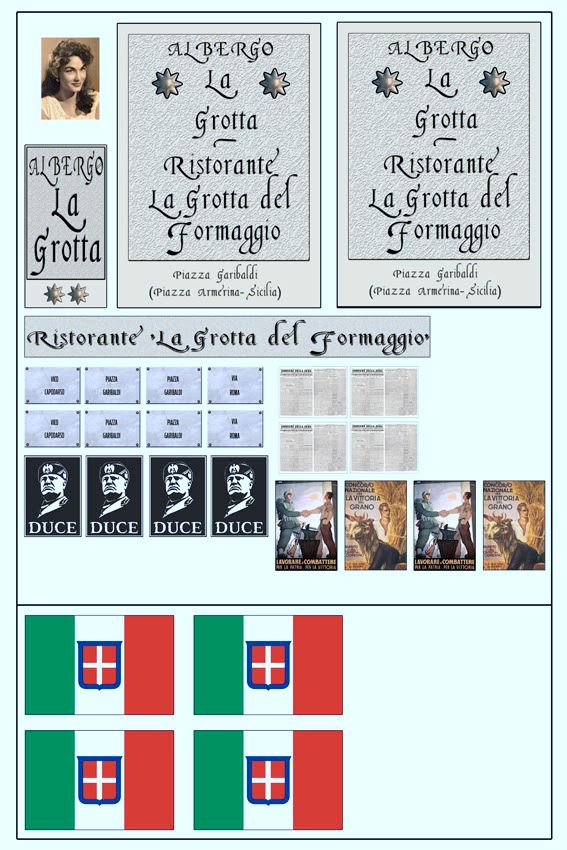
The cobbles that I will use will be these of the brand Kancali...

l040.jpg


:X And the sections of sidewalk , of the same brand, will be these...

l041.jpg


They are sheets of latex, totally flexible and that allow to connect the above mentioned sheets in any type of surface due to his flexibility. I will have care it is at the moment of fixing it, since with white glue it will be late more in drying off. And as for the unions of the different sheets or chunks that I have to use, I will seal them with Tamiya Putty.

I hope that you like.

See you soon.

Yago.
 
After covering the whole surface with DAS to level, I have placed the whole paved one.

The better thing is to see the change from the beginning...

l033-4.jpg


l035-2.jpg


l042.jpg


l043.jpg


l044.jpg


l045.jpg


l046.jpg


Finally I used glue of contact. Today on Saturday or tomorrow Sunday, I will place the sections of sidewalk and will seal each and every of the unions with putty. And I will refill some hollow that it appreciates between some unions.

And here I leave a few photos you detail with a kubel and a figure, this way podreis to see the size of the cobbles with regard to the figure...

l048.jpg


l050.jpg


l047.jpg


l049.jpg


And after having the whole tied evening, I have decided to grant the license to me of placing the source in the boulevard, and to place some palm to give something of color and acentura some own characteristics of Sicily since they are the palms...

l060.jpg


l061.jpg


l062.jpg


In these photos, the boulevard appears with a very narrow width. I have to expand it a bit. And I have to do the base of the source, since to the being an area in difference, I have to realize as a wedge that goes below to level it and that remains straight or to level, and not in fall as the rest of the square.

I hope that you like. I will continue working hard.

See you!

Yago.
 
And the final result of the square is this...

Placement of the sidewalk in the central part of the square...

l063.jpg


l064.jpg


l065.jpg


Location of the fountain in the boulevard...

l066.jpg


l067.jpg


l068.jpg


l069.jpg


You can see that in the low part of the fountain there is a hollow. Today on Tuesday I will refill this part supporting the silhouette of the base of the source and giving this angle in order that it stays to level.

I hope that you like. This is one not to stop, and everything owes at the arrival of the good time (sun and heat), which is like a recharge of energy.

See you!

Yago.
 
Hi
Out standing work i love the way you led me into the origins of the dio with maps and arial pics will follow with great interest this project and iam learning some Italiano lol
Cheers Chris
 
Back
Top