• Modelers Alliance has updated the forum software on our website. We have migrated all post, content and user accounts but we could not migrate the passwords.
    This requires that you manually reset your password.
    Please click here, http://modelersalliance.org/forums/login to go to logon page and use the "Forgot your Password" option.

P-51B 'The Deacon' * * F I N I S H E D * *

P-51B 'The Deacon'

How would you make a scaled sloppy paint job on the stripes? Maybe a ragged edge on the masking tape?
 
P-51B 'The Deacon'

...and that's the $64,000 question, Bob. It's real difficult to make-out in the photos, but you'll need to take my word on this: None of the stripes are straight, nor are they 'exactly' a scale 18" width, if you could see it 'in-the-flesh' it would be more apparent. Problem is striking the balance between looking 'real' but sloppy and looking like a 'sloppily' painted scale model !!

as I said - I'm not certain if it's worked :hmmm - Good job I don't take it all too seriously otherwise I'd have pulled-out my hair by now... oh, wait a minute...


h581d6d4.jpg


...Yeah, I already did that !!

Ian

 
P-51B 'The Deacon'

I think when you get the flat coat on it, it'll be more apparent. Good picture (y)
 
P-51B 'The Deacon'

Looks great Ian. I agree, you can paint it like they did on the real thing, but on the model it would look like crap. I think it looks fine as is.
James
 
P-51B 'The Deacon'

...the pre-shadow technique looks superb and the painting job fabulous...as always :good:

Luiz.
 
P-51B 'The Deacon'

The hardest part of this project so far has been trying to paint the invasion stripes so they look like they were applied in a hurry but NOT like this is a badly painted model. Not certain this has worked, so whatever comments you'd like to make, I'd be happy to hear.

How would you make a scaled sloppy paint job on the stripes? Maybe a ragged edge on the masking tape?

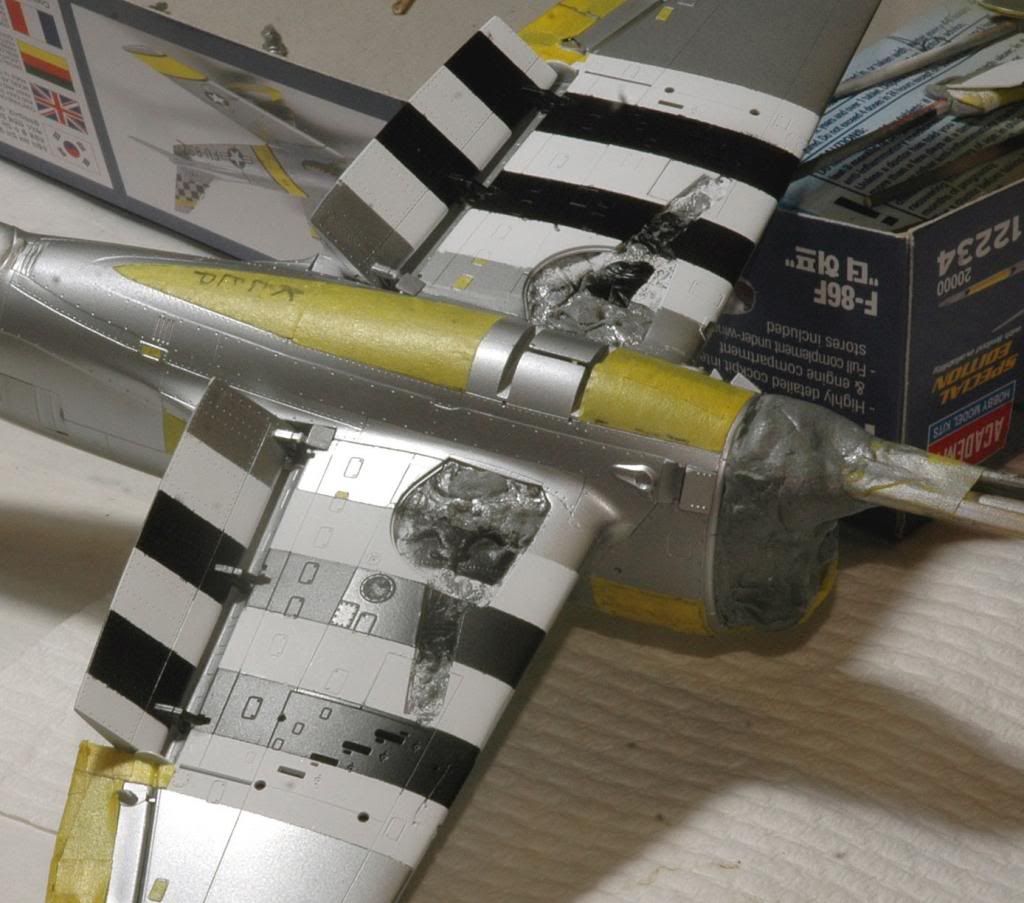
Had the same thought for my P-47 invasion stripes Ian,

DSC_1469is.jpg~original


trying to get that effect in scale is near impossible when you want to create it!!!

Bob is onto it, dullish blade, Tamiya masking tape, glass cutting board will give a fine ragged edge, depending on how dull the blade is.

Too dull, it gives too much of a ragged edge, too sharp, well there is the variable!

As you can see some are too straight, some ok, it's a hit or miss affair, this time I used a too sharp blade but didn't really push the tape down hard, I masked all the stripes first, then removed the ''white ones'' sprayed the white, then remasked over the white, removed the ''black stripes'' and sprayed the black.

I think yours look fine, when the decals, flatcoat and weathering are applied I think it will all blend in nicely.

What we need is a miniature paint roller for these stripes! :drinks
 
P-51B 'The Deacon'

Last update before finish:

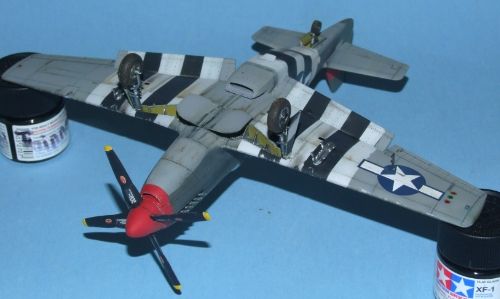
Decals on, paint chipping using good old Humbrol 56 and a good #1 sable brush, and a simple panel line wash with Raw Umber/Paynes Grey mixed roughly 60/40 and diluted with ordinary turps.


On the underside I take a tiny spot of the oil paint straight from the tube, place it where I want it then use a clean brush with no turps and brush it back with the airflow. sometimes I'll work it a little to 'feather' the effect.


I took these pics this morning before I worked a little more on it. As this is written, I've finished the whole thing other than matting it down and final assembly. Might get time to do that tomorrow afternoon after work.

AFN.

Ian
 
P-51B 'The Deacon'

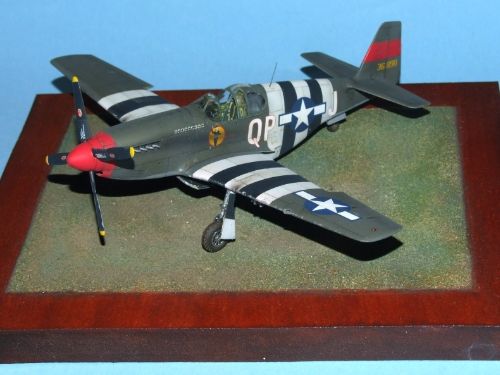
Kit: Tamiya 61047
Paint: Camouflage - Xtracolour enamels. Invasion stripes, ID stripes, interior, tyres – Tamiya acrylics. Pylons, wheel hubs, undercarriage legs and wheel bays – Alclad lacquer.
Decals: Microscale 48-139
Extras: Ultracast resin exhausts, Eduard Zoom set. Vac-form ‘Malcolm’ canopy.

North American P-51B Mustang
Assigned to: Maj. Howard ‘Deacon’ Hively
334th FS, 4th FG, US 8th Air Force
Debden, June 1944


Lost count of how many Tamiya P-51’s I’ve built over the years, but what I do know is that this is easily my best. Took just over a month from start to finish, just grabbing an hour or two bench-time here and there.

Particularly pleasing on this build is that I deliberately tried to replicate the ‘hasty’ application of the invasion stripes. Really difficult to pull-off without the project ending-up looking like a badly painted and rushed model. I think I’ve done it – no two stripes are the prescribed 18” scale width, they aren’t straight and a little patchy in ‘depth’.

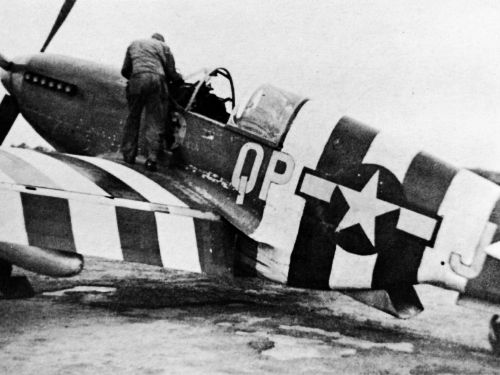
You can see from the accompanying photo ‘The Deacon’ was heavily paint chipped and dirty, again, an effect I’ve tried to replicate.

More photos in the 'Finished Builds' section: Really enjoyed this (hassle free) project and very happy with the end result. As ever thanks for taking the time to look and all the support, and happy to answer any questions, comments and criticism.

AFN

Ian
 
Back
Top