• Modelers Alliance has updated the forum software on our website. We have migrated all post, content and user accounts but we could not migrate the passwords.
    This requires that you manually reset your password.
    Please click here, http://modelersalliance.org/forums/login to go to logon page and use the "Forgot your Password" option.

Large Custom Millennium Falcon (new pics )

Large Custom Millennium Falcon

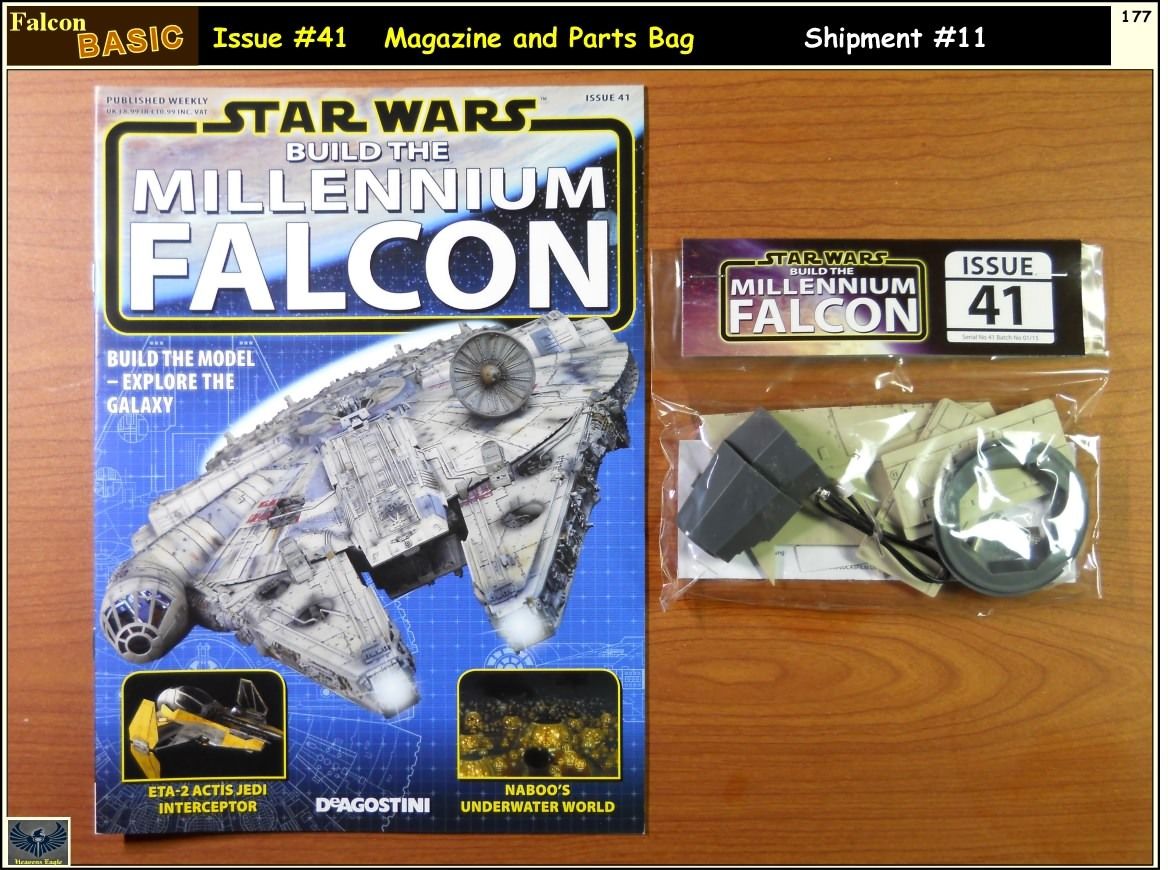
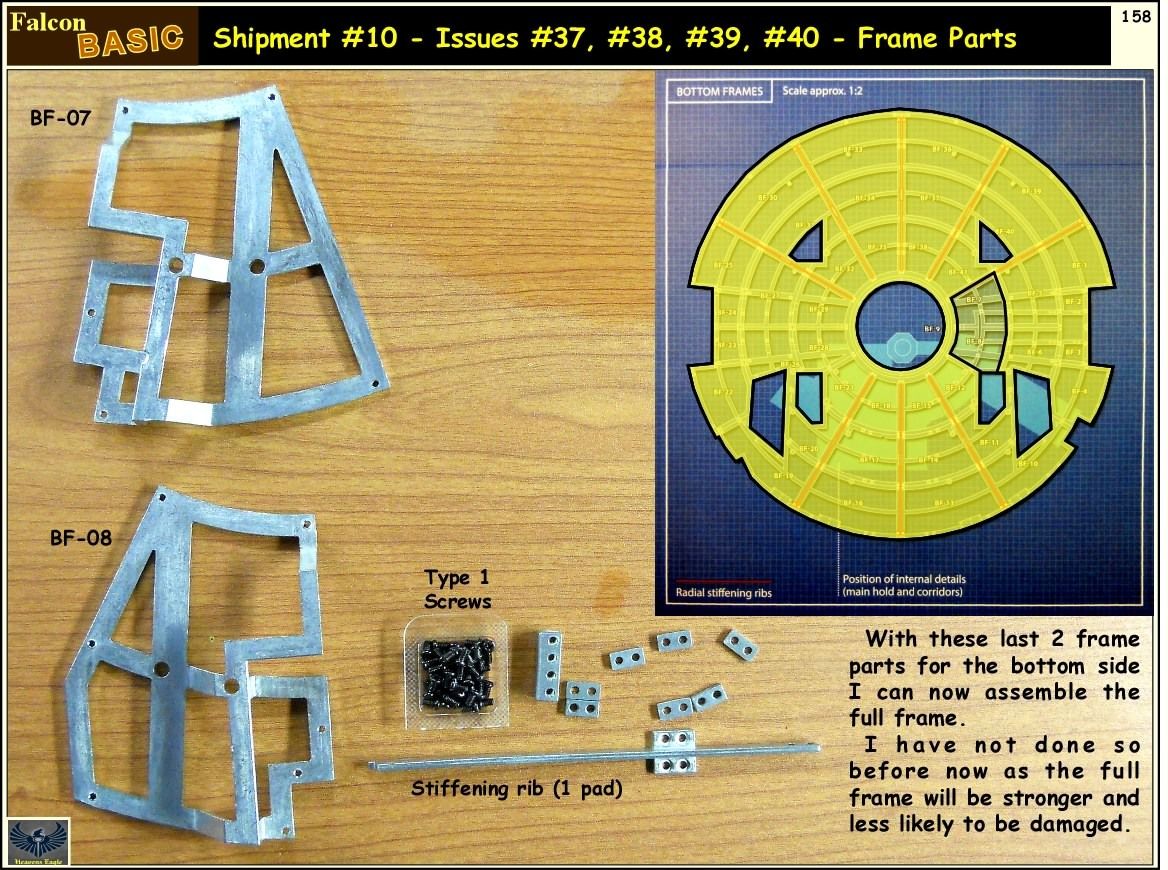
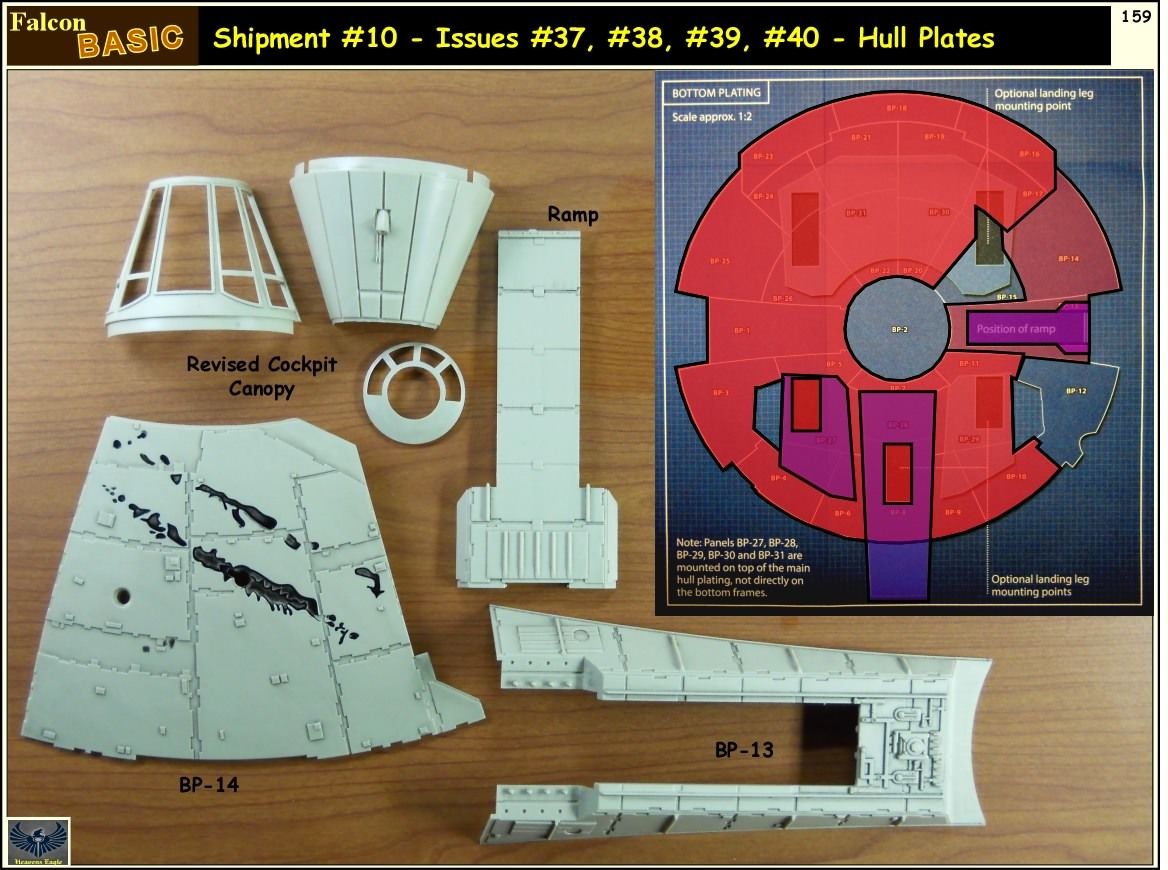
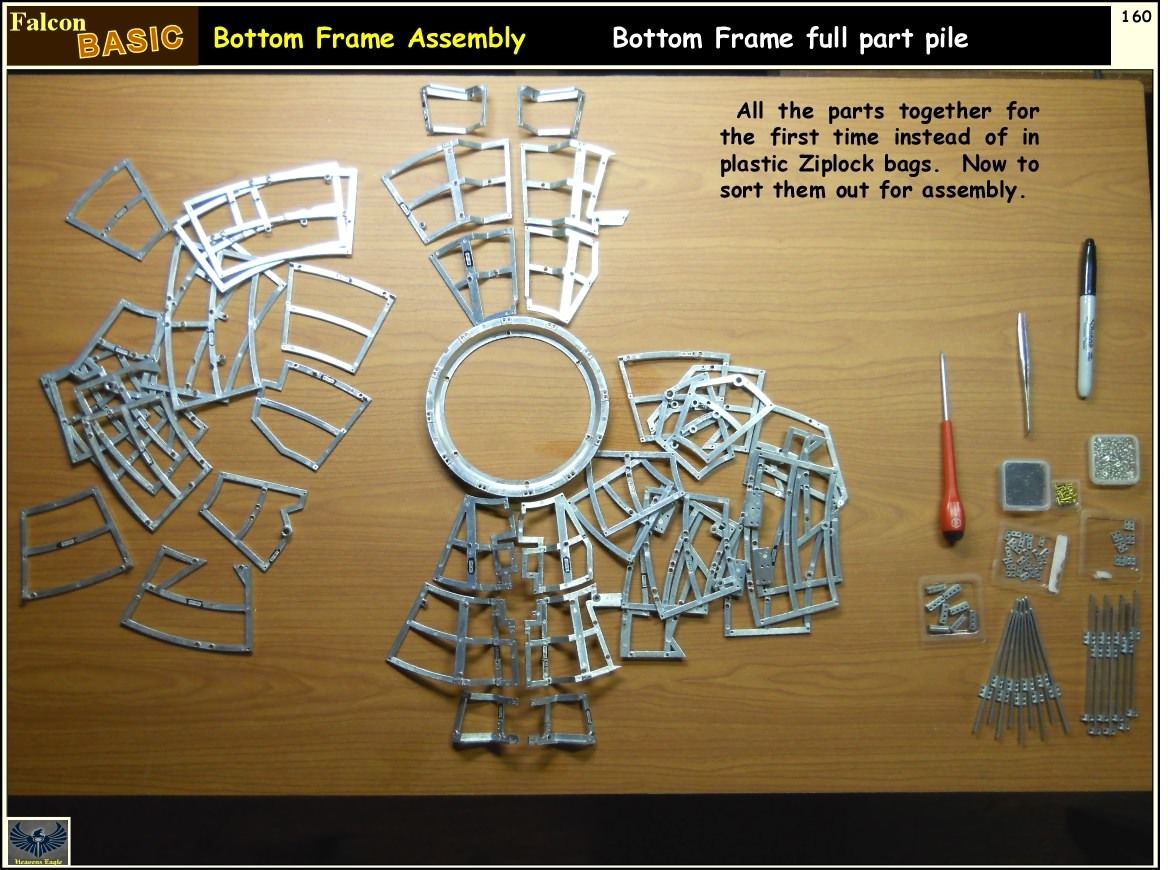
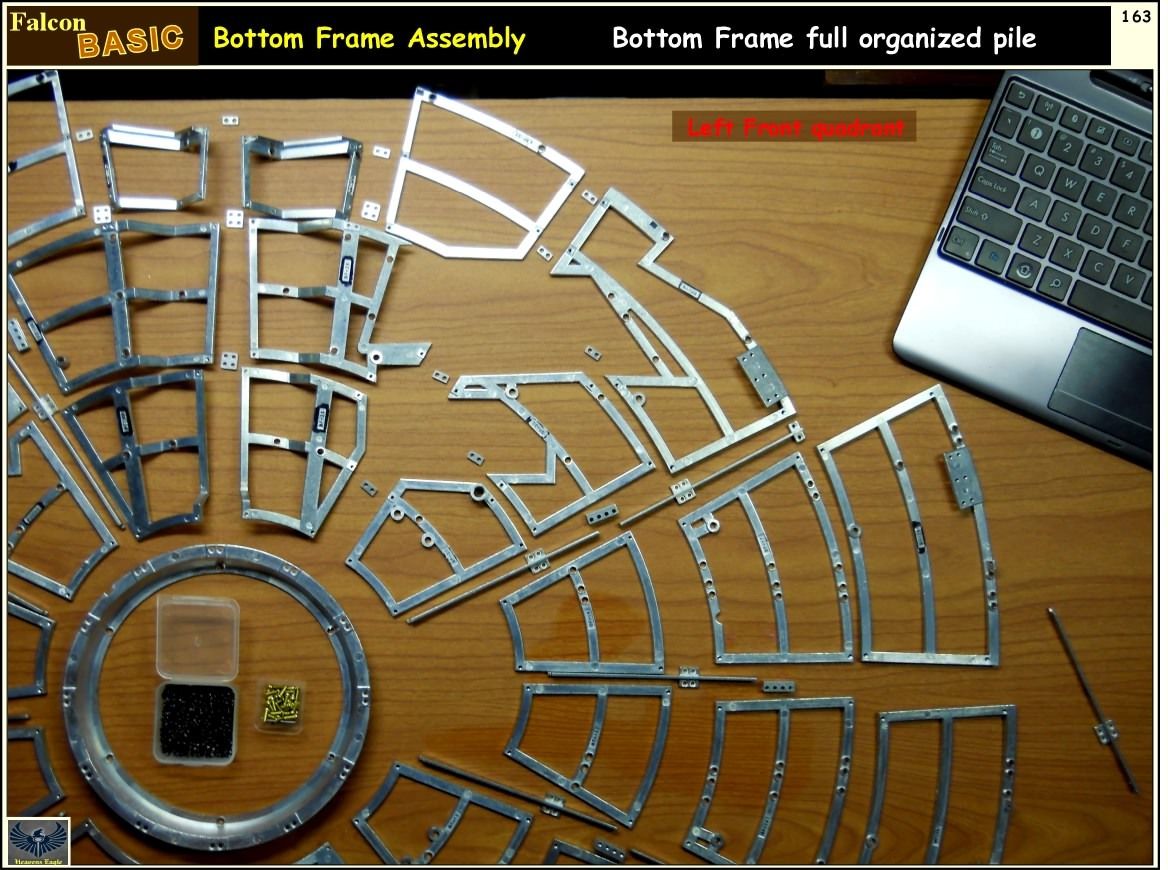
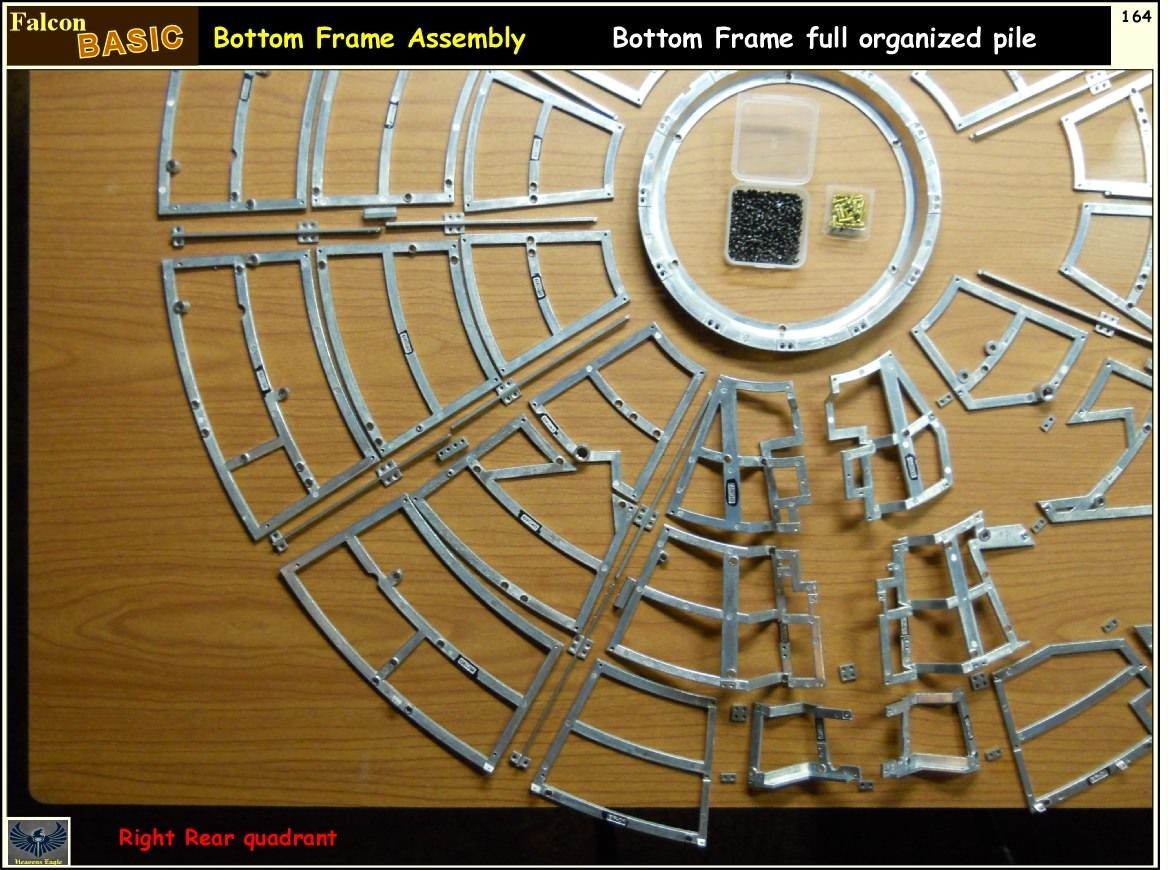
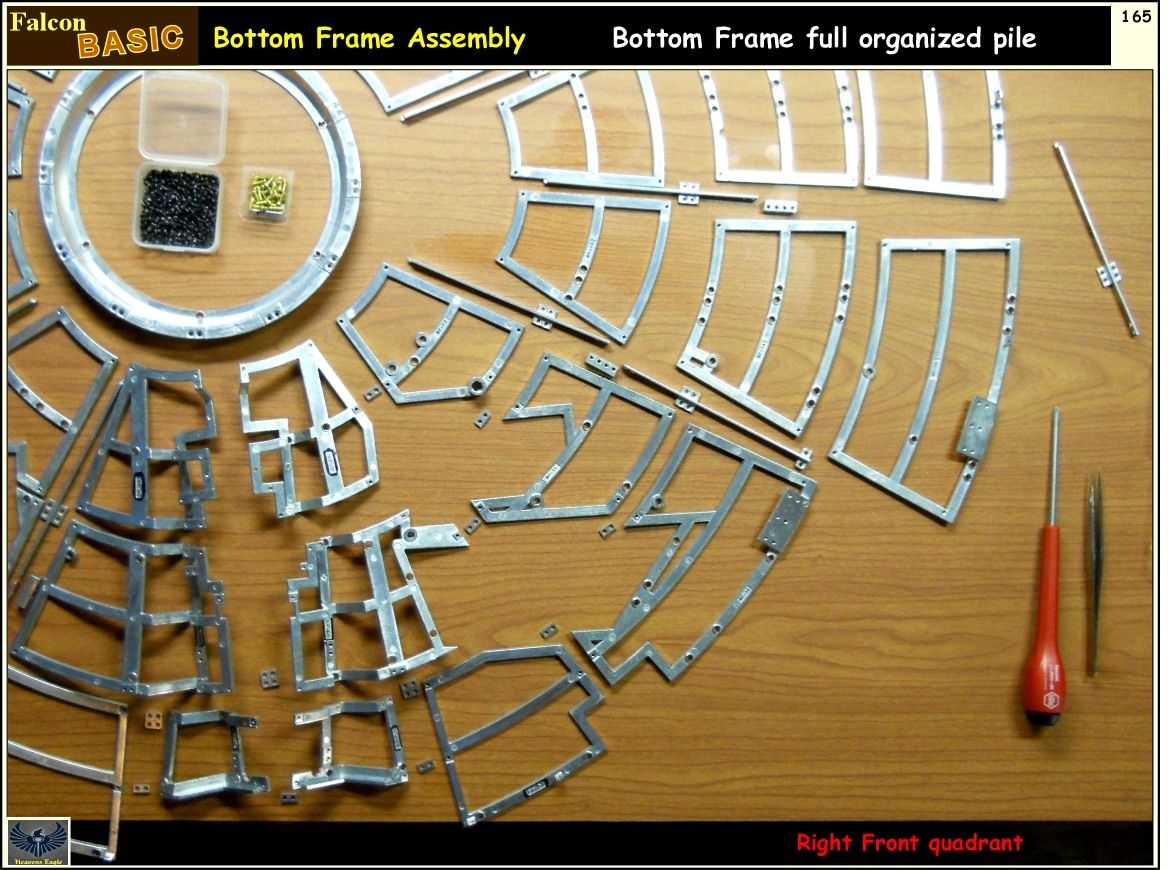
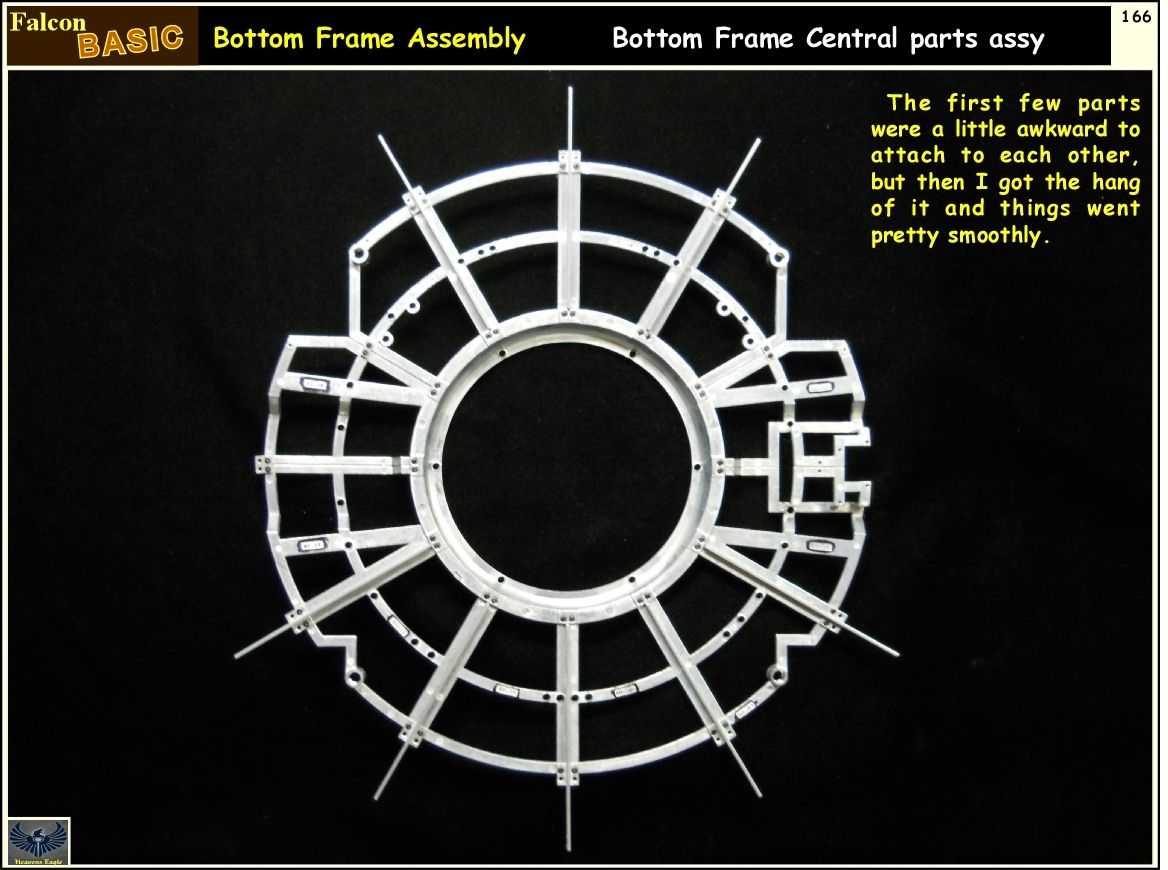
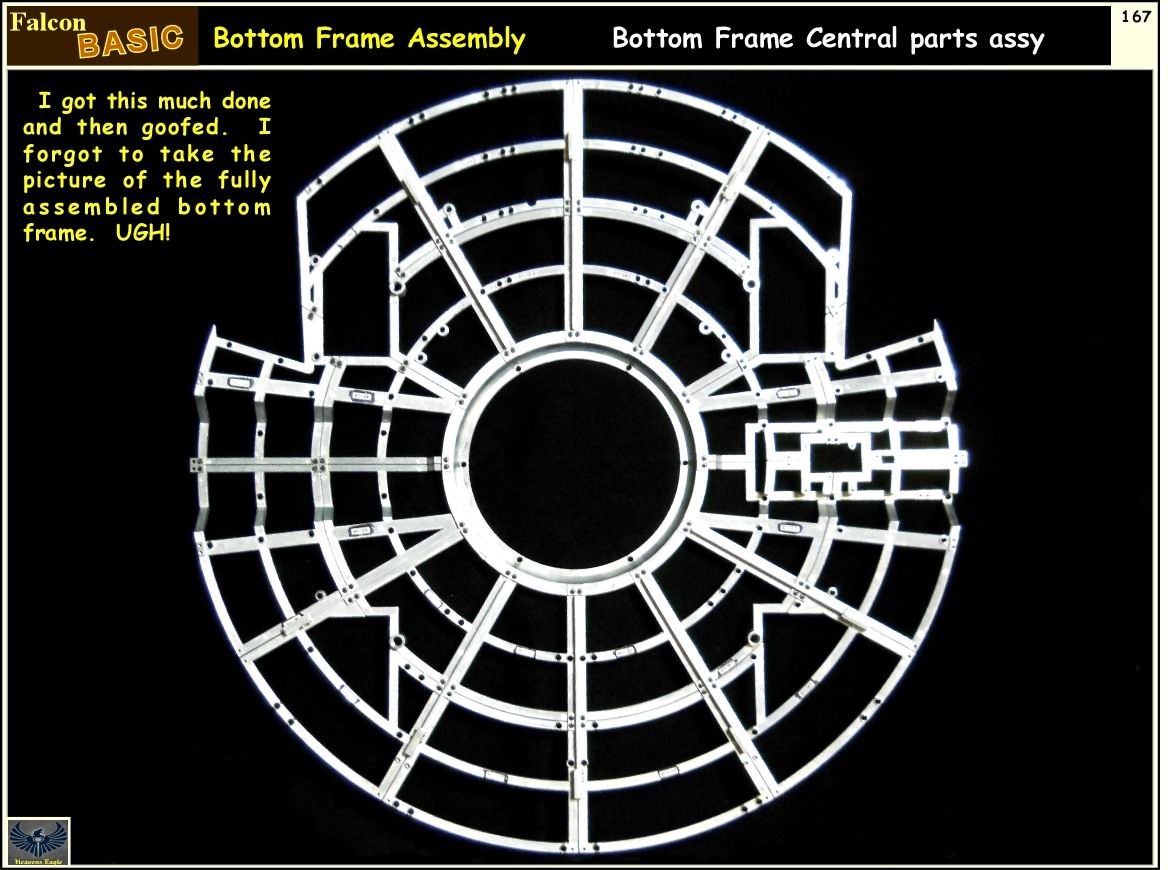
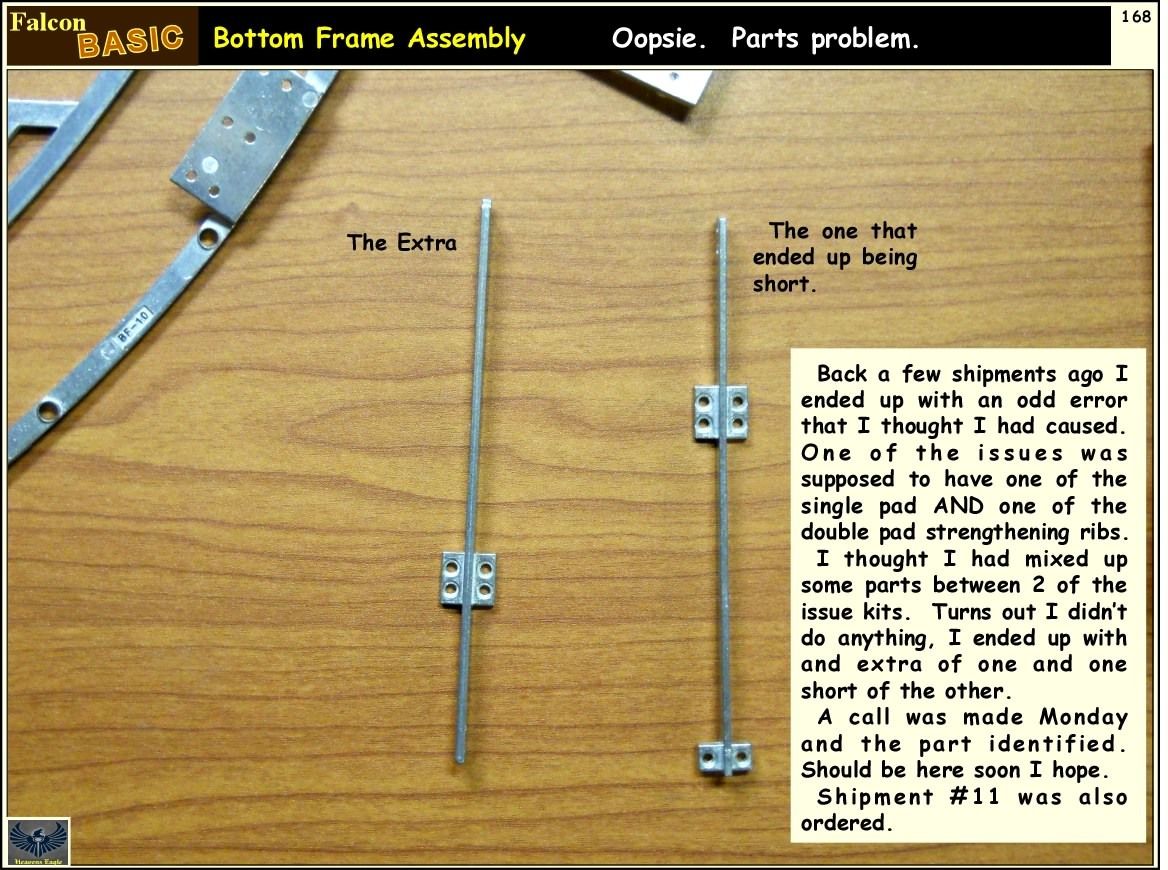
Received shipment 10 friday and spent the whole weekend assembling the bottom frame and adding in the basic hull plates. I will get the photo part of my posts put together this week and posted. Then to get back on the Az before I get too sidetracked.

:captain
 
Large Custom Millennium Falcon

Here are some photos folks! This beast is going to be huge (like I didn't already know that, yeah :S ) So now that I have the whole bottom frame assembled and most of the plating attached, I will have to figure out a place to keep it while I wait on the rest of the parts.

Enough of that though, the pics explain things as we go.

Falcon-Basic-150.jpg~original


Falcon-Basic-151.jpg~original


Falcon-Basic-152.jpg~original


Falcon-Basic-153.jpg~original


Falcon-Basic-154.jpg~original


Falcon-Basic-155.jpg~original


Falcon-Basic-156.jpg~original


Falcon-Basic-157.jpg~original


Falcon-Basic-158.jpg~original


Falcon-Basic-159.jpg~original


That is the end of the latest shipment, stay tuned for the fun stuff.
 
Large Custom Millennium Falcon

Here is where I assemble the bottom part of this beast. Enjoy!

Falcon-Basic-160.jpg~original


Falcon-Basic-161.jpg~original


Falcon-Basic-162.jpg~original


Falcon-Basic-163.jpg~original


Falcon-Basic-164.jpg~original


Falcon-Basic-165.jpg~original


Falcon-Basic-166.jpg~original


Falcon-Basic-167.jpg~original


Falcon-Basic-168.jpg~original


Falcon-Basic-169.jpg~original


Falcon-Basic-170.jpg~original


Falcon-Basic-171.jpg~original


Falcon-Basic-172.jpg~original


Falcon-Basic-173.jpg~original


Whew! :gogo Once I now figure out where I am going to store this huge beast it will be better. The parts all fit in several WNW sized boxes. This is the size of a small satellite dish. :hmmm Nah!

Hope you enjoyed!

Till next time :beer
 
This is nuts! :yipee

Why you say that Chuck? I guess that is an advantage of being a batchlor, no one complaining and no deadly dustcloths destroying delicate devices. :D

There are still 15 more shipments before I get all the parts. I went ahead and bumped up shipment #11 so it should show up in the next few days. One of those builds I can work on for a bit then set aside for a bit. Only now I need to find a place to put the satelite dish. :facepalm

Have been visiting with a guy on another forum that is also building one and he is keeping me on my toes. Keeps it fun which is why I even bother. :laugh:
 
I received the part that was needed and I bumped up the schedule for shipment #11. Received the spare part Friday and shipment #11 on Saturday, so you know what I was doing. :D Since the pictures tell it all here we go.

Falcon-Basic-174.jpg~original


Falcon-Basic-175.jpg~original


Falcon-Basic-176.jpg~original


Falcon-Basic-177.jpg~original


Falcon-Basic-178.jpg~original


Falcon-Basic-179.jpg~original


Falcon-Basic-180.jpg~original


Falcon-Basic-181.jpg~original


Falcon-Basic-182.jpg~original


Falcon-Basic-183.jpg~original


Falcon-Basic-184.jpg~original


Falcon-Basic-185.jpg~original


Falcon-Basic-186.jpg~original


To be continued. . .
 
Here is part 2 (again) Seems like I end up with a lot of photos don't I.

Falcon-Basic-187.jpg~original


Falcon-Basic-188.jpg~original


Falcon-Basic-189.jpg~original


Falcon-Basic-190.jpg~original


Falcon-Basic-191.jpg~original


Falcon-Basic-192.jpg~original


Falcon-Basic-193.jpg~original


Falcon-Basic-194.jpg~original


Falcon-Basic-195.jpg~original


I am now working on both the Arizona and the Falcon. Kind of bouncing back and forth which was some of the idea when I started all this mess. I still have not decided where to located the partial assembly yet. Might be time to clean off some shelves back in Tulsa and bring them back with me. We will see how that goes. While the garage here gets rather warm, it isn't all that bad compared to the heat in Oklahoma. I would rather have my "stuff" here so it could start getting weeded out.

Tomorrow I will work on the Arizona pics. Have some interesting things going on with the 5"/51 Caliber mountings. :geek
 
Very cool stuff. I am surprised though that they didnt wire the limit switches into the motor circuit directly rather than through a controller. That would eliminate the over run problem I guess maybe because you would have to run a common wire maybe.
 
Here is part 2 (again) Seems like I end up with a lot of photos don't I.

Falcon-Basic-187.jpg~original


Falcon-Basic-188.jpg~original


Falcon-Basic-189.jpg~original


Falcon-Basic-190.jpg~original


Falcon-Basic-191.jpg~original


Falcon-Basic-192.jpg~original


Falcon-Basic-193.jpg~original


Falcon-Basic-194.jpg~original


Falcon-Basic-195.jpg~original


I am now working on both the Arizona and the Falcon. Kind of bouncing back and forth which was some of the idea when I started all this mess. I still have not decided where to located the partial assembly yet. Might be time to clean off some shelves back in Tulsa and bring them back with me. We will see how that goes. While the garage here gets rather warm, it isn't all that bad compared to the heat in Oklahoma. I would rather have my "stuff" here so it could start getting weeded out.

Tomorrow I will work on the Arizona pics. Have some interesting things going on with the 5"/51 Caliber mountings. :geek

Get your geek on fer sure man!

Looking good Paul.. :pilot
 
Man, Paul, this is quite the experience to watch. It is a good thing you have the dexterity with tweezers and watches to get this completed. I cant imagine placing all those tiny screws. I am sure this will be an awesome build when done.
 
Coming along very nicely my friend... I have been thinking about doing the running lights on the bottom but not sure yet. If I do I'll probably use FO for the small ones. Have you considered how to fill the big nasty mounting holes yet?
 
Hey Jim! Welcome to MA (also known by some as the nuthouse) :D

As to "flling" those holes, I will probably smooth that raised ring that is around them down smooth with the surrounding surface. Then will probably make 4 little plates with some index pins to keep them aligned. Screw some short M6-.4 set screws into the holes add some magnets to the plates and place them over the holes.

That way they are covered and hidden but I still have options.

Speaking of magnets, all the landing gear bay doors are held in place with magnets. I have noticed folks having a lot of trouble removing them since they fit down flush. I will be adding a larger stronger magnet to the underside (inside surface)of the doors to act as a handle. Take a piece of steel or another magnet and hold it close there and pull the door off. :hmmm
 
Thanks bro... glad to be here... took awhile to get approved! I don't know if anyone here knows me, but I've been around awhile! Hope I'm able to contribute!

I was thinking about your floodlight holes... instead of using a jewelers glass, use some hot glue in the spot and allow it to dry. It should disperse the light properly and cut it down enough for the scale. And you should be able to get it flush with the surface so that it's not seen. Just a thought!

The biggest problem with using LEDs at this scale is that it looks WAY out of scale when it's compared to the original model. You stop and think about it. If you look at some of the builds that use lights on the bottom or even inside, the light is so bright it looks like they used halogen floodlights everywhere! You've got to remember that you have to dim down the interior and exterior lights to make it look more "natural" and in scale with the scale it's in. If you have a halogen floodlight in full scale, you also have to scale down the power of that light by the same scale and make it 43% dimmer or it will look like the sun! Just a helpful tip for ya, not many realize this!
 
Yeah we try to keep the trolls and rif-raf out. Makes for a nice community that does group effort and helping each other out. There is a lot that can be learned from these folks, and they all like to help.

Thanks for the suggestion Jim, but I (almost) never use hot glue. Definitely not on this build. On looking in the watch parts catalogue, the watch crystal idea is out (smallest dia available is 15mm) So I will be using some clear acrylic. As for diffusion way ahead on that one Jim. :hmmm :D

Hey... what you got against Hot Glue anyway? Did it wrong you in a card game somewhere? Did it run off with your girlfriend? I don't think so! LOL I found that the "clear" hot glue works great for light dispersion. It's inexpensive, and will cut down the total brightness of a LED at full power to the proper scale! Works great... Used it in my C-3PO eyes and looks perfect for the scale!
 
Back
Top