• Modelers Alliance has updated the forum software on our website. We have migrated all post, content and user accounts but we could not migrate the passwords.
    This requires that you manually reset your password.
    Please click here, http://modelersalliance.org/forums/login to go to logon page and use the "Forgot your Password" option.

KLM Royal Dutch Airlines Boeing 747-400

Re: Boeing 747-400 (AIrline undecided)

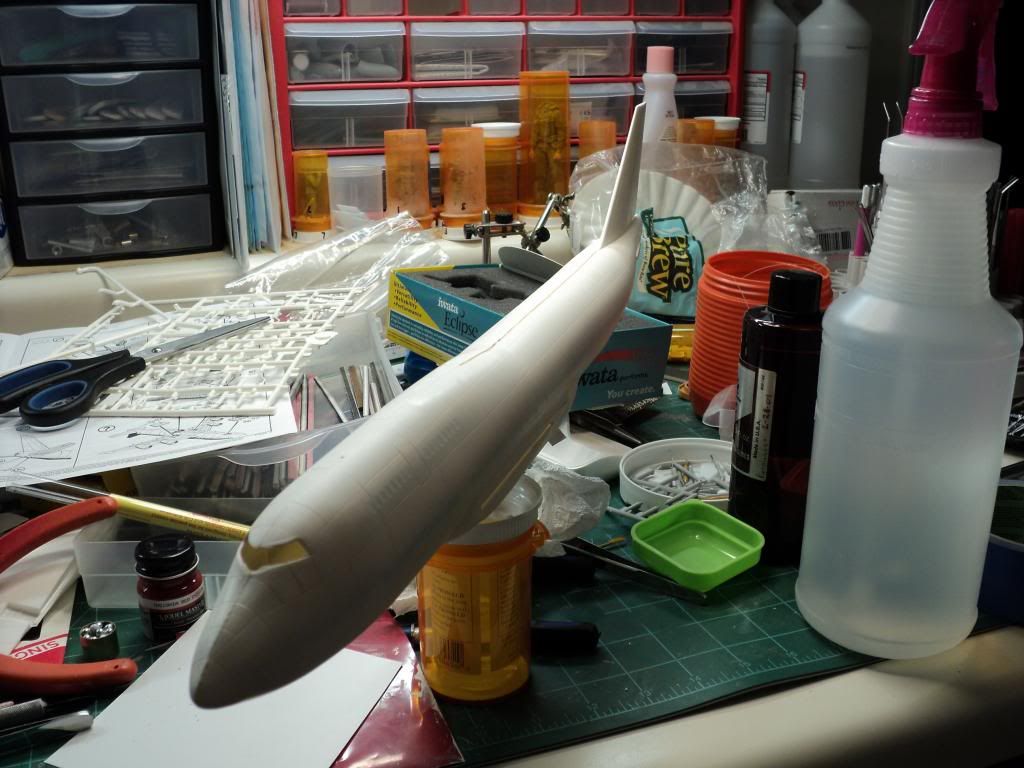
Finally a little bit of progress to report on my build.

Put in a lot of OT at work this weekend, so didnt have much time for modeling, but I was able to get some in last night.

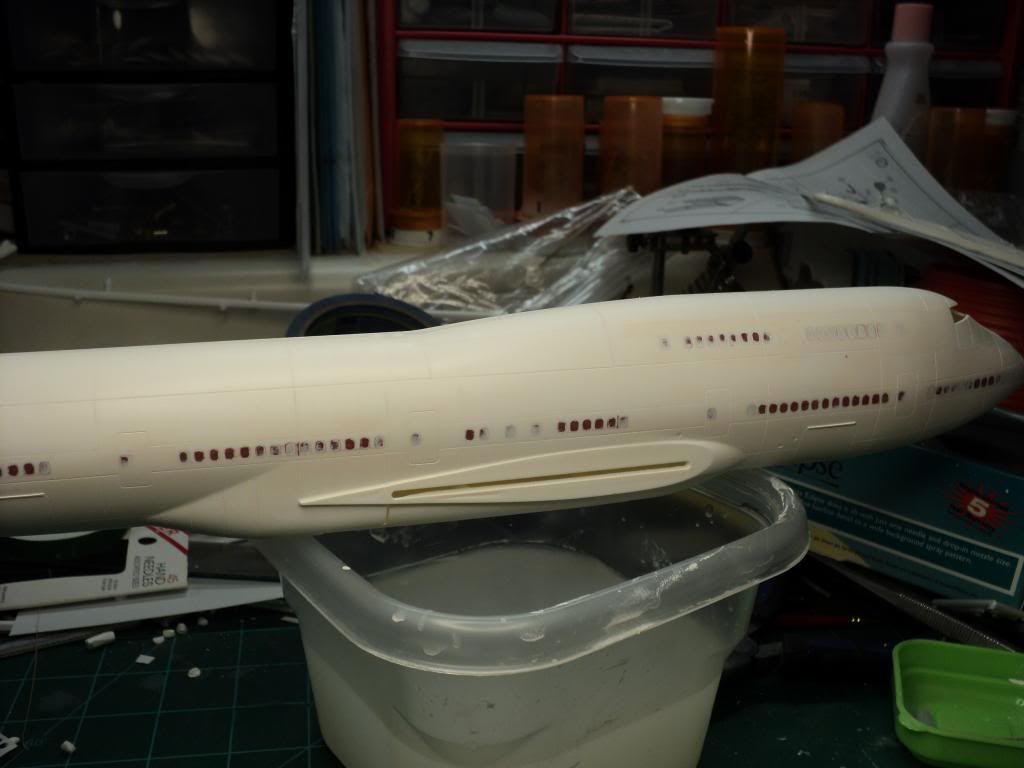
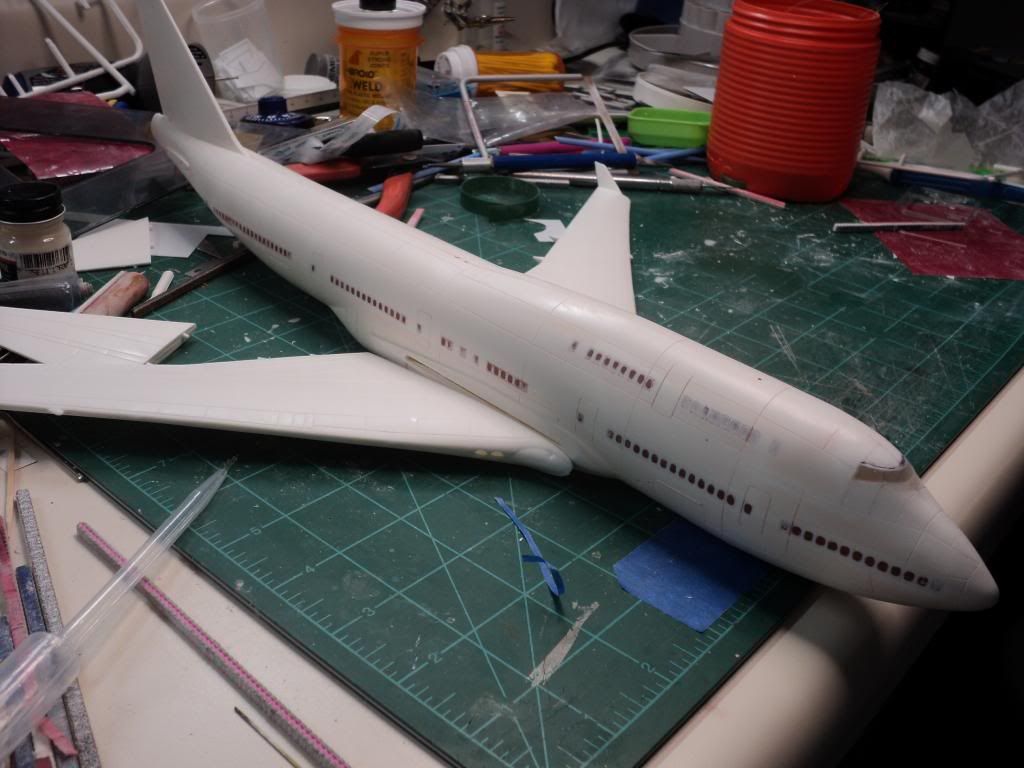
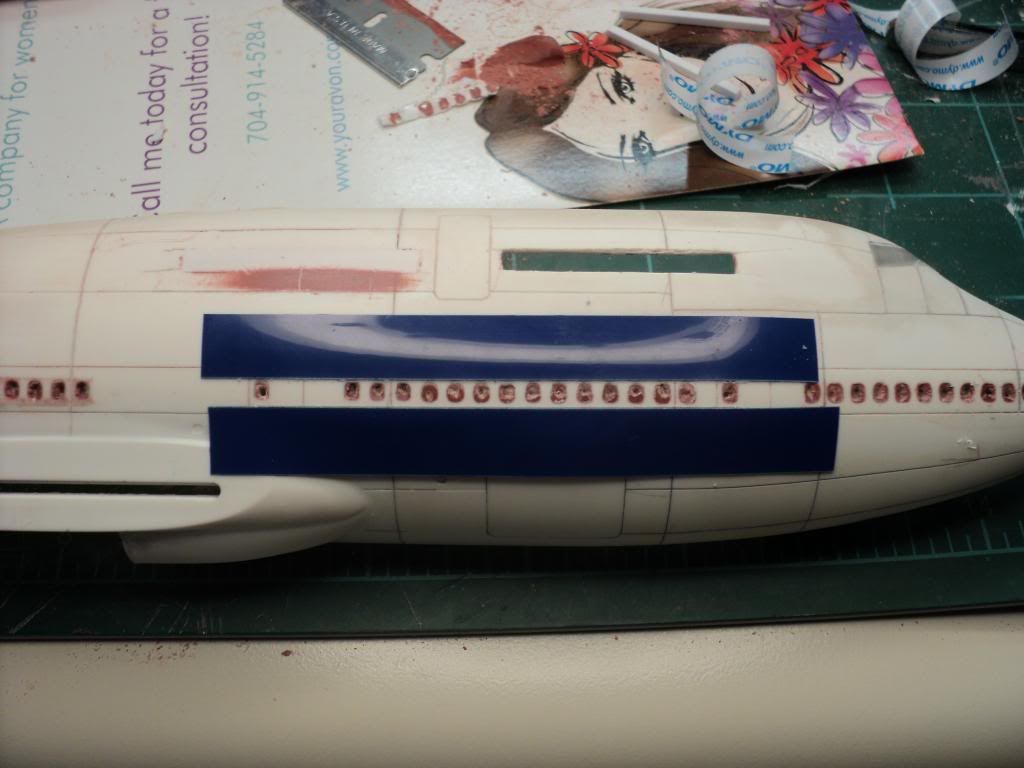
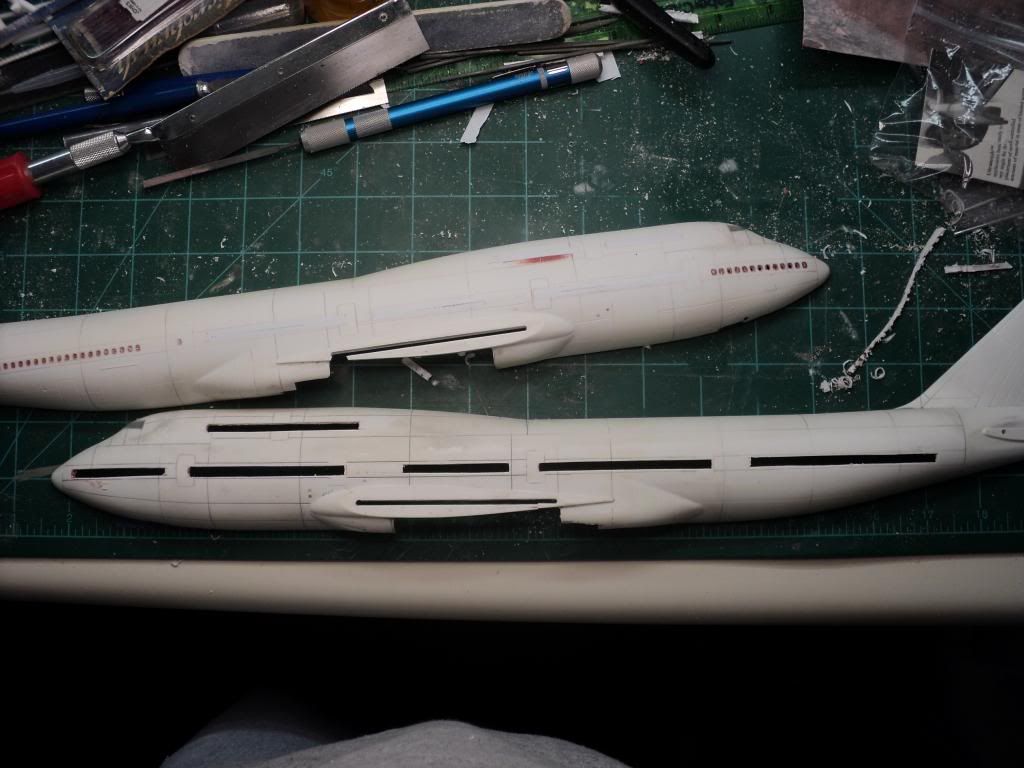
The first task this weekend was getting the fuselage halves glued together. Fit was well below what I had hoped it would be. I'm finding on this kit, that the fit is horrible, w/ lots of cleanup work required anywhere that 2 pieces have to be joined together.

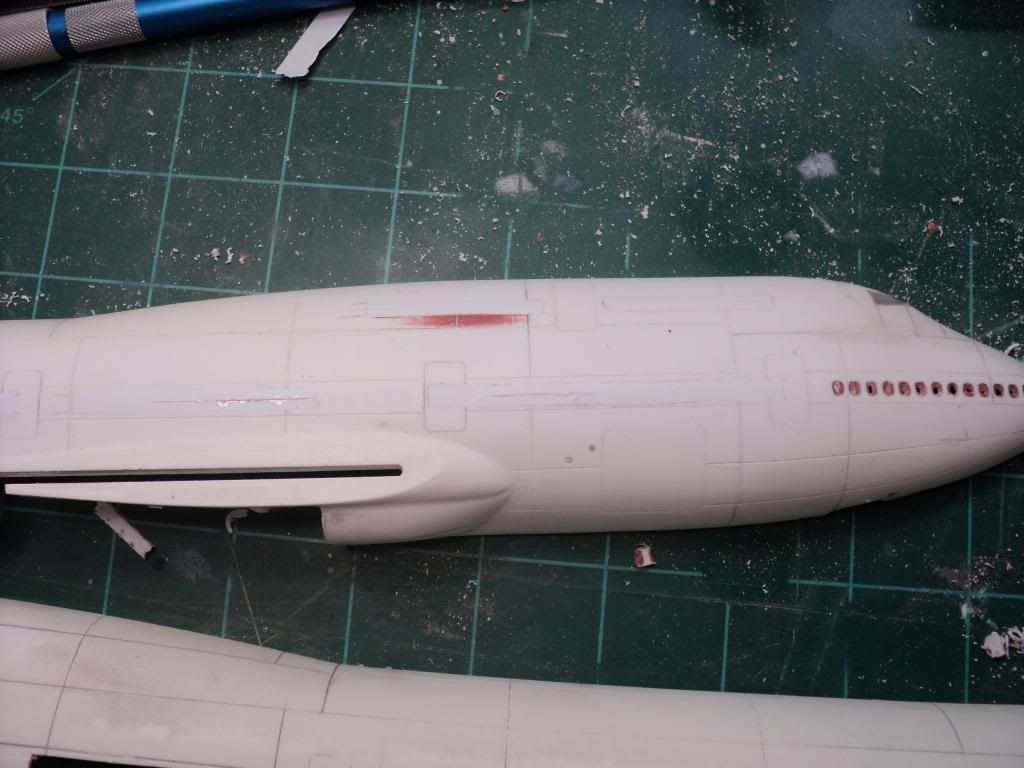
The 2 fuselage halves went together ok in a few places, but for the most part there's at least a small step at the join all the way around thats going to require a lot of sanding and clean up.

Boeing019_zps18d528b2.jpg


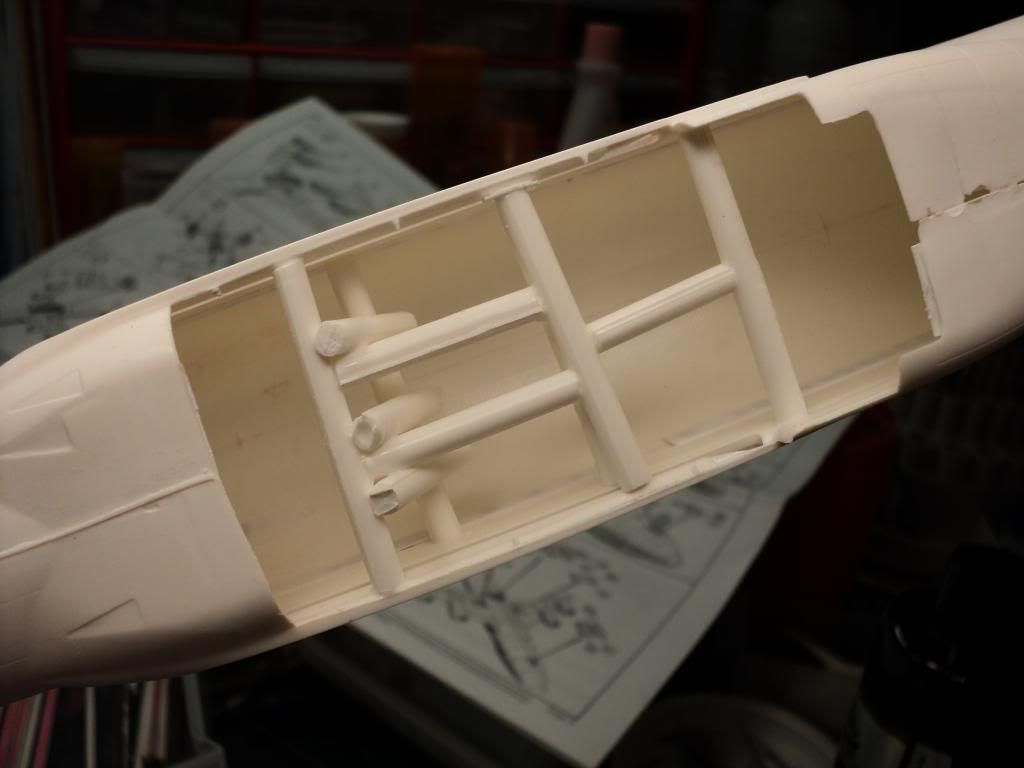
The worst area by far, is around the wing roots & main gear bays.

Boeing020_zps03ac2f65.jpg


Boeing021_zpsdb28fe64.jpg


Boeing023_zps0000a49b.jpg


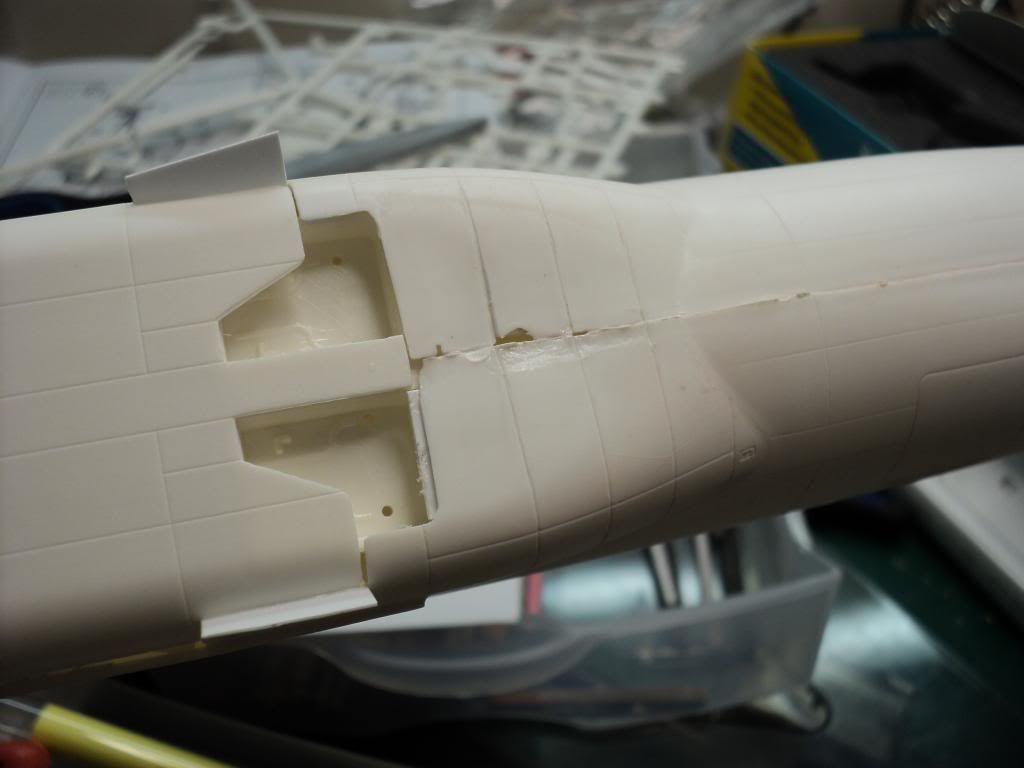
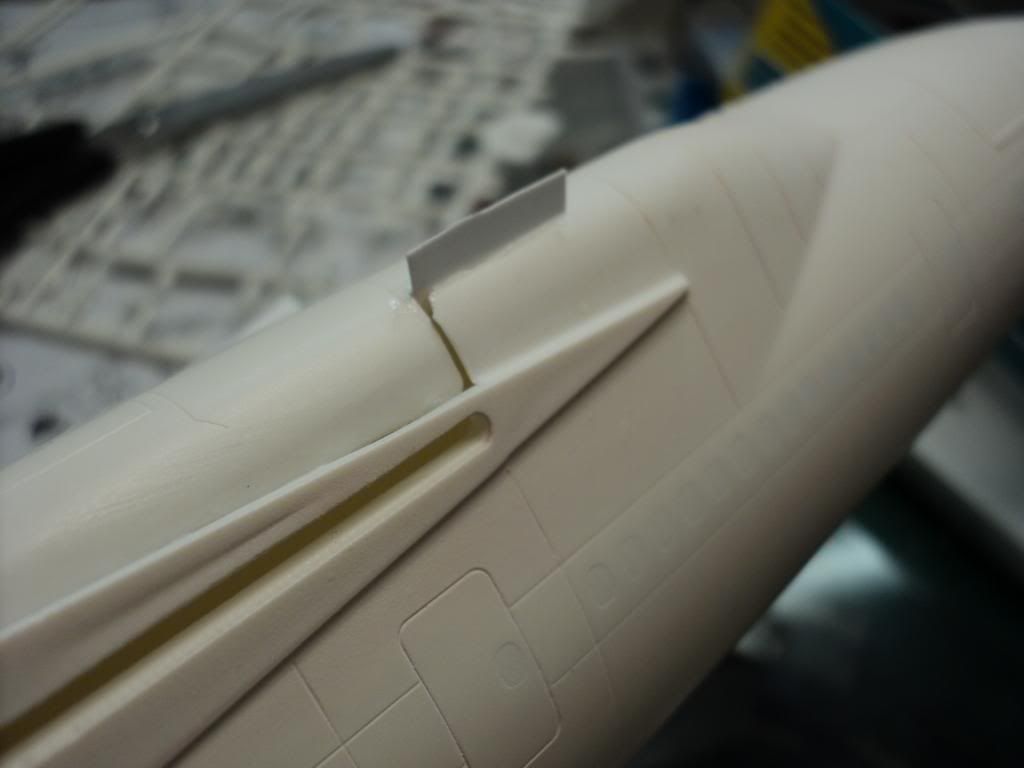
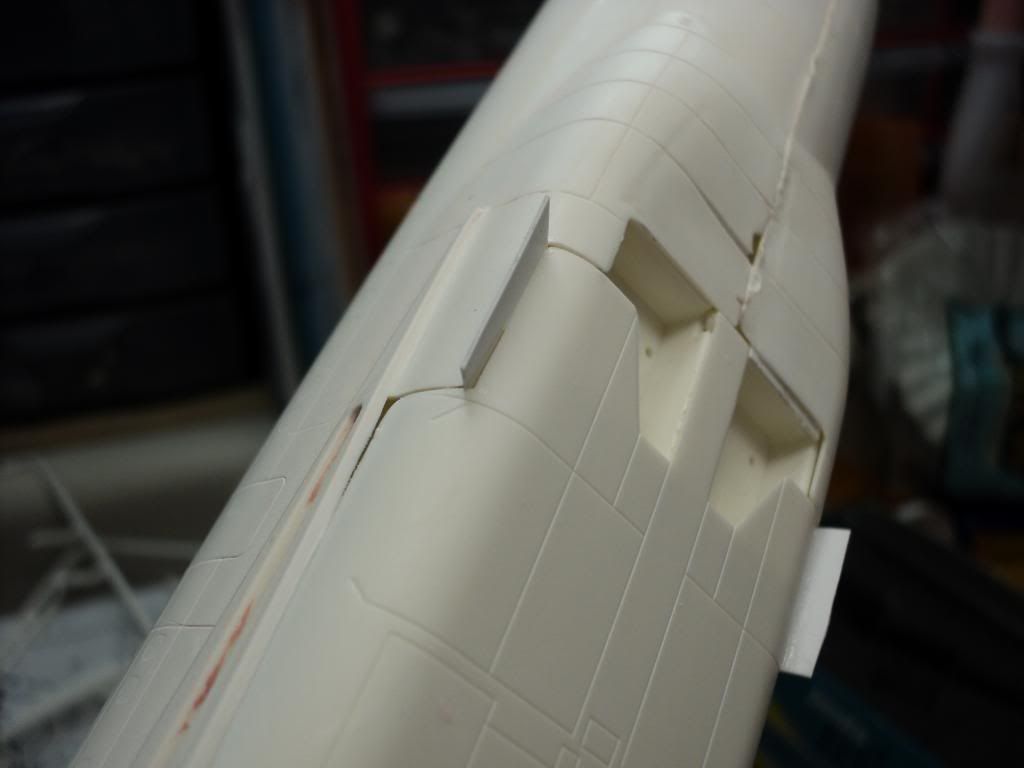
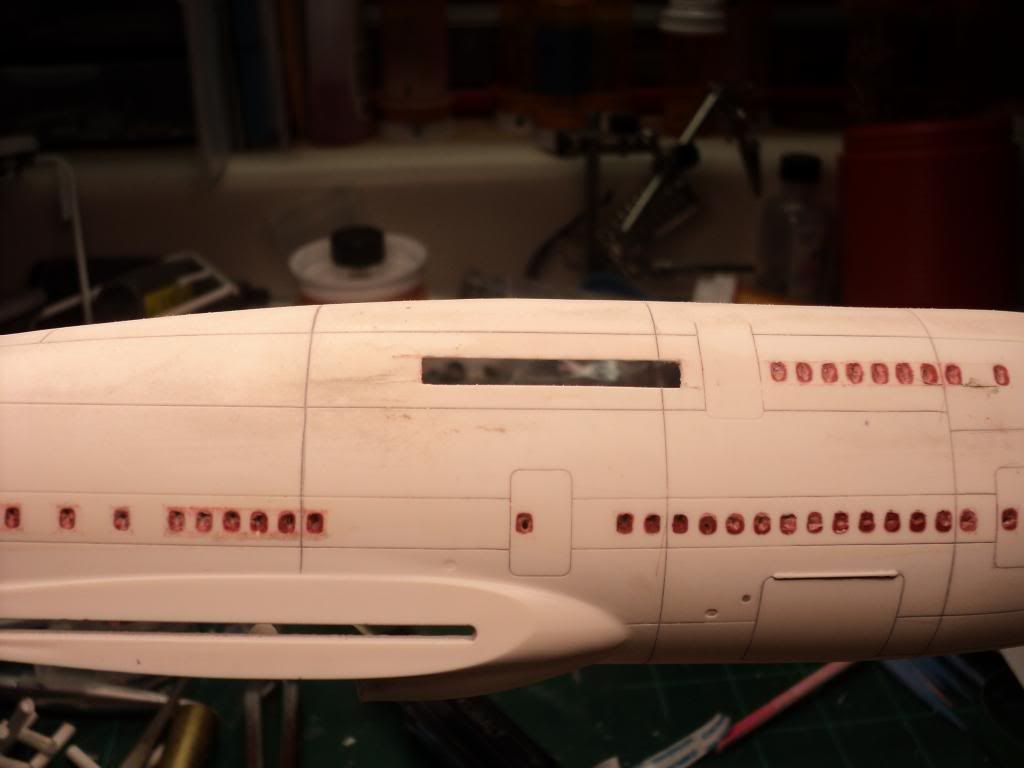
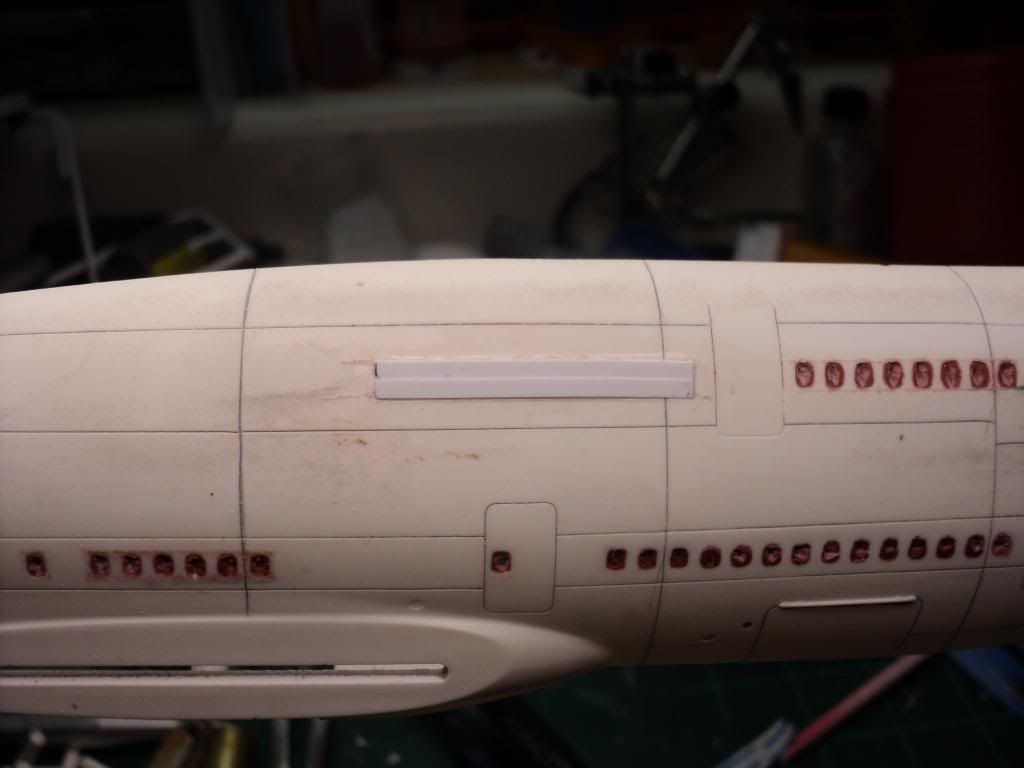
It took some .020" sheet to fill the first set of gaps, just to help start stabilizing the parts together so any more work could be done. Thats where I ended it last night, to give the glue time to dry completely. Tonight I'll trim the plastic strips out and sand it smooth and start work on filling the other gaps w/ sheet and stretched sprue.
 
Re: Boeing 747-400 (AIrline undecided)

Ouch, some nasty gaps there. You going to use a spreader to keep the fuse the same width while you work on those?
James
 
Re: Boeing 747-400 (AIrline undecided)

Ya know, I never even thought about adding bracing inside the fuselage, I probably should have. Once the wings are hanging off of it, there's really no internal structure to support the weight. Guess I'll work on pulling it apart tonight to add bracing.
 
Re: Boeing 747-400 (AIrline undecided)

Thanks for commenting about internal support James. I went back this evening and removed the belly panel I glued in, and it came out frighteningly easy. I could tell there was very little holding it in place.

Once I had it out, I started working w/ the sprue that came w/ the kit to add reinforcement. Thankfully the kit sprue is pretty large and worked perfectly.

This is what I ended up w/ once I was done. The fuselage is a lot more rigid now. Plus it gave me a little bit more gluing surface for the belly panel.

Boeing024_zps955fff88.jpg


I then glued the belly panel back in place, filling some of the gaps w/ sheet styrene, as well as using stretched sprue. I also finished gluing together the other wings. I had one wing glued a few weeks ago, but never did hte 2nd wing or hte horizontal stabs. Now the cleanup work beings on all the seams. Hoping to order my decals this week. Probably going to go w/ KLM airlines from Draw Decals.
 
Re: Boeing 747-400 (AIrline undecided)

Was home sick from work yesterday, so was able to get some more progress made. Worked on rescribing some of the lost panel lines. I also made a nice discovery. I started sanding down the primer coat that i'd put down to check the putty work on the windows, and found that when I sanded the primer down, that the outlines on the windows almost disappeared. My guess is that the putty absorbed the paint, causing it to make the windows visible in the paint. Looks like a little bit more putty work on some of the windows and they will be gone completely, which is exactly what I want.

Boeing027_zps53150f58.jpg
 
Re: Boeing 747-400 (AIrline undecided)

I am following this with interest Adam. I think it will come out exceptionally real
 
Re: Boeing 747-400 (AIrline undecided)

Thanks guys. No progress to show since the last update, been too busy w/ other things to work on the kit.

I do have a good piece of news to post. I finally picked the scheme for this a/c and today I ordered the details. I'm going w/ KLM Royal Dutch Airlines, in what is apparently an older scheme. The newer scheme is a little bit different, but I like the color combination so I went w/ this one.

Decals are coming from Draw Decals, and will apparently take a few weeks to show up. They are a print on order company, and according to the invoice, it could take a couple of weeks to print if they don't have any already printed.

Here's what the real a/c looked like. This picture was taken in Nov of 2005 in Toronto.

1322045.jpg


And here's the decal sheet.

44s_747_4klm.jpg


Unfortunately the dark blue stripe has to be painted, so that's going to be real interesting, for sure.

I had found a scheme I really liked, and thought I'd found a decal for it, but then it turned out to be the wrong scale, and the vendor has a horrible rep for stealing peoples money. Air New Zealand did special schemes for the Lord of the Rings movies, and they just unveiled one for the new Hobbit movie. My plan is to get every reference image I can get of the 2 747-400's and the current 777-300 and all the images from the movies I can get, and then down the road if/when I'm in a position to do the decals, either myself or have them made, I'll have what I need to do it.

Here's a shot of the LotR 747-400

0460562.jpg


One thing I'm starting to think about, is whether to fill in all the panel lines on the model, or leave them in place. Im beginning to lean toward filling them in and going w/ a smooth fuselage, for a better look, but they might help in painting the stipes on the scheme I'm going w/, so I'm kind of torn at the moment on what I want to do.
 
Re: Boeing 747-400 (AIrline undecided)

That looks cool. Love the livery you're going to do too. This might be of interest.
http://www.ebay.ca/sch/i.html?_trksid=p5197.m570.l1313&_nkw=LotR+747-400&_sacat=0&_from=R40
James
 
Re: Boeing 747-400 (AIrline undecided)

Yea, I've seen a few of the diecasts. I'd rather build my own. The only diecasts I own are Jeff Gordon race cars, and I dont really collect those anymore.
 
Re: Boeing 747-400 (AIrline undecided)

Wow, didnt realize it had been so long since I made an update!

Finally a little bit of progress to show. Still working on filling all the massive seams & fit and alignment issues. Tonight I want to Walmart and got 2 cans of light grey primer, so tomorrow I can prime everything again, to get an idea of what needs more work. Still trying to get all the windows filled, and its getting pretty frustrating, I just cant seem to get them to fill completely smooth.

I got the Rolls Royce engines last week, w/ a huge thanks to a member over on Aircraft Resource Center. We traded the engines he had for the GE engines that came in my kit. I've gotten all 4 assembled, and mostly cleaned up, and starting work on rescribing lost panel lines, and they only need a little bit of touch up work in a few places and they'll be good to go.

On to the pic's


Boeing037_zpse4c3f2dc.jpg


Boeing038_zps336e09fe.jpg


Boeing039_zps9100c8b8.jpg


Got the winglets glued on this evening. Went ok, but typical of how the rest of the build has gone. Lots of flash on the parts that took some time to clean up, and then no locating pins at all even though there were locating holes in the ends of the wings, so not sure what was up w/ that. But I got them on, and only need a little bit of filler to get them faired in to the wings nice & smooth.

Boeing040_zpsce0e0ccf.jpg
 
Re: Boeing 747-400 (AIrline undecided)

Wonder if the locating pin was at the sprue gate, just got cut off. I've done that many a times. Looking good Adam
 
Thats definitely a possibility. And I might have just sanded them off, but I dont remember seeing them to begin w/. It took quite a bit of sanding & clean up to get them clean enough to go on smoothly.
 
Well, back to step 1...

Boeing042_zps23a7a459.jpg


Got it primed this morning, and every single window on the fuselage was still very visible. In an attempt to loosen the putty, I dunked it in Purple Power, which then dissolved the superglue holding together the nose weight I put together (brass tube w/ BB's superglued inside w/ a styrene disk on one end). So I had bb's loose inside the fuselage, as well as the brass tube loose.

W/ no other option, I carefully broke the fuselage halves apart, so that I could get everything out of the fuselage. Thankfully it came apart pretty clean, w/ only a couple areas where I had problems, and amazingly it didnt brake the clear windshield, but I ended up having to use a razor saw to cut it in half, so thats going to take a little extra work when I get it glued back together, but since I'm using a decal for the windshield, Im not worried about it, I can clean it up, putty it and paint over it.

I have to say this build has been horrible. The fit of every single part just sucks. I've had to sand down every single mating joint on every single part. If I hadnt spent money on decals, and the money to swap engines w/ a guy in Australia, I do believe that this model would make a one way flight into the trash.
 
Well, the first section is cut out, and filled in. I'll get this one sanded down to see how it goes, before moving on to the rest. If it goes good, then I'll fill all of the rest, and then sand them all down at the same time, but want to do a test run on a single set before I do a ton of cutting.

Windows removed & the hole cleaned up w/ a flat file.

Boeing043_zps1b1d790f.jpg


And then filled in w/ 2 pieces of .080" square stock.

Boeing046_zpsa7a772a1.jpg


The interesting thing I discovered is that the fuselage is as thick as the square stock I put in, so I guess I dont have to be quite as worried as I originally was, about sanding or scribing through the plastic.

One advantage I thought about, by painting & then stripping the primer, is I got some really nice pre-shading on all the panel lines, haha. Too bad thats not what I was going for, haha.
 
Thanks Ron! Definitely gonna show it who's boss, not going to let this one get me down!

Not a great deal of progress, since I've been sick as crazy the last week, but wanted to share what I've managed to get done in the last week.

I've spent all my time working on cutting out the windows and filling the openings in, and I think I've finally hit on the method that works best for me. It took awhile to find a method that would work w/o destroying any detail around the openings, or cause low spots in the fuselage ( which I managed to do on teh first section). I pulled out all the large emory boards that I've got, and used those to start smoothing things out. They're large enough that it spreads the sanding out over a larger area, so I'm less likely to cause unintentional extra sanding anywhere, and it also allows for a smoother sanding job.

TO get started, I either used Dymo label tape as a guide, or a ruler, and then scribed above & below each set of windows w/ a sewing needle chucked up in my pin vise. I think went back w/ the back of a #12 xacto blade to deepen it, and then I started using my thinnest razor saw blade to finish off each section. The saw worked great b/c it helped me get a much straighter cut on each opening, so there's slightly less work to clean the opening up. All I have to do is work the opening until its large enough for the 2 strips of square stock to fit.

Boeing049_zps81b863d4.jpg


I decided to cut all the openings in the 2nd fuselage half tonight, so that tomorrow I can get all the strips glued in and start drying, and then I can work on sanding the whole thing down at once. I'm about 2/3's of the way done w/ the first half, as you can see in the top half of the picture.

Boeing050_zpse2eadaec.jpg


And a close up shot of the areas I've worked. So far I'm pretty pleased w/ the results. Might try giving this side a shot of primer tomorrow evening, so I can see how smooth it is.

Boeing052_zps4e89332e.jpg
 
Back
Top