Adam Baker
Active member
Building this as part of a group build on ARC, and figured I'd share it here too.
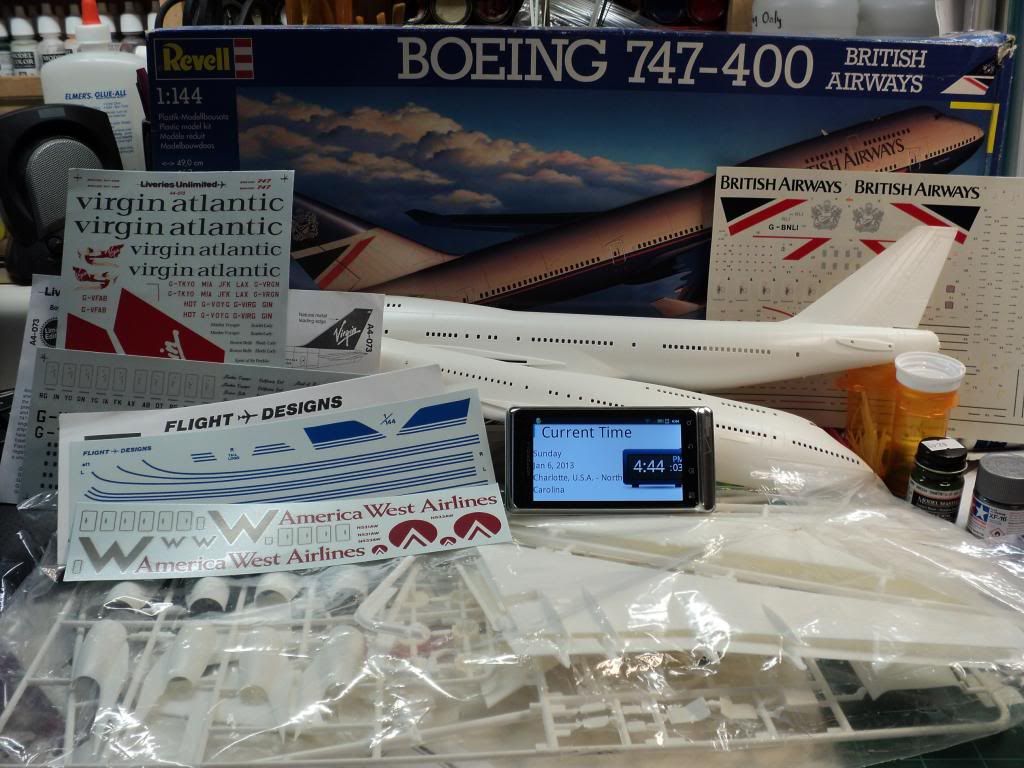
Kit is RoG's 1/144 Boeing 747-400 in British Airways livery. Upon pulling the kit out of the box, I found out that there's actually 3 sets of decals w/ it. I think I picked the kit up in a raffle at a meeting of the model club I'm in, a few years ago. I know I've looked at the kit before, but its been a few years, so I totally forgot about the decals. Besides the kit BA decals, there are decals for Virign Atlantic by Liveries Unlimited, and America West by Flight Designs. I dont know that I'm going to use any of these decals, as I'd prefer something flasher, w/ as little white in the paint scheme as possible.
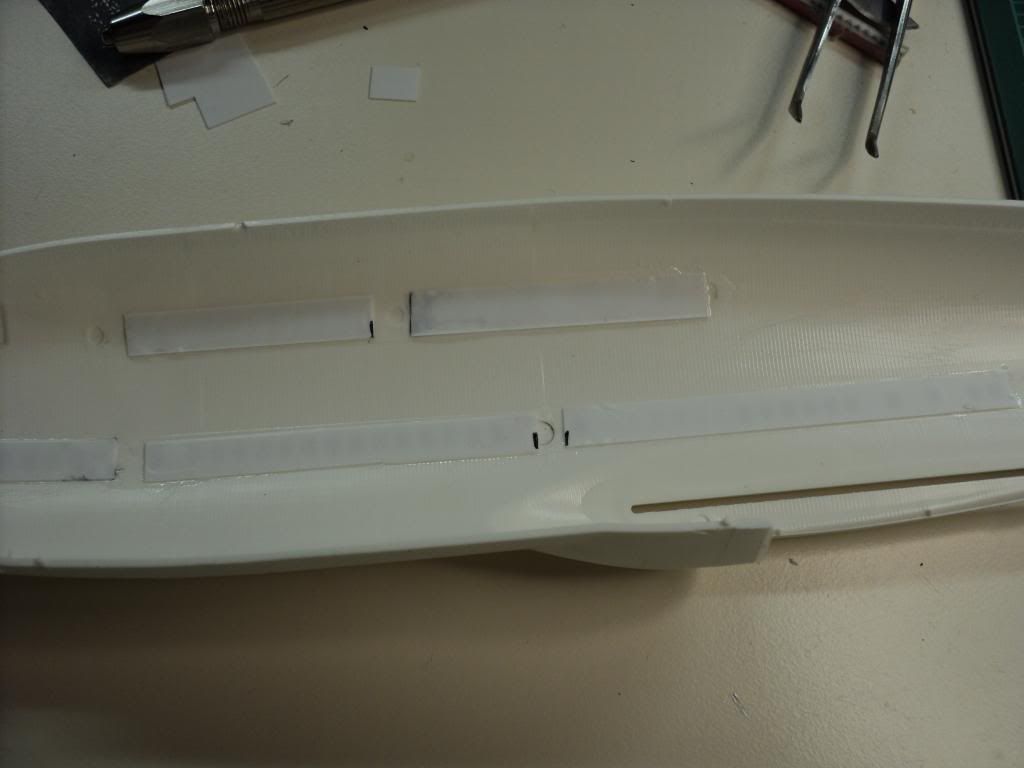
B/c the kit doesnt include any clear windows, and the decal sheets have decal windows, I decided to fill the windows in. I started by backing all the windows w/ strips of .010" styrene, and then filled them w/ Bondo Glazing Putty.
Backing strips
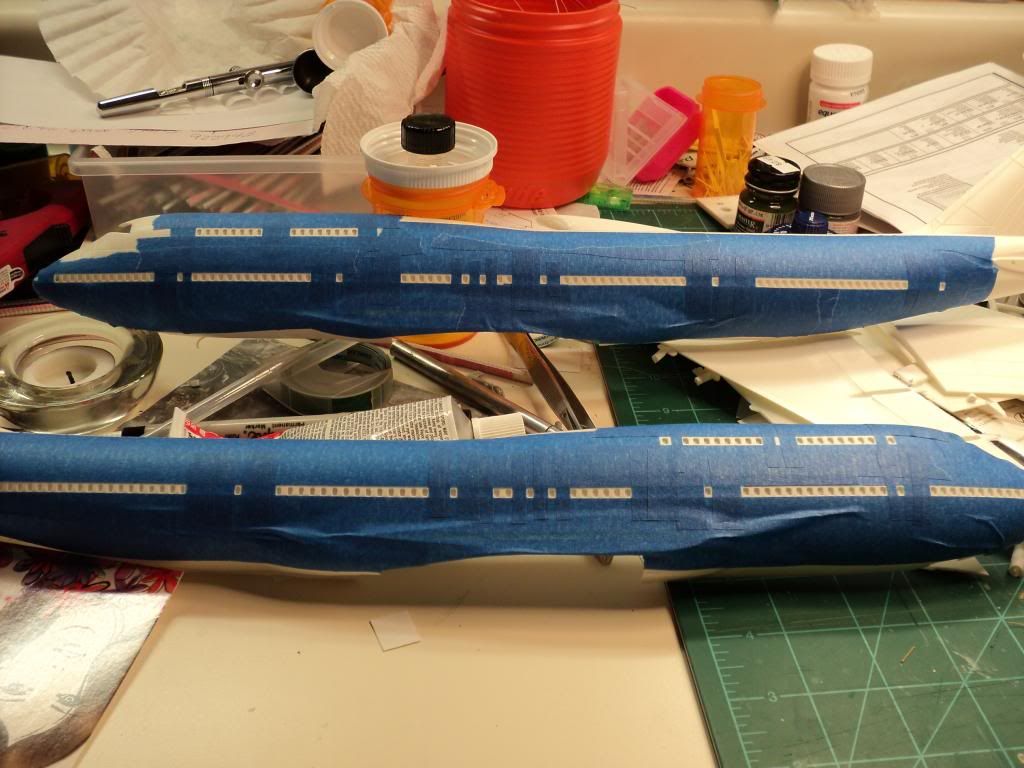
Masking w/ blue painters tape
First coat of putty down
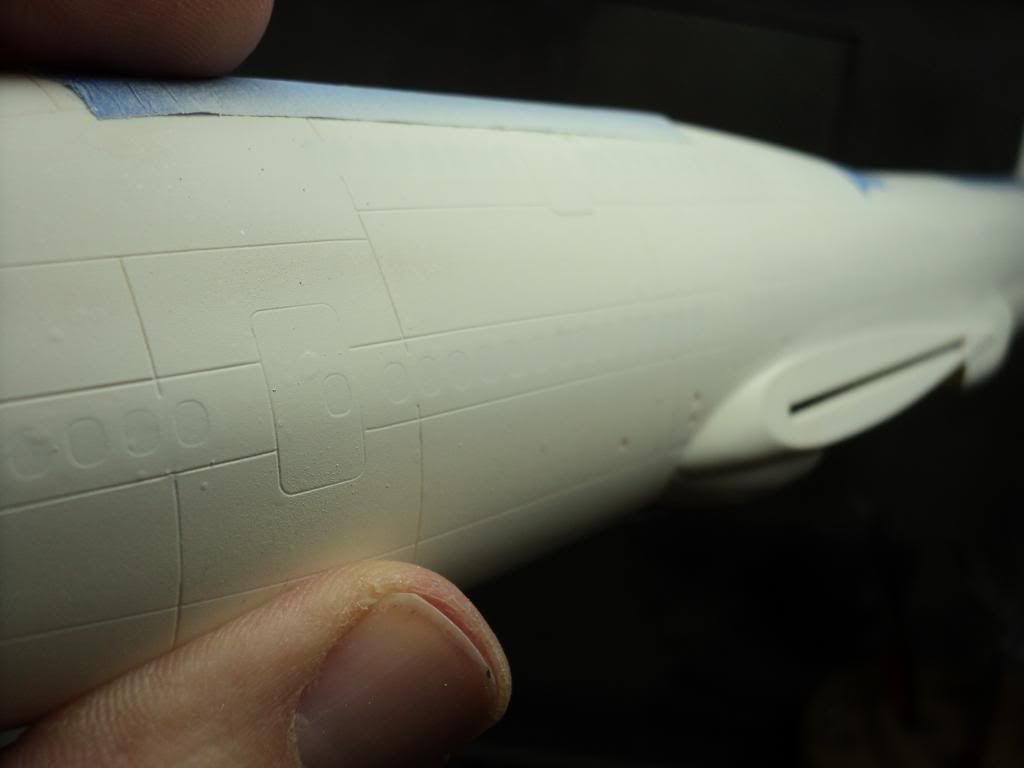
After sanding the putty off.
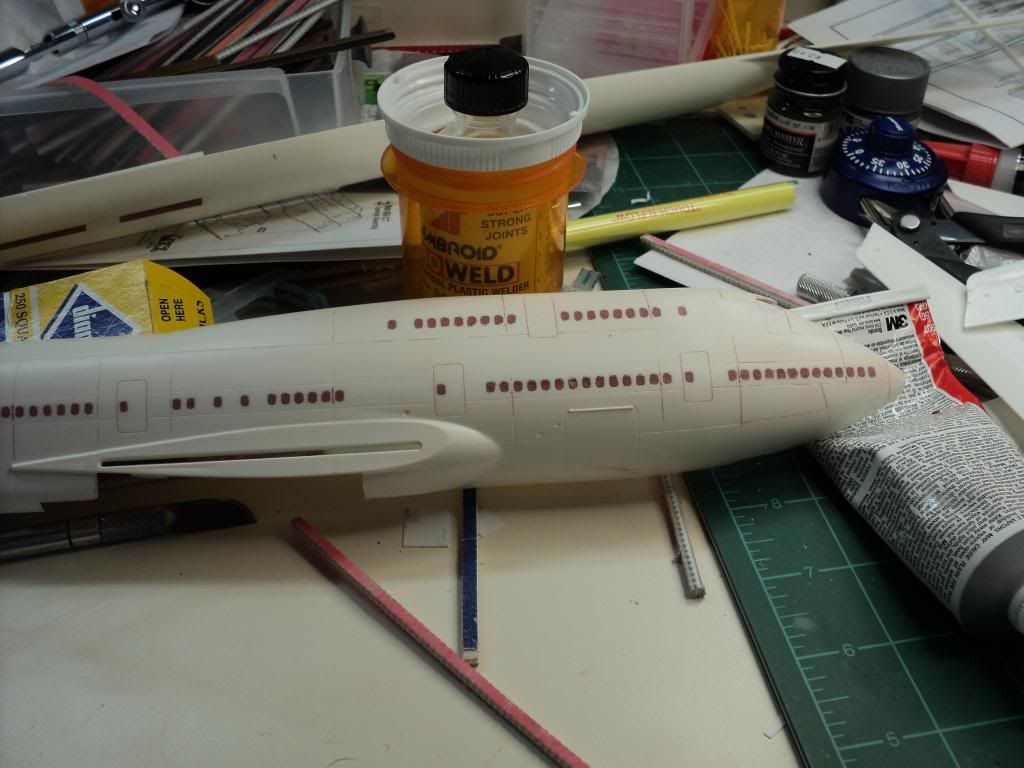
The first application of putty did pretty good, but its going to take at least 1 more coat of putty, so this afternoon I got it taped back up, and put a 2nd coat down. I'm going to let the putty dry for at least 24 hrs before sanding it off. That will happen tomorrow afternoon, I'll then put down a primer coat over the windows when I prime my Draken, so that I can check how well the putty did to smooth things out.
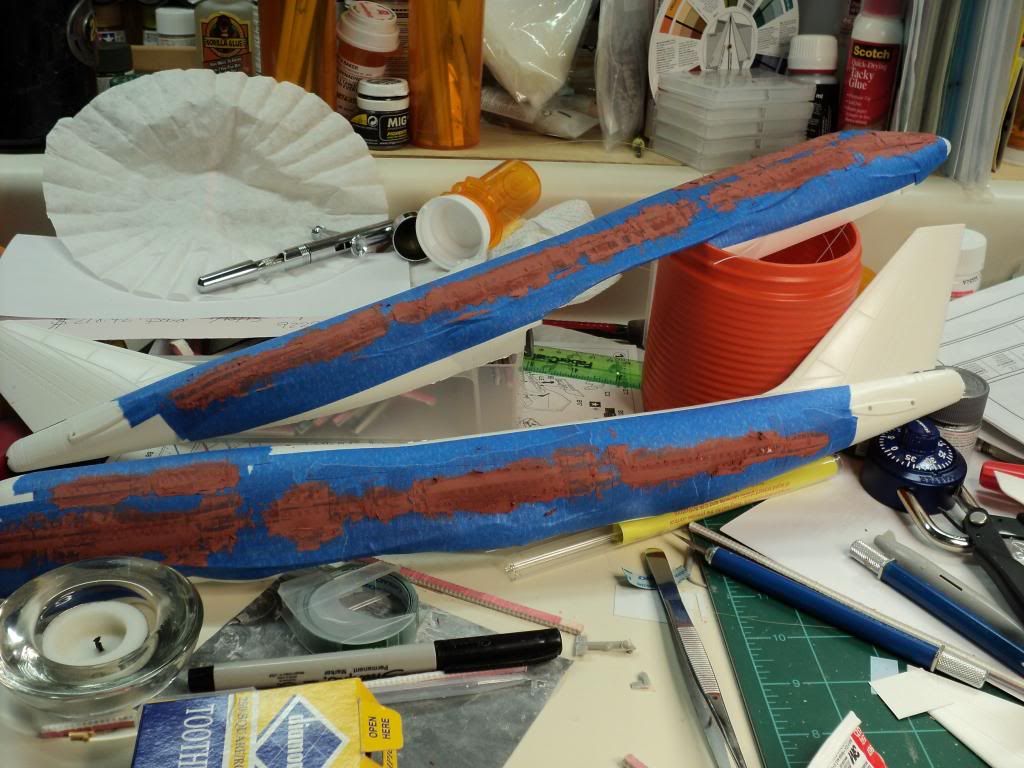
I've moved on to working on the wings & engines, and I have to say its been interesting. I'm very surprised at the amount of flash, and extra plastic, that's present all over the place on this kit. It looks like all mating surfaces are going to be sanded to make sure they are flat, as so far most pieces have had a wavy surface to them that obviously wont work for gluing. Its taken a lot of work to get the first wing sections ready to be glued together, and I can already tell its going to take a lot of filling on the seams to get it cleaned up, but I've got plenty of sprue from this kit to stretch for filler.
Kit is RoG's 1/144 Boeing 747-400 in British Airways livery. Upon pulling the kit out of the box, I found out that there's actually 3 sets of decals w/ it. I think I picked the kit up in a raffle at a meeting of the model club I'm in, a few years ago. I know I've looked at the kit before, but its been a few years, so I totally forgot about the decals. Besides the kit BA decals, there are decals for Virign Atlantic by Liveries Unlimited, and America West by Flight Designs. I dont know that I'm going to use any of these decals, as I'd prefer something flasher, w/ as little white in the paint scheme as possible.
B/c the kit doesnt include any clear windows, and the decal sheets have decal windows, I decided to fill the windows in. I started by backing all the windows w/ strips of .010" styrene, and then filled them w/ Bondo Glazing Putty.
Backing strips
Masking w/ blue painters tape
First coat of putty down
After sanding the putty off.
The first application of putty did pretty good, but its going to take at least 1 more coat of putty, so this afternoon I got it taped back up, and put a 2nd coat down. I'm going to let the putty dry for at least 24 hrs before sanding it off. That will happen tomorrow afternoon, I'll then put down a primer coat over the windows when I prime my Draken, so that I can check how well the putty did to smooth things out.
I've moved on to working on the wings & engines, and I have to say its been interesting. I'm very surprised at the amount of flash, and extra plastic, that's present all over the place on this kit. It looks like all mating surfaces are going to be sanded to make sure they are flat, as so far most pieces have had a wavy surface to them that obviously wont work for gluing. Its taken a lot of work to get the first wing sections ready to be glued together, and I can already tell its going to take a lot of filling on the seams to get it cleaned up, but I've got plenty of sprue from this kit to stretch for filler.