• Modelers Alliance has updated the forum software on our website. We have migrated all post, content and user accounts but we could not migrate the passwords.
    This requires that you manually reset your password.
    Please click here, http://modelersalliance.org/forums/login to go to logon page and use the "Forgot your Password" option.

Italeri Alfa 2300 FINISHED

paddy

Well-known member
This is another first for me as following my Scammell build with the twisted chassis and my Porsche paint scheme that couldn’t work over the rear wheel arches, I have decided to actually plan ahead with this one.

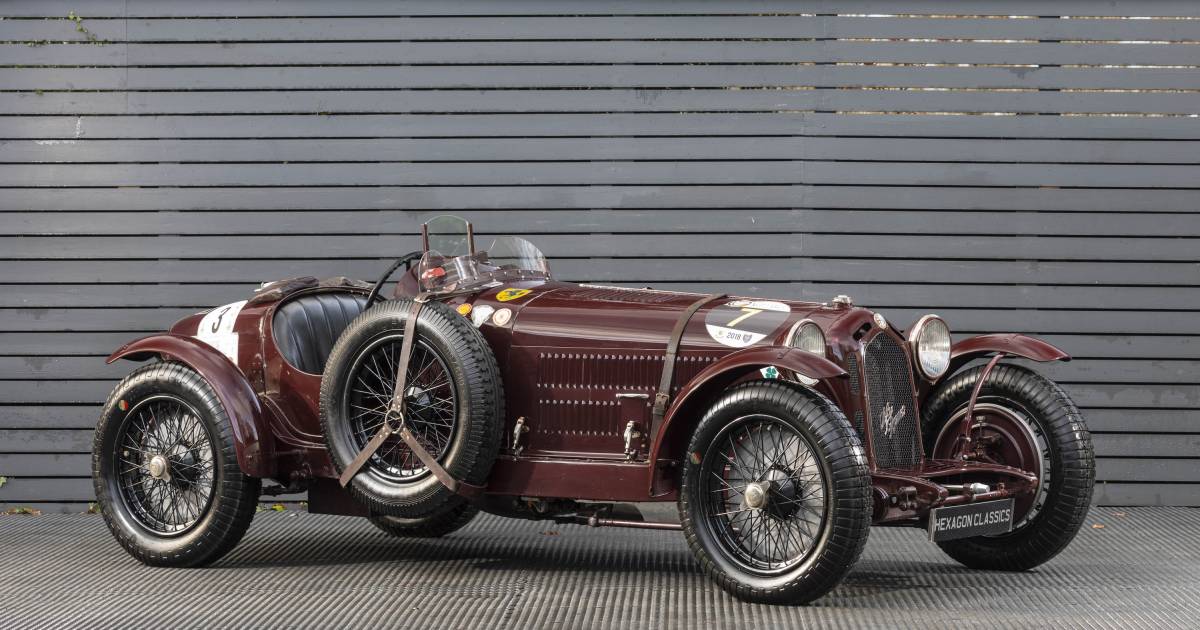
This is a 1/12 Alfa 8c Roadster, Italeri also do this as a 8c Monza, essentially the same thing minus fenders and lights.

DSC_4108.JPG

Strangely all the external bolts are lock wired on the Monza and roadster and I have checked with originals, and this is correct., this might present a problem as these fixings are very small, Italeri get round tis by simply not including and external nuts and bolts. In my opinion if you are trying to build a faithful model of the original these will have to be added. I think these would have been about 15mm on the full size car so will need to 1.5 mm on the model. Looking on the net other people have attempted this with varying degrees of success but the tendency seems to be to go over size so rather than being a detail they become a feature as too big

20911_1467184356_resized_dscn5378 z.jpg
Here you can see on an original the wired bolts aft of the rear cone

vehicle_ad_standard_image_1fbb7b1a771df66ba198f10a8528a7f9.jpg
And again here on top of the chassis rail

The best solution i have come up with "so far" is to use a slotted screw and lay the wire in the slot then fill and paint the screw head as the RHS demo here

DSC_4111.JPG


The left had side is a Meng 1.2mm nylon nut which i drilled an 0.3nn hole through which may work if i cut the stud off thats sticking through the nut
The real problem here is getting these Meng nylon nuts off the sheet they come molded too.
I have ordered some cheese head brass screws ( as opposed to the round head on the right) to see if they might work better so i will come back to this.

the next problem Sorry, part of the pan, is the colour ? Italeri call out three different shades of red in various readings so they obviously were as lost as i am -)
The box art and instructions show Mica Red which is metallic and plainly just wrong.

Mica on shiny (1).JPG


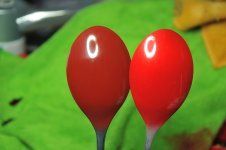
Mica is nearest the camera, its semi transparent like a Alclad so shows the silver of the spoon. I did try it with a white undercoat but its still metallic

this is Tamiya dull red, also called Hull red, its matt from the can, the second picture shows the same spoon with gloss clear over matt.

Dull red (1).JPG
Dull red (2).JPG


DSC_4097.JPG
And this is Mica with a white undercoat v Hull red glossed

Looking at original cars i cant find two the same so really its a case of what's going to look best in the scale.

7d264c887e4b55f09efbfa3d98f266695cdb1eed.jpg
Alfa_Romeo_8C_2300_Monza_at_Goodwood_Revival_2012.jpg
i674534.jpg
12457_01_jl83662.jpg


i am leaning towards the Tamiya hull red glossed because it gives me the option to go flat, semi gloss and full gloss on different parts like full gloss body and semi gloss chassis and would tie in better with this original

20911_1467184356_resized_dscn5378.jpg


Back to the research ..........and cleaning spoons :cool:
.
 

Attachments

  • Mica on shiny (2).JPG
    Mica on shiny (2).JPG
    406.6 KB · Views: 61
Last edited:
Based on your previous build this will be fun to follow along with. Good luck with them colors...I like the Red one myself. :bigrin:
:victory:
 
I don't think I have ever seen any two of these early cars that were the same color. That maroon one with the long fenders is a cool color. My guess is don't make it too bright of a red and you will be good to go.
 
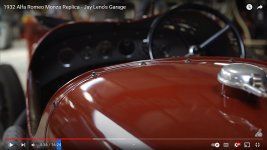
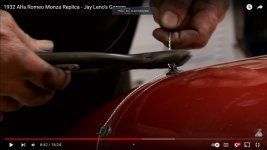
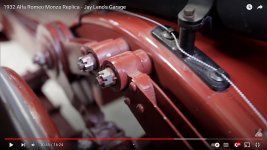
By running the Jay Leno video in HD and using screen grab i got these

Untitled-1.jpgUntitled-11.jpgUntitled-111.jpg

These show square drive flanged bolts particularly because they are holding a bracket on in the 3rd pic

and there is my problem :)
 
To add, I think I enjoy all the research involved in our quest to build as good of a replica as possible with any given talents we may have. It's funny how when we started out in this hobby, a large majority of us built what was on the box as the reference. In time we start venturing outside of the box art and more into replicating something more in tune with our real interests in real life. This one's gonna be something really cool to watch come together.
 
Color is so subjective to lighting. It looks as if all 4 Alfas in the first group of pictures run from red to burgundy, even though they must be the same car (?). Hard to choose the correct red. The red metallic is dead sexy, even if it isn't exactly right.
 
I mocked this up today with 14BA screws and washers but its still too big i think
DSC_4113.JPG


You can see here from a another build on the web that compared with the real thing its easy to make these too big even though mine are less than 1mm

IMG_20200427_141333.thumb.jpg.0bff16f1d67ab1dd9ed6f42e390d2f4c.jpg
20911_1467184356_resized_dscn5378 z.jpg
DSC_4116.JPG


I have some other ideas which i will try later
 
This is a great site for build reference. The kit has no detail at all on the bulkhead so this is a life saver

 
OK this is as small as i can go, its 16BA which is a 0.75mm thread or about 18 thousands of an inch. on the left

DSC_4122.JPG


unfortunately i dont have any 16 BA washer but i will get some and see if that makes the whole thing a bit more technical. a small dab of CA and a drop of silver paint will help tie the whole thing together

,,,,,,,,,,,,,,,,,unless i think of something better :)
 
As for "FINE" wire, I grabbed a broken Apple phone charger cord. (co-worker pitched it) Opened up the cable and stripped down insulation etc. and the wire in the cable is really fine. You could get a couple of strands and wind them and they would be about right I believe.
 
Hi Paul the wire thats twisted in the picture is from a multi core cable and is .008", i cant go any smaller than that because it will not take the twists and just snaps before i get enough turns. If the original wire was 1/16" ( even that is big) then to 12 scale it would have to be .500", I will se if i an find anything nearer.
Its an interesting problem that this scale is showing detail thats going to be really hard to replicate which i suppose is why Italeri dint attempt it but it stuff that very much shows on 12 scale that probably wouldn't on 24 scale. Its detail that needs to be there but for example the other guys model above looks to have .5mm wire which scaled up would be 6mm which is basically a steel rod :)

It may be a case of artistic licence like peoples huge picked out panel lines on aircraft :)
 
Are their any string products that you can use instead of wire?
I mean it's not like this is for actual structural reinforcement.
 
I am looking at fishing line bob but to be honest its the bolts themselves that are over size.
The ones the other guy used are 3D printed of square and accurate but still over size.
 
Back
Top