• Modelers Alliance has updated the forum software on our website. We have migrated all post, content and user accounts but we could not migrate the passwords.
    This requires that you manually reset your password.
    Please click here, http://modelersalliance.org/forums/login to go to logon page and use the "Forgot your Password" option.

IAR 81C

As I try to take in all the hints/tips/visual references,this provides another viewing pleasure.
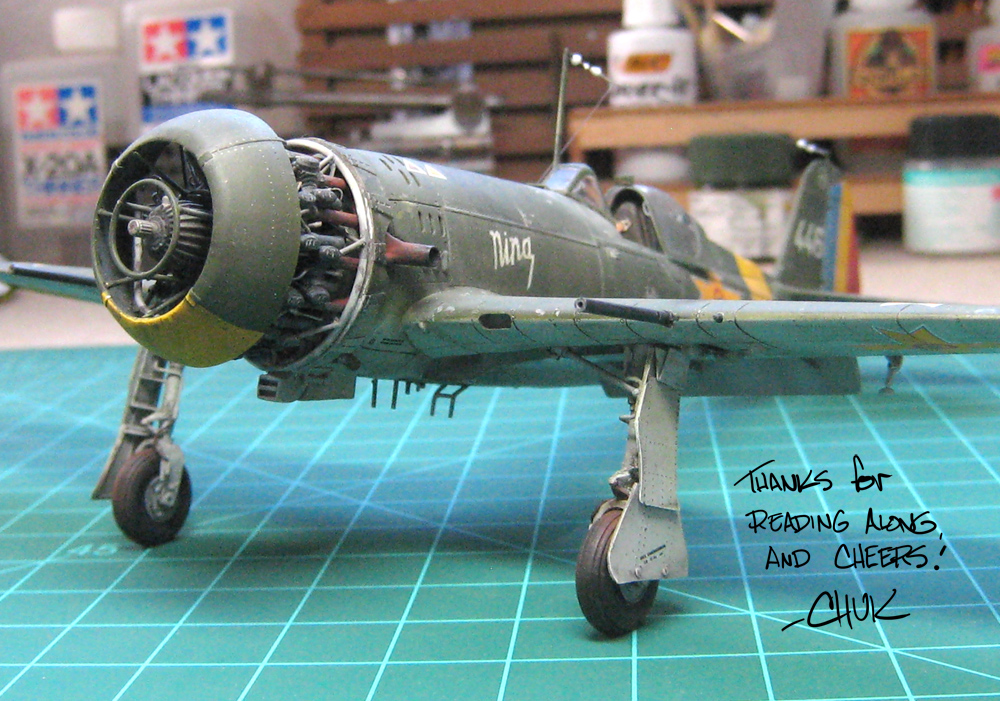
The chipping on the back of the prop (one of my favorite parts of a plane ;) ) is just great. Looks like FOD -cleaver little sponge.

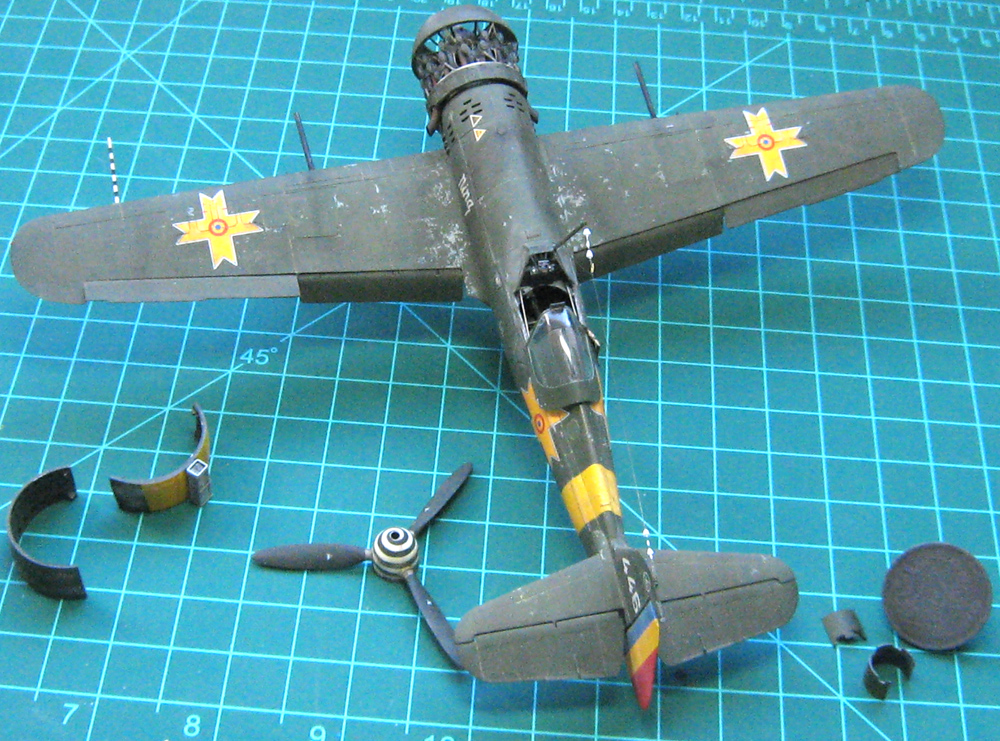
I was worried for about 1/10 of a second that the engine brace-thingie would be unfixable.
Glad you got finally got it "chuk-erized" into submission :v

Again, thank you for this treatise on how to build an IAR (y) ........ CHEERS :drinks
 
Looking awesome man!
Had a question on the fuel stains. It looks like you basically painted on a little black oil paint and then blended it in with a brush, maybe damp with thinner? it that simple or was there more?

Thanks
mike
 
Beautiful as always Chuck. Those exhausts are just stunning. It takes a lot of work to give a model this much depth when it's not heavily weathered. I applaud you.
 
'Masterclass', 'Tour-de-Force', 'Bl**dy great modelling', pick one, they all apply !!

Ian.
 
Oh man, now I know how Magda feels, I got tired just watching this! I am stunned and amazed at how well you fixed that problem. I even realized that after seeing the engine cover not fitting. I was holding my breath until the final pic showing the fix!

I am speechless....
 
Jeez, you guys! this is gonna go straight to my big, fat head. Thanks! :blush:

Paul, what you see is what I did. Just two pigments brushed on over that black/brown base. You can see the difference between the fresh, locked pigments and the pipes after I'd been pawing them for a while, doing all that fussing and fitting. They got burnished a bit, butt he colors are still there- just a bit more subtle. Thanks!

Prop Duster- thanks! There's not very much that's unfixable, it just depends on how much you want it, as Coach would say. Notice that the old ring was glued to the front of the fuselage, on that styrene stock fairing i made sometime last year. The new has a brass inner ring, and mounts directly to the engine- I should have done that first. I unsoldered most of those vee struts and repositioned them- it was not really that hard a fix. It made for a long sit at the bench, though- I was lucky to have a clear day for it!

Skinny Mike, that's just what I did. I'll be adding some dusty pigment over this, followed by some lesser fuel streaks. The trick is to layer the effects on, going lightly until you get that look you want. Wis me luck!

I've been dabbling a bit and checking a few things off my Fiddley List. It's getting to the point of choosing what detail to add last! The final object will be rather fragile, so I've got to tread lighly. Again, thanks to all my friends here- you're the greatest bunch on the whole interwebs!
 
Not much to say that hasn't been said before - really awesome stuff.

There is only one little thing I would like to say. There is an S missing from Nina's words right at the beginning of your post. This only comes to prove that no matter how stunning the girls are, I am paying attention to all aspects of your post B)

Really sorry, but English is not my first language and for some reason, I seem to be reading it in a different way. It doesn't make a difference mate, your work is really awesome :notworthy


Laurence
 
Thanks, Laurence- I'll have to fix that typo. Derp! Thanks to you, too, Phil!

Here's a teaser- the IAR is done- I'll post the final update soon. Hopefully you can see it- I can't at the moment, but that sometimes happens when I post at MA.


mpygkf3
 
You'll all just have to wait a bit for the finale, which is in progress! Linking pics from Facebook can be tricky. :frantic
 
Well, this one's done at last. Like every build, this has been a real learning experience for me, and I hope I've been successful in sharing what I've picked up through the highs and lows. Thanks to all for reading along!

IAR_188.jpg


IAR_189.jpg


IAR_190.jpg


IAR_191.jpg


IAR_192.jpg


IAR_193.jpg


IAR_194.jpg


IAR_195.jpg


IAR_196.jpg


IAR_197.jpg


IAR_198.jpg


IAR_199.jpg


IAR_200.jpg


IAR_201.jpg


IAR_202.jpg


IAR_203.jpg


IAR_204.jpg


IAR_205.jpg


IAR_206.jpg


IAR_207.jpg


Margo_&_Lili.jpg
 
Thanks goes. to you, Chuk... for taking us all along on the ride with you. Been a great trip as usual and a great model at the summit...

...well done, sir.

Iian.
 
Well that was certainly worth teasing us over ;)

Very sublime work all around Chuk-- I really love all the intricacies you've added-- words really fail to emote the praise this is worth- and I'm not just blowing smoke-- you deserve the praise for your resilience and tenacity. Bravo sir!
 
Back
Top