
-
Modelers Alliance has updated the forum software on our website. We have migrated all post, content and user accounts but we could not migrate the passwords.
This requires that you manually reset your password.
Please click here, http://modelersalliance.org/forums/login to go to logon page and use the "Forgot your Password" option.
You are using an out of date browser. It may not display this or other websites correctly.
You should upgrade or use an alternative browser.
You should upgrade or use an alternative browser.
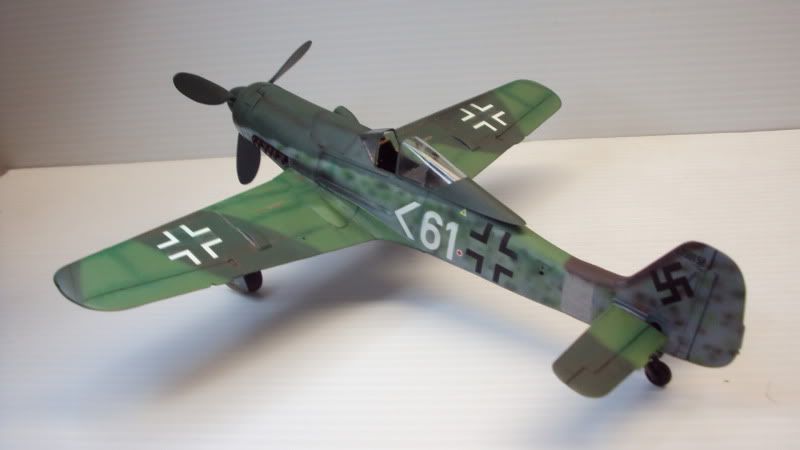
Fw-190d11 1/48 ProModeler
- Thread starter Adam
- Start date
Thanks for the kind words guys.
Christian, those were the kit decals and were by Cartograf. I have come to the conclusion after talking with a few other people that whoever owned the kit before me did not store them properly and they were allowed at one point to get damp/really humid or something. Others who have done this kit have had zero problems with the decals.
Christian, those were the kit decals and were by Cartograf. I have come to the conclusion after talking with a few other people that whoever owned the kit before me did not store them properly and they were allowed at one point to get damp/really humid or something. Others who have done this kit have had zero problems with the decals.
phantom II
Master at Arms
Thanks Adam,
I also have the Eagle cal decals for mine. I hope to build it some day soon.
Cheers, Christian B)
I also have the Eagle cal decals for mine. I hope to build it some day soon.
Cheers, Christian B)
phantom II
Master at Arms
I thing I need to amend my statement. Mine is 1/32 . :laugh:
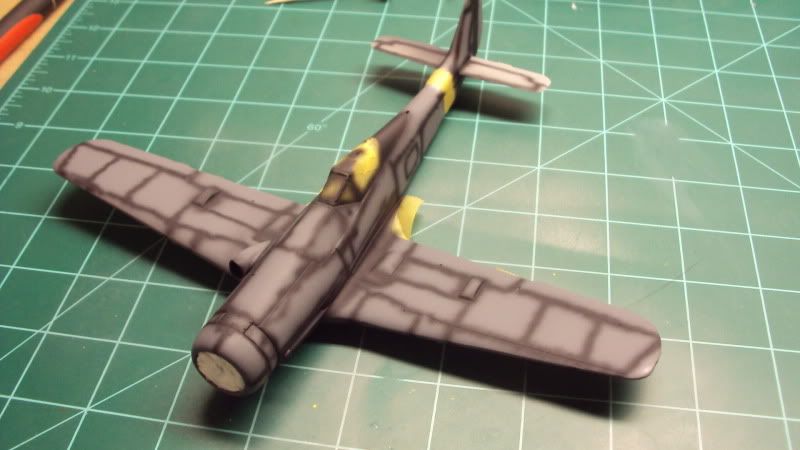
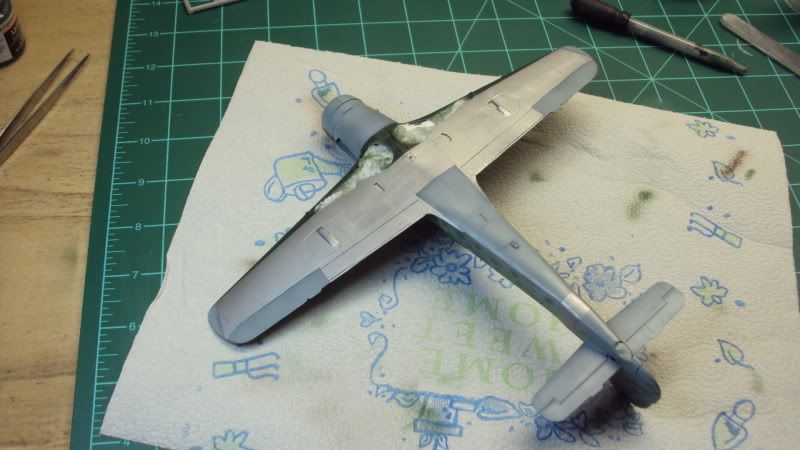
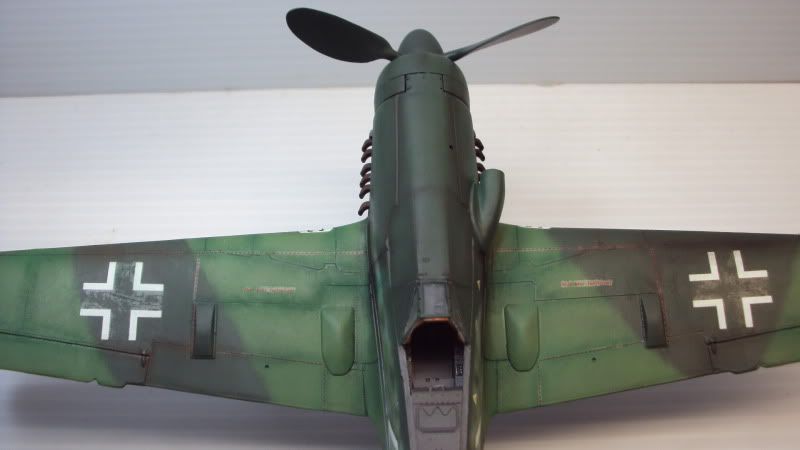
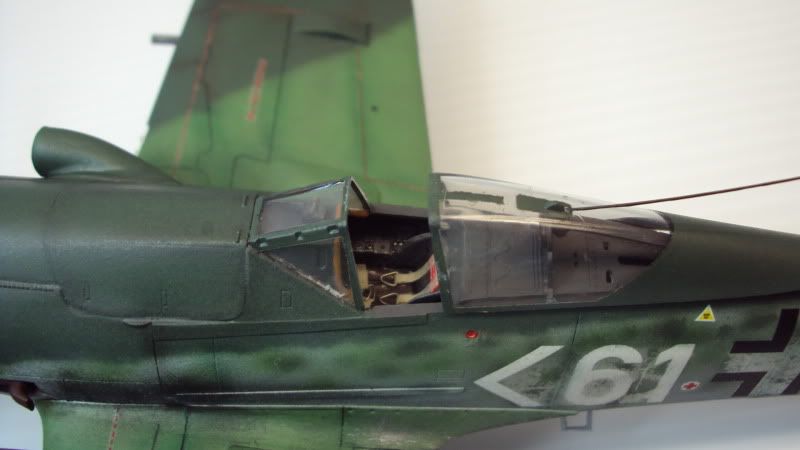
Big update today. I temporarily attached the sliding portion of the canopy with a little white glue for painting. Then I masked everything off and preshaded. After that I began applying color with the RLM 76.
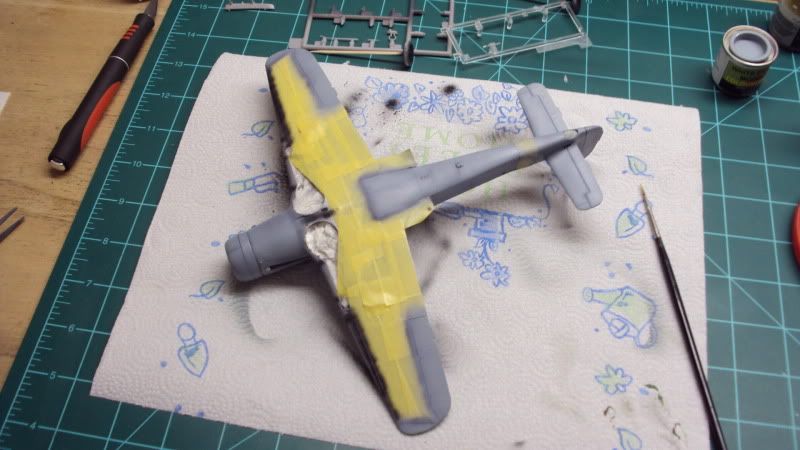
Then I began putting the top colors on and this is where I started to have trouble. My airbrush was spitting something fierce and just generally behaving badly. Checked the paint mixture and that was OK. Needle was straight. I didn't think it could possibly need cleaned as I had just cleaned it prior to preshading. Well I ended up breaking it all down again and cleaning it and low and behold it worked fine after that. :gogo
Before cleaning AB:
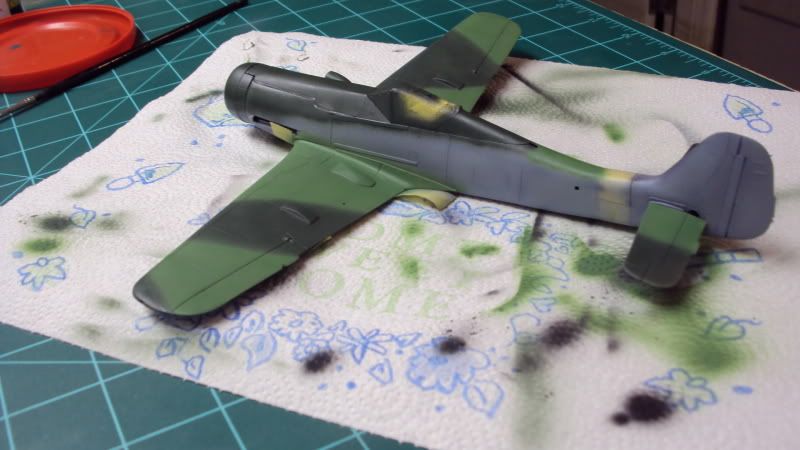
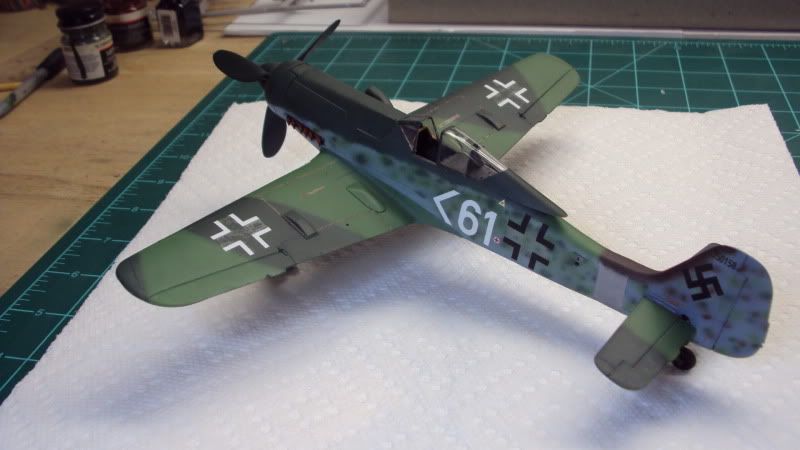
Final:
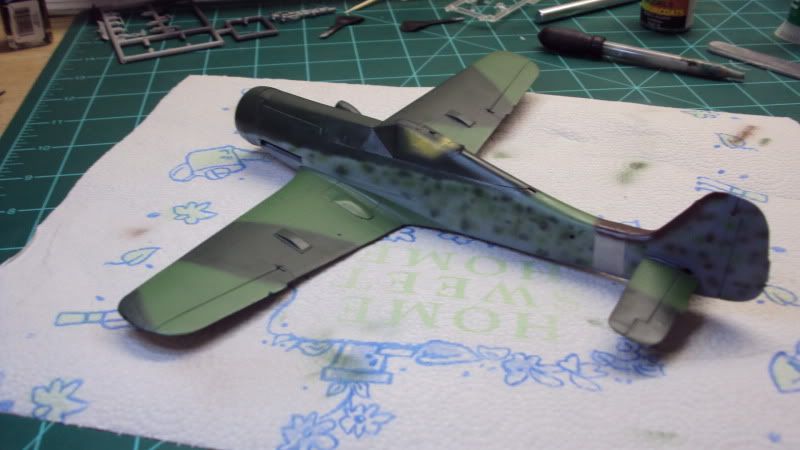
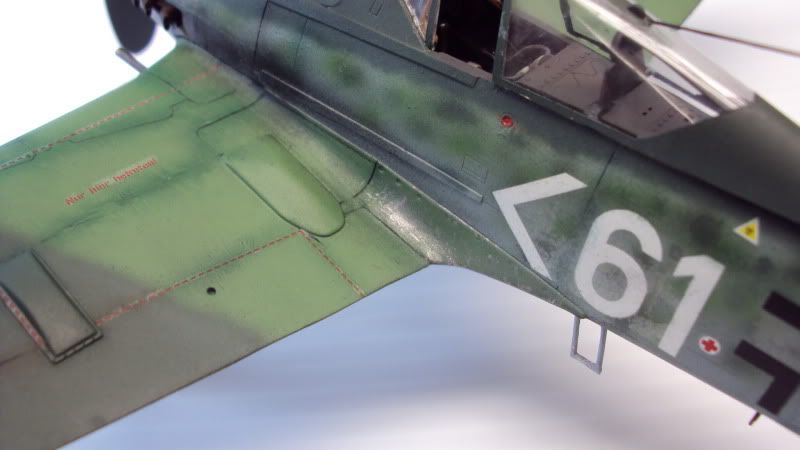
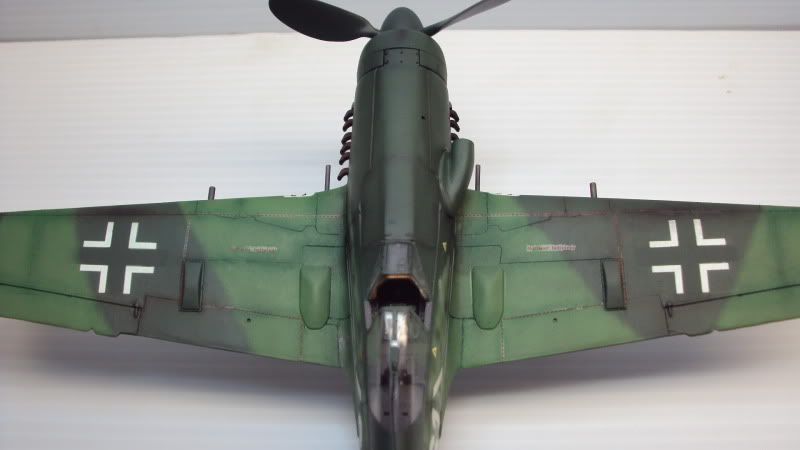
I also thought my mottling was a bit too stark so I went over it with a highly thinned mixture of 76 and that seemed to tone it down to a level I could live with.
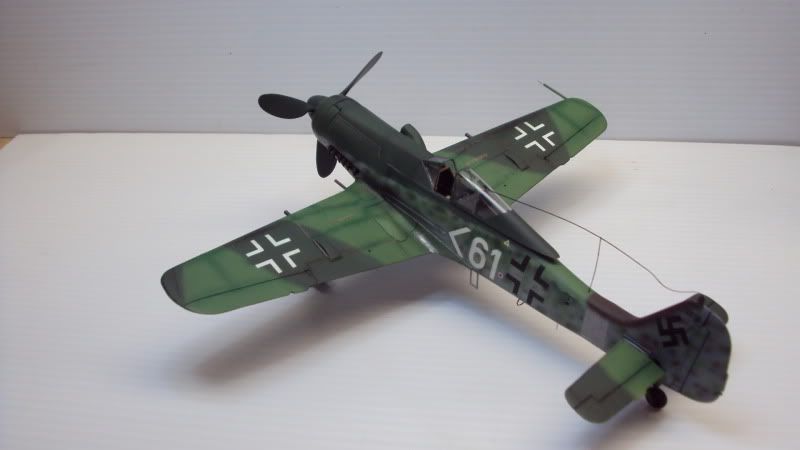
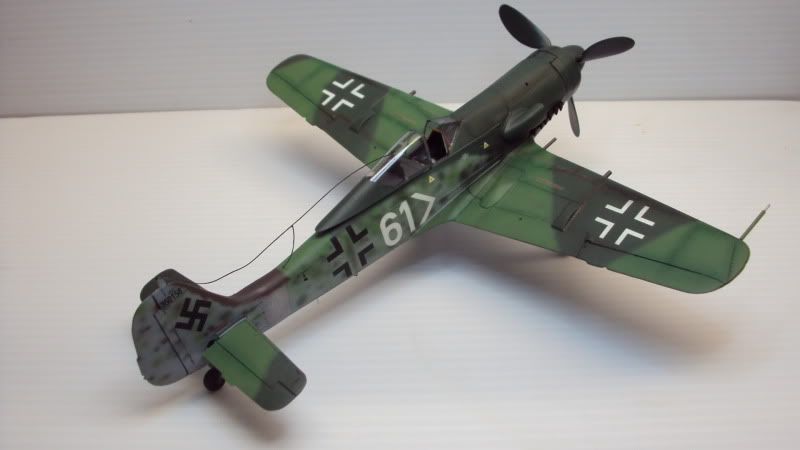
Then it was futured and it was on to the decals! These things were horrible. I could not get them to silver no matter what I tried. Numerous applications of solvent did nothing. I even tried scoring them and dabbing future underneath them to no avail. In retrospect I should have gone looking for some different crosses and such the moment I put the first one on, but oh well. As this thing really needs to get off the bench they are staying silvered... It's not like I wanted to take this to an upcoming show or anything...
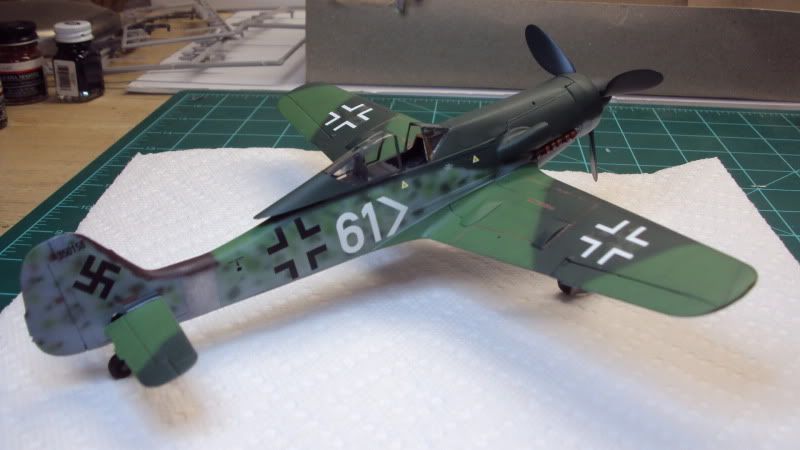
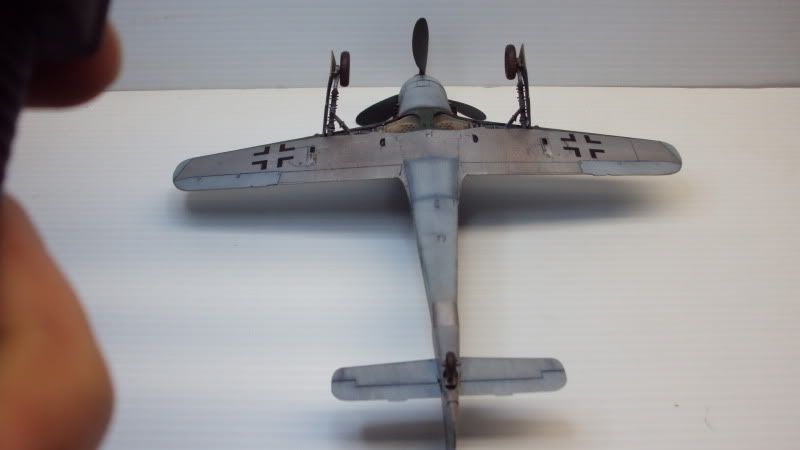
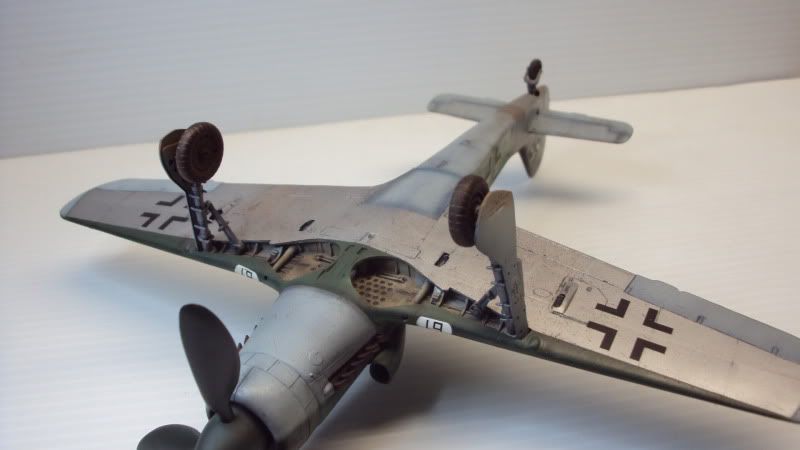
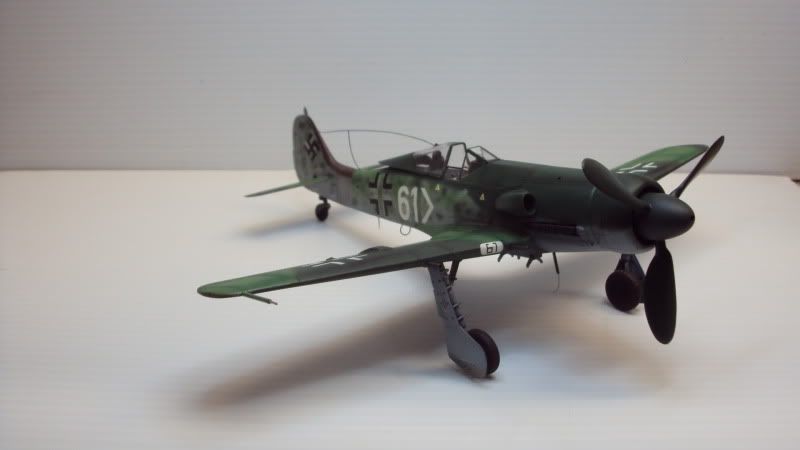
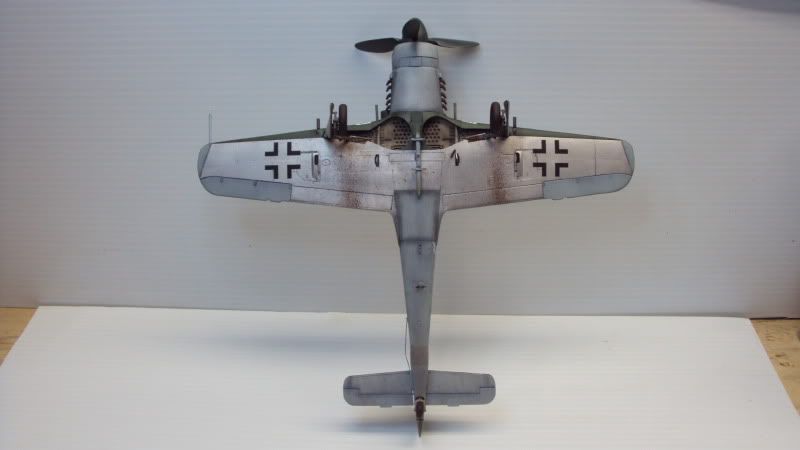
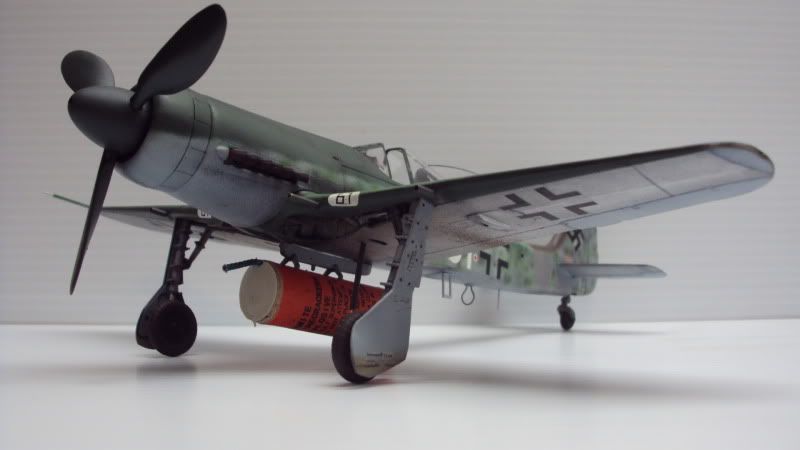
I've now attached the landing gear and done a little weathering. All that's left to do is finish the weathering and attach all the little bits. The canopy is temporarily perched for the pictures.
Onward and upward! Thanks for looking and keep on modeling!
The mottling rocks dude! Good idea on the overspray of the base color. I like that!
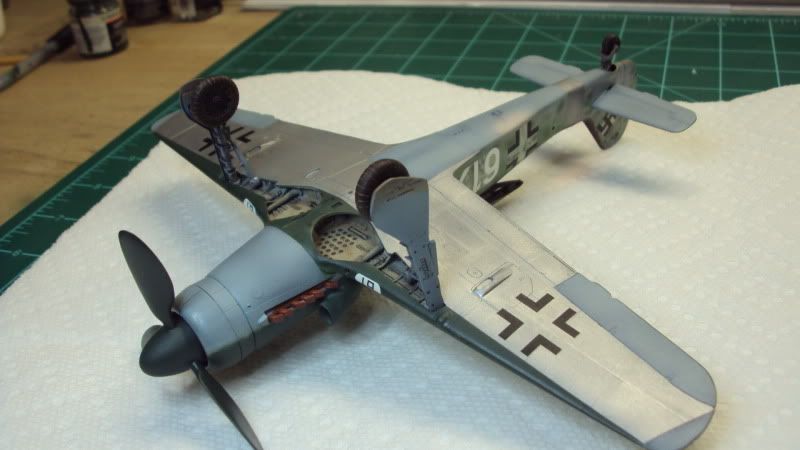
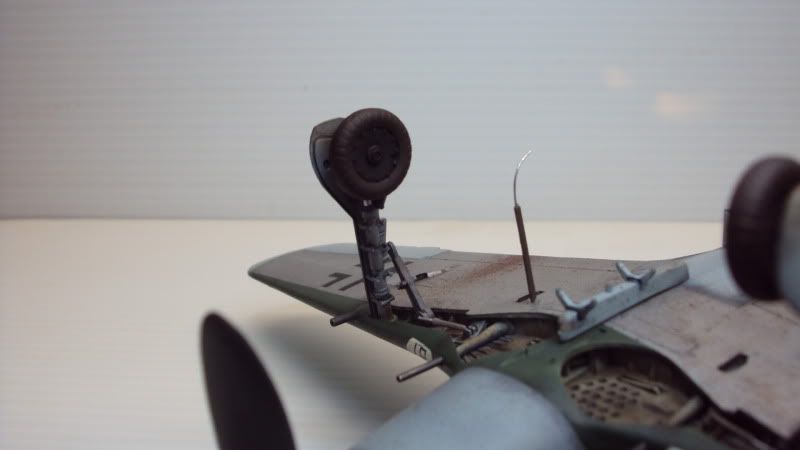
Thanks OD and MP! I figured what the heck, the decals are messed up anyways. I tried something new to me. I weathered the crap out of it with some pastels and I got the bottom really dirty. I don't really like the way the panel lines look, but it certainly doesn't look like any of my other builds. If you ignore the frakkin decals it actually looks kind of cool. I've still got to attach the cannon, aerial, gear retraction strut, and the antennaes, and the drop tank rack. It's supposed to be sunny here the next few days so hopefully I can get some nice outside piccies. What do you guys think?
Thanks for looking and keep on modeling!!!
Thanks for looking and keep on modeling!!!
That's the way to do it, trying something new only leads to growth, why do the same thing over and over..(said the guy who has 4 wildcat boxes on his WIP shelf)
could remove the decals and mask off those crosses and paint them.
could remove the decals and mask off those crosses and paint them.
phantom II
Master at Arms
Don't worry MP. Just you different boxes.....
What frakkin decals ?
Cheers , Christian B)
What frakkin decals ?
Cheers , Christian B)
Thanks for the input guys.
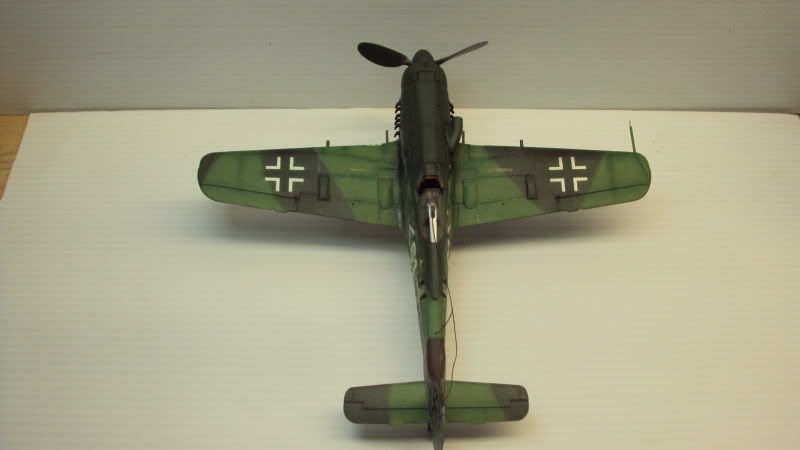
Terry, i tried scoring them and getting solvent underneath them before I flat coated it and it didn't make a dent. These decals are just doomed. I ended up masking the white on the crosses off and spraying the dark green over them. Got rid of the silvering. All the little ones are just gonna have to stay that way though.
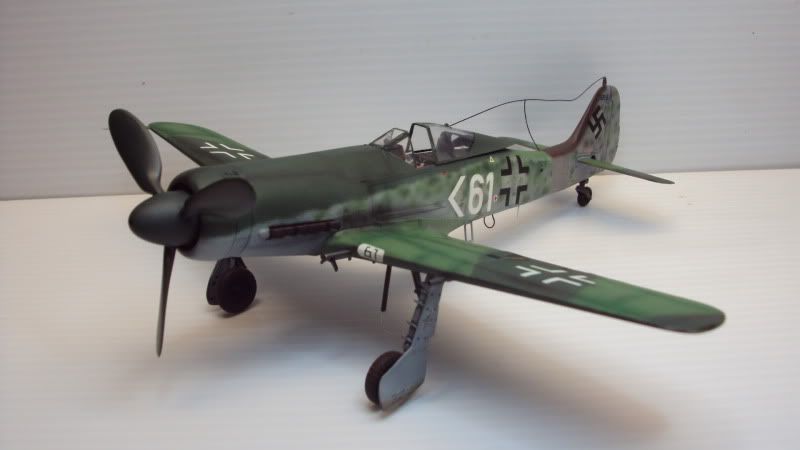
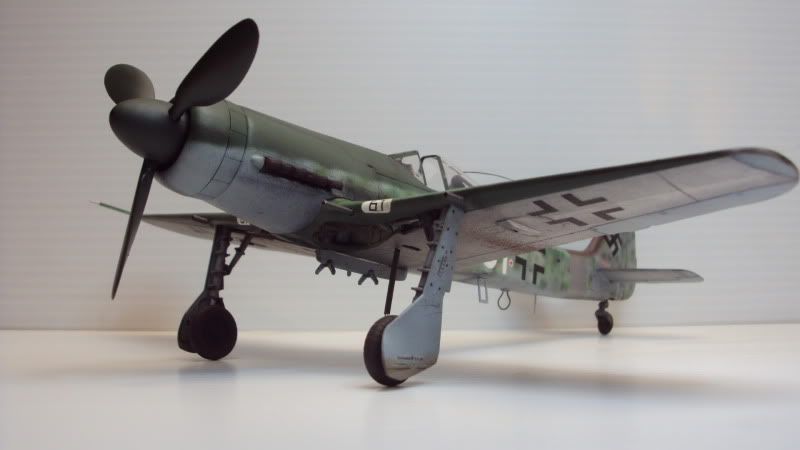
Here it is all finished. Even though I've wanted to tear my hair out with this kit and it almost went up against the wall a few times I still had a lot of fun with it and heck, I even learned a few things.

Just for good measure!
Thanks for all your help and support guys. Keep on modeling!
Terry, i tried scoring them and getting solvent underneath them before I flat coated it and it didn't make a dent. These decals are just doomed. I ended up masking the white on the crosses off and spraying the dark green over them. Got rid of the silvering. All the little ones are just gonna have to stay that way though.
Here it is all finished. Even though I've wanted to tear my hair out with this kit and it almost went up against the wall a few times I still had a lot of fun with it and heck, I even learned a few things.
Just for good measure!
Thanks for all your help and support guys. Keep on modeling!
What is that strapped under it, looks like a cherry bomb..
Adam, aside from the decal that's one fine looking butcher bird!
Adam, aside from the decal that's one fine looking butcher bird!
phantom II
Master at Arms
He's making a bombing run on the Betty ! :laugh:
phantom II
Master at Arms
Just between us, is that what happened to Terry's B-26 ?
Cheers, Christian :S
Cheers, Christian :S
What is that strapped under it, looks like a cherry bomb..
Adam, aside from the decal that's one fine looking butcher bird!
That is what they call "Dixie Dynamite" 'round these parts.
Similar threads
- Replies
- 10
- Views
- 2K