I'd do a combo, there were some panels on the 109 that were nm later in the war if I recall. Maybe the fuel cell accesses?Ok, now that the top side is figured out, on #112, is it lt. blue or NM or a combination ? Gary S.

-
Modelers Alliance has updated the forum software on our website. We have migrated all post, content and user accounts but we could not migrate the passwords.
This requires that you manually reset your password.
Please click here, http://modelersalliance.org/forums/login to go to logon page and use the "Forgot your Password" option.
You are using an out of date browser. It may not display this or other websites correctly.
You should upgrade or use an alternative browser.
You should upgrade or use an alternative browser.
Do-335 1/48th scale by Tamiya
- Thread starter centaur567
- Start date
centaur567
Well-known member
Sounds like a SWAG to me. Gary S.
Heavens Eagle
Well-known member
If you look at the underside of the wing there are lighter and darker panels with very easy to see panel lines. My guess is that the underside of the main wings, the nose gear and main gear doors, the bomb bay doors and maybe a little under the rear radiator intake are natural metal. The underside of the horizontal stab and elevators might be painted a light blue or natural metal but as they are most likely separate parts painted and then placed on the plane are probably all painted. Also the front engine cowling is shiny natural metal.
centaur567
Well-known member
Thanks!! It kinda looks to me that the gear doors might be blue also. Gary S.
centaur567
Well-known member
Managed to get the fuselage and wings glued together without too much trouble. The fit is very good with a little persuasion. Use decals for the instrument panel and seat belts. They will looks ok with the canopy closed up. Gary S.
.
Heavens Eagle
Well-known member
This might be a little late, but I perused my Valiant wings reference book on the Do335 and there were 2 two seaters that were finished and flown. Numbers 112 and 114. Both had natural finish on the underside with no light blue paint. Here is the color plate from the book.

centaur567
Well-known member
Wow. This really helps a lot!! If I can find the right numbers, I'd like to do 114. Do you have any history on it's disposition? Looks like #14 has a rear view mirror. Thanks so much.Gary S.
Heavens Eagle
Well-known member
Hey Gary, in my reference book there was only one small very poor photo of the 114 aircraft from the left side. It was missing the canopies and was in pretty sad shape. The photo shows it wrecked alongside the perimeter hedge. Thus the above color plate is actually the best to work from.
Both the 112 and 114 were converted from armed A-10 single seat variants. There were only 3 completed the 111, 112, and 114 aircraft. There wasn't any info on the 111 plane.
Both the 112 and 114 were converted from armed A-10 single seat variants. There were only 3 completed the 111, 112, and 114 aircraft. There wasn't any info on the 111 plane.
centaur567
Well-known member
Thanks for the info! Here's a couple photos of #114. Gary S.
centaur567
Well-known member
The wings, tail and other misc. parts are on. The rt. wing took some muscle to "snap" on. The fit is very good. The kit also comes with a large nose weight. The kit instruction says to close up the Bombay, but I wanted to open it and use the bomb and it's "not used" parts to open it up. I'm running out of parts, so my next task is to mask off the canopy which is my least favorite thing to do. I have to remember to install the gunsight before glueing the canopy. The kit went together really well. Just for fun I stuck on without glue the landing gear just to take a photo of a dude from the 410 kit standing next to the model. He's probably wonder how to get in. Gary S.
Nice work Gary! 
Heavens Eagle
Well-known member
Gary you are making me want to pull out one of my HK or ZM 1/32 kits.
Really like the build so far.

Really like the build so far.
centaur567
Well-known member
Go for it!! I'm sure it will be a masterpiece. Gary S.
centaur567
Well-known member
After finding this picture, it showed the bomb used and it's bombay closing mechanisms, which convinced me to open it up. Added wire to the fins of the bomb. Looks like on the real bomb that pipes were used for this. Gary S.
Here's a neat web site for WWII aircraft photos.
As a former bomb loader I have to say. That's crazy way to load bombs! Probably doing it this way during evaluation.
Heavens Eagle
Well-known member
They did something similar on the early Ju88's. I have someplace a photo of the cable runs that they used and the cables went back to the tail wheel for part of it. I have two photos of a Ju88 where they were getting ready to load the bombs and there is a pile of cable under the plane, several of the black uniforms (maintenance crew) that you can see their feet on the other side of the tail area, and the pilot walking around smoking a cigarette.
centaur567
Well-known member
Looks like the cables go forward into the nose wheel bay or to a winch. Gary S.
Reviewing some docs this was standard in WW2. I guess I thought Jammers were around for ever!
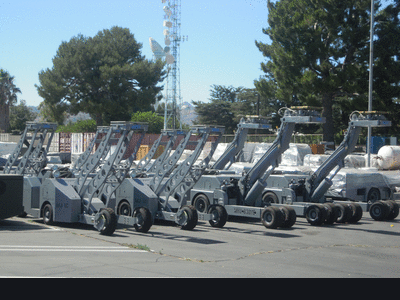
Aircraft Aerial Munitions Lift Trucks / Aircraft Bomb Loaders
Aircraft Aerial Munitions Lift Trucks / Aircraft Bomb Loaders, MJ-1C Bomb Loaders, MHU-83D/H Bomb Loaders, Aircraft Missiles Loaders
hiigroupasia.com
Barney
Well-known member
This was pre-jammer days! Of course, we were still flying SPADs when I went through the Black ShackAs a former bomb loader I have to say. That's crazy way to load bombs! Probably doing it this way during evaluation.
Similar threads
- Replies
- 24
- Views
- 5K
- Replies
- 104
- Views
- 22K