hmm....crabs....right you are, really glad you found the problem.

-
Modelers Alliance has updated the forum software on our website. We have migrated all post, content and user accounts but we could not migrate the passwords.
This requires that you manually reset your password.
Please click here, http://modelersalliance.org/forums/login to go to logon page and use the "Forgot your Password" option.
- Home
- Forums
- Current Campaigns
- Past Campaigns
- Finished Campaigns
- 2011 Campaigns
- MrT's Bomber Command!
You are using an out of date browser. It may not display this or other websites correctly.
You should upgrade or use an alternative browser.
You should upgrade or use an alternative browser.
Chris' B-25H and some goodies
- Thread starter phantom II
- Start date
phantom II
Master at Arms
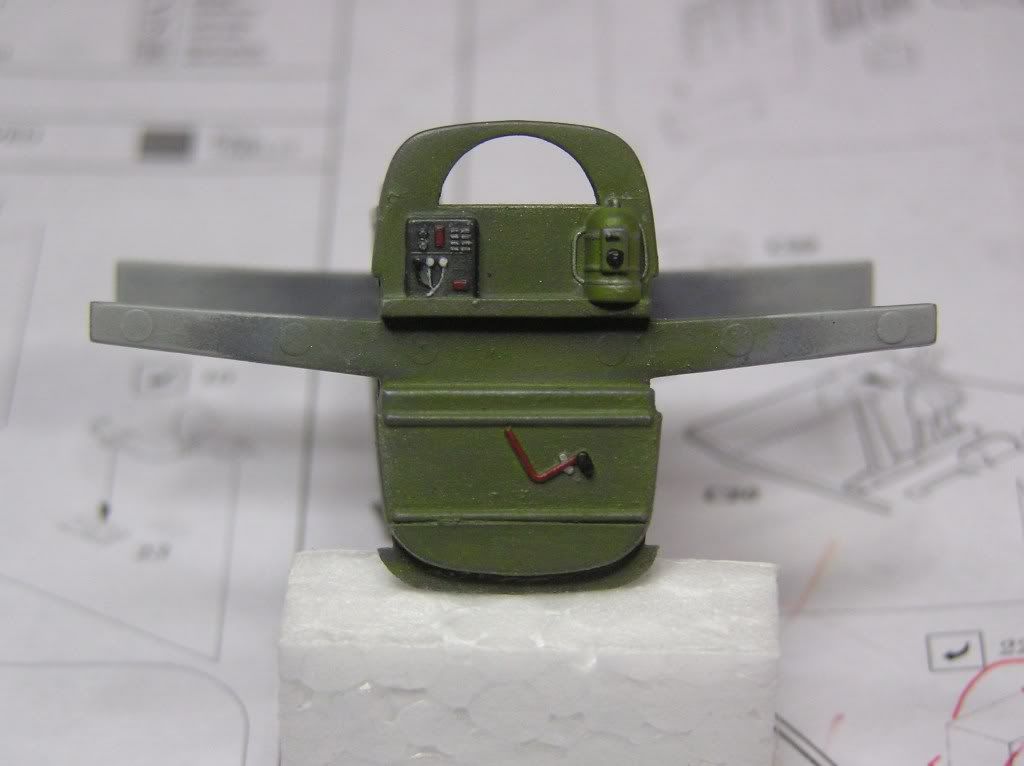
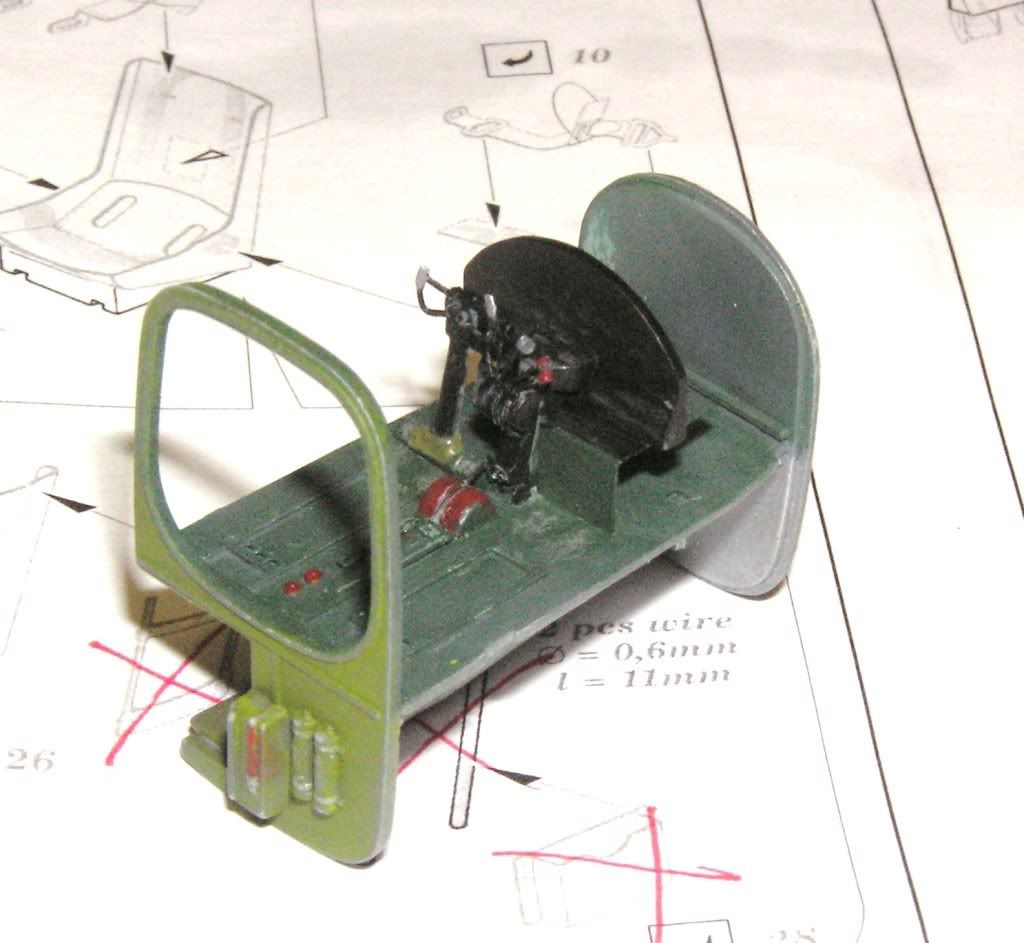
Well guys I did not have much time to build today, so it's just some minor improvements over yesterdays work.
I built the back side of the pilots seat and hand applied a bit of primmer on it so I could see what it was going to look like.
For the most part I like PE for this scale but sometimes it lacks three dimension. I added some plastic knobs to the controls and to the Yoke since those items are not flat.
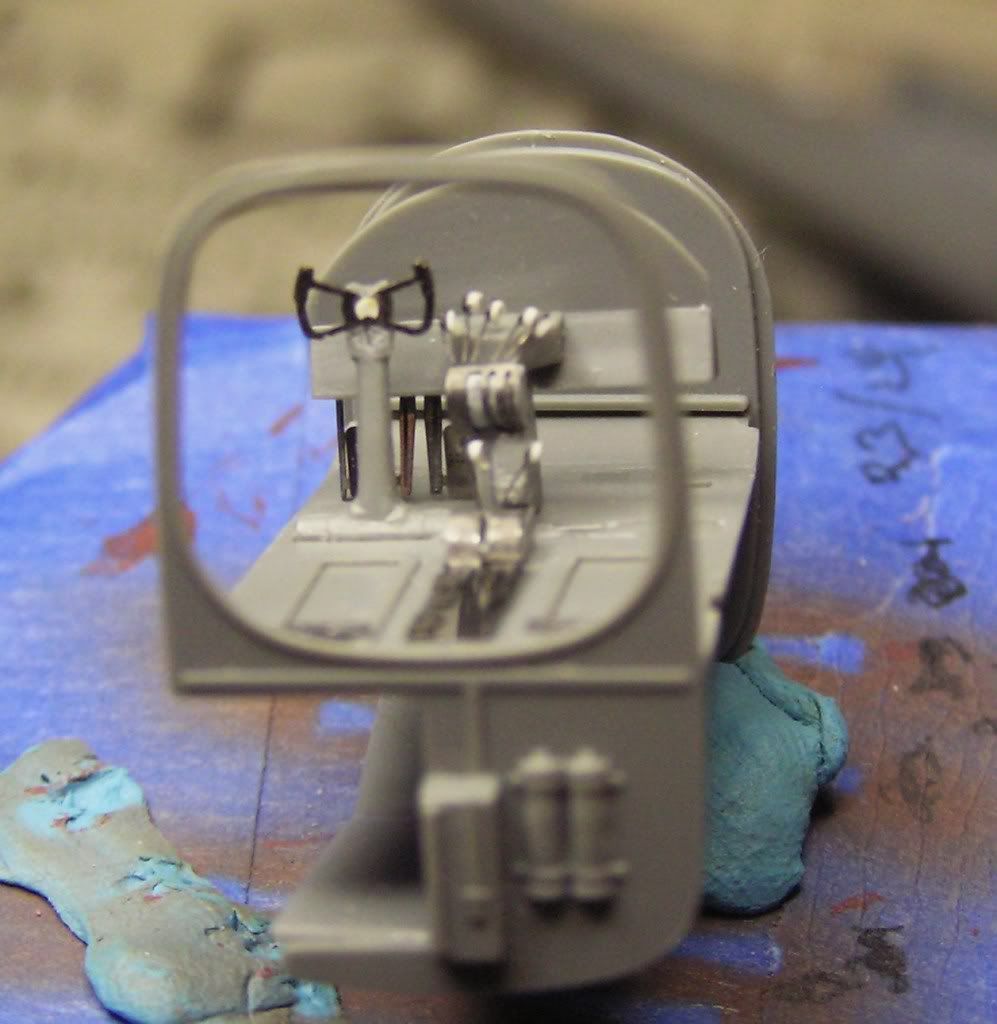
Thanks for looking.
Cheers, Christian
I built the back side of the pilots seat and hand applied a bit of primmer on it so I could see what it was going to look like.
For the most part I like PE for this scale but sometimes it lacks three dimension. I added some plastic knobs to the controls and to the Yoke since those items are not flat.
Thanks for looking.
Cheers, Christian

phantom II
Master at Arms
Just not too close !
phantom II
Master at Arms
Well boys and girl I'm definitely not the IT. guy  but I think you have figured it out by now.
I will just re-post the missing pictures below.
Sorry for the inconvenience.
Bob I'm jealous about the seafood opportunity.
Cheers, Christian
but I think you have figured it out by now.I will just re-post the missing pictures below.
Sorry for the inconvenience.
Bob I'm jealous about the seafood opportunity.
Cheers, Christian
Looks great so far, Christian! I've actually built this kit with the PE sets- take a gander at my Modeling Madness review.
Cheers!
chuk
Cheers!
chuk
phantom II
Master at Arms
Hi Chuck,
I have looked at it before. Did not realize that was your build ( Hurumph ). Seems like a good kit but there sure is a lot of ejector marks.
I have been thinking about taking some artistic liberties with mine IE: applying the green splotches seen on the G models. I believe it stopped with the H but it sure would be fun.
What is your opinion ?
PS, I hope I don't have to lift myself to your standards. I'm afraid I might stain something in the process.
Cheers, Christian B)
I don't know how, but I missed this!
Great start Chris! That interior will certainly look fantastic when you finish your magic! :dude I'll be watching closely as there's always a lot to learn from you guys. BTW, will much of the cockpit be visible in your model? I sure hope so!
Cheers and good luck with your build! B)
Fernao
Great start Chris! That interior will certainly look fantastic when you finish your magic! :dude I'll be watching closely as there's always a lot to learn from you guys.
BTW, will much of the cockpit be visible in your model? I sure hope so! Cheers and good luck with your build! B)
Fernao
I'm not exactly sure of when the splotches were abandoned, but I've never seen an H model with them. That said- it's your model, isn't it? No one's going to take away your birthday if you have fun with it- that's the whole point! I painted my bomb bay green, as I hate NMF- I've seen a few wartime pics of green bays, but most were bare metal. It didn't stop me.
Your Mitchell is lookin' swell- cheers!
chuk
Your Mitchell is lookin' swell- cheers!
chuk
More Photobucket problems there Chris???
No joy on the Seafood front yet. But I haven't hooked up with the local guys so I'm sure it's coming. It's been a long week...wait..I just got here.
I'm amazed at the detail in 1:72, the map case and all. That's pretty dang cool! Git'er done...
No joy on the Seafood front yet. But I haven't hooked up with the local guys so I'm sure it's coming. It's been a long week...wait..I just got here.
I'm amazed at the detail in 1:72, the map case and all. That's pretty dang cool! Git'er done...
phantom II
Master at Arms
Hello everyone,
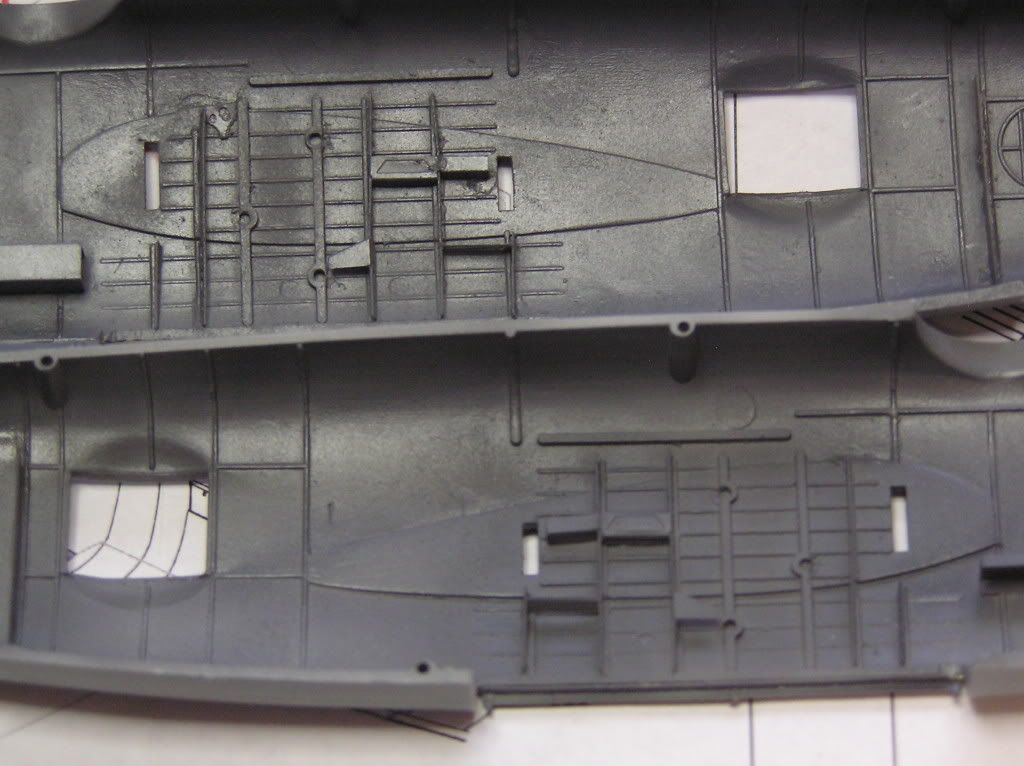
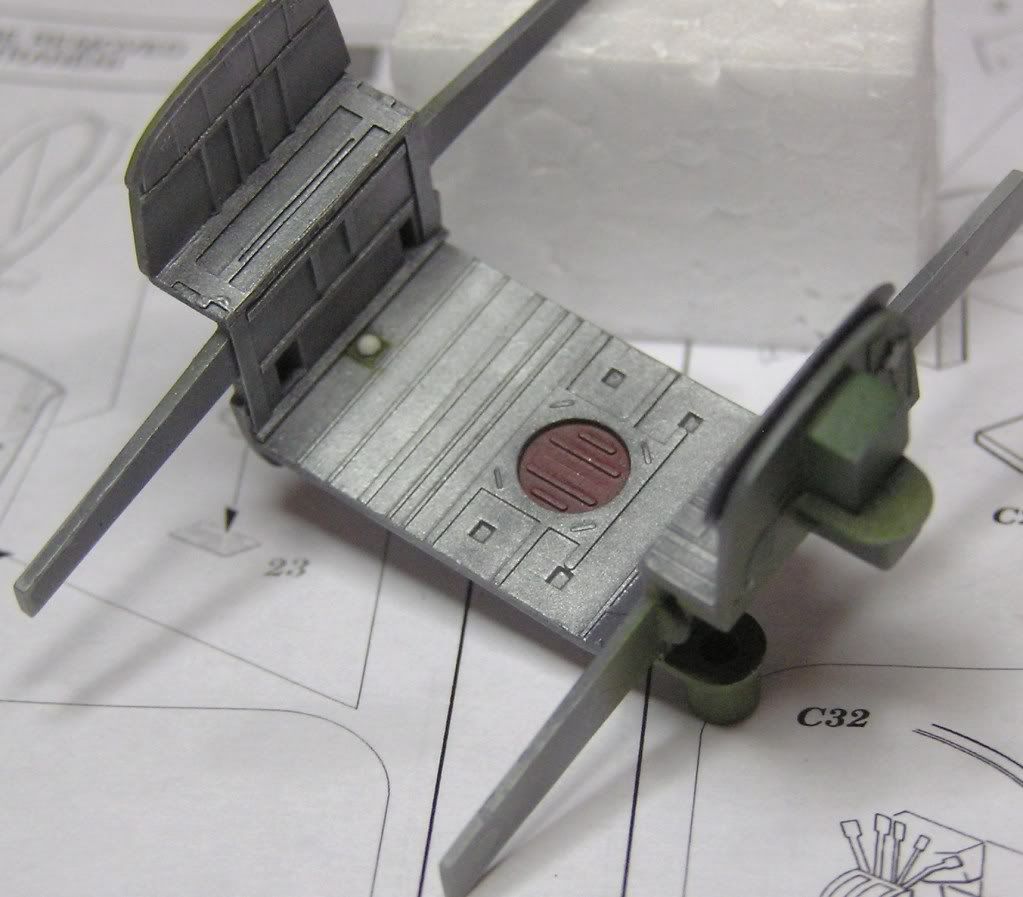
seems like it has been forever since my last post but it took me a long time to add the PE to the bomb bay and get it primered.
These photos don't reveal much but there's a lot of fragile PE. in here. I got so rapped up in making it fit I could not break myself away to take any pictures before this point.
Hopefully, I should be able to show more progress soon.
Cheers, Christian B)
It would be nice if that bomb bay could be visible. Hasn't someone ever fixed a single led inside the body of a model, such as this B-25H, so that one could see it's interior through the transparent parts? Is that such a farfetched idea...?
 I mean, after all the work involved, specially in 1/72 scale... :huh:
Anyway, nice work there Chris: what will be your choice of color for the interior (general area)?

Cheers and thanx for sharing! B)
Fernao
Anyway, nice work there Chris: what will be your choice of color for the interior (general area)?
Cheers and thanx for sharing! B)
Fernao
phantom II
Master at Arms
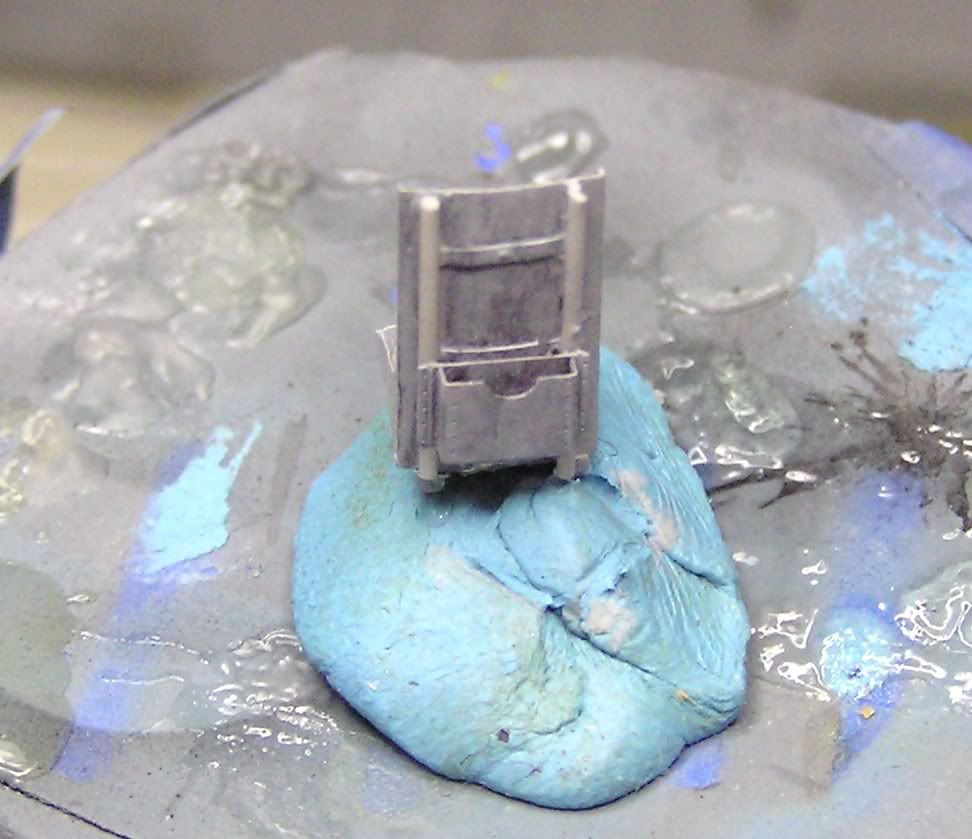
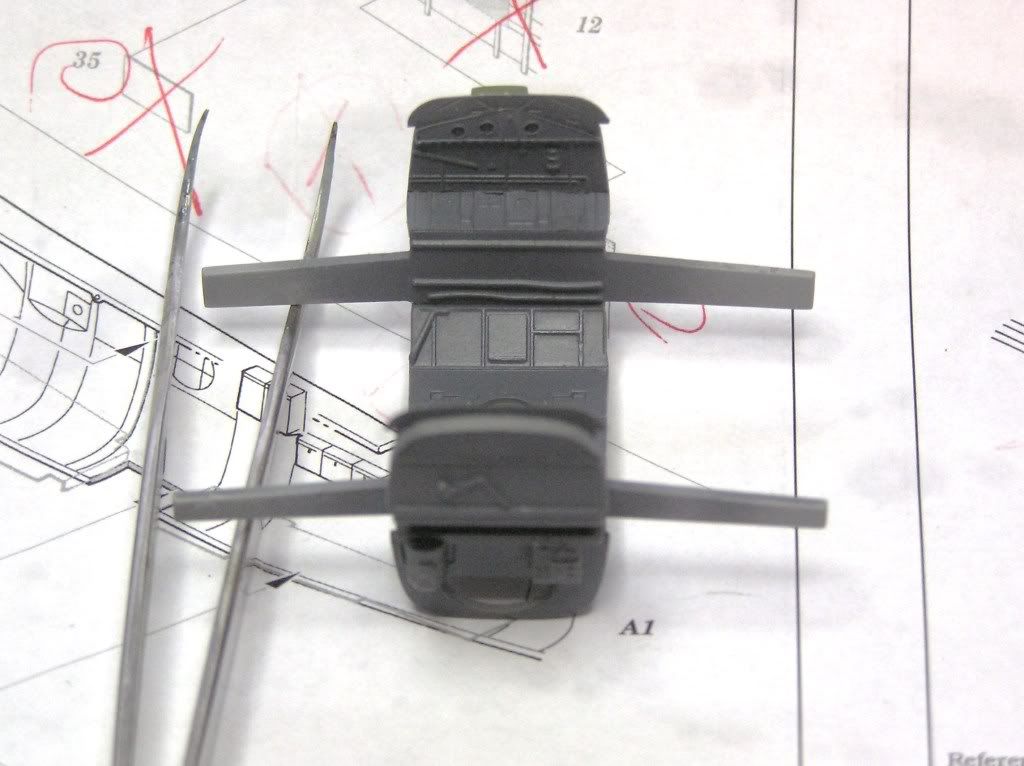
rear bulk head of the same bomb bay is also ready.
Finally the fuselage are in progress. I hope to get far enough to close them tomorrow.

Anyhow that's all I have today. It's going quite well at this point.
Thank you for looking. Comments are welcome.
Cheers, Christian B)
Finally the fuselage are in progress. I hope to get far enough to close them tomorrow.
Anyhow that's all I have today. It's going quite well at this point.
Thank you for looking. Comments are welcome.
Cheers, Christian B)
phantom II
Master at Arms
The other bulkhead
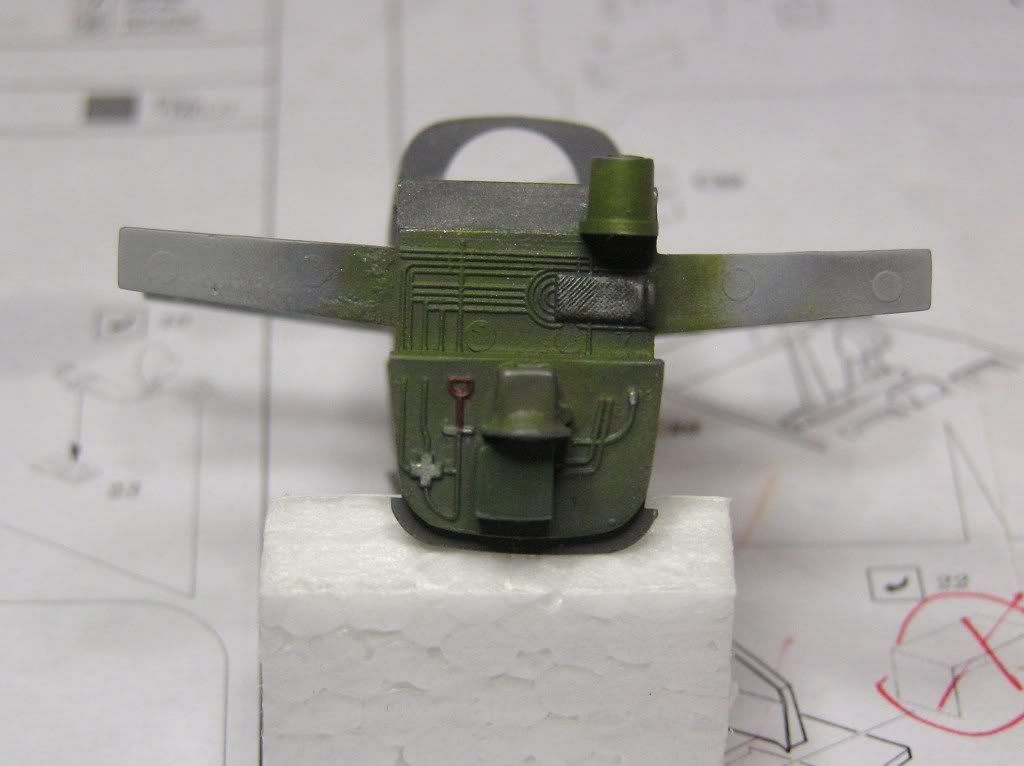
and now the interior of the bomb bay.
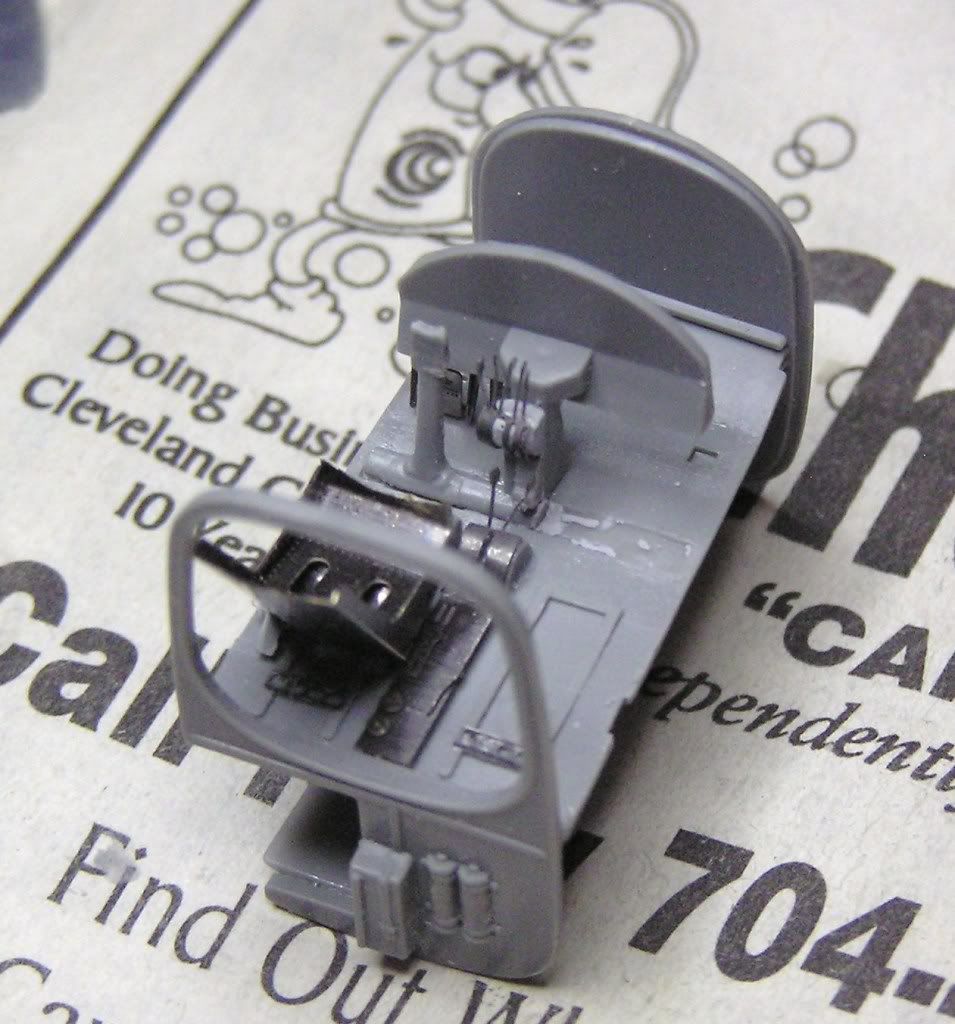
and now the office, which is still a work in progress.
It is amazing to me that they created so much detail in areas that will not been visible.
Cheers, Christian B)
and now the interior of the bomb bay.
and now the office, which is still a work in progress.
It is amazing to me that they created so much detail in areas that will not been visible.
Cheers, Christian B)
Lovin' the OD and bomb racks Chris. Remind me to tell you about sicking my head in the bomb bay of Sentimental Journey years ago and talking to the crew about the common equiptment use between the WW2 bombers and the B52s that I worked on.
phantom II
Master at Arms
Hello everyone,
finally got to a point where I can post a few pictures, so here goes.....
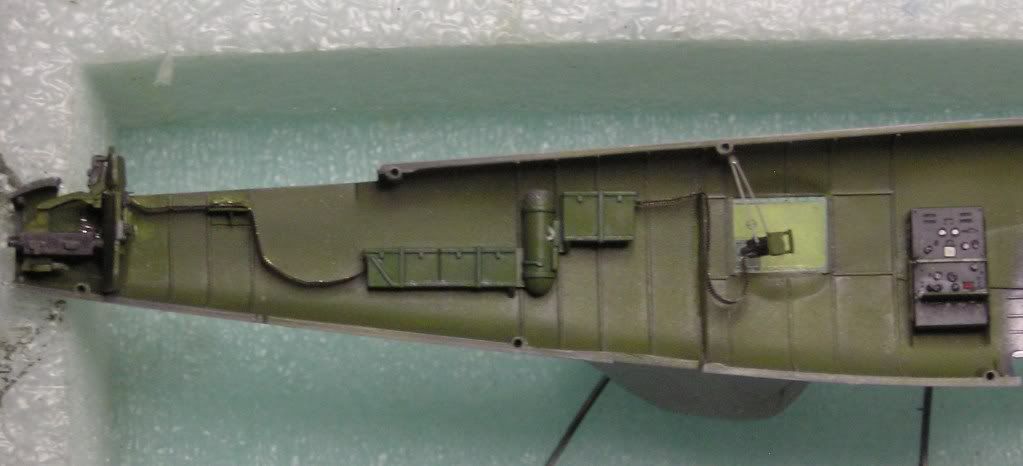
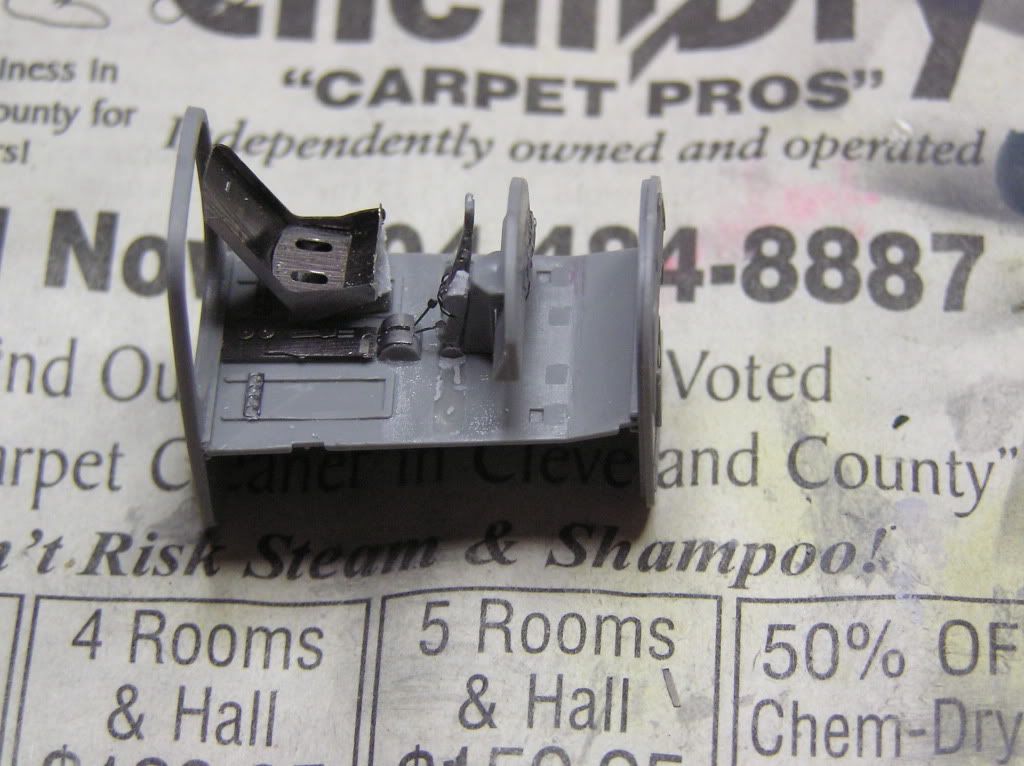
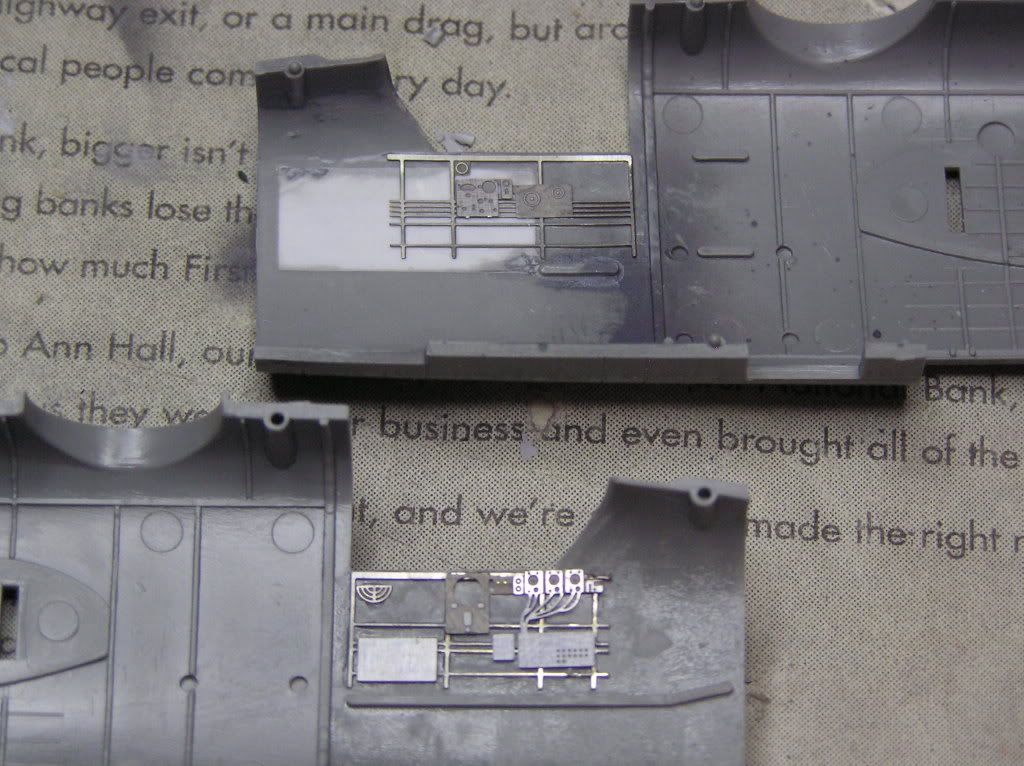
I must say, this has been challenging. Lots of small items going on in here. I installed some knobs and placard to the radio . After installing the amo. boxes I ran the belts to various guns. Very interesting to run belts to both sides of the tail gun in this small amount of space. They did not cooperate one bit.
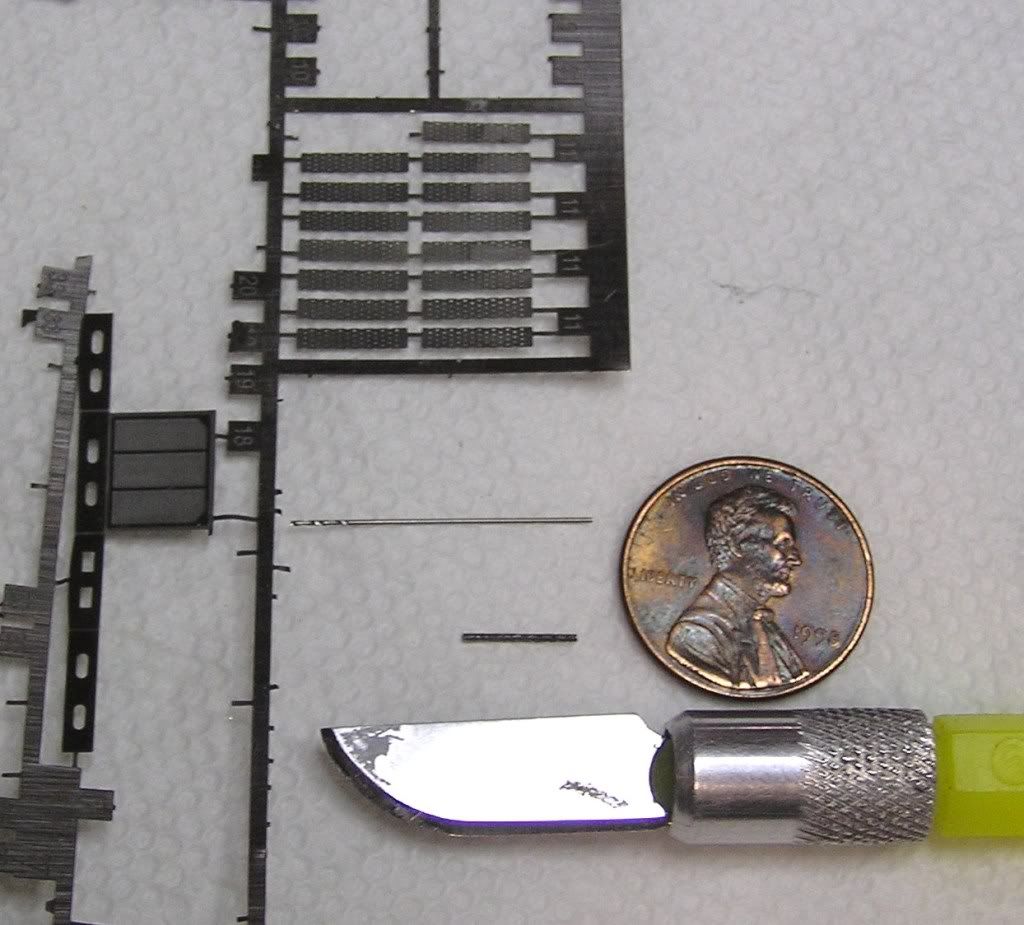
At this point I took out the PE fret with the gun barrels attached. After a period of time I figured out just how to form one into a barrel around this .016 drill bit. I guess all the guys at Eduards are very good with this stuff since they did not even throw out a single idea out there.
This is the precise time it chose to launched into space and refused to be found for twenty four hours.
This is the point I made a command decision to order some wonderful resin barrels from Aires . After all this is supposed to be fun.
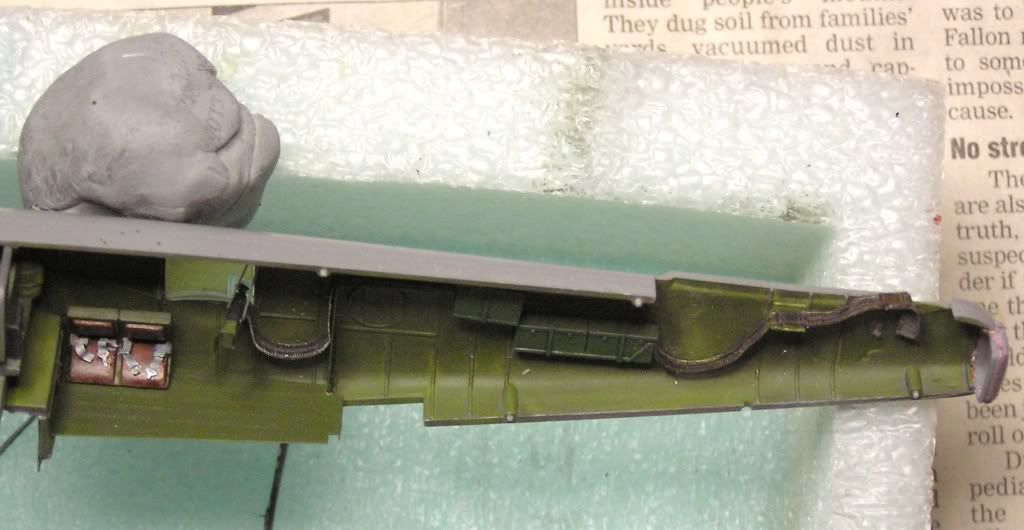
This side is the right gun placements and the seat that had to be transferred from the left side due to the huge radio.
Hopefully I can finish the cockpit shortly so this thing can be buttoned up.
Cheers, Christian B)
finally got to a point where I can post a few pictures, so here goes.....
I must say, this has been challenging. Lots of small items going on in here. I installed some knobs and placard to the radio . After installing the amo. boxes I ran the belts to various guns. Very interesting to run belts to both sides of the tail gun in this small amount of space. They did not cooperate one bit.
At this point I took out the PE fret with the gun barrels attached. After a period of time I figured out just how to form one into a barrel around this .016 drill bit. I guess all the guys at Eduards are very good with this stuff since they did not even throw out a single idea out there.
This is the precise time it chose to launched into space and refused to be found for twenty four hours.
This is the point I made a command decision to order some wonderful resin barrels from Aires . After all this is supposed to be fun.
This side is the right gun placements and the seat that had to be transferred from the left side due to the huge radio.
Hopefully I can finish the cockpit shortly so this thing can be buttoned up.
Cheers, Christian B)
Similar threads
- Replies
- 60
- Views
- 24K
- Replies
- 138
- Views
- 35K