• Modelers Alliance has updated the forum software on our website. We have migrated all post, content and user accounts but we could not migrate the passwords.
    This requires that you manually reset your password.
    Please click here, http://modelersalliance.org/forums/login to go to logon page and use the "Forgot your Password" option.

Carlo Faggioni's SM.79bis ANR (2nd plane)

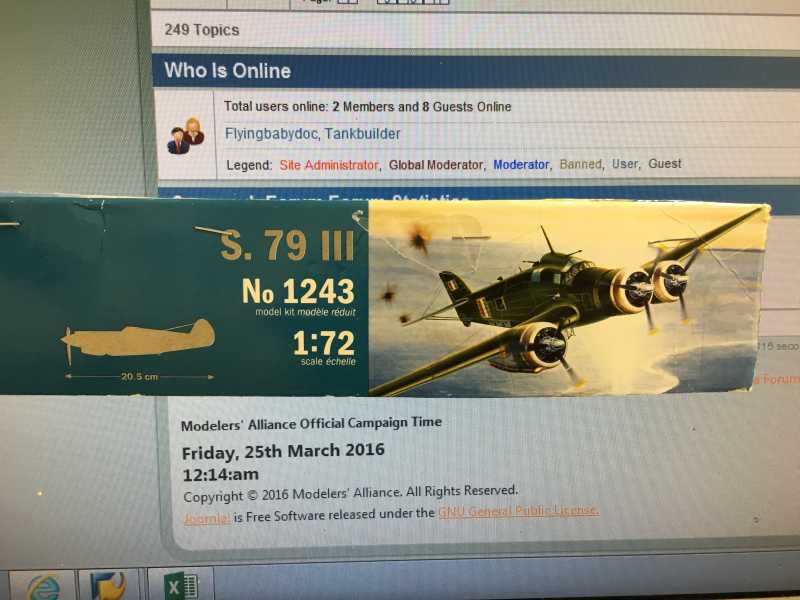
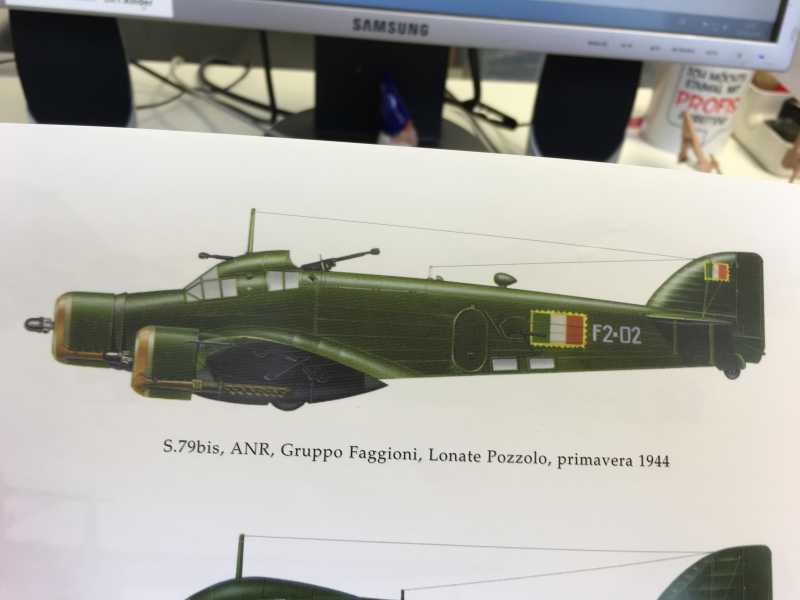
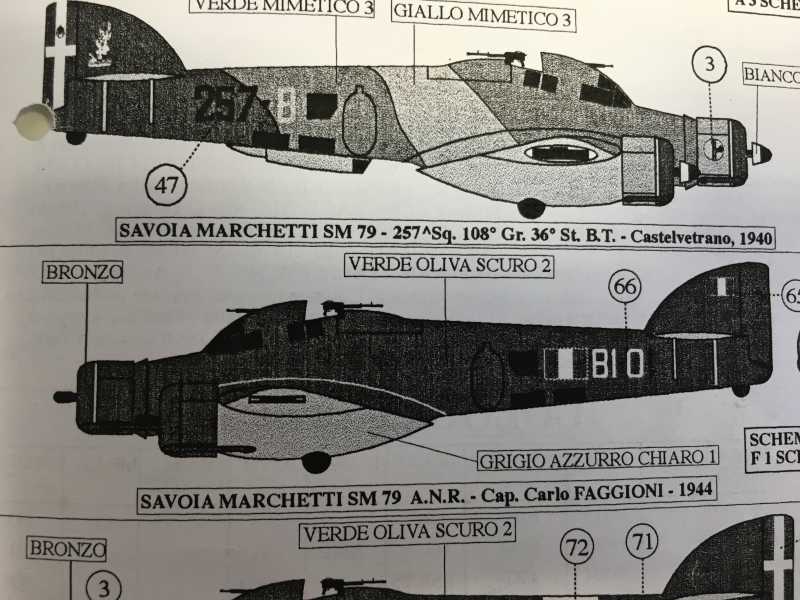
Carlo Faggioni's SM.79bis (ANR)

Hi everyone

Thanks for the support. Sorry about the whinning, all is good and here I am ready for another one.
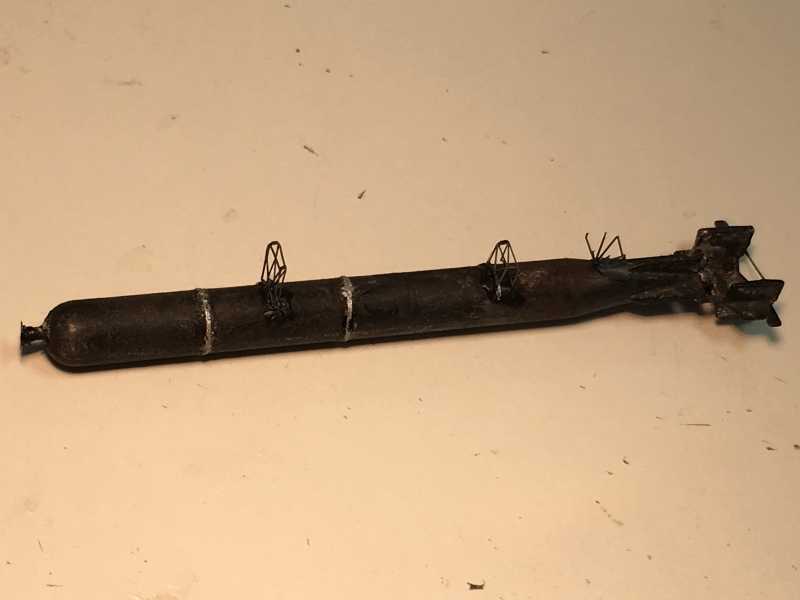
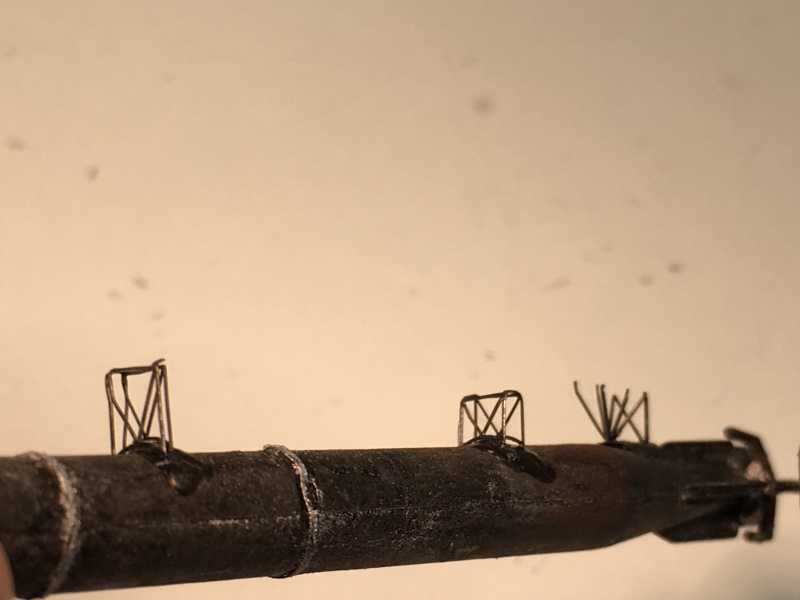
The guys were not wearing stockings... :D :D. This picture was artificially restored in colors (original can be seen in the website of the Aeronautica Militare Italiana) and the shadows from the torpedo were coloured as dark skin. It does look funny! :dude

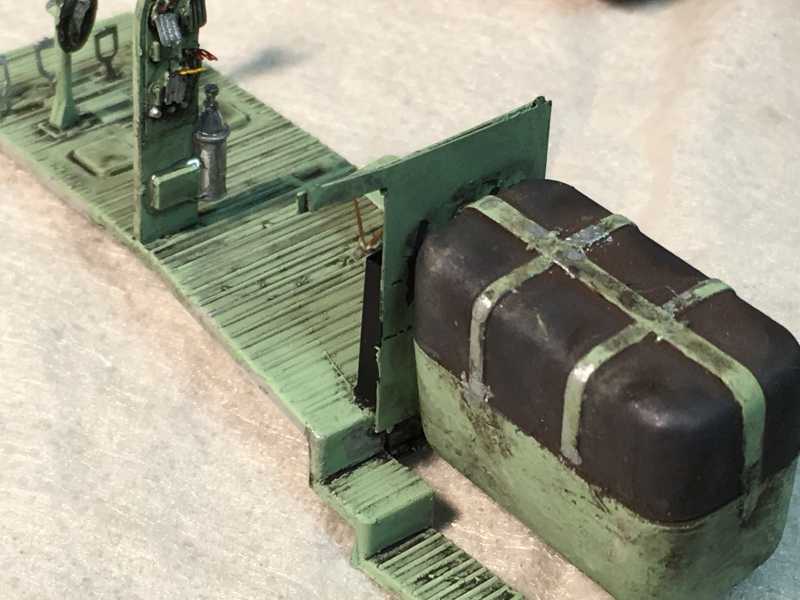
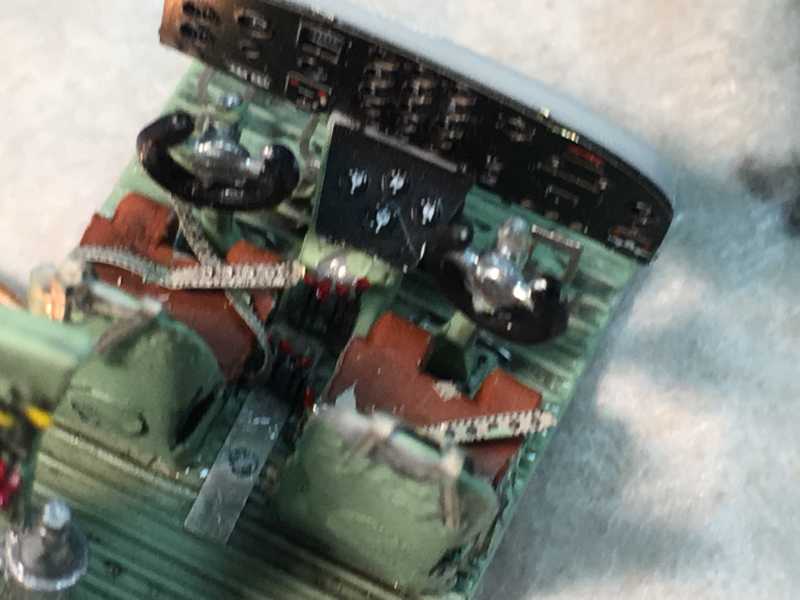
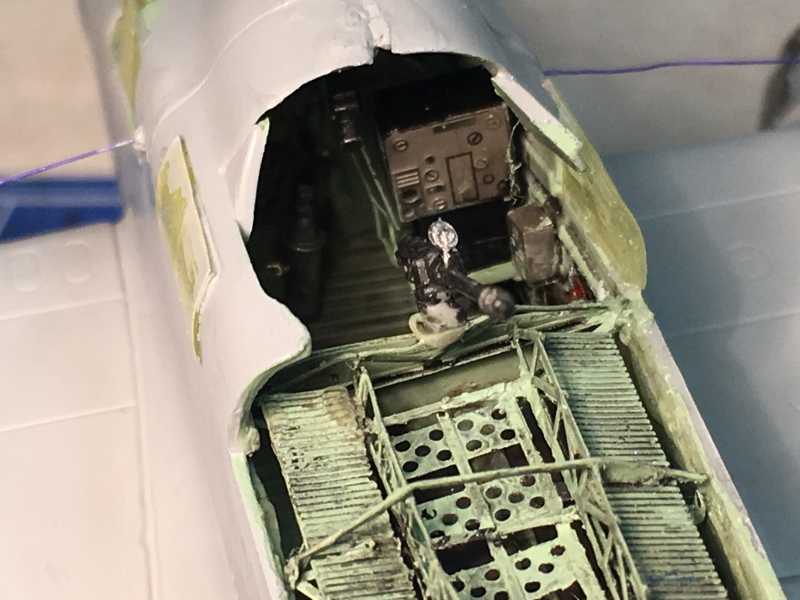
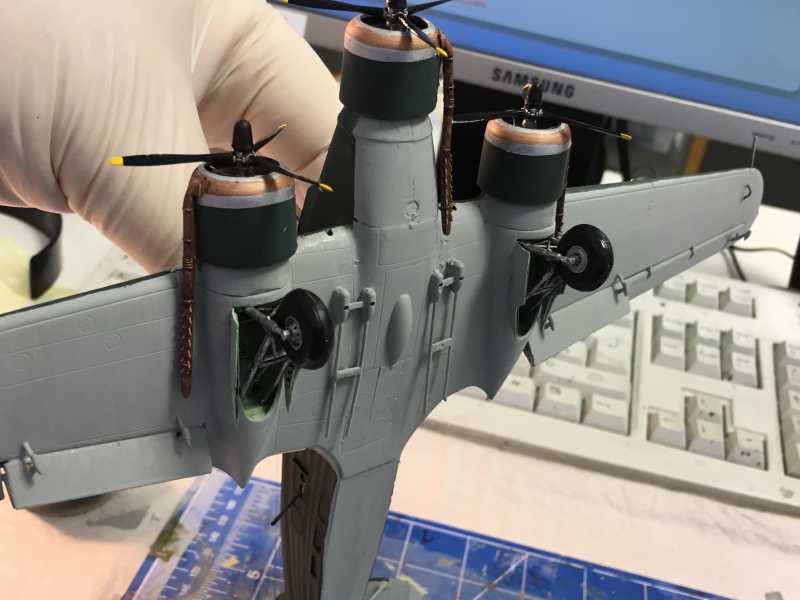
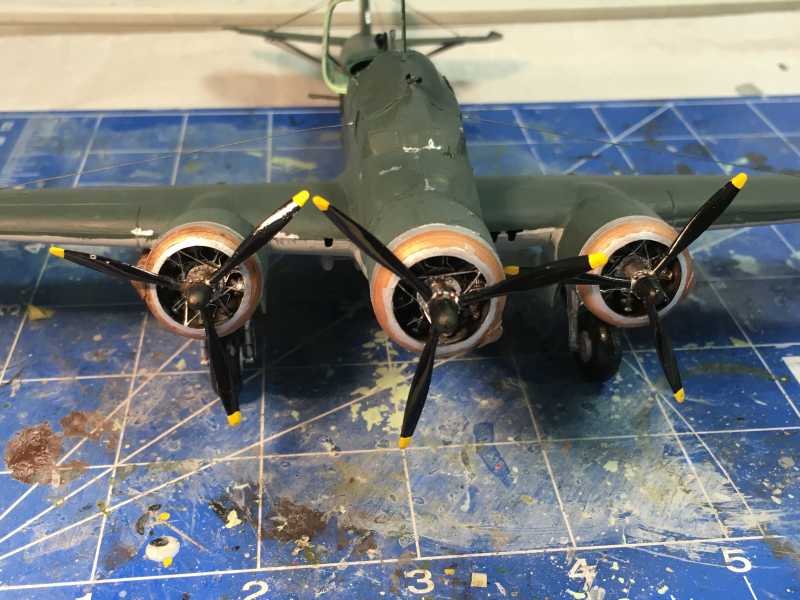
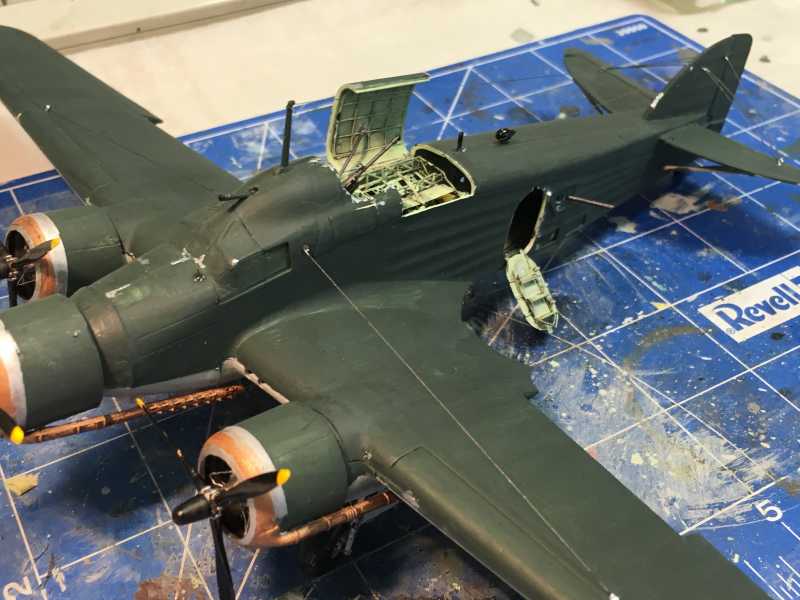
So, here is my second attempt and second entry. This is the other airplane flown by Carlo Buscaglia after the Armistice in Sept. 1943. He joined the Aeronautica Nazionale Repubblicana (ANR), which was the air force branch of the German puppet state in northern Italy (Repubblica Socialista Italiana). Faggioni flew only twice the SM.79bis before dying over Anzio in 1944. This improved version of the SM.79, also called SM.79bis, had a few important modifications:

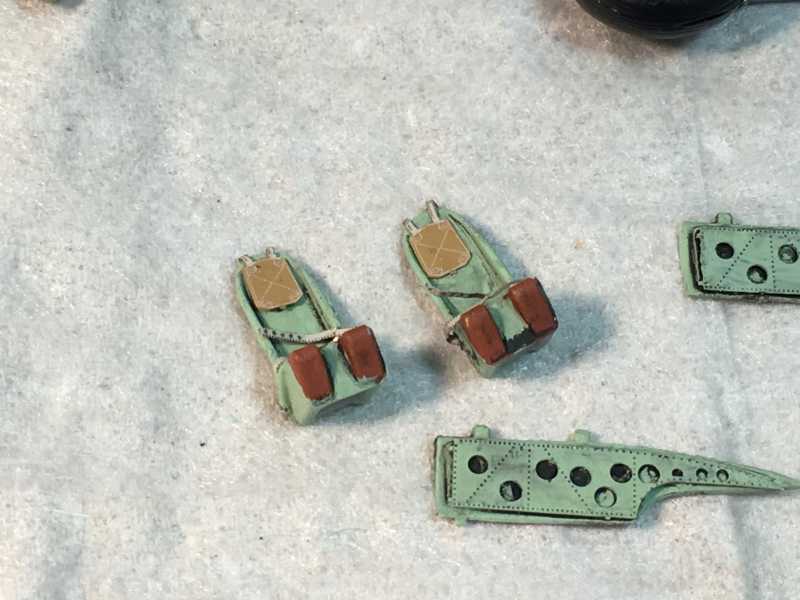
- Addition of Armour plates
- four 12,7mm Machine guns
- RDG-RGM-37 receiver
- strenghtned access door
- increased fuel capacity to 1,165 liters
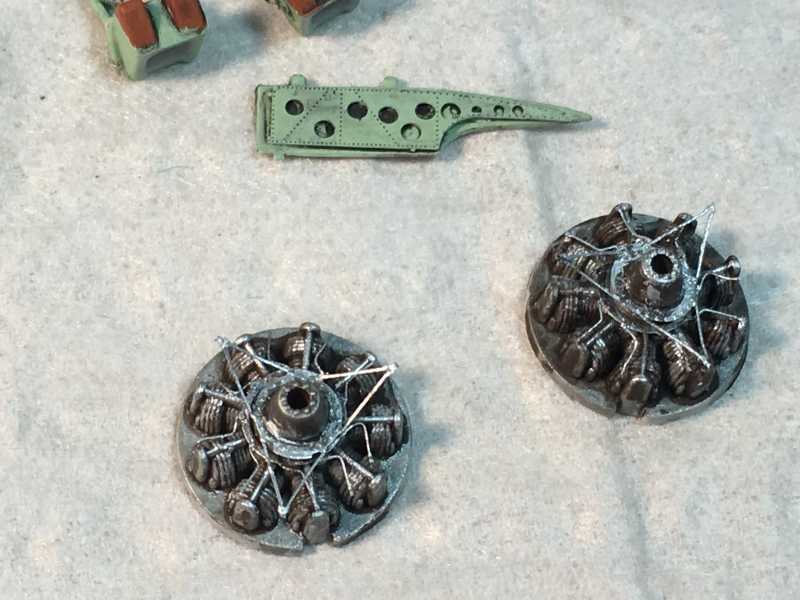
- new exhaust pipes
- removal of the dorsal gondola and bombing apparatus
- variable-pitch, constant-speed and featherable airscrews
- new 24V electric system
- FuG 101 radioaltimeter and several other navigation updates

(Gori, Cesare in SIAI S.79 - Ali d'Italia 29, 2008 La Bancarella Aeronautica, Torino, pp.80-81)


h318236f.JPG

h4d130ef.JPG

h7aea64a.JPG

hd683849.JPG

hb3ec246.JPG


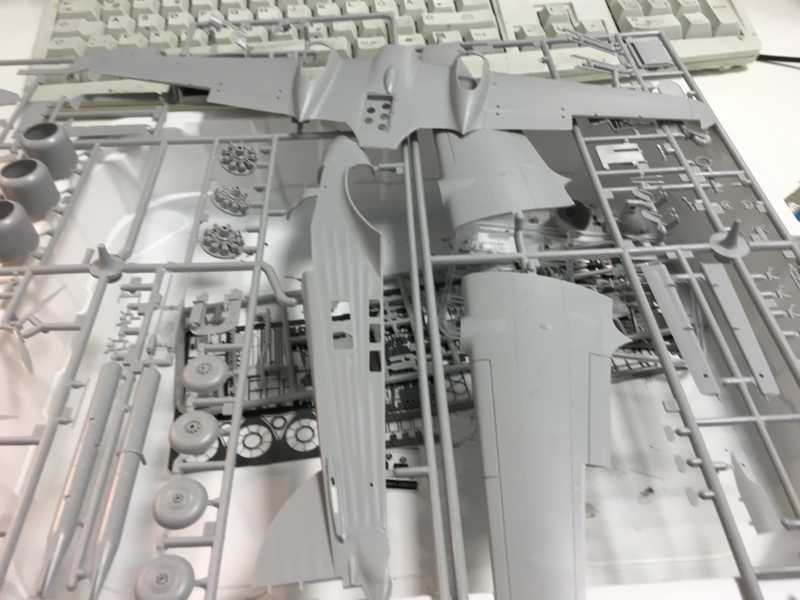
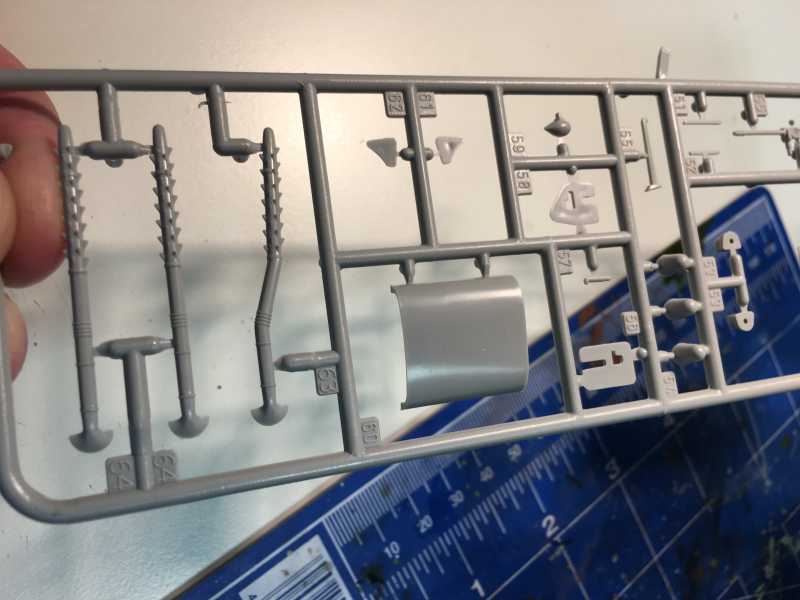
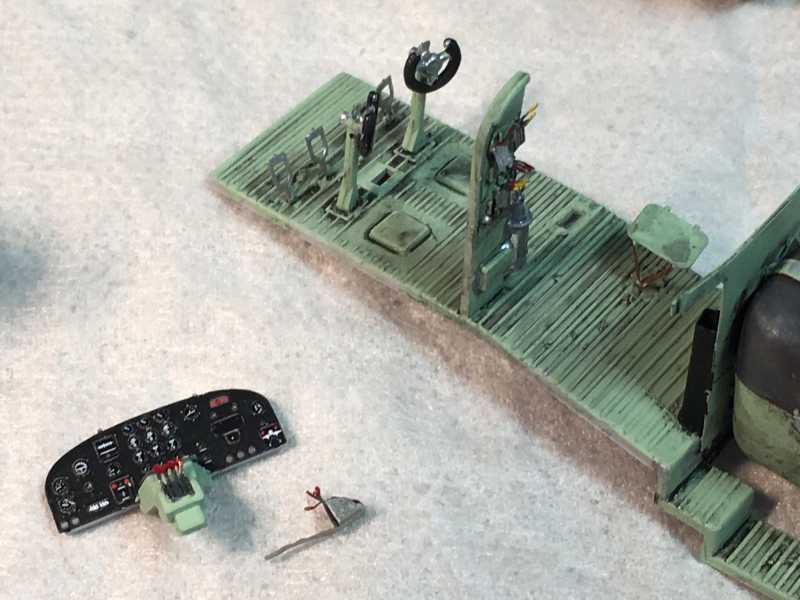
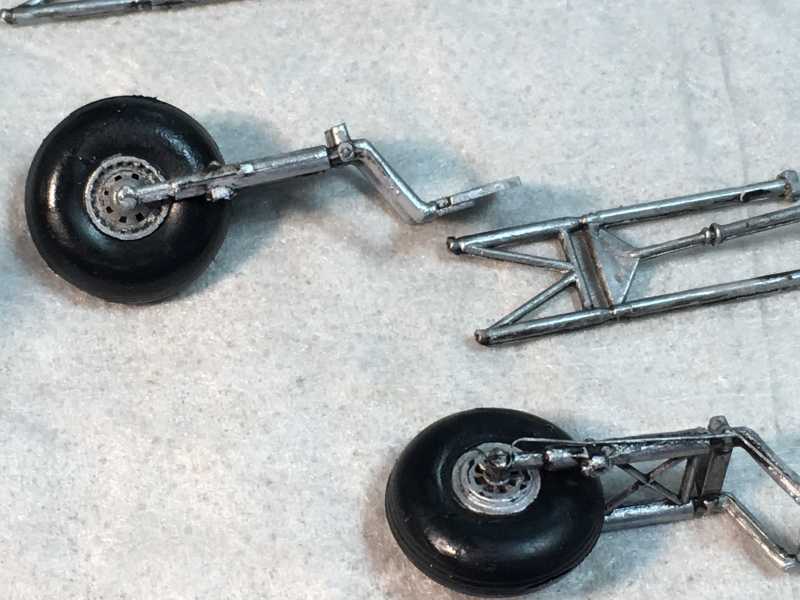
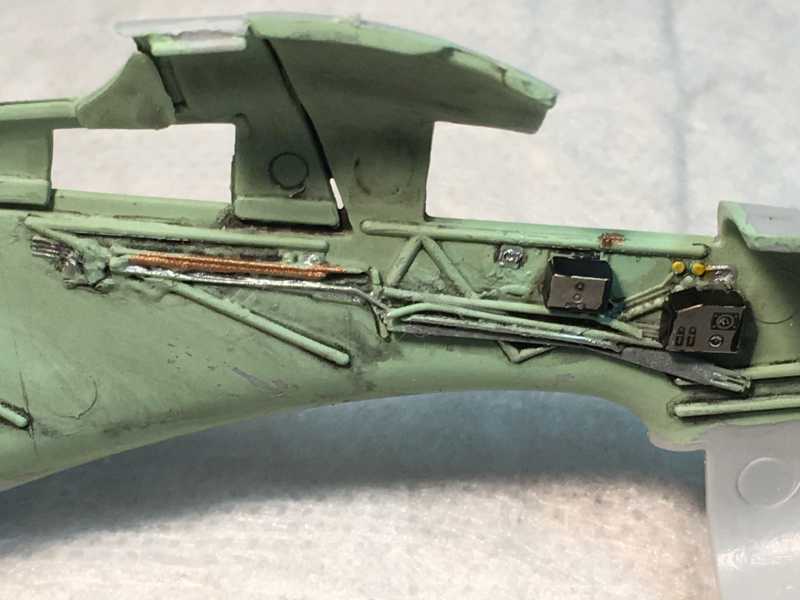
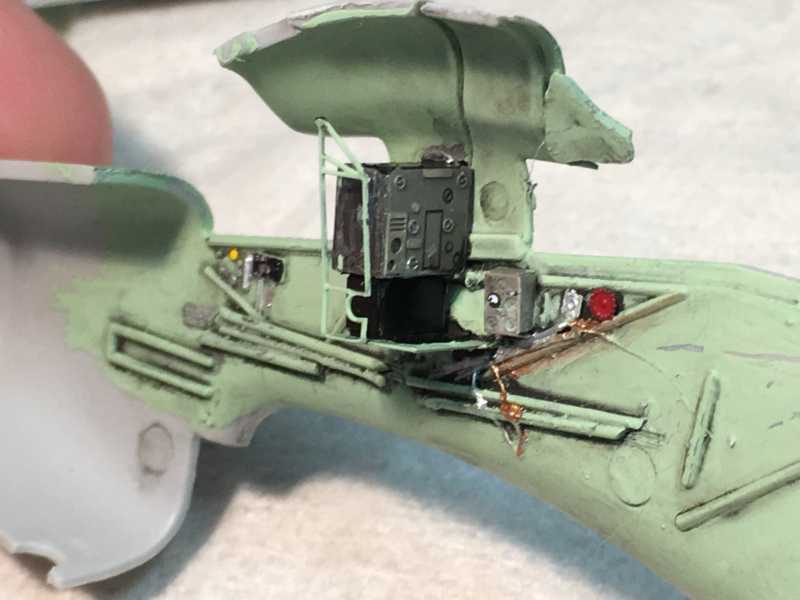
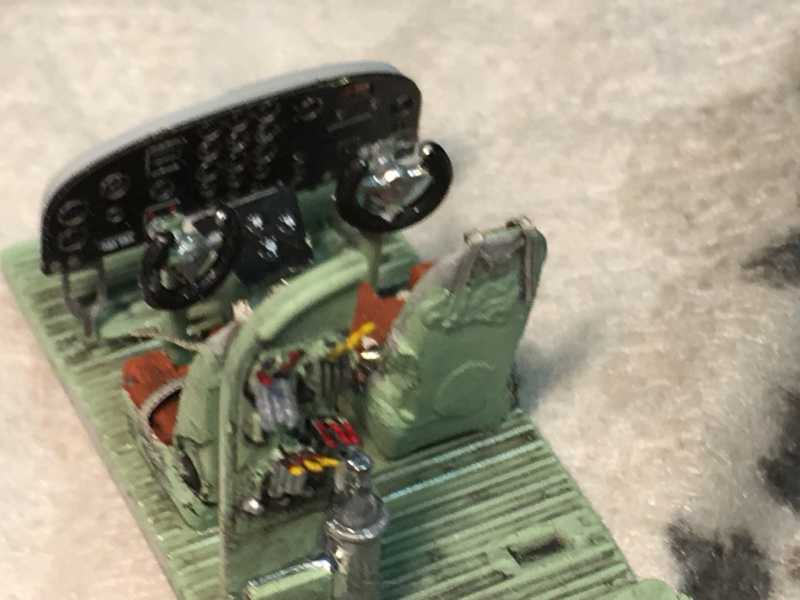
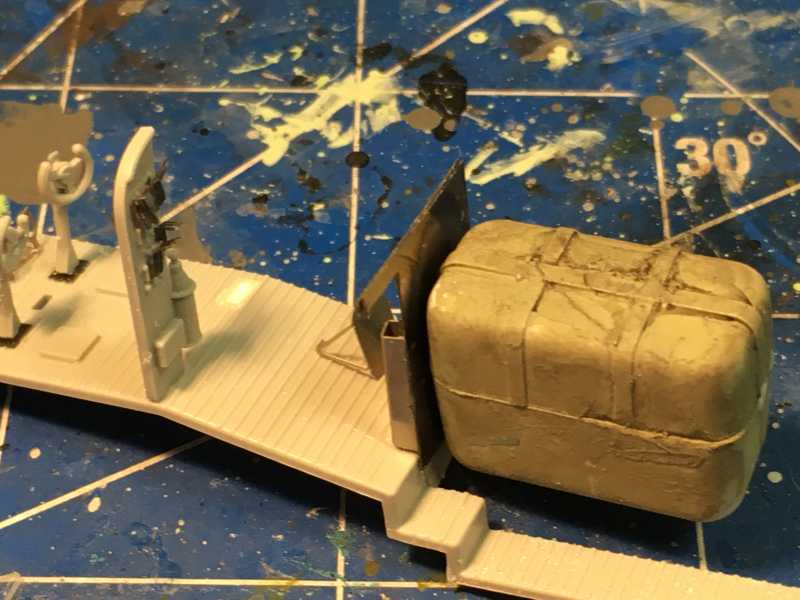
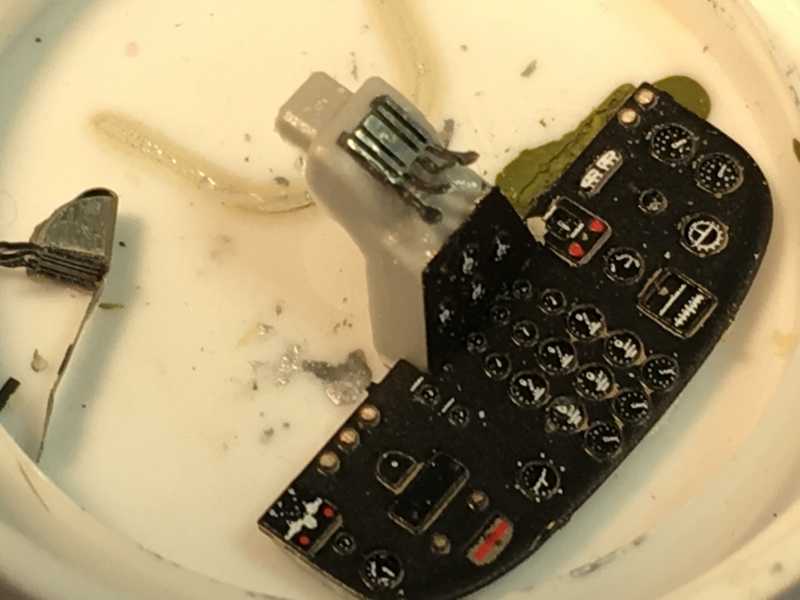
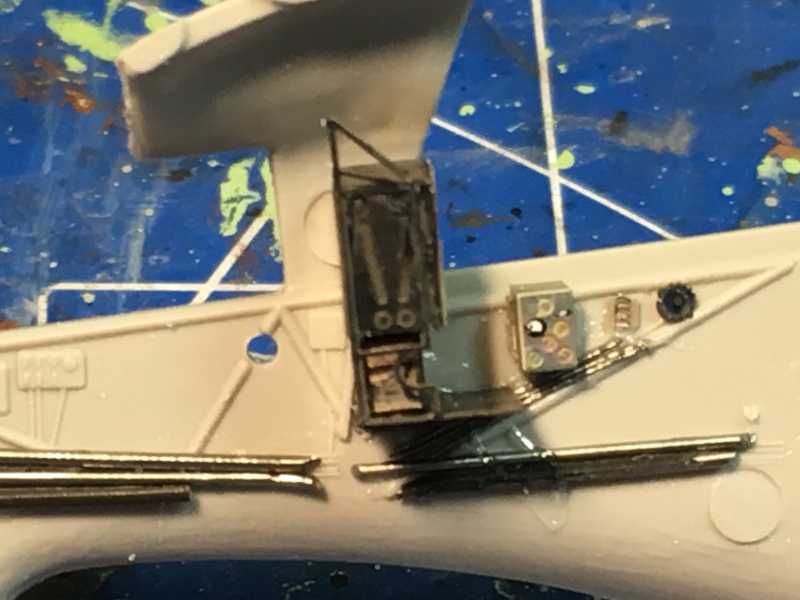
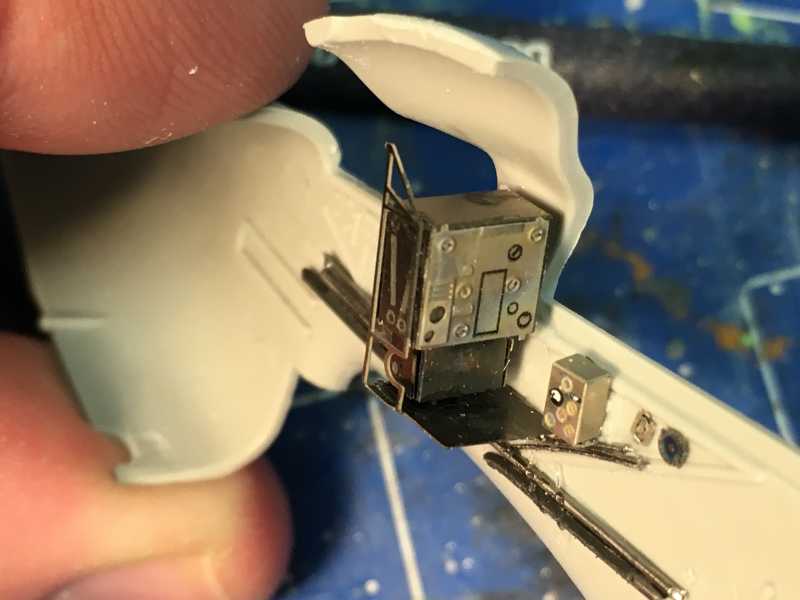
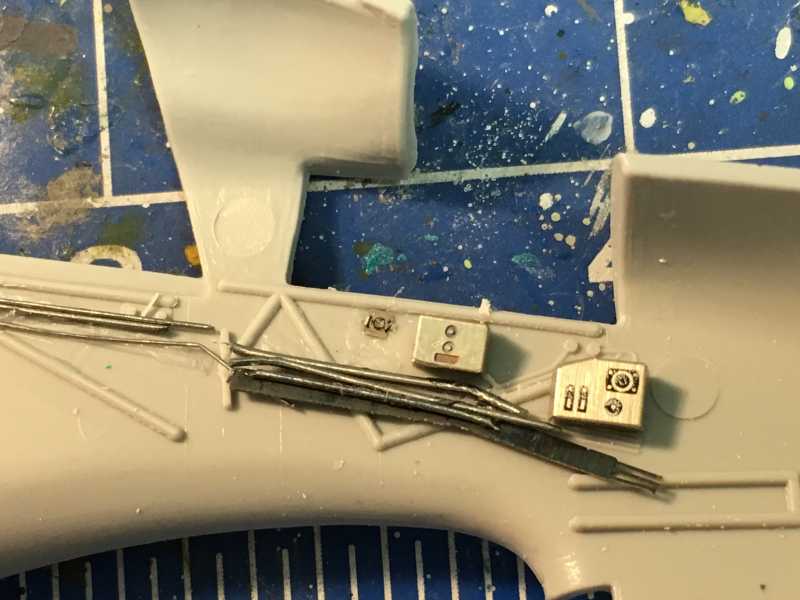
I will be using the PE from Eduard and Decals from Sky models. Let's see if I can do better.

Happy Easter everyone!

Alex
 
Carlo Faggioni's SM.79 (281-4)

Second time around. Let's hope it gets better this time. Actually the experience with the Stuka was very positive, as you can see in the other thread.

This is the beginning of the build. One major modification of the SM.79bis was the increased range due to an extra fuel tank in place of the bomb shaft. I have used an extra fuel tank I had from a Dornier Do-17 and assemble this modification:


h35678f9.JPG


Other than that, the interior PE and extra cables are already in place.


h9dc121a.JPG

h1bd9f00.JPG

h678151e.JPG

h6f0b770.JPG

hd798fbb.JPG


I will wait for the extra wiring after the initial painting, it will look better hopefully.

As usual your comments are most appreciated

Cheers

Alex
 
Looking really good. I like all the extra details you put in and at such a small scale. If you would like a suggestion. if you look in a specialty shop you can find some fine lead wire for fly fishiing that will give you some various diameter "wire ". Also if you have a computer where the small fan siezes up you can strip the wire out of the armiture and it is super fine, perfect for your scale. And I have never found any but a lot of European modelers use fuse wire. I hope those hints are of some use or interest to you.
James
 
Lot of really good detail in here. Should be a nice build.

I agree with James . Getting your hands on some used electronics is a great source for fine wires.

If you can't find a source just PM me and I'll point out some businesses that can help.

Cheers, Christian B)
 
Damn thats some fine work there (And I am off to go look for that burnt out fan I have lying around here somewhere)
 
Thanks guys!

YOur suggestions are great James. I usually have little access to eletronics but fishing shops abound here (Ulm is crossed by the Danube river, lots of trout). I will look into that. I usually use old guiding wires for ureteral catheters but today there were only rather big ones. Something new on the to do list! Many thanks!. :drinks :drinks

I will also look into some of the hardware stores here. There is usually a great selection of eletronics stuff.

More work to come. I really really enjoy building this fine details. :geek

Cheers

Alex

I would assume your hospital has an IT staff to manage all the computers required. Hit them up for a small fan (1 inch is good) and then strip the wire. Takes a bit of work but it is very fine stuff.
James
 
If you want some really fine wire, an old dead quartz watch movement has a coil in it that has some super fine wire. To get it loose will require some acetone and a careful light touch to unwind it.

crazy.gif
 
Hello dear friends,

So a little update. The internal painting and assembly are finished. As usual, the Italeri kits seem to fit rather well IF (that is a big IF) you do not use PE in the assembly. Otherwise, it is a bit nerve-wrecking.

The initial shots are from the crash site with the different components. The additional fuel tank is completely scratch-built based on some diagrams and images found in the Ali d'Italia issue of the Sparviero.

I really think the detailing and painting got better in this one than in the previous models:


hb3dd5de.JPG

h8069a90.JPG

h826d28e.JPG

ha5e3ead.JPG

hf58357a.JPG

h96ae33c.JPG

h678ed8c.JPG

hfb914dd.JPG

hf7594f0.JPG


Now the cockpit assembly. Here there was a lot of fitting, sanding and filling required:


h4024c67.JPG

h211ab37.JPG


And finally the main interior assembly:


h3d315be.JPG


I hope I can get some more work done in the weekend.

Thanks for looking and for your comments.

Cheers

Alex
 
Better and better each time Alex . I really like this one.

In total agreement about the PE . Besides it has a tendency to not fit correctly :bang head

Keep up the good work . (y) (y)

Cheers, Christian B)
 
Hello dear friends,

So a little update. The internal painting and assembly are finished. As usual, the Italeri kits seem to fit rather well IF (that is a big IF) you do not use PE in the assembly. Otherwise, it is a bit nerve-wrecking.

The initial shots are from the crash site with the different components. The additional fuel tank is completely scratch-built based on some diagrams and images found in the Ali d'Italia issue of the Sparviero.

I really think the detailing and painting got better in this one than in the previous models:


hb3dd5de.JPG

h8069a90.JPG

h826d28e.JPG

ha5e3ead.JPG

hf58357a.JPG

h96ae33c.JPG

h678ed8c.JPG

hfb914dd.JPG

hf7594f0.JPG


Now the cockpit assembly. Here there was a lot of fitting, sanding and filling required:


h4024c67.JPG

h211ab37.JPG


And finally the main interior assembly:


h3d315be.JPG


I hope I can get some more work done in the weekend.

Thanks for looking and for your comments.

Cheers

Alex
Great interior mate :popcorn
 
Hi Alex, Your doing a great job. Hope it can be seen latter. Good thing you took pics. The lines of the Italian aircraft are a pure work of art. Gary
 
Hi there

Thanks a lot friends, you have been very kind to me. I really appreciate your support. (y)

Little progress this weekend. Had a dinner party, the wife did a wonderful job in preparing sushi and sashimi but too much sake was involved...

Here is what I have thus far. All in all better than the previous one.

Cheers

Alex


he1bbfe6.JPG


h3b2271d.JPG


h5ab893c.JPG


h5c95058.JPG


h83e788e.JPG


h0b215b9.JPG
 
Pretty nice Alex . Nice PE for the torpedo mount .

Might have to pick some up for this future build .

A wife that can make sushi would definitely be a keeper (y)

Cheers, Christian B)
 
Thanks Christian

Your suggestion of the many coats (and really thin ones) did pay off. This is the progress after painting, I think it looks better than the previous ones. Now I am letting it rest then will futurize it for the decals.

Cheers

Alex


h6b9a7b3.JPG


h4480e42.JPG


ha8fcef0.JPG


hab5f446.JPG
 
Back
Top