
-
Modelers Alliance has updated the forum software on our website. We have migrated all post, content and user accounts but we could not migrate the passwords.
This requires that you manually reset your password.
Please click here, http://modelersalliance.org/forums/login to go to logon page and use the "Forgot your Password" option.
You are using an out of date browser. It may not display this or other websites correctly.
You should upgrade or use an alternative browser.
You should upgrade or use an alternative browser.
BATTLE BLOG # 2 -THE FIRST LSSW PANTHER G
- Thread starter Brokeneagle
- Start date
Brokeneagle
Master at Arms
MP,Luiz, James ,Ron & Chuck - thanks guys, glad u liked the shots. ")
Base color/weathering and tank color/weathering sync
OK, I have sorted out some photo's and have realised I had better link up with some older progression shots.
These are a little fuzzy as I took them with my Macro lens without a tripod - sorry.
I will throw in a couple of the previous shots so that you remember where we were up to.
November 2014
December 2014
Then I went on holidays in December and was able to get more time.
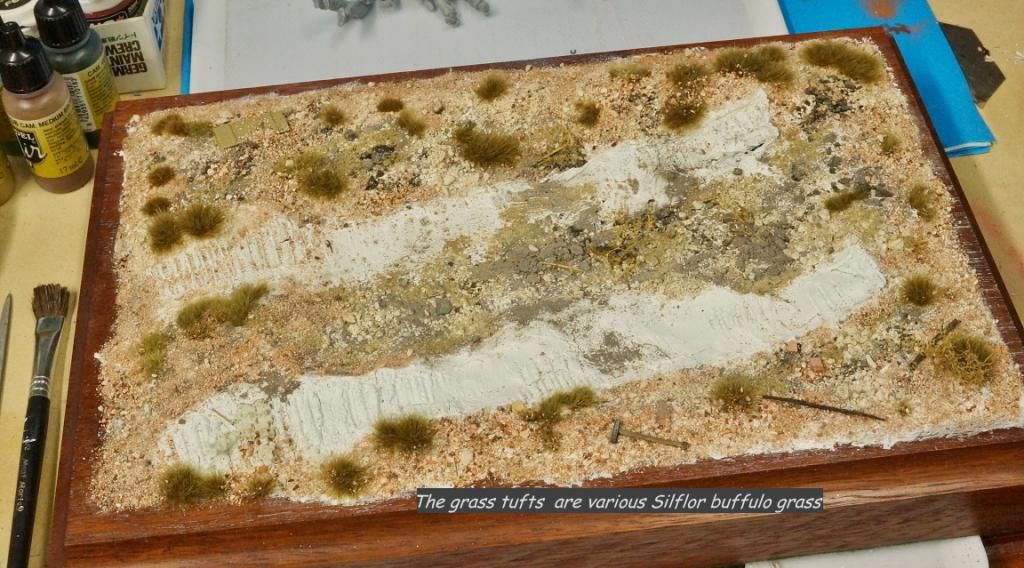
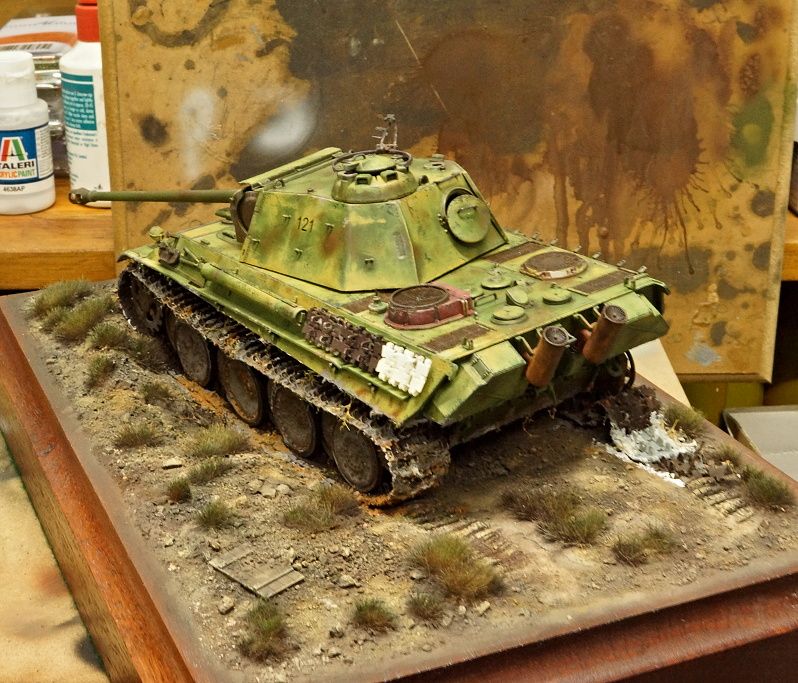
The base here has the basic acrylic ground colors applied by airbrush.
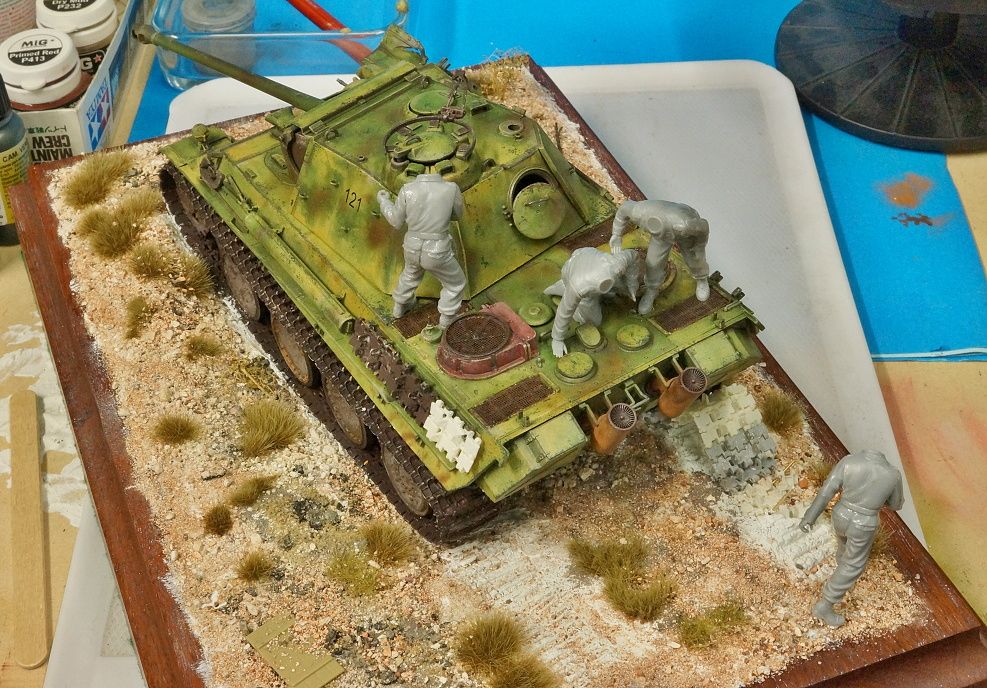
The tank is still in the base cammo with some chipping but basically no shadow weathering or worn winter cammo yet.
The tank has the basic colors to be able to now fix it to the base are blend in with the advanced coloring and weathering of the base, that way they match and the tank doesn't look as though it has been 'choppered - in'.
Some important points to note at this stage are -
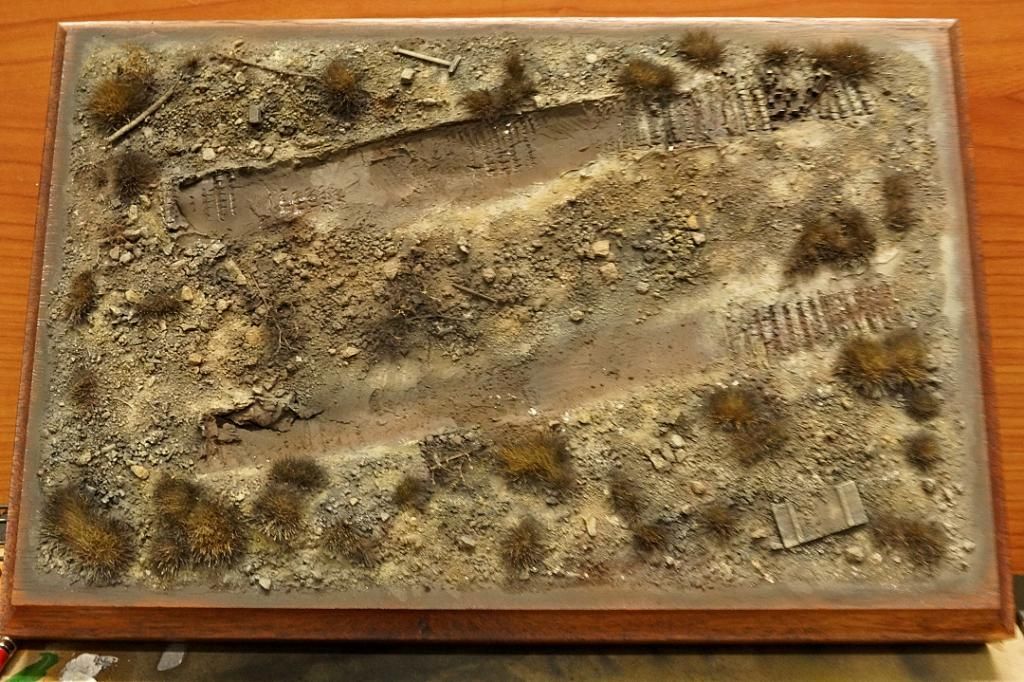
1) The tank does not sit parallel with any base side.
2) The tank is not horizontal to the base - it is not only in a depression but also subtly leaning to the left as u look from the back.
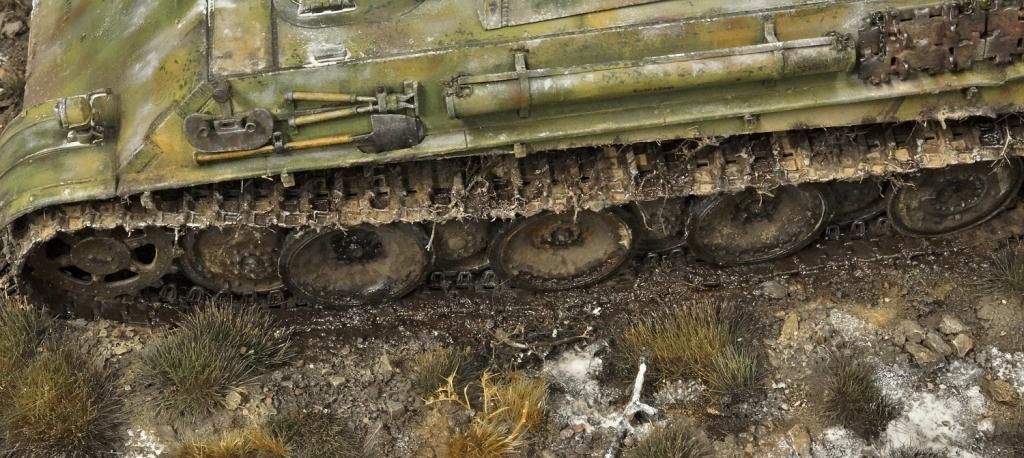
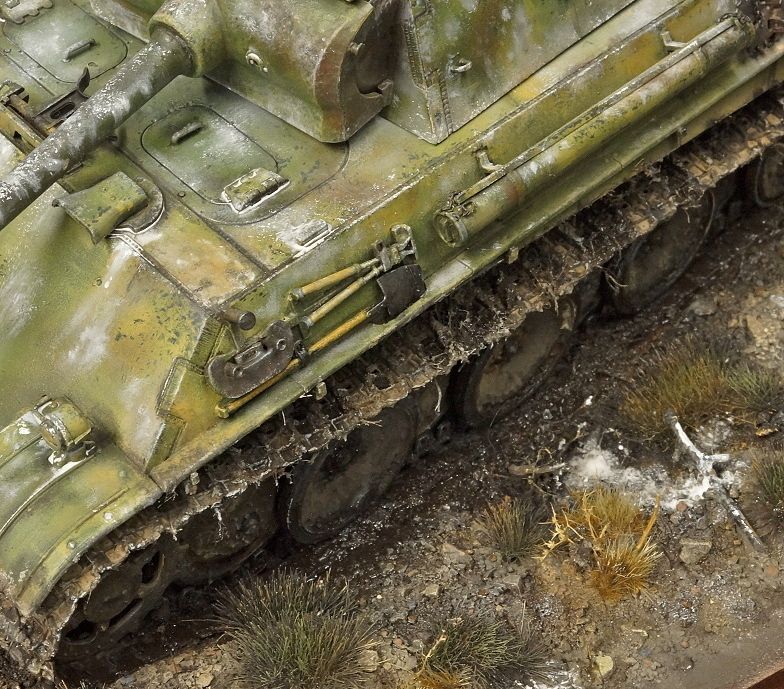
3) All tanks look better when the bottom section of track is sunk to the wheels or even lower, as this gives the vehicle weight and makes it look more real.
Esthetically, when u sink the bottom/ base length of track (especially on German armor)it gives the tank a lower profile, making it look more aggressive, heavy and stops it sitting too proud on the tracks.
I try to never show German armor on cobblestone for all of the above reasons , and if I have to (which i will with my #1 Battle Blog - last Tiger 1 in Berlin)i will make use of debri and gathered dirt to reduced the lower track effect.

Back soon - hope these are useful for the 'dio makers'.
Base color/weathering and tank color/weathering sync
OK, I have sorted out some photo's and have realised I had better link up with some older progression shots.
These are a little fuzzy as I took them with my Macro lens without a tripod - sorry.
I will throw in a couple of the previous shots so that you remember where we were up to.
November 2014
December 2014
Then I went on holidays in December and was able to get more time.
The base here has the basic acrylic ground colors applied by airbrush.
The tank is still in the base cammo with some chipping but basically no shadow weathering or worn winter cammo yet.
The tank has the basic colors to be able to now fix it to the base are blend in with the advanced coloring and weathering of the base, that way they match and the tank doesn't look as though it has been 'choppered - in'.
Some important points to note at this stage are -
1) The tank does not sit parallel with any base side.
2) The tank is not horizontal to the base - it is not only in a depression but also subtly leaning to the left as u look from the back.
3) All tanks look better when the bottom section of track is sunk to the wheels or even lower, as this gives the vehicle weight and makes it look more real.
Esthetically, when u sink the bottom/ base length of track (especially on German armor)it gives the tank a lower profile, making it look more aggressive, heavy and stops it sitting too proud on the tracks.
I try to never show German armor on cobblestone for all of the above reasons , and if I have to (which i will with my #1 Battle Blog - last Tiger 1 in Berlin)i will make use of debri and gathered dirt to reduced the lower track effect.
Back soon - hope these are useful for the 'dio makers'.
Very useful. Having done my 2nd or 3 base now I'm feeling more confident doing them. These are great tips Ian, thanks so much! 
Brokeneagle
Master at Arms
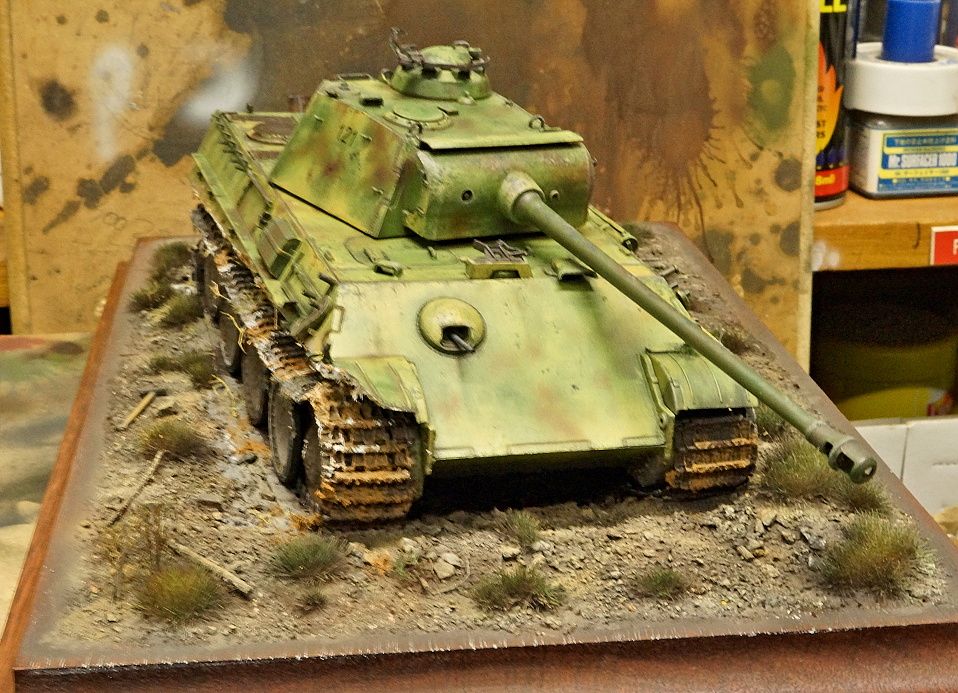
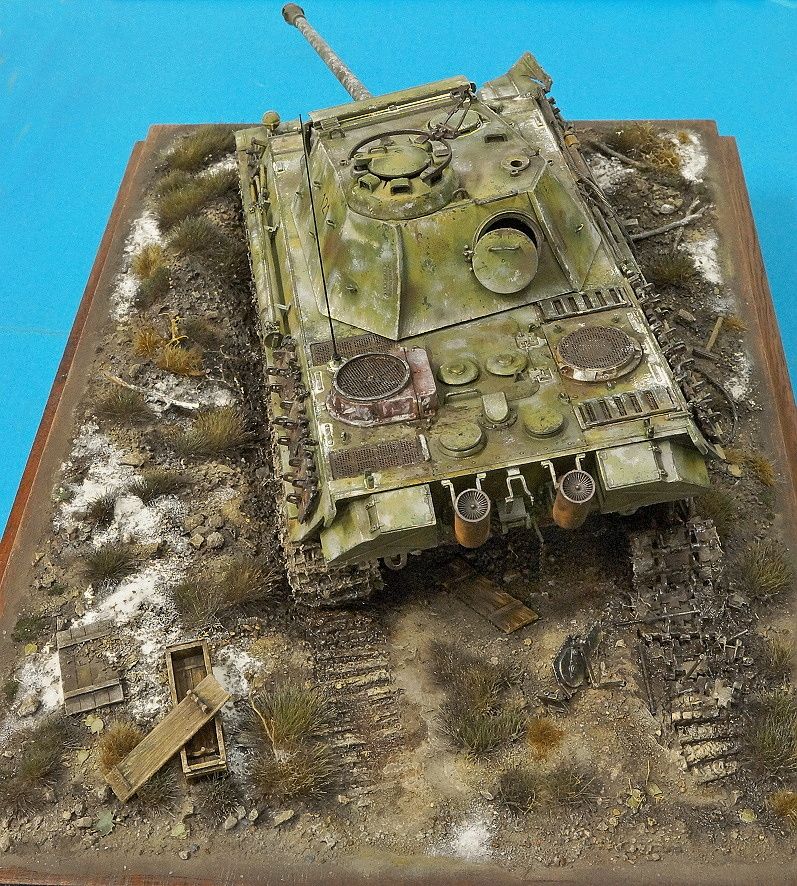
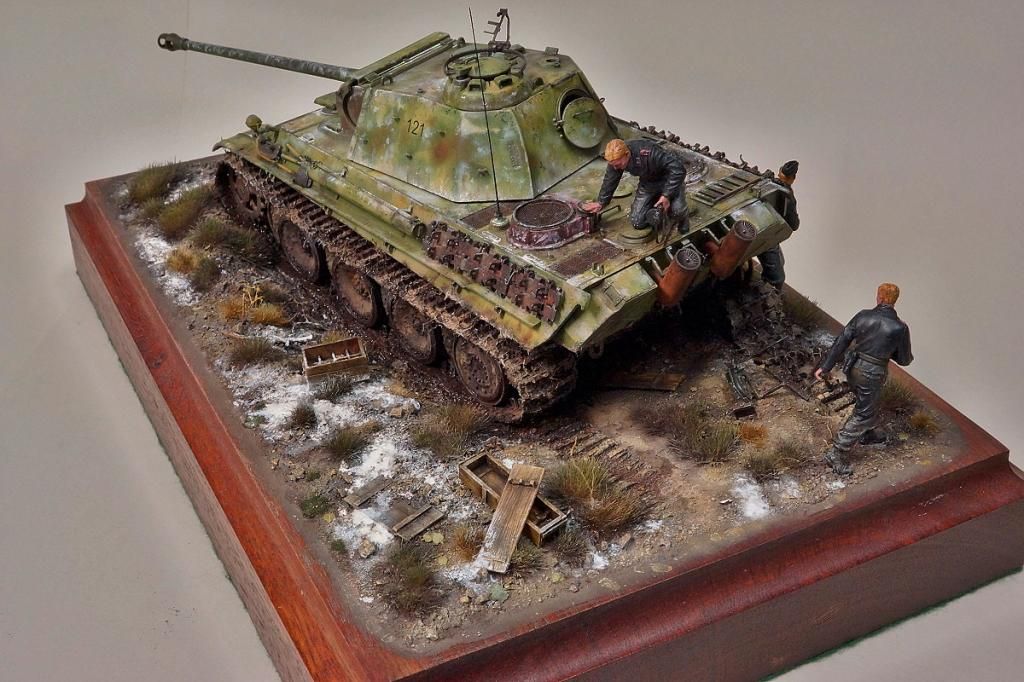
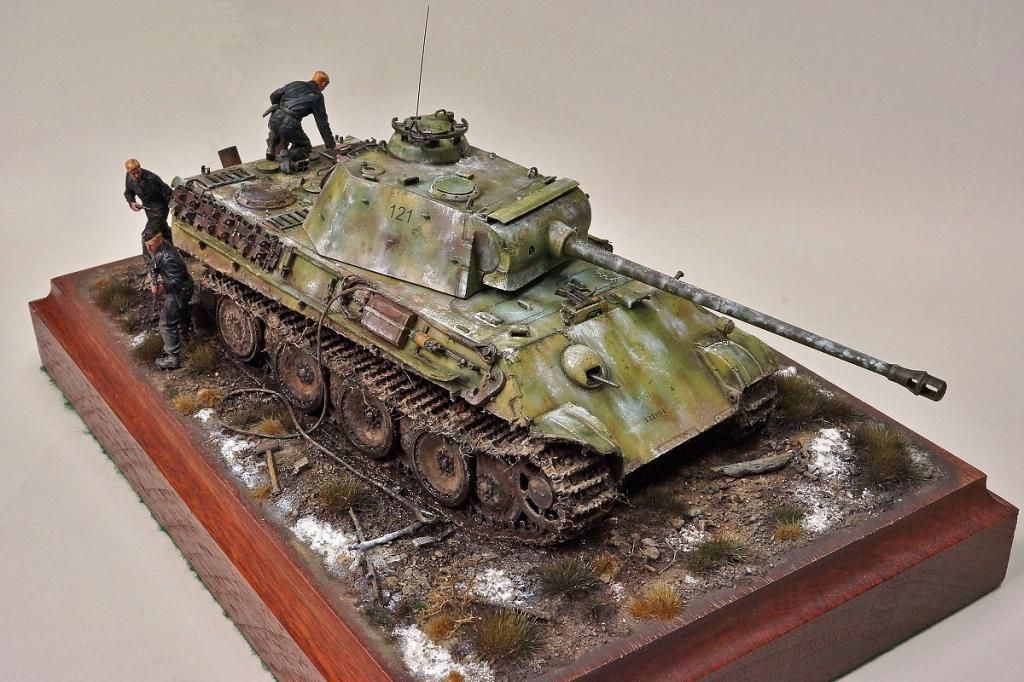
OK, tank is done and the base is completed so here are the shots.
Still working on the figures and I will come back and add more research around the battle situation and consequences.
Still working on the figures and I will come back and add more research around the battle situation and consequences.
OK, tank is done and the base is completed so here are the shots.
Still working on the figures and I will come back and add more research around the battle situation and consequences.
Truly inspiring Ian. Thanks for showing us the progress on this and explaining the process. :drinks
Brokeneagle
Master at Arms

Wow - thanks guys- a massive compliment from 3 very fine modellers.
Luiz, James, MP.I thought that I would show some more detail shots.
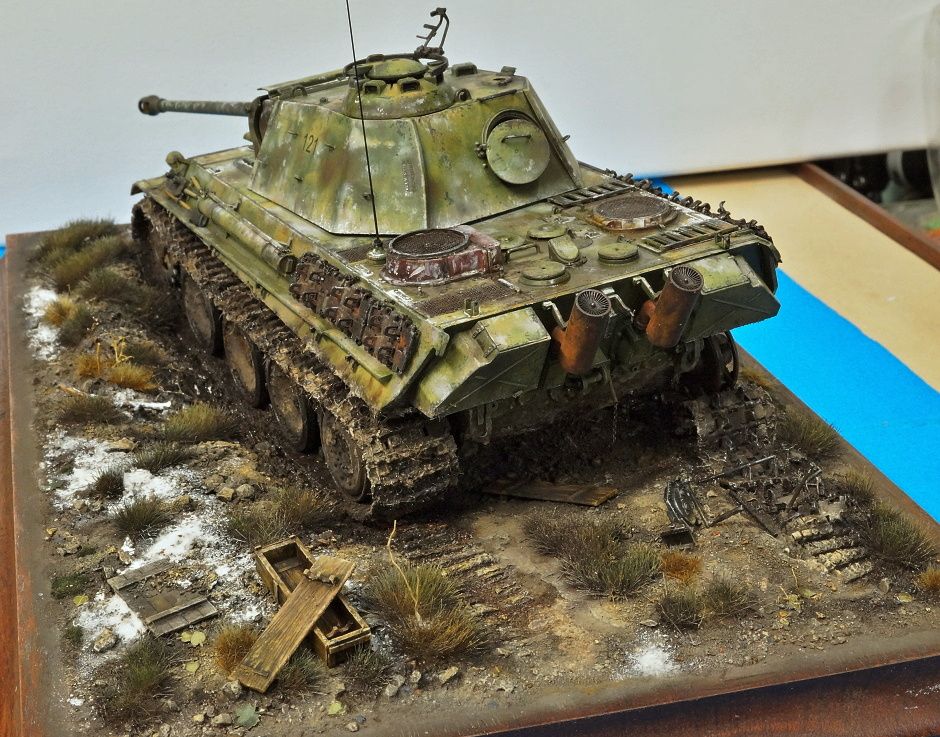
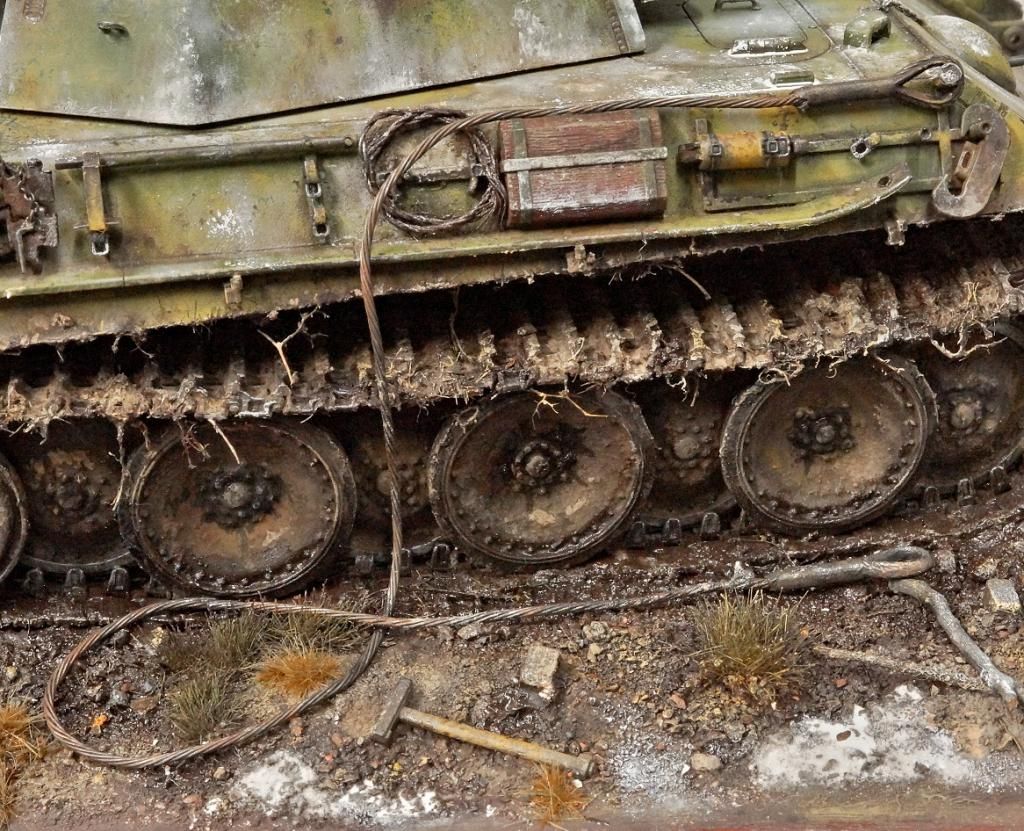
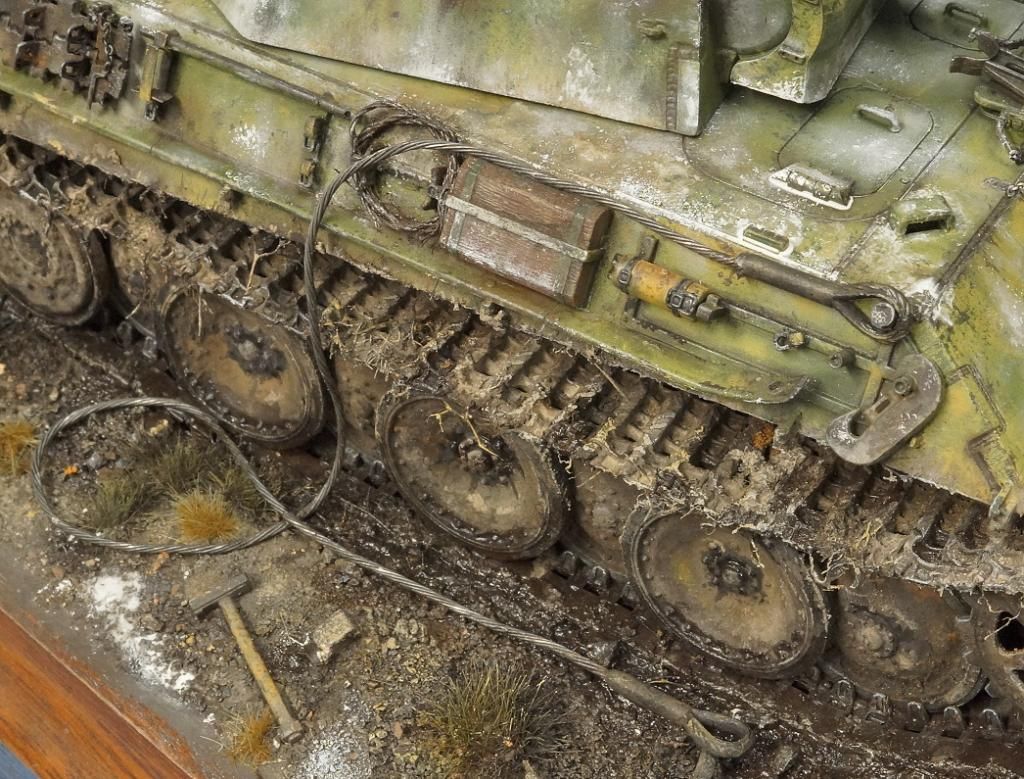
This is a shot focusing on the wet mud that the tank has dug -up with it's tracks in the ditch. I used the MIG Productions Wet Effects for this as I had not used it before. Nice product and perfect for a built up effect with ground work but it takes a lot of layers to get it to look really wet.
I enhance some parts with Extra Color gloss varnish to 'hurry it along'. The 'stringy' debri effect was achieved by using fine roots, cut off weeds from my garden. I wash the dirt off and soak them in a white glue and water solution. When they are dry i cut them to the desired lengths and stick them to the track using the mud mix and a white glue called Tiger glue.They then get painted along with everything else
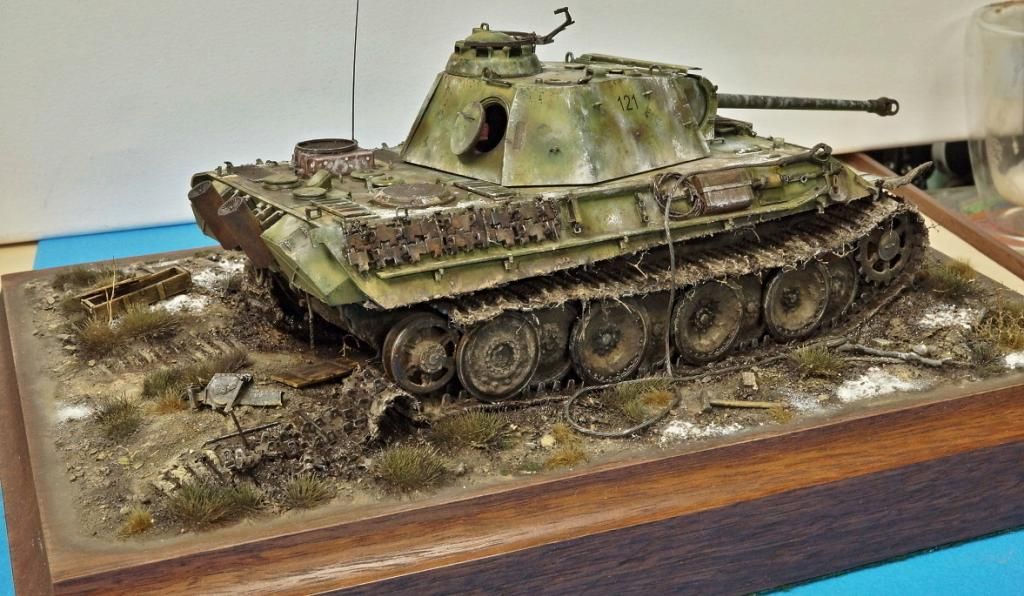
This shot is focusing on the rear of the scene, but specifically on the jack. I had to modify the storage clamp on the rear plate (between the exhausts) to be in the open position, as well as model the jack in the used state. This was easy with the excellent Jack that Dragon provides - you get a choice.
Also notice the remains of a damaged chain at the end of the Tow pintle handle that used to be attached to the rear plate when the tank rolled out of the factory .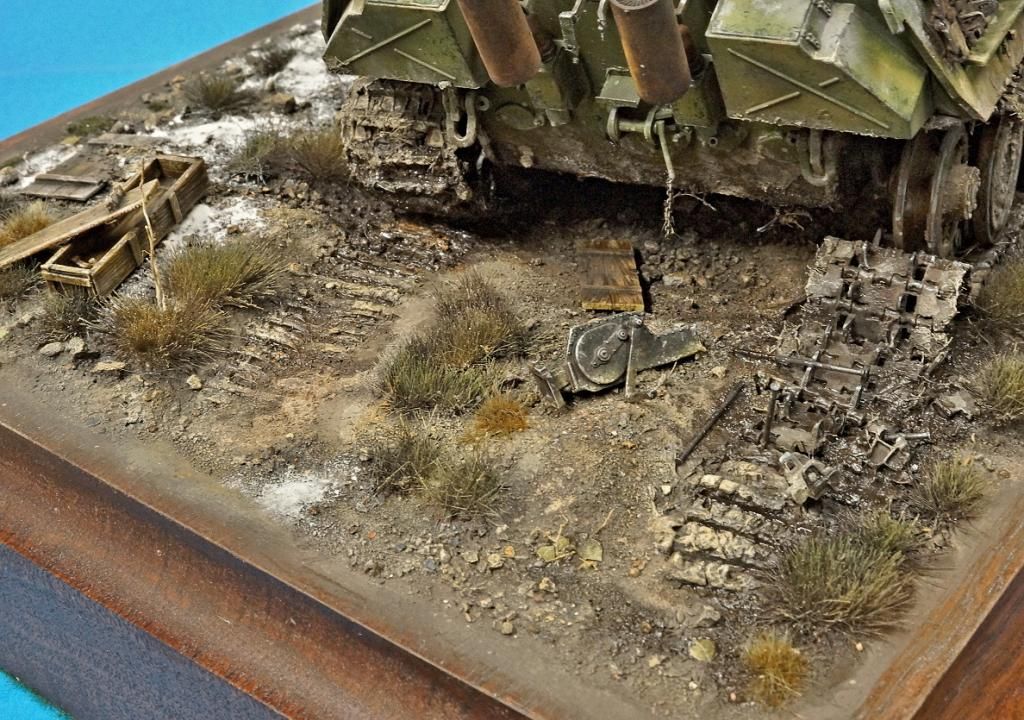
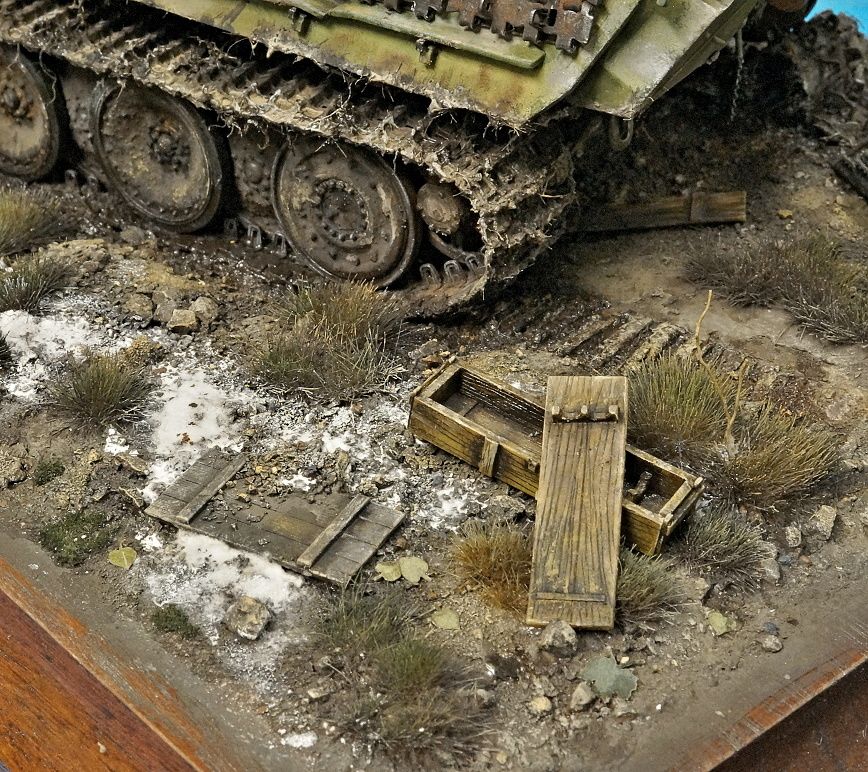
The boxes are from the Tamiya Panther ammo set and are done in the same way as James does his wood for the ww1 planes using oils. There are also a few different types of leaves around the base from Plusmodel.
The snow effect was done with VLS Snow Flakes, mixed with MIG pigment fixer and MIG Ashes White pigment. I did the lighter frosty effect with white oil paint. The mix needs to be the same as if it were slushy snow so just keep adding until it feels the same (see photo).
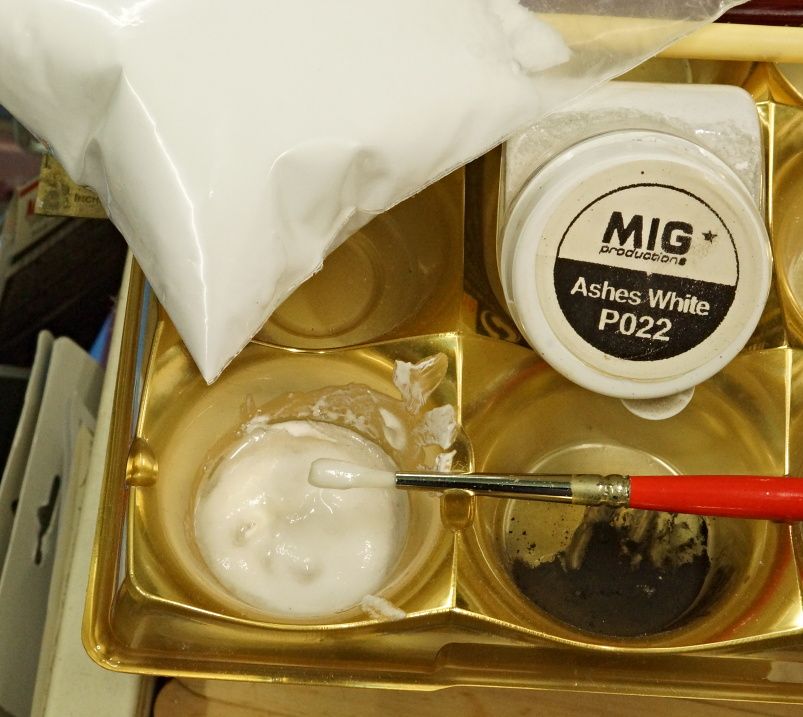
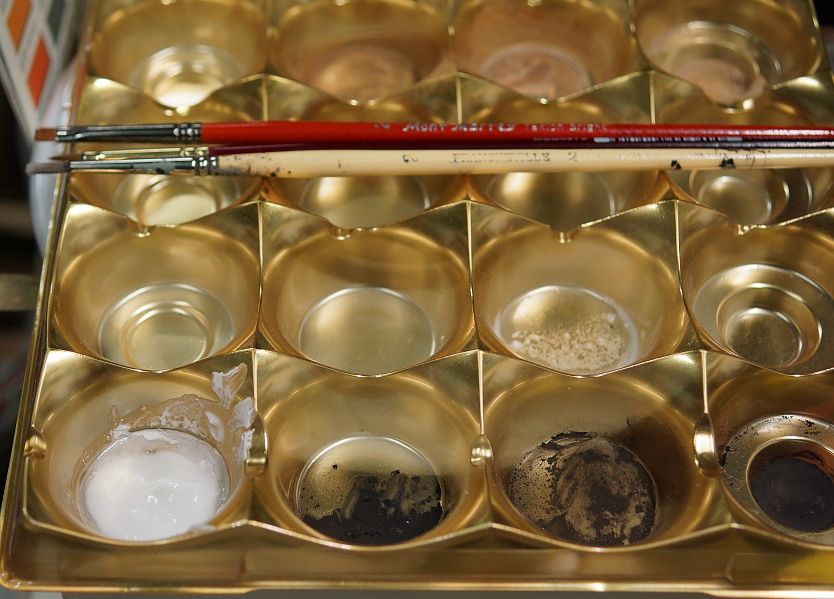
Nothing like a chocolate tray for pigment preparation - thank you Xmas. :laugh:
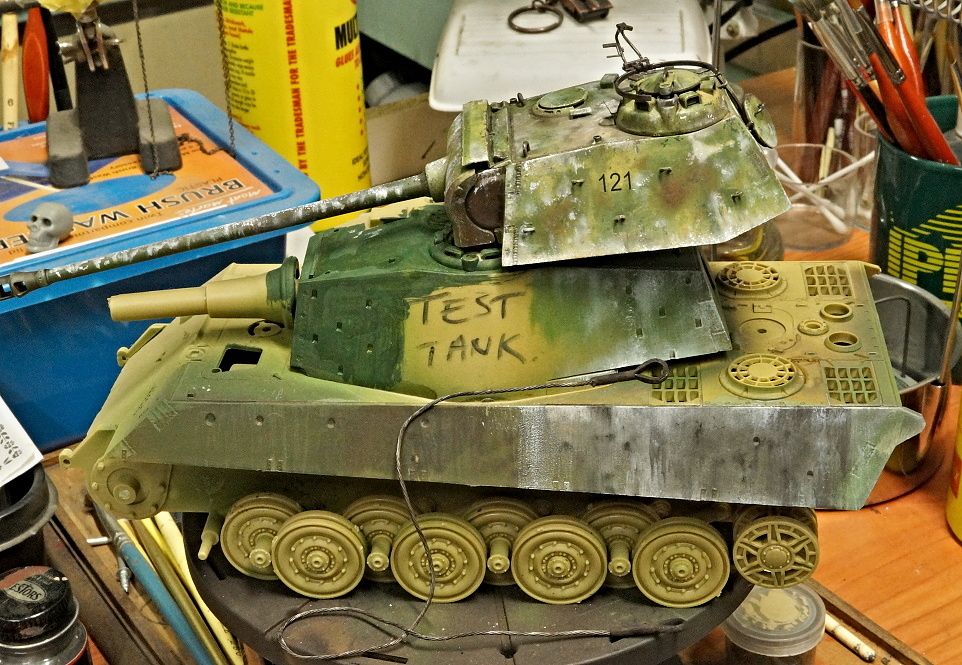
The test tank continued to get a 'beating' at every stage as well!
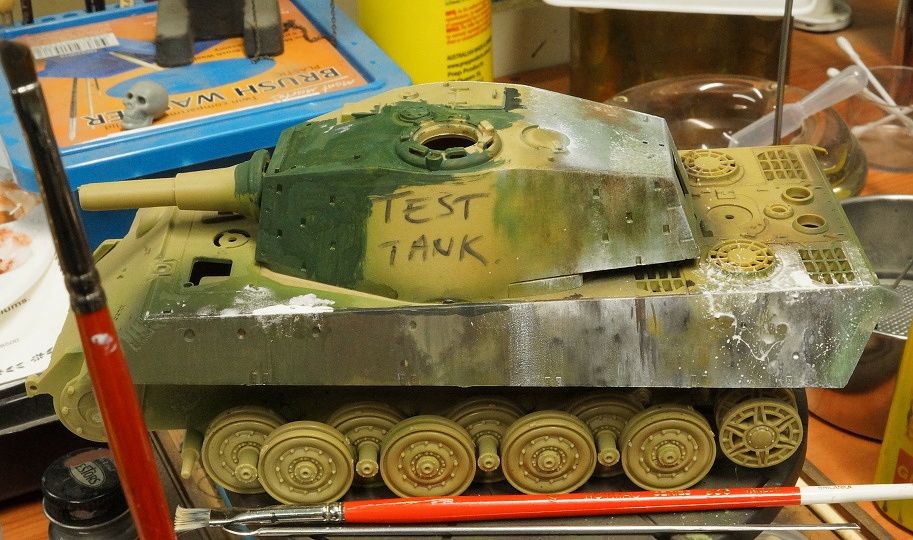
A nice comparison of a turret with flat paint and a finished one - what a difference a paint job makes.
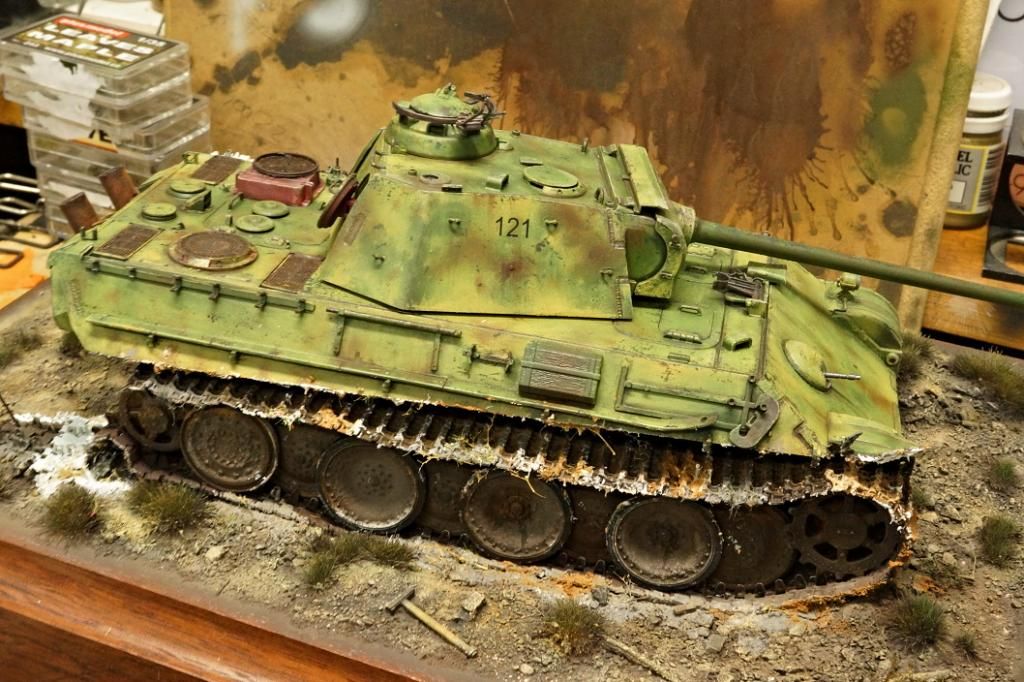
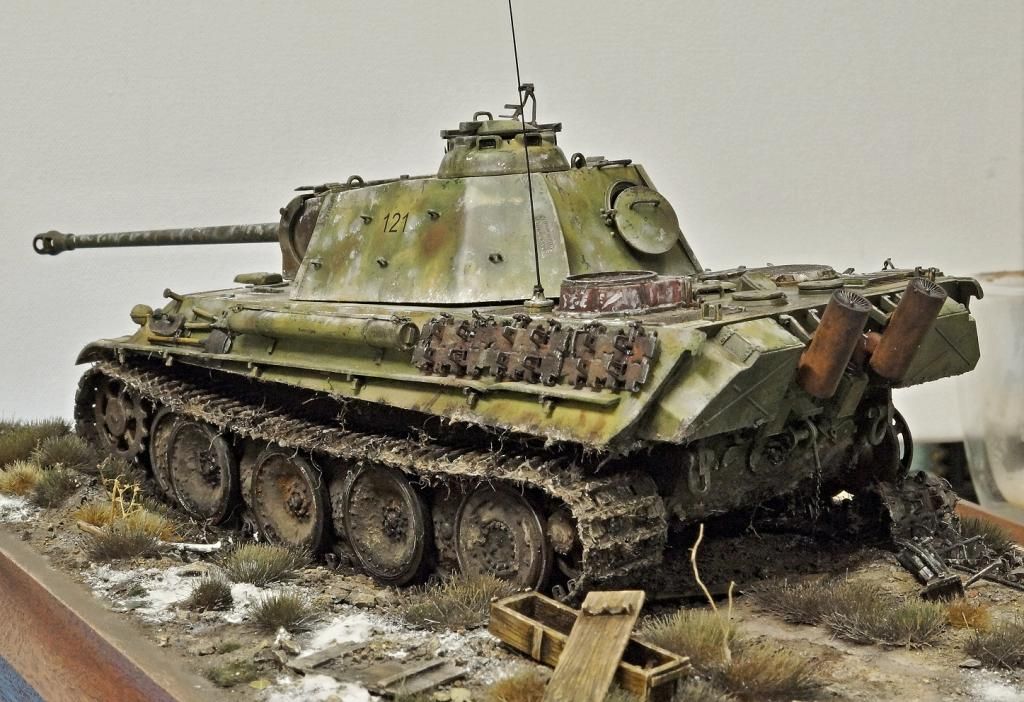
A lot of the 'wearing winter cammo' was done with a brush and oils but some sections need a 'sharper edged look' so I used a scrubbing pad gently dipped in tacky white oil paint followed up with a pigment pin wash of Ashes White.
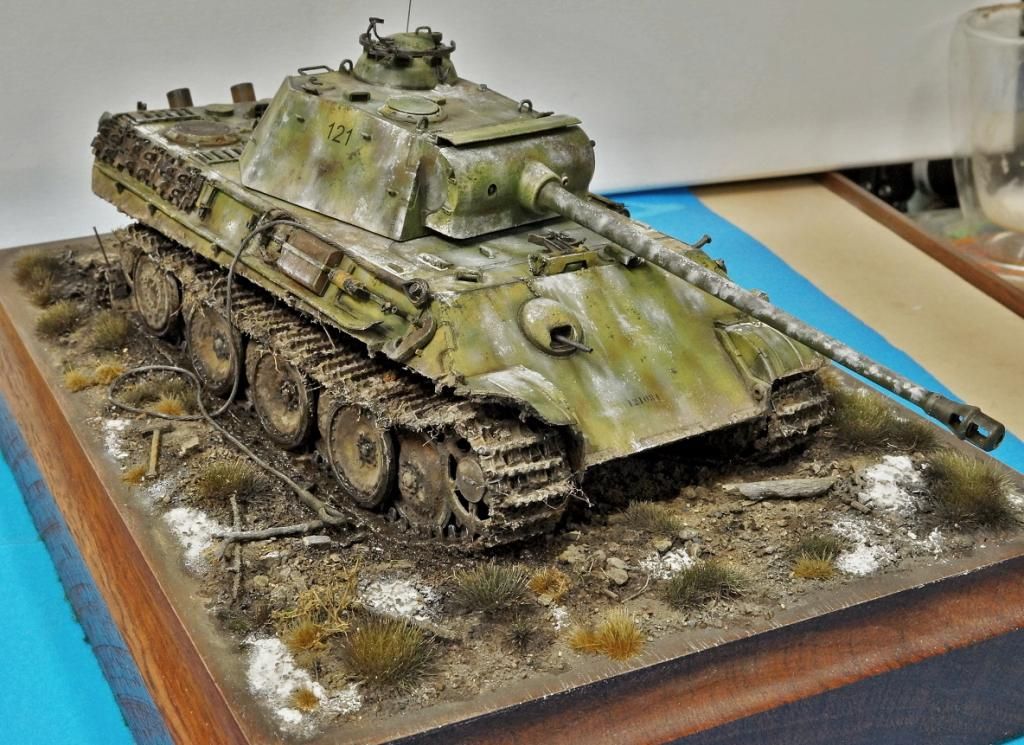
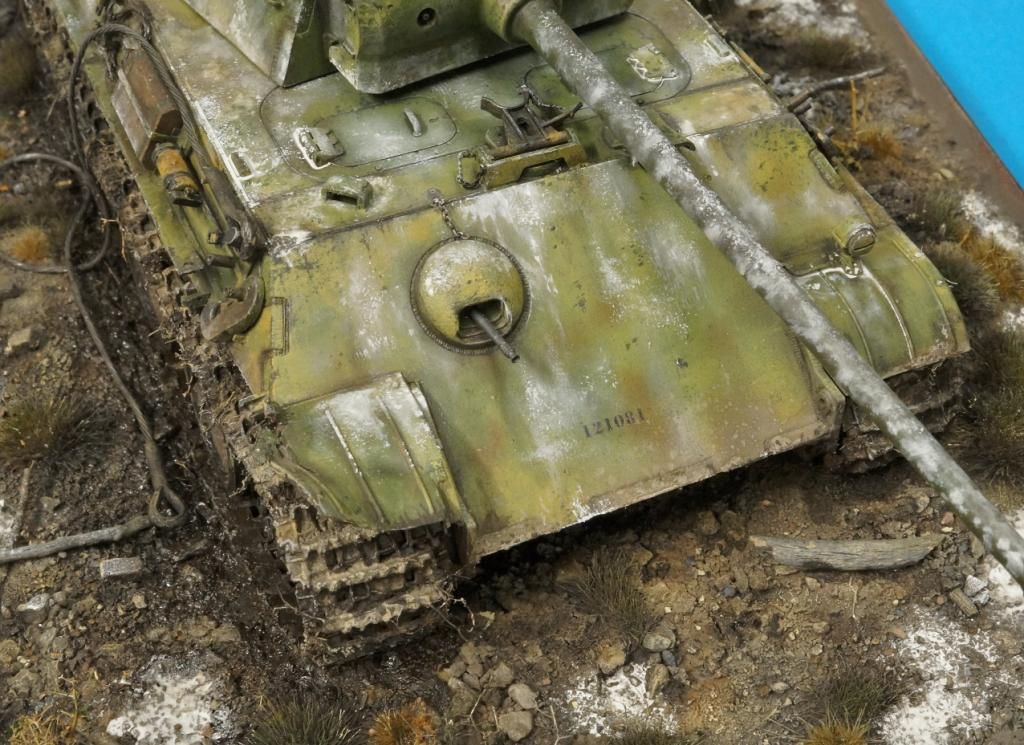
I also added the Chassis number to the front plate as seen on some late panthers (Archer decal set - Panther D & G exterior stencils AR 35350).
A chain and handle were added to the barrel clamp mounting left side as well.I used Archer for the stencils on the barrel cleaning rod container too - you can see them if you look hard in one of these photos.
I also added the remains and attachment for the front mg Ball mount weather cover. You can also see to the left a good example of the white pigment pin wash, and in the centre the remains of a dark yellow paint layer on the barrel clamp mounting.
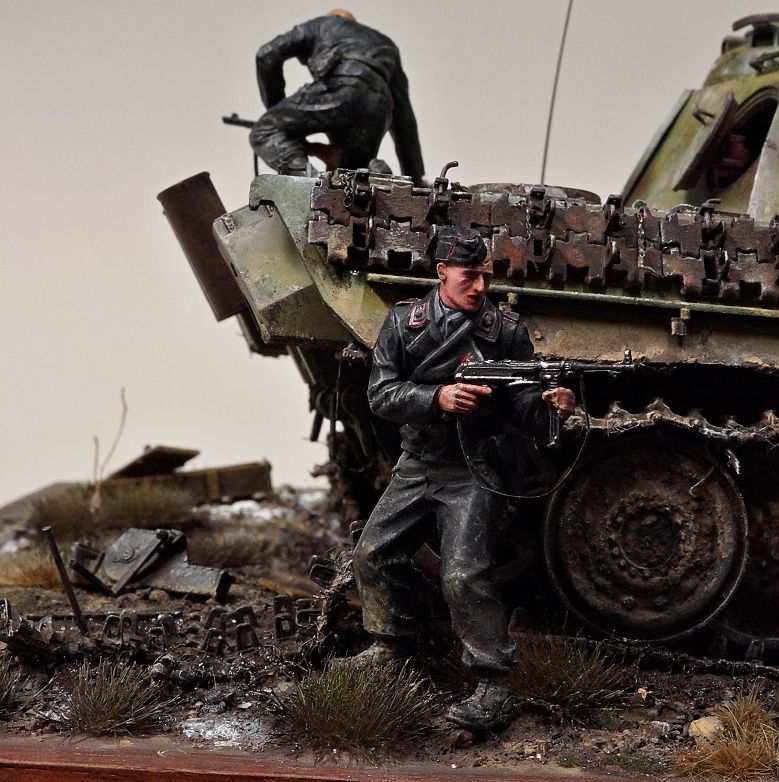
This shot shows the wearing winter cammo as well as the use of chains on the spare track links to hold the retaining pins.
The cable is real steel wire fed into the drilled -out Dragon tow cable ends.
I personally like the effect of the worn dark yellow on the extinguisher and the clamps.
If you like the look of the empty clamps then you will be pleased to know these are the easy way out - no PE - just cut up the Dragon tools to leave the clamps, sand the edges, genlty file out the centre handle hold to make it slightly larger and paint the sides black brown.
See you again in a little while with figures and more technical history about this battle and the tank.
Ian.
Oh man I love it. Ian you put so much detail that it's easy to over look the craftsmanship involved. Having the tools laid about as if they were trying to repair the track really builds the story being shown.
Brokeneagle
Master at Arms
Thanks Ron appreciate that!
Brokeneagle
Master at Arms
Oh man I love it. Ian you put so much detail that it's easy to over look the craftsmanship involved. Having the tools laid about as if they were trying to repair the track really builds the story being shown.
Thanks MP
I suppose that what it is really all about - the base allows a simple story as an exstension to the model and brings it to life I think.
I hope the figures come out OK - it's been about 3 years since I painted a 35 scale figure.
Ian.
Brokeneagle
Master at Arms
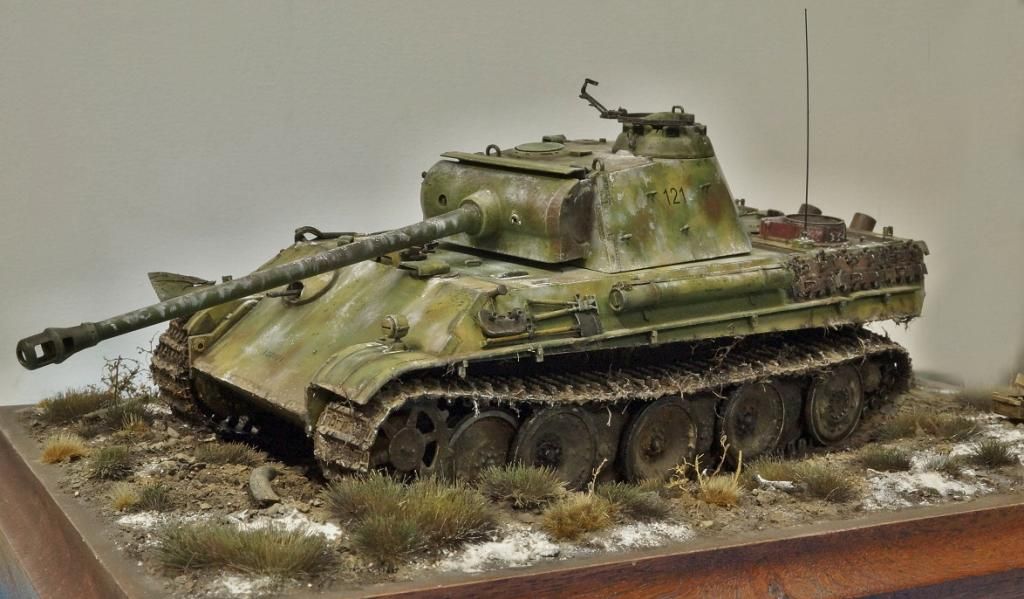
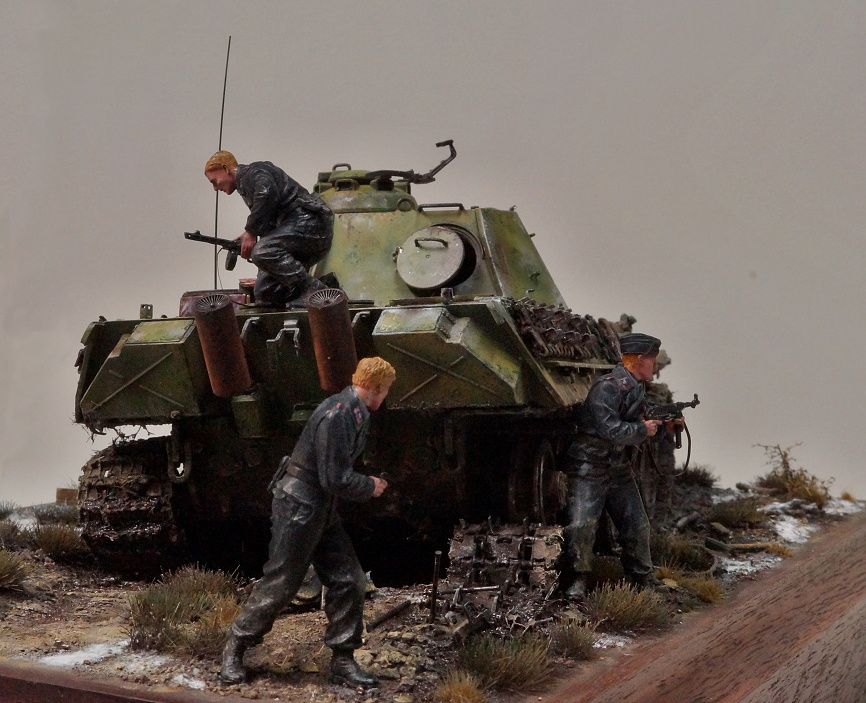
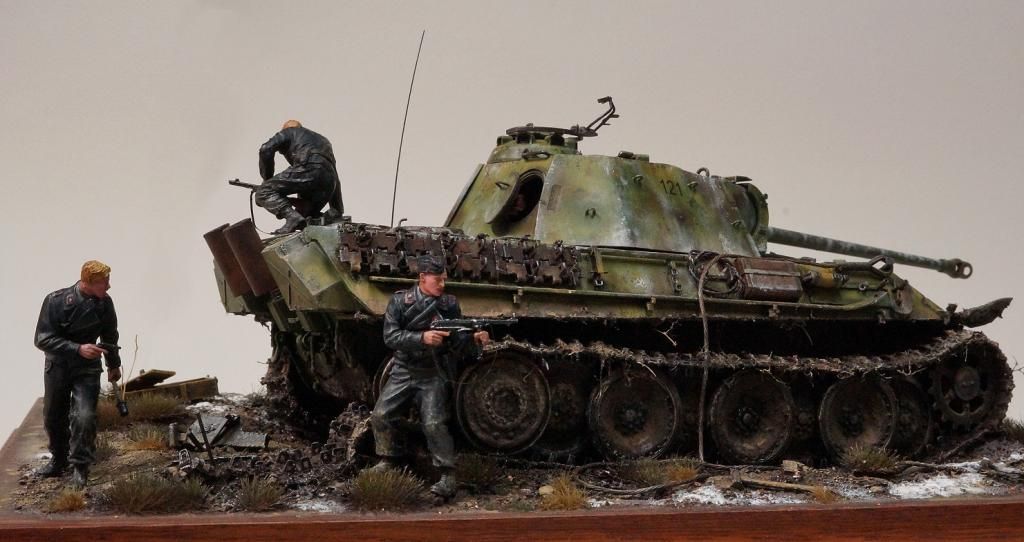
BATTLE BLOG # 2 -LSSW PANTHER G finished
Hello everyone, hope your modelling has been going well.
I have completed my figures and made the last touch-ups to the tank and ground work.

Hello everyone, hope your modelling has been going well.
I have completed my figures and made the last touch-ups to the tank and ground work.
AndyFettes
Master at Arms
Simply brilliant Ian
That's a show stopper for sure Ian. Great job
Similar threads
- Replies
- 39
- Views
- 13K
- Replies
- 4
- Views
- 2K
- Replies
- 120
- Views
- 36K