
Greg Kimsey
Well-known member
I had thought to continue the first Scout thread with this second one, but decided to give it its own since I think it is going to be different in many ways.
Follow this link to Scout II#1...https://modelersalliance.org/threads/amt-international-scout-ii.157157/
My plan is to make the hinges far more durable since I think the hinges in the first one are very delicate and will break off easily.
I am using a new way (for me) to make the hinges. Normally folks use a metal rod that fits into a tube, then solder a strip of metal to the section of tube that glues to the model. My soldering is better but still not great so I have started bypassing the tube and make a loop in the metal sheet and wrapping it around the rod so there is no chance of the solder joint failing. I solder the loop closed.

I was going to use the same door hinges as before which were like this.

And after watching some videos I am going with this style of hinge which allows the door to open more closely to the real thing..

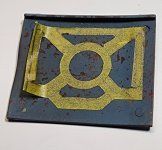
The hood detail will be the same as the first one and starts with a tape

template
The rear seat will be hinged a little differently


The doors need filler so I am using various thickness of styrene depending on how strong it needs to be. I had to trim down the inner door panel, which was oddly enough larger than the door panel. The hinged side has .08" styrene into which I will cut slots for the two hinge flaps so it needed to be thicker than the other parts.

That is really all I have so far. Oh, by-the-by, I have ordered a Phrozen 8K Resin 3D printer, so my plan is to try and 3D print the missing engine components! Stay tuned for that.
Here is the body painted and weathered

Follow this link to Scout II#1...https://modelersalliance.org/threads/amt-international-scout-ii.157157/
My plan is to make the hinges far more durable since I think the hinges in the first one are very delicate and will break off easily.
I am using a new way (for me) to make the hinges. Normally folks use a metal rod that fits into a tube, then solder a strip of metal to the section of tube that glues to the model. My soldering is better but still not great so I have started bypassing the tube and make a loop in the metal sheet and wrapping it around the rod so there is no chance of the solder joint failing. I solder the loop closed.
I was going to use the same door hinges as before which were like this.
And after watching some videos I am going with this style of hinge which allows the door to open more closely to the real thing..
The hood detail will be the same as the first one and starts with a tape
template
The rear seat will be hinged a little differently
The doors need filler so I am using various thickness of styrene depending on how strong it needs to be. I had to trim down the inner door panel, which was oddly enough larger than the door panel. The hinged side has .08" styrene into which I will cut slots for the two hinge flaps so it needed to be thicker than the other parts.
That is really all I have so far. Oh, by-the-by, I have ordered a Phrozen 8K Resin 3D printer, so my plan is to try and 3D print the missing engine components! Stay tuned for that.
Here is the body painted and weathered
Attachments
Last edited: