• Modelers Alliance has updated the forum software on our website. We have migrated all post, content and user accounts but we could not migrate the passwords.
    This requires that you manually reset your password.
    Please click here, http://modelersalliance.org/forums/login to go to logon page and use the "Forgot your Password" option.

All Righty ... What's on the bench today?

Paddy, I cut short lengths of tubing in my bandsaw. I avoid losing the cut bits by not quite cutting all the way through, and then breaking off the cut part. There is also the plastic Micro Tubing, that's what I have used on rigging to simulate turnbuckles. Never mind the PLine box, it was just there to prop up the line in the picture. There is also a Midge tubing, I think it is smaller. Hareline Dubbin is the supplier,
https://www.hareline.com/


0181dh9a.png
 
Thanks john
at the moment i am trying again with brass tube with a length of piano wire inside so it doesn't collapse when you roll it.,
I think i have found a way to get the length consistent.
plastic or rubber would be idea but it may be imposable to feed a fishing line through it twice as its not a smooth surface inside.

End of the day Bobs Buckles can part off lengths of brass tube with a clean cut so i should be able to do it as well :-(
 
Paddy, I was able to get EZLine though the tubing once without too much difficulty. But I just had a thought that heat shrink tubing might also work if I don't melt the model. I'm sure your hands are steadier than mine so you should be able to do it if you so choose. I did a series of posts on my build log for the DH-9A on rigging, here is a link to the page where that part starts. The rigging material here is actually heavier than EZLine and I got it from a supplier recommended by WNW.

http://goldeneramodel.com/mymodels/dh9a/1dh9a/0401dh9a.html
 
Last edited:
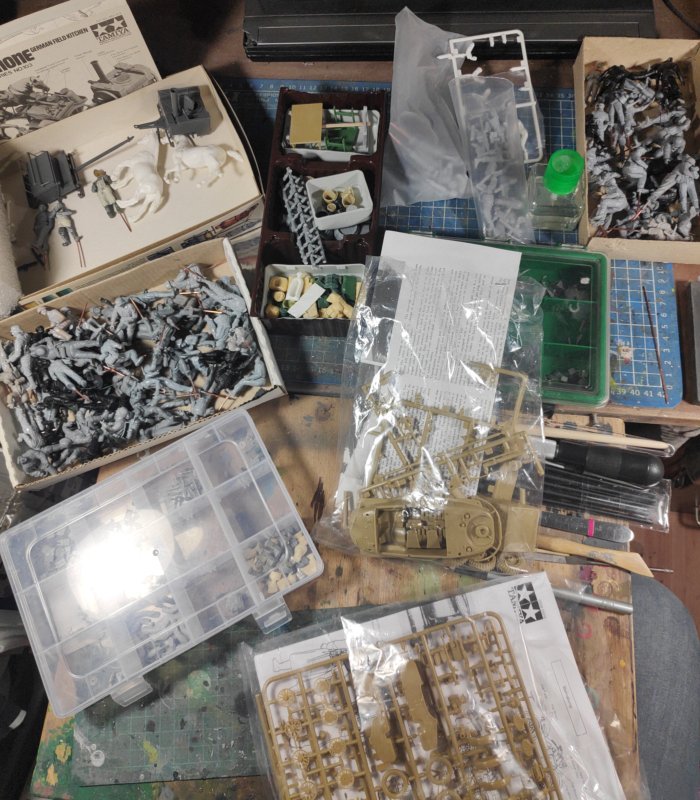
on the table? This!
Making-Of-003.jpg

Some many moons ago I bought several started figures, a Schwimmwagen, two BMW, a Gulaschkanone, a Kübelwagen and several other stuff in 1/35. It is partly build and some is primed.

I will not use all of this, but I'll do a dio with some out of this. At the moment the starting idea is: several different Germans from different parts meet at a point to get something to eat and have a break. Location will be somewhere in France, Russia, not sure in Autumn - I don't know yet.
 
This where i am with rigging.

_DSC8047.jpg


Forgive me if i junk the stupid metric system but this is .024" tube with .015" bore
By putting some .015" piano wire in the tube it looks like i can cut the tube by rolling it under a scalpel blade without collapsing the bore.
The line is .0065" so i can double it up in the bore of the tube and the wire loop is .0 .008" wire.

I think this will work in 1/32 scale as for example the line is 6.5 thou and x32 thats a "cable" thickness of .2" or 5mm ?

the only issue i can se is that the DH2 seems to have various thickness of rigging all over but as pictures are few and far between and there doesn't seem to be any originals left who knows :)
 
Okay to cut the tube for your turnbuckles just roll the tube and score with a new blade in your knife, riding it lightly. You can then snap the tube off and it will be sharp and not crimped. I have a tool a fellow modeler made with grooves in it and cut lines to a particular legnth. You could easily make one with some bass wood. I'll post a picture when i get home. If you are looking for the wire size for the rigging lines i would say Wing Nut Wings is a good resource. They still have the instructions up and ref photos. http://www.wingnutwings.com/ww/v98C..._instructions/32028 AMC DH.2 instructions.pdf
1699995623101.png

1699995663387.png

Hope this helps some.
James
 
Thanks James that's excellent, silly thing is i downloaded the instructions from Scalemates and never thought to look there for the rigging :)
 
Thanks Paul, had a few mis-fires recently so have gone back to my roots with what i know. Cant go to far wrong with a motorcycle.
 
Quite a while ago I started this

Making-Of-001.jpg


That's the Smer box of an 1/50 Ansaldo S.V.A. 5 made by Artiplast back in 1975

Making-Of-002.jpg


OK, the blob that shoul be the pilot is a bit too much plastic all around but then the overall looking of the plane is there and details, well for most of them you have to get creative. The transparencies - OK that one piece is packed seperately, something you dont find in every kit.

The decal options give a wide selection of possible paintings - all russian green on upper sides and light blue on under sides. I sometimes wonder how a group of revolutionaries with so much imagination could win the revolution in Russia. But maybe that was the reason... green over blue and a red star.

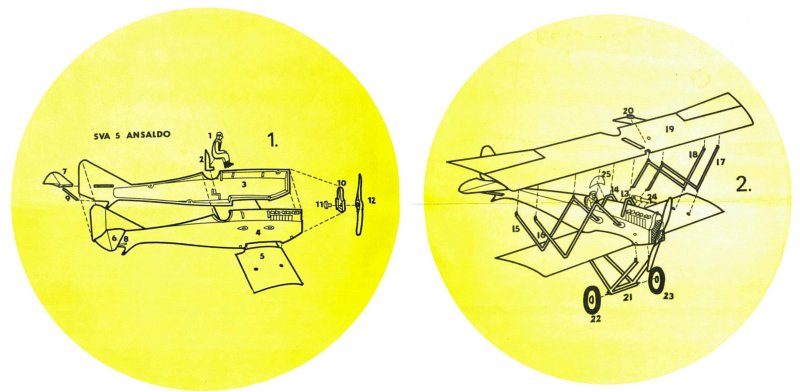
But then, if you follow the instructions, it is an easy build with only two steps

Making-Of-005.jpg


and it shows the glory of the cockpit.

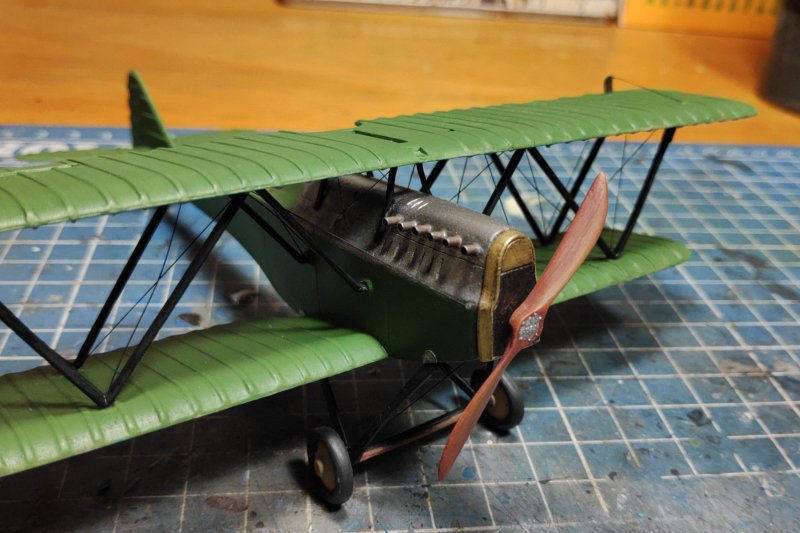
So after some weeks I'm now here

Making-Of-006.jpg

Making-Of-007.jpg


so, some more days, weeks ...
 
Back
Top