mustang1989
Well-known member
Man......you make this stuff look aaaaaaaaaaalllll too easy Paddy!!

Modelers Alliance has updated the forum software on our website. We have migrated all post, content and user accounts but we could not migrate the passwords.
This requires that you manually reset your password.
Please click here, http://modelersalliance.org/forums/login to go to logon page and use the "Forgot your Password" option.

")

"Request a quote" translate to "If you have to ask, you can't afford".How deep are your pockets Paddy??
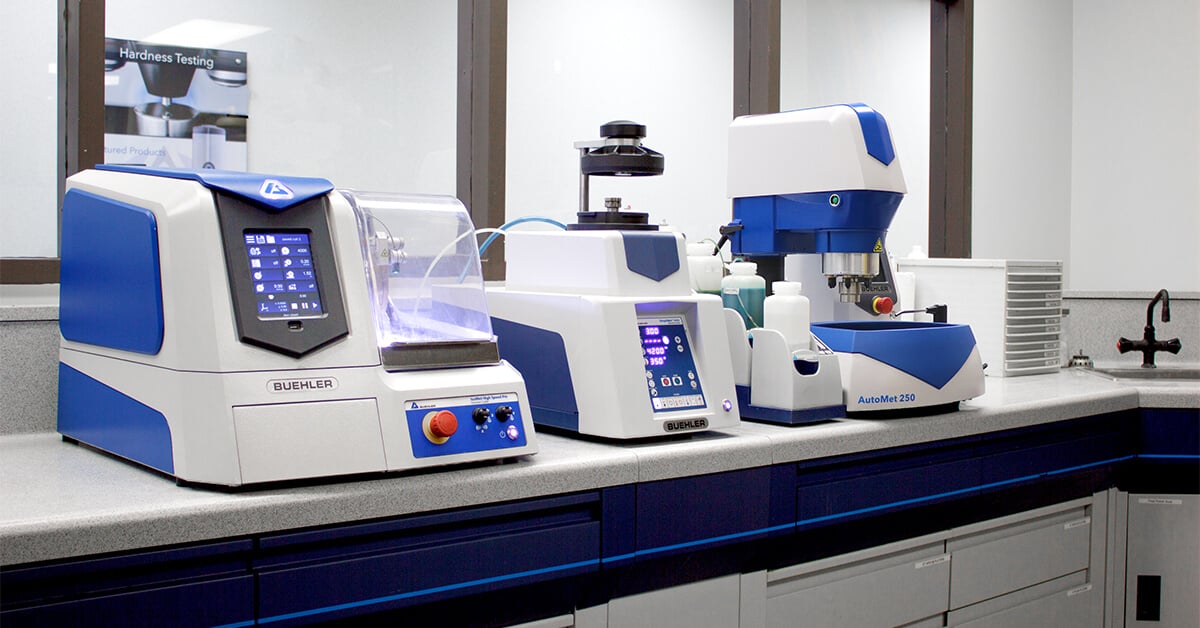
I can attest that one of these would work great!
IsoMet Low Speed Precision Cutter - Buehler - Metallography Equipment & Supplies for Sample Preparation
IsoMet Low Speed Precision Cutter precision sectioning saw designed for cutting various types of material with minimal deformation by using gravity fed force.www.buehler.com
Seriously though, maybe something like a Dremel?
Which kit and scale?I am going to play a little game with you. You can participate or not, its up to you. But here is my next build.
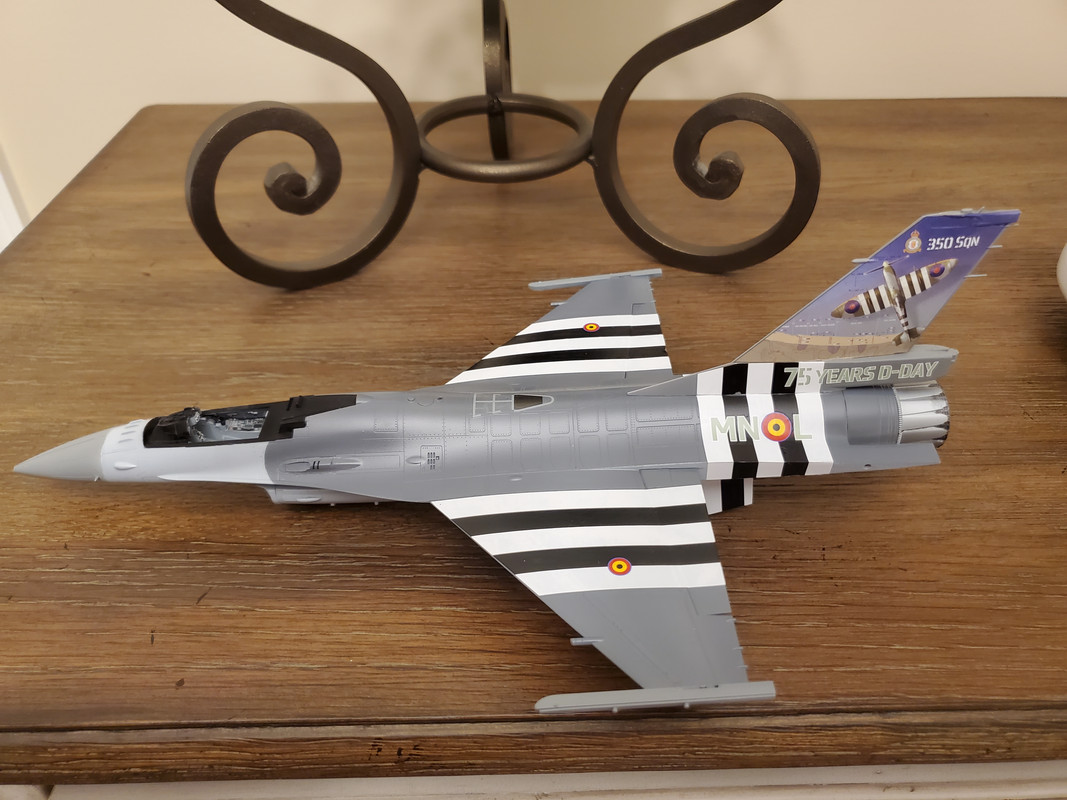
Tamiya 32Which kit and scale?
View attachment 163404
 On the bench today as i type ,