-
Modelers Alliance has updated the forum software on our website. We have migrated all post, content and user accounts but we could not migrate the passwords.
This requires that you manually reset your password.
Please click here, http://modelersalliance.org/forums/login to go to logon page and use the "Forgot your Password" option.
You are using an out of date browser. It may not display this or other websites correctly.
You should upgrade or use an alternative browser.
You should upgrade or use an alternative browser.
All Righty ... What's on the bench today?
- Thread starter panzerace007
- Start date
Nice colors! 

Heavens Eagle
Well-known member
My bench is in clean up and redo mode at the moment. Been cleaning up around the house and this weekend I worked on the garage so I could sand down and repaint some old watch crystal cabinets. One I used for hobby stuff years ago and it had been in storage for a long while. The other is about 12 inches square and about 50 inches tall. It will be mostly for paint and other odds and ends.
Time to get things reorganized and decluttered. Will be a bit before getting back to the bench as I have a number of things to deal with.
Time to get things reorganized and decluttered. Will be a bit before getting back to the bench as I have a number of things to deal with.
Heavens Eagle
Well-known member
That's actually part of the reason I am doing this. Everything has gotten so scattered that I am having problems finding stuff now. :idonno
Duke Maddog
Well-known member
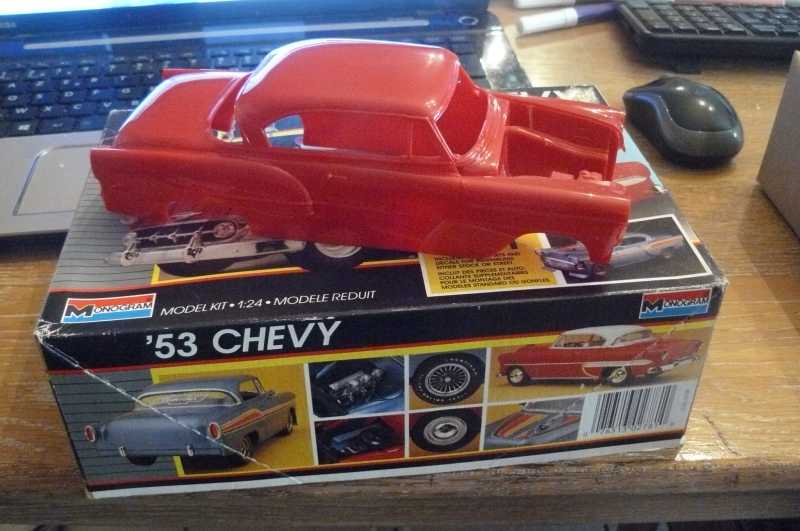
Mats, that Chevy is looking great so far! Keep it coming!
Paul, I know how you feel about the need to clean up. I'm getting there soon myself. It's amazing how quickly things get so cluttered again.
Paul, I know how you feel about the need to clean up. I'm getting there soon myself. It's amazing how quickly things get so cluttered again.
Duke Maddog
Well-known member
Hobby Day weekend was good to me this month. I was able to get a lot more done than I expected to.
I'll start with my aircraft.... or more accurately, my helicopters. I managed to get the rotors painted up and ready for installation. You can also see that metallic piece to the lower right; that is the main gun for one of them (the US Army one):

Later on, I added the main gun to the Israeli helicopter:

Later on, I dullcoated these two Cobras, removed the window masking and re-added the skids to the Israeli one. I also found a couple places on the Israeli one that still needed some filler, so I added Mr. Surfacer 500 to those spots:

All I need to do is sand and re-paint those fixes, add the rotor blades, the ordinance and some of the detail parts and these birds will be done. My next post should see these completed.
Next up is some work I did on the two Tomcats I'm doing for a review build.
It was time to add the decals to the other cockpit now. These are the decal parts that all had to be added to this cockpit. The majority of them are for the instrument panels alone:

Here are the decals added to the cockpit side panels:

These went on very well and stayed in place nicely. I did notice that these weren't cut to the shape of the side panels either, but with some simple adjustments, I got them to fit well enough.
Here are all the little decals on the instrument panels. It was a challenge getting them all on without messing up the ones placed before. The trick is to start in the center bottom and work your way up and out. These had just been hit with Solvaset so they hadn't yet sucked down into the details when this pic was taken:

Here is a shot of the two cockpits side by side so you can see the differences between the P/E set and the decals. You can see that I dry-brushed a white on the P/E parts to bring out the details:

One thing I realized later was that I had forgotten to put in a piece behind the front pilot's seat on each of these cockpits. I did try to pull the seats out but I had glued them in too tightly to remove them. Here are the cockpits next to the piece I forgot to install:

We shall see whether that will make a major difference or not once everything is put together and covered with the canopy.
Moving on, I then assembled the front gear bay and cemented it to the cockpit tubs. Afterward I installed these sub-assemblies into one side of the forward fuselage. The instructions call for 5 grams of weight to be placed inside the nose cone, but since I don't have a scale; I'm supplementing the weight inside the nose cone with the additional weight in front of the cockpit as seen here:

I then closed up the two fuselage halves on each one. You can see on the P/E cockpit that I was correct; the incorrectly cut P/E on the side consoles did make the two halves difficult to close:

With some extra pressure and clamps, I was able to close it up sufficiently and will hopefully not have a seam at all. Looking inside; it appears the P/E was not dislodged or damaged in any way. Here are both cockpits closed up inside the forward fuselage halves; the P/E one has more clamps on it:

Later on I'll add the P/E ejection seat pull handles, paint them and then close the canopy down over these to protect those P/E pieces. I will also probably mask them afterward with some liquid mask to prepare this early for paint.
That's all I have for now on this.
Now on to my autos and other vehicles.
First off, I finally put an Oily Black wash on the Monkeemobile engine components. I was hoping to find my black wash also but I need to mix some new:

I wanted to make these parts look as if the car was used. After this, I masked off the windshield frame and painted it Chrome Silver, along with the hood tie-downs:

That's as far as I got with that so far. I hope to get more done on this soon.
Since I was working on my cars, I had re-shot a white coat on the Mach 5, then clearcoated it after it was dry. I then dipped the windscreen and headlight covers in Future to make them more clear and clean:

While those were drying, I pulled out the decals and applied them to the Mach 5:


Later on I'll seal these decals and then I can move forward on this car again.
Finally, I pulled out the red that I had and shot it on the underside frame and suspension units of the three Borax wagons from the 20-Mule Team model. Here's the first wagon:


The second wagon:


...and the water wagon:

The tank isn't cemented down to that; this is why I was able to get such a clean spray on this. The other two wagons didn't have a separate frame to keep the box separated so I just shot it like you saw. I'll just have to mask them off later when I'm ready to shoot the blue coat. I do need to find out what blue color these should be.
That's all I have on those.
Now for my armor.
At Hobby Day I helped my friend Harmon build up a 1/48 scale Tamiya Sherman Firefly for an upcoming game convention. This tank will be used in a battle during a Bolt Action tabletop war game. Here it is after a couple hours of assembly ready for paint:

After that, I wanted to get further along on my T-14 Armata tank. It was time to finally get those P/E RPG screens completed. After three and a half hours; here are the two screens ready to go:

Each one of those is about an inch and a half long and each one of those slats had to be installed individually. There goes even more of my rather scarce hair.
After that ordeal the rest of the P/E on the hull and turret was easy. Here's the start of the P/E parts on the hull:

Later I finished up all the P/E (except the screens) on the hull:

Next was adding all the remaining details and P/E to the turret. The first few pieces are here:

Then I finished off with the rest of them along with the machine gun mount:

There are still a few more detail parts to put on the turret but I'll wait until after this is painted and weathered to reduce or eliminate the chance of breakage.
This is starting to look fairly impressive! All I have to do now is add the tracks on the one side and then I can prime this before painting it:

That's all I have for now. I have this week off for Easter so I will have more done to show later. I might even have something finished by then too.
Stay tuned, more to come.
I'll start with my aircraft.... or more accurately, my helicopters. I managed to get the rotors painted up and ready for installation. You can also see that metallic piece to the lower right; that is the main gun for one of them (the US Army one):

Later on, I added the main gun to the Israeli helicopter:

Later on, I dullcoated these two Cobras, removed the window masking and re-added the skids to the Israeli one. I also found a couple places on the Israeli one that still needed some filler, so I added Mr. Surfacer 500 to those spots:

All I need to do is sand and re-paint those fixes, add the rotor blades, the ordinance and some of the detail parts and these birds will be done. My next post should see these completed.
Next up is some work I did on the two Tomcats I'm doing for a review build.
It was time to add the decals to the other cockpit now. These are the decal parts that all had to be added to this cockpit. The majority of them are for the instrument panels alone:

Here are the decals added to the cockpit side panels:

These went on very well and stayed in place nicely. I did notice that these weren't cut to the shape of the side panels either, but with some simple adjustments, I got them to fit well enough.
Here are all the little decals on the instrument panels. It was a challenge getting them all on without messing up the ones placed before. The trick is to start in the center bottom and work your way up and out. These had just been hit with Solvaset so they hadn't yet sucked down into the details when this pic was taken:

Here is a shot of the two cockpits side by side so you can see the differences between the P/E set and the decals. You can see that I dry-brushed a white on the P/E parts to bring out the details:

One thing I realized later was that I had forgotten to put in a piece behind the front pilot's seat on each of these cockpits. I did try to pull the seats out but I had glued them in too tightly to remove them. Here are the cockpits next to the piece I forgot to install:

We shall see whether that will make a major difference or not once everything is put together and covered with the canopy.
Moving on, I then assembled the front gear bay and cemented it to the cockpit tubs. Afterward I installed these sub-assemblies into one side of the forward fuselage. The instructions call for 5 grams of weight to be placed inside the nose cone, but since I don't have a scale; I'm supplementing the weight inside the nose cone with the additional weight in front of the cockpit as seen here:

I then closed up the two fuselage halves on each one. You can see on the P/E cockpit that I was correct; the incorrectly cut P/E on the side consoles did make the two halves difficult to close:

With some extra pressure and clamps, I was able to close it up sufficiently and will hopefully not have a seam at all. Looking inside; it appears the P/E was not dislodged or damaged in any way. Here are both cockpits closed up inside the forward fuselage halves; the P/E one has more clamps on it:

Later on I'll add the P/E ejection seat pull handles, paint them and then close the canopy down over these to protect those P/E pieces. I will also probably mask them afterward with some liquid mask to prepare this early for paint.
That's all I have for now on this.
Now on to my autos and other vehicles.
First off, I finally put an Oily Black wash on the Monkeemobile engine components. I was hoping to find my black wash also but I need to mix some new:
I wanted to make these parts look as if the car was used. After this, I masked off the windshield frame and painted it Chrome Silver, along with the hood tie-downs:
That's as far as I got with that so far. I hope to get more done on this soon.
Since I was working on my cars, I had re-shot a white coat on the Mach 5, then clearcoated it after it was dry. I then dipped the windscreen and headlight covers in Future to make them more clear and clean:

While those were drying, I pulled out the decals and applied them to the Mach 5:


Later on I'll seal these decals and then I can move forward on this car again.
Finally, I pulled out the red that I had and shot it on the underside frame and suspension units of the three Borax wagons from the 20-Mule Team model. Here's the first wagon:


The second wagon:


...and the water wagon:

The tank isn't cemented down to that; this is why I was able to get such a clean spray on this. The other two wagons didn't have a separate frame to keep the box separated so I just shot it like you saw. I'll just have to mask them off later when I'm ready to shoot the blue coat. I do need to find out what blue color these should be.
That's all I have on those.
Now for my armor.
At Hobby Day I helped my friend Harmon build up a 1/48 scale Tamiya Sherman Firefly for an upcoming game convention. This tank will be used in a battle during a Bolt Action tabletop war game. Here it is after a couple hours of assembly ready for paint:

After that, I wanted to get further along on my T-14 Armata tank. It was time to finally get those P/E RPG screens completed. After three and a half hours; here are the two screens ready to go:

Each one of those is about an inch and a half long and each one of those slats had to be installed individually. There goes even more of my rather scarce hair.
After that ordeal the rest of the P/E on the hull and turret was easy. Here's the start of the P/E parts on the hull:

Later I finished up all the P/E (except the screens) on the hull:

Next was adding all the remaining details and P/E to the turret. The first few pieces are here:

Then I finished off with the rest of them along with the machine gun mount:

There are still a few more detail parts to put on the turret but I'll wait until after this is painted and weathered to reduce or eliminate the chance of breakage.
This is starting to look fairly impressive! All I have to do now is add the tracks on the one side and then I can prime this before painting it:

That's all I have for now. I have this week off for Easter so I will have more done to show later. I might even have something finished by then too.
Stay tuned, more to come.
Duke Maddog
Well-known member
Thanks for the great replies guys! That's what keeps me motivated to keep going. I even got some more work done today. I might even get something finished soon.
Here's my latest progress to date.
I was shooting clearcoat to seal the decals on the Mach 5 and I thought, why not try and gloss up the Corvette I've been building? So I shot a coat of gloss on that and set it aside:

It is still way too grainy for my taste. Gonna have to polish that up and try again.
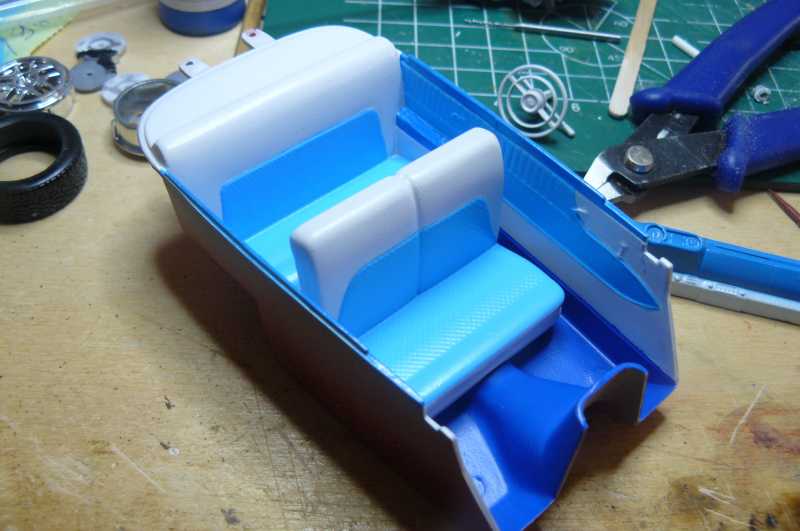
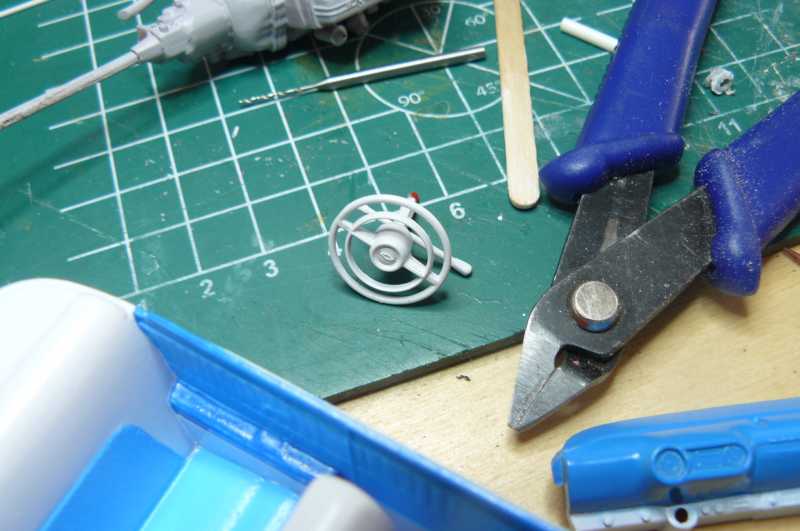
Meanwhile, since I felt like I was so close to getting done on the Monkeemobile, I decided to marathon that model. First off, I painted and detailed the dashboard and added that and the steering wheel to the interior tub:

After that, I dropped that tub into the body of the car after removing the support sprue from the windshield frame:

While that was drying, I built all the wheels and tires and then added them to the chassis:

I couldn't resist after that, I had to mock up this car to see how it was going to look. The top and the upper engine part is only dry-fit to the car:

Moving along, I pulled out the decals and got them placed on the doors:


I've since slightly messed these up due to silvering and cloudiness, but for the most part they are now fixed. They do look good so far. After they had dried sufficiently, I went ahead and installed this on the chassis and then glued on the car top. The rear side parts were a bit narrow so it took some clampage to make sure this sat right:

After that dries, I should be able to call that car finished.
One other car that I'm close to finishing is the Mach 5. On that one I assembled the wheels and tires first:

After that, I painted the underside with an Oily Black:

On the top just in front of the windshield, there is an opening for a little remote drone sensor that looks like a small bird. I lost the cover to that opening to I had to scratchbuild another one:

While that cover was drying after painting, I removed all the Silly Putty masking on the rest of the car to see how it was looking so far. She's almost done; the next pics after these will be in the finished Forums:

While waiting for parts on those cars to dry, I also worked on the two Cobras. The one Cobra got it's ordinance mounted on the stubby wings. All that is left is some detail painting and adding the last detail parts:

The other Cobra was giving me problems with the landing skids breaking again. That one still has to dry before I can add the ordinance and other detail parts to it. Because of that I didn't shoot any pics of it. Suffice it to say; both of these Cobras should be done either later today or tomorrow.
That is about all I got done so far today. Stay tuned for some finished models coming up soon.
Thanks for looking in, comments are welcome.
Here's my latest progress to date.
I was shooting clearcoat to seal the decals on the Mach 5 and I thought, why not try and gloss up the Corvette I've been building? So I shot a coat of gloss on that and set it aside:
It is still way too grainy for my taste. Gonna have to polish that up and try again.
Meanwhile, since I felt like I was so close to getting done on the Monkeemobile, I decided to marathon that model. First off, I painted and detailed the dashboard and added that and the steering wheel to the interior tub:
After that, I dropped that tub into the body of the car after removing the support sprue from the windshield frame:
While that was drying, I built all the wheels and tires and then added them to the chassis:
I couldn't resist after that, I had to mock up this car to see how it was going to look. The top and the upper engine part is only dry-fit to the car:
Moving along, I pulled out the decals and got them placed on the doors:
I've since slightly messed these up due to silvering and cloudiness, but for the most part they are now fixed. They do look good so far. After they had dried sufficiently, I went ahead and installed this on the chassis and then glued on the car top. The rear side parts were a bit narrow so it took some clampage to make sure this sat right:
After that dries, I should be able to call that car finished.
One other car that I'm close to finishing is the Mach 5. On that one I assembled the wheels and tires first:

After that, I painted the underside with an Oily Black:

On the top just in front of the windshield, there is an opening for a little remote drone sensor that looks like a small bird. I lost the cover to that opening to I had to scratchbuild another one:

While that cover was drying after painting, I removed all the Silly Putty masking on the rest of the car to see how it was looking so far. She's almost done; the next pics after these will be in the finished Forums:

While waiting for parts on those cars to dry, I also worked on the two Cobras. The one Cobra got it's ordinance mounted on the stubby wings. All that is left is some detail painting and adding the last detail parts:

The other Cobra was giving me problems with the landing skids breaking again. That one still has to dry before I can add the ordinance and other detail parts to it. Because of that I didn't shoot any pics of it. Suffice it to say; both of these Cobras should be done either later today or tomorrow.
That is about all I got done so far today. Stay tuned for some finished models coming up soon.
Thanks for looking in, comments are welcome.
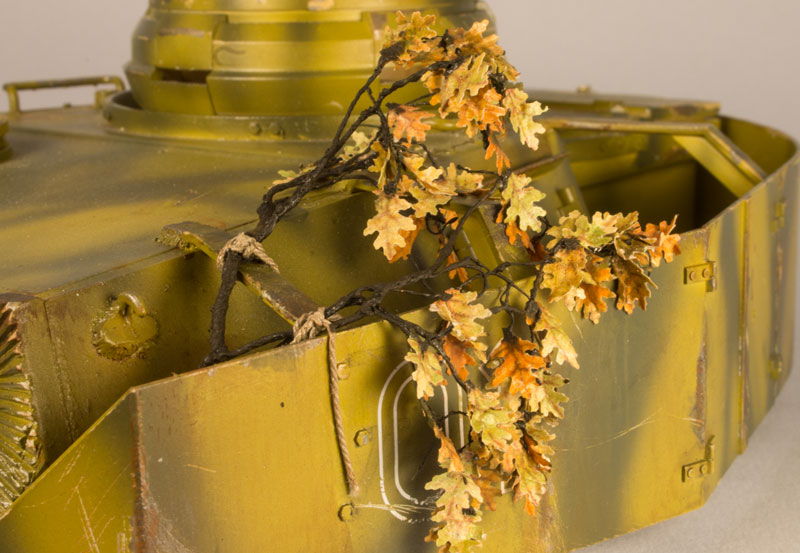
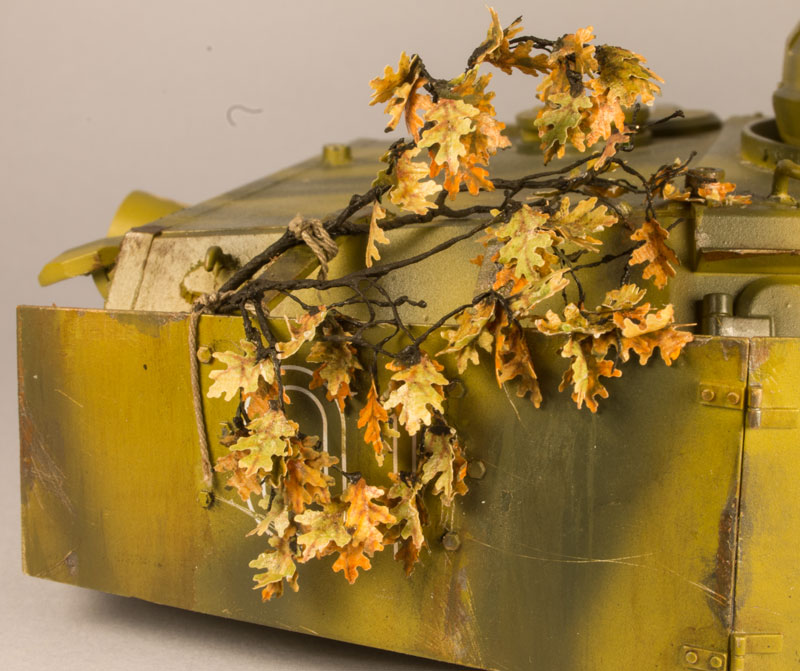
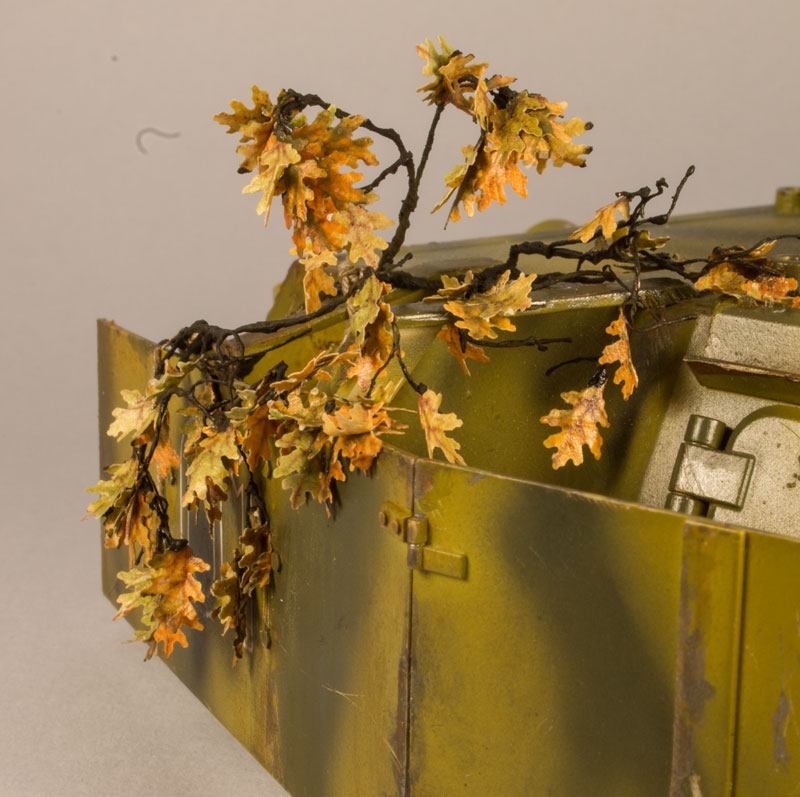
that string looks spot on to scale. What scale is that?
jknaus
Administrator
Started this Thursday and in between power outages, going in to work on a holiday and just lazing I am just shy of ready to paint this Meng Shilka. Amazing ewhat can be done if you dont surf the web too much and put your mind to it. I really hope to be able to finish priming the hull and maybe even the turret. 2 more days off to try and finish.


James
James
ausf
Master at Arms
that string looks spot on to scale. What scale is that?
1/16.
It's my old Tamiya RC that I never really finished.
Similar threads
- Replies
- 39
- Views
- 9K
- Replies
- 60
- Views
- 18K


 .... great projects at the same time...you´re a super modeler :frantic