• Modelers Alliance has updated the forum software on our website. We have migrated all post, content and user accounts but we could not migrate the passwords.
    This requires that you manually reset your password.
    Please click here, http://modelersalliance.org/forums/login to go to logon page and use the "Forgot your Password" option.

All Righty ... What's on the bench today?

Picking at this as I can. Almost to paint stage.

DSC06815.JPG


DSC06816.JPG


DSC06817.JPG


S-63 next, I have everything for it now. See if its doable.

James
 
Nice work guys.

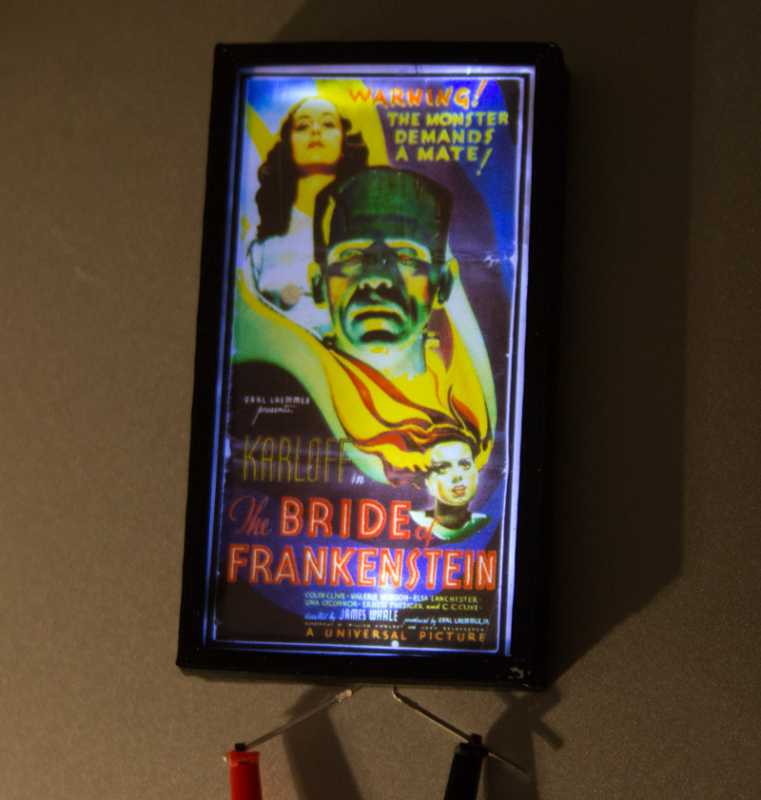
Here's what just came out of the 3D printer for my up coming Bride build. I figured I need a one sheet, might as well illuminate it.

It's one inch across the top, you can see the LED sticking out the bottom. I'm going to try a warm white one, this is a cool white and I have to bounce the light a bit better, but you get the idea.


hea413b6.jpg
 
Nice gun there James. BUT man you sure took a chsance with old Mr. Murphy when you had the gun that close to the edge. You're far braver than I am.

Cheers
 
You scared me there for a second Mike. I haven't seen a real clothes pin in so long and I have these tiny ones that are about 3/4 ". So my size reference was all out of whack.
 
It's been a rough couple weeks, but here is what I managed to get done whenever I had the time.

I'll start with the last couple things I did on the B-377 when I finished her up. First off, the decals on the nose had all cracked, so I took some Insignia Blue and painted over as a touch up. You'll also note here one of the the decals that had cracked off and disappeared. I didn't fix that as I have no decal to match that:

WIP_B_377_XVI.jpg


I had also built the propellers and painted them up. I used Chrome Silver on the hubs just for fun:

WIP_B_377_XVII.jpg


After that is when I installed the landing gear and the gear doors. Later, I found out that this bird still didn't want to sit right. So, I had to add some more weight to the forward end of it. The best stuff I had was some birdshot my friend had given me so I first stuffed some in the forward landing gear bay:

WIP_B_377_XVIII.jpg


Once that was filled, I glued it with a slightly diluted Modge Podge glue which held it fine. But it still wanted to sit on it's tail. So, I re-opened one of the popped out windows near the front, poured in some more birdshot and then followed it with some more slightly diluted glue. I stood this on it's nose the whole time and left it that way until the birdshot stayed glued. Some is still lose inside, but it's no biggie; she at least sits properly on her landing gear now. Afterward, I re-added the window using the Micro Crystal Clear window-making glue, added the propellers and called her done. Again, you can see the final model in the other Thread.


Moving on, I tried again to get some languishing projects finished. I finally started on the P/E screen for my T-14 Armata tank. It was tough; I didn't get very far:

WIP_CTA_III_T-14_Armata_Tank_VIII.jpg


You can see how much more needs to be done; but that took me about 45 minutes or so to do as it is. And I have one more of these to do.....


Okay, it was time to move on to something simpler. I pulled out my Soviet Carrier Baku and started to decal the deck. These are some delicate decals indeed and they don't lay down very well. However once I got started; I realized that I still needed to paint a yellow strip down one section of the deck, some of which has to be covered by decals. That put an end to this task right here:

WIP_ShipbuildersSquaredCampaign_X_.jpg


Yes, later on I did apply some decal solvent to eliminate the silvering. The yellow stripe is now painted and I can hopefully move forward on this again. Pics forthcoming...


After this, I puttered around doing some detail stuff to the Hampden which I did not take pics of. That bird is practically done anyway; I might as well wait and post pics of the finished model.

So, with all that done, I decided to start a couple more models. One is the British Type 82 destroyer HMS Daring. I started with the main superstructure:

WIP_HMS_Daring_I.jpg


After that was the hanger structure:

WIP_HMS_Daring_II.jpg


Pretty easy compared to the main superstructure. These look good together:

WIP_HMS_Daring_III.jpg


They look even better on the almost completed hull:

WIP_HMS_Daring_IV.jpg


This ship is almost ready for paint now before I detail it out.


Moving on, I started one of two projects for the Micro Modelling Month Campaign which you can follow over there as well. This one is the Hobby Boss F-15E Strike Eagle that I'm building to replace the one that was stolen back in 1996. I started, naturally; with the cockpit:

WIP_MMM2017_Eagle_III.jpg


Gotta paint and decal that next. Meanwhile, I assembled the whole rear fuselage of the plane, getting it ready for the forward part to be added later:

WIP_MMM2017_Eagle_IV.jpg


I might even get this to the paint stage in a few days. That would be nice.


That's all I have for now, like I said; it's been a rough couple weeks. Thanks all for looking in, comments are welcome.
 
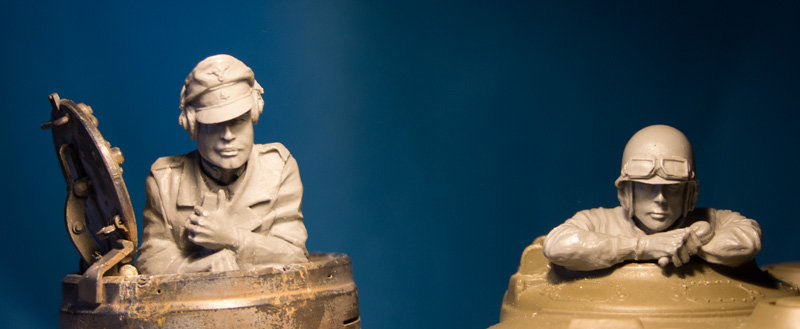
Pulled some resin from molds, two 1/16 TCs for RC market and got started on the Bride build.

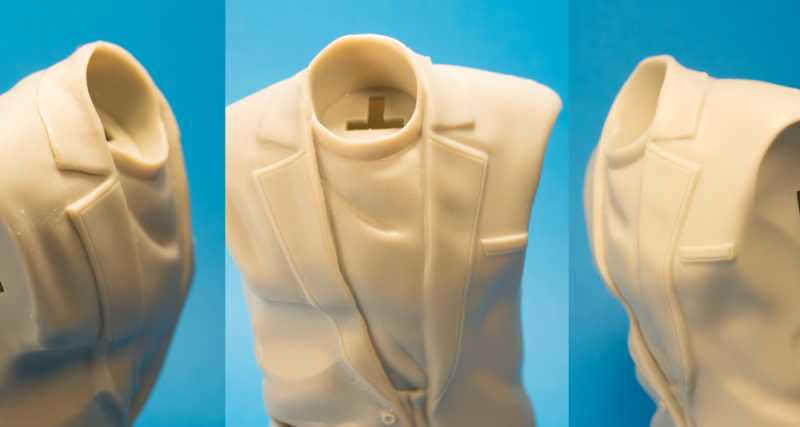
I started to develop the undercuts around the lapel, RS is done, LS untouched, lighting from top so the shadows are from the cutting, not the photo. You can really make a styrene figure pop with a bit of X-Acto (now OLFA for me) work.


hea49bf8.jpg


h9825015.jpg
 
"You can really make a styrene figure pop with a bit of X-Acto "

That really does work well, it defines the edges as well as adding 3D (y)
 
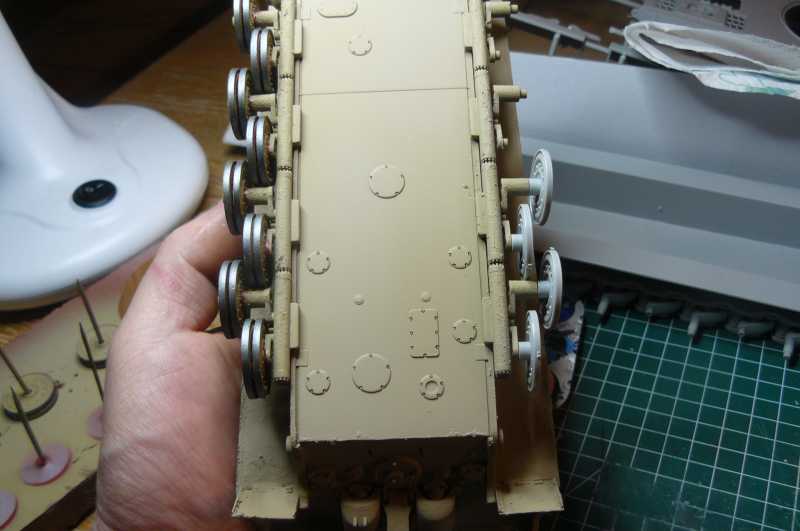
Enjoying some roadwheels this saturday :)

h58e6230.JPG


It's my trumpeter E-75 kit that have recieved an homemade upgade to the wheels, original to the right, find it looks more "right" with the dubble wheels, and they keep the tracks in place to (track teeths between the dubble wheels)
 
Matts, I do love the double wheels better nice work!


Okay, I managed to get some things done this past week so here's my latest update. First off, all of this is work on my Micro Modeling Month subjects. Then I did some work on a SPAModeler's review of the Hasegawa F-14 Tomcat Dual Kit. I won't be showing that here until I complete the review so that it gets shown over there first.


I'll start with the MMM campaign models. I installed the completed cockpit inside the forward fuselage first:

WIP_MMM2017_Eagle_V.jpg


Then I closed it up with some weight in the nose, just in case:

WIP_MMM2017_Eagle_VII.jpg


I also puttied and smooth out some seams that I had seemingly all over this model:

WIP_MMM2017_Eagle_VI.jpg


Just for fun, I put the two sub-assemblies together to see how this bird was coming along. Here they are dry-fit together:

WIP_MMM2017_Eagle_VIII.jpg


Later on, I cemented the whole thing together and added the canopy after I dipped it in Future. This bird, once the canopy is masked; is ready for paint:

WIP_MMM2017_Eagle_IX.jpg


I also worked on my Hasegawa AH-1S Cobra for my US Army. I had a devil of a time with the cockpit decals. After 45 minutes of sitting in water; they still looked like this:

WIP_MMM2017_Cobra_III.jpg


Finally, I just decided to let them dry and later on I simply cut them out with scissors and cemented them to their respective parts of the cockpit and instrument panels:

WIP_MMM2017_Cobra_V.jpg


WIP_MMM2017_Cobra_VI.jpg


WIP_MMM2017_Cobra_IV.jpg


I was finally able to close this bird up:

WIP_MMM2017_Cobra_VII.jpg


After a few touch-ups and then some added details, I closed up the canopy on this bird as well:

WIP_MMM2017_Cobra_VIII.jpg


After masking the canopy, this bird will also be ready for paint.

That's all I have for now on these. I will also be posting these on my Micro Modeling Month Threads as well. I also completed a commission build which is also a Modeling Resolution model that I will be posting later.

Thanks all for looking in, comments are welcome.
 
Back
Top