• Modelers Alliance has updated the forum software on our website. We have migrated all post, content and user accounts but we could not migrate the passwords.
    This requires that you manually reset your password.
    Please click here, http://modelersalliance.org/forums/login to go to logon page and use the "Forgot your Password" option.

Advance to Arnhem 1/16 scale

Colors Used

I neglected to mention the colors used, here's the line-up. I did not use AK's Intermediate Green, AK3058. I was way too light for my taste and really isn't representative of the actual uniform color. You can see all the colors I used below.

_DSC0088b-vi.jpg


More to follow soon.
 
Oil er up!

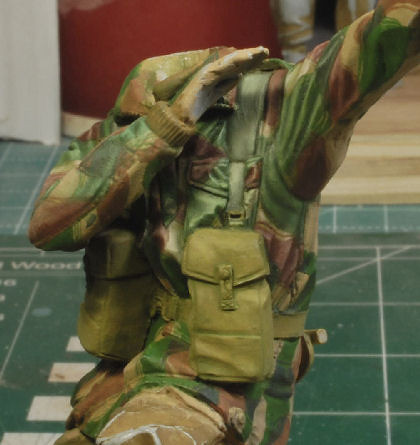
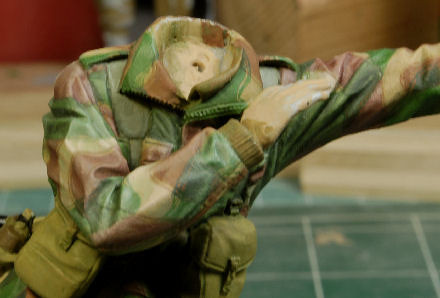
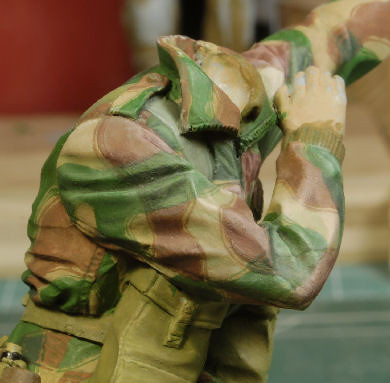
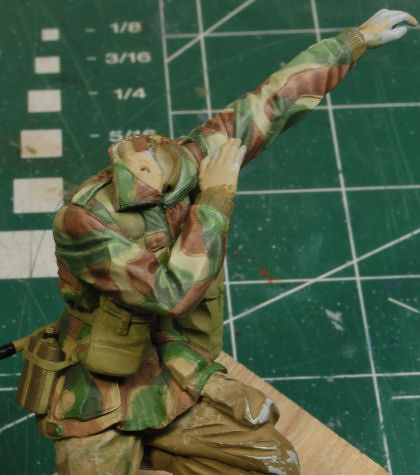
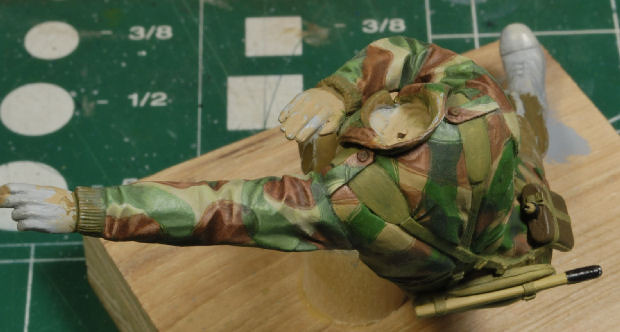
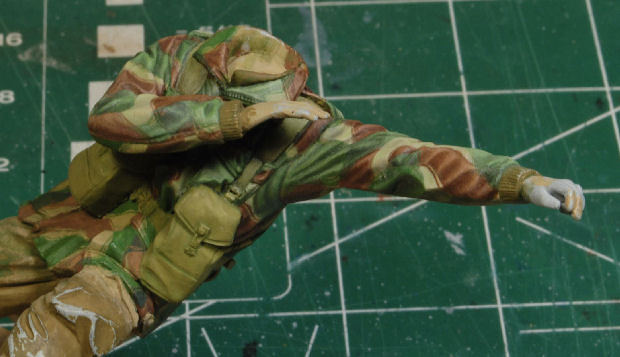
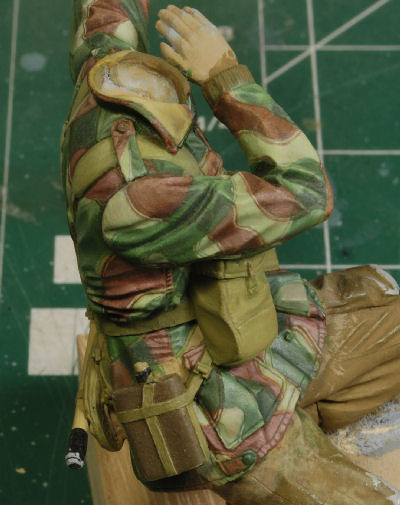
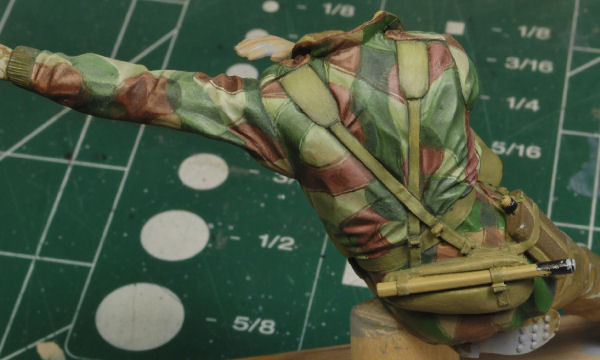
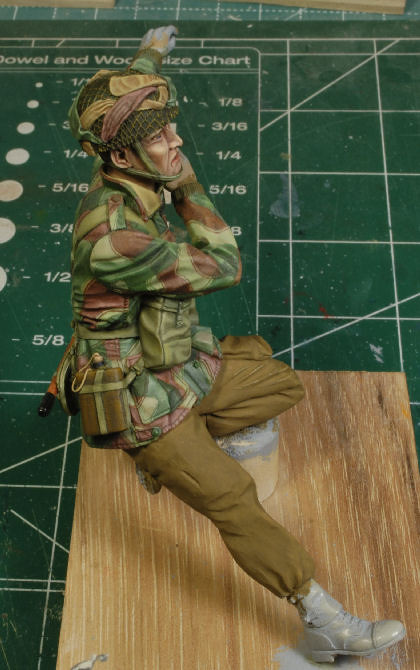
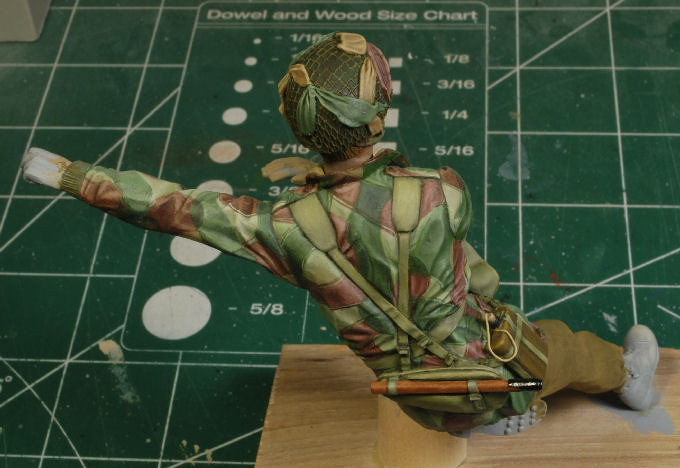
Now the fun part begins, the oils. I decided to do a test run on shading and highlighting to figure out how to go about this particular camo pattern. What I'm finding is there is no easy way about it. Each area is being treated like a separate canvas and I am having to switch colors on the spot while transitioning through a particular area.

It's really not that big of a deal, but tone matching for realism is my concern. I don't want to end up with a white wash look after covering a large area to realize I have to go back and tone it down. But, it is a test run. In this session I have done the front chest area, right arm, and upper portion of the left arm only.

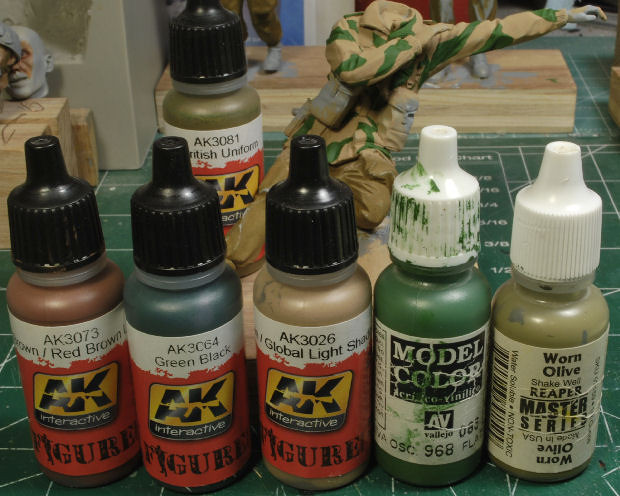
Initially I ran a light wash of Windsor Oxide Chromium, which is almost an exact match for my light green tone, mixed with a spot of Ivory Black over the entire figure to seep into the creases and crevasses. Then I went back and wiped off that tone from all the tan and reddish areas. Pin lines have not been added to the seems, etc., not yet. That will be the last detail to add before the brass buttons, clips, and zipper. Sorry about the pics, they aren't the greatest.

_DSC0089b-vi.jpg
_DSC0091b-vi.jpg
_DSC0092b-vi.jpg


Also, the web gear shoulder straps will be returned to a more tan-ish appearance closer to the ammo pouches. I got carried away with the excitement of finally painting in oils I forgot to bring it back home to a more realistic tone, lol. The paint is still a bit wet and shinny, but it's the overall appearance I'm looking at right now.

So, some serious thoughts or suggestions would be greatly appreciated at this point, especially from my fellow oilers, if you please.


More to follow. Cheers, Ski.
 
Tweaking the Tones

Not being happy with the prior test results I cleaned up the appearance of the "white-wash" and added darker tones to the reddish and green areas as well as a very light green shading tone to the tan areas. The over all green tone is becoming more visible and gives the smock a more blended appearance. I'm calling this test run a success.

_DSC0100_JPGb-vi.jpg
_DSC0098_JPGb-vi.jpg
_DSC0099_JPGb-vi.jpg


This camo pattern is naturally slow going, but I'm liking the results so far and I'm having a hootin ditty of a time at it!


More to follow, comments welcome. Cheers, Ski.
 
woa your paint skills are just first rate! The detail on the No.4 Enfields is very nice. I regret ever parting with my real-deal Canadian Produced gun. It shot like a champ and there is a reason the Brits hung onto that fine rifle for so long
 
Steady Progress

Just a minor update for now. I've been working this camo pattern all week, it's been plugging along at a reasonable rate. As you can see, each and every section must be painted separately, so there really are no shortcuts. I have been able to duplicate my oil tones when they become unworkable, or at least so close you'd never be able to notice. That was one of my concerns when starting the camo pattern, consistent tones on each individual smock, not the four separate smocks as a whole. They all need slight variations from each other for realism.

So far I have gotten a bit of rhythm going and the pace has picked up slightly, but there won't be any way to speed this up much more than my current pace. This certainly isn't the toughest camo pattern out there, but it does take time to work it.

_DSC0107b_JPG-vi.jpg
_DSC0102b_JPG-vi.jpg
_DSC0105b_JPG-vi.jpg


I will continue along the lower back portion of the smock and then knock out the ammo pouches and gear in the rear before I go on to the next three figures.

I'm pretty happy with the palette set up right now, the tones seem to be working well. I'm a bit anxious to complete this figure alone, but I'll stick with the smocks until all four figures are done. I hate going back to relearn formulas I may have forgotten just a few days or even a week back. Steady ar she goes!


More on the way and thanks for watchin. Cheers, Ski.
 
Upper Torso Done for Now

After finishing the camo pattern on the upper torso I went ahead and took care of the web gear and finished the smock collar. Well, why stop there, right? So, I went ahead and took care of the helmet too, why not. I added a string for the canteen cap using thin copper wire and also took care of any issues that were visible. I'll set this figure aside for now and continue on with the next figure in the same fashion. Once all the figures reach this point I'll go back and take care of the hands, trousers, and boots.

_DSC0109b-vi.jpg
_DSC0110b-vi.jpg
_DSC0111b-vi.jpg


Any questions or comments feel free to holler and thanks for watchin. Cheers, Ski.
 
Back
Top