
-
Modelers Alliance has updated the forum software on our website. We have migrated all post, content and user accounts but we could not migrate the passwords.
This requires that you manually reset your password.
Please click here, http://modelersalliance.org/forums/login to go to logon page and use the "Forgot your Password" option.
You are using an out of date browser. It may not display this or other websites correctly.
You should upgrade or use an alternative browser.
You should upgrade or use an alternative browser.
''A'' for Arado!
- Thread starter matrixone
- Start date
Thanks chukw!
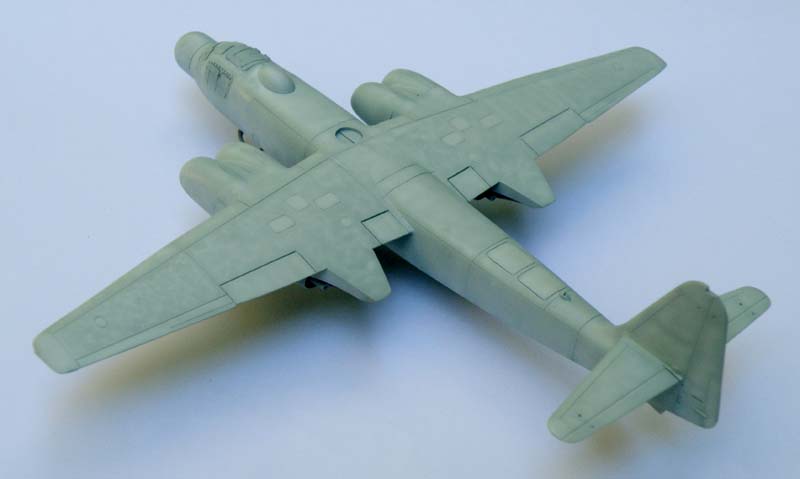
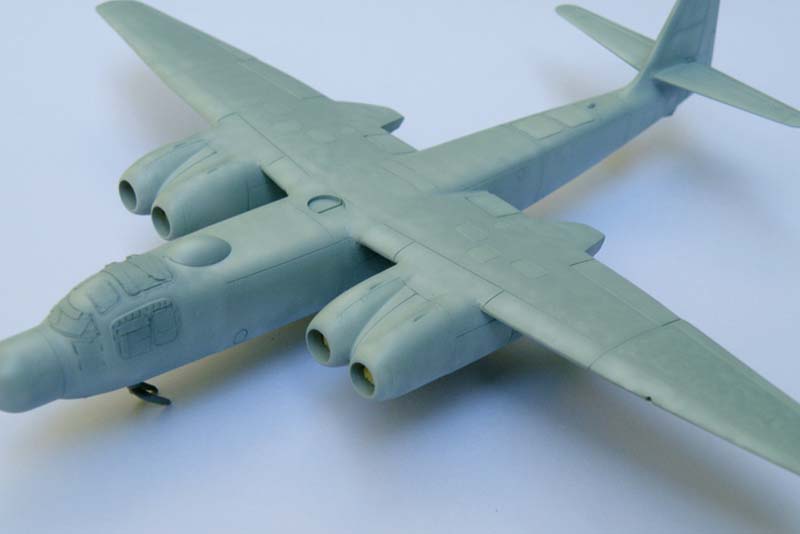
The basic airframe is now together, as can be seen in the update pictures I had to putty the join between the wings and fuselage. This was done by placing tape on either side of where the putty was to be placed and then smooshing down the putty, after the putty is pressed into place the tape is then removed which leaves a much smaller area that needs to be sanded down. I am trying to preserve the panel line detail as much as possible and the less putty that is put on makes it easier to do this.
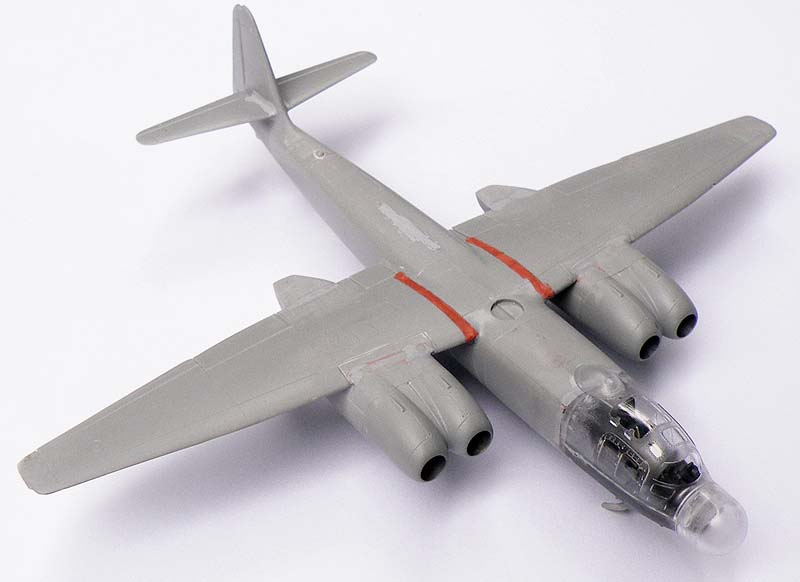
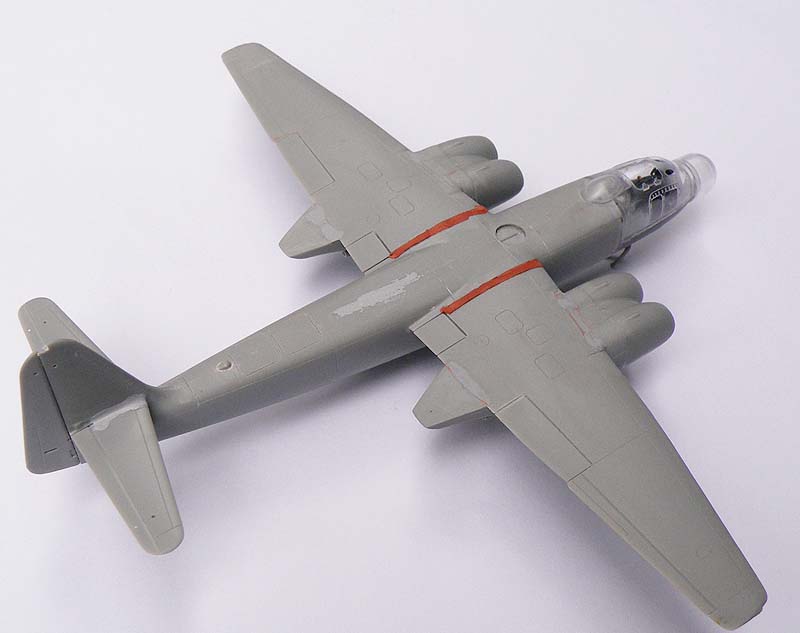
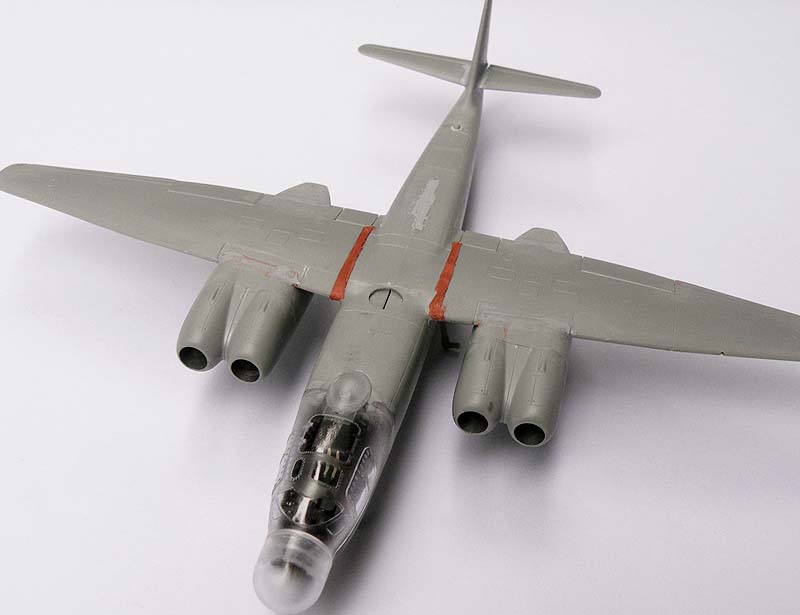
After the putty is sanded off I will wash the model and mask off the canopy and start painting.
Matrixone
The basic airframe is now together, as can be seen in the update pictures I had to putty the join between the wings and fuselage. This was done by placing tape on either side of where the putty was to be placed and then smooshing down the putty, after the putty is pressed into place the tape is then removed which leaves a much smaller area that needs to be sanded down. I am trying to preserve the panel line detail as much as possible and the less putty that is put on makes it easier to do this.
After the putty is sanded off I will wash the model and mask off the canopy and start painting.
Matrixone


The best part of building models is now at hand with this model and painting has started.
After a tough time with getting the gaps filled on this model the hard work has paid off and this thing is starting to shape up nicely, it was not until a coat of paint was put on before I knew if the putty work around the engine nacelles was a success or not, it seemed like half the time spent on construction was put into blending in the engine nacelles to the wings.
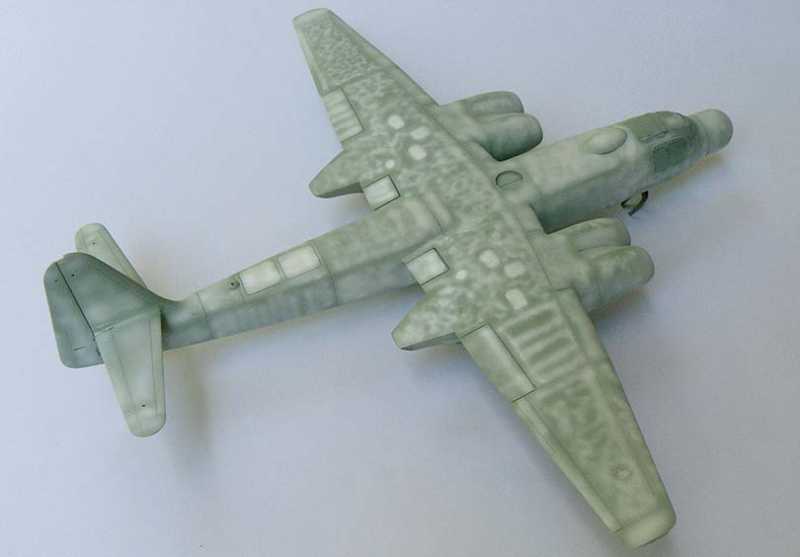
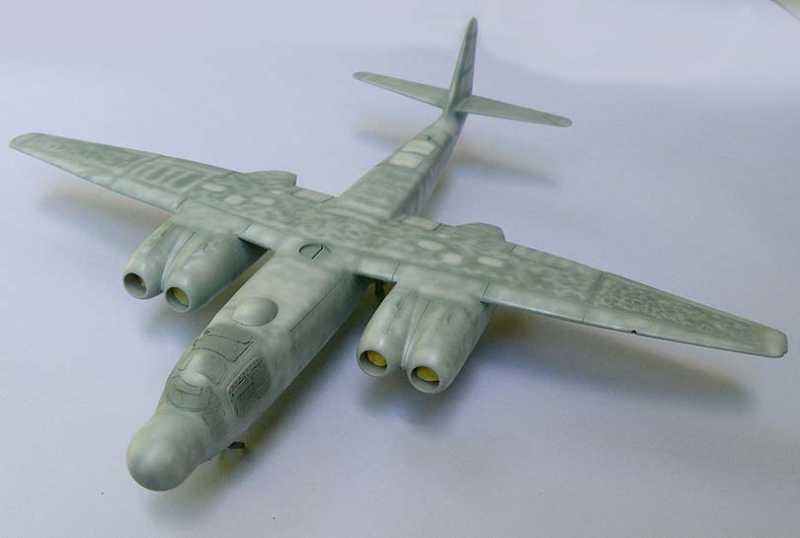
Next for this model will be a thin coat of pale RLM 76 sprayed on to tone down the white highlights on the panels and then thin wispy RLM 75 mottles will be airbrushed on.
Matrixone
After a tough time with getting the gaps filled on this model the hard work has paid off and this thing is starting to shape up nicely, it was not until a coat of paint was put on before I knew if the putty work around the engine nacelles was a success or not, it seemed like half the time spent on construction was put into blending in the engine nacelles to the wings.
Next for this model will be a thin coat of pale RLM 76 sprayed on to tone down the white highlights on the panels and then thin wispy RLM 75 mottles will be airbrushed on.
Matrixone
Sherman 18
Master at Arms
MORE! :woohoo: great update

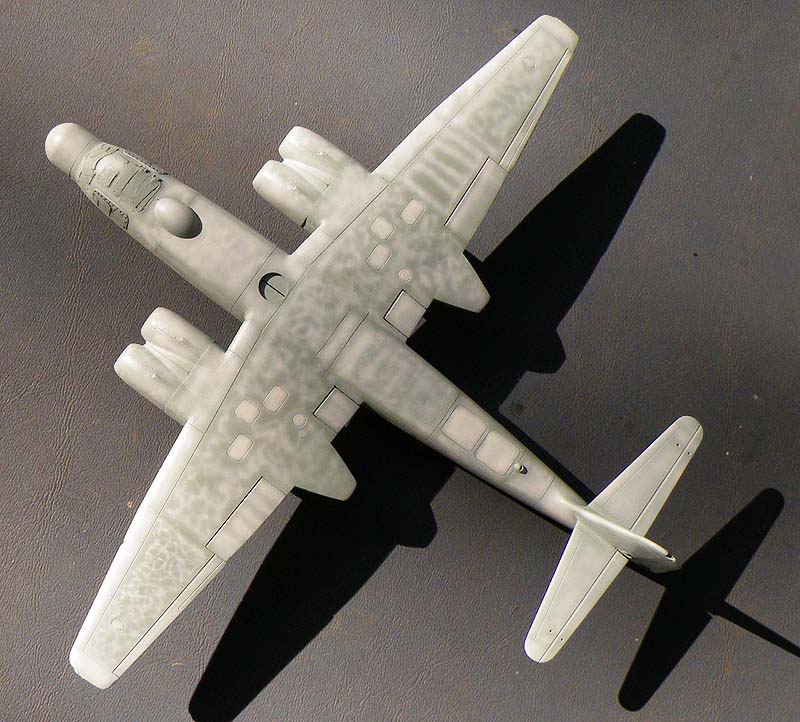
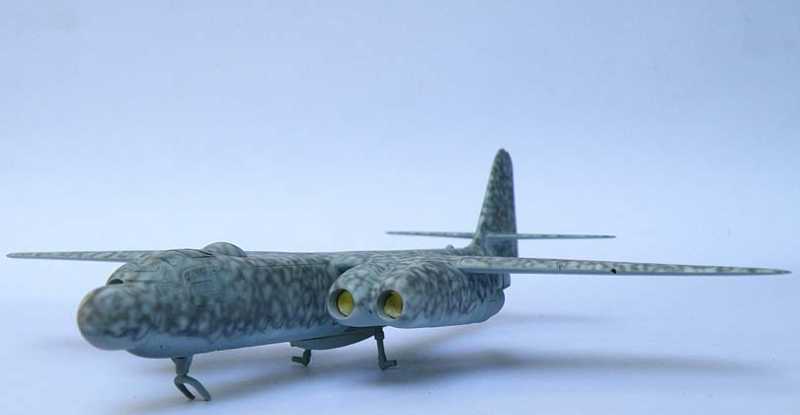
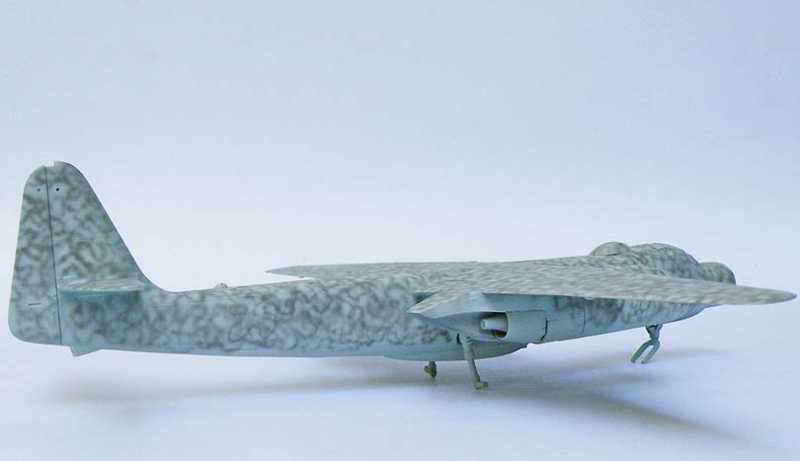
Pale RLM 76 has been sprayed on and all the highlights have been toned down.
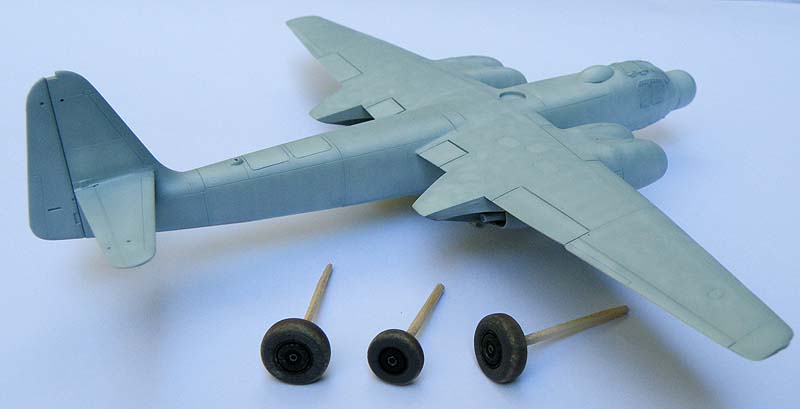
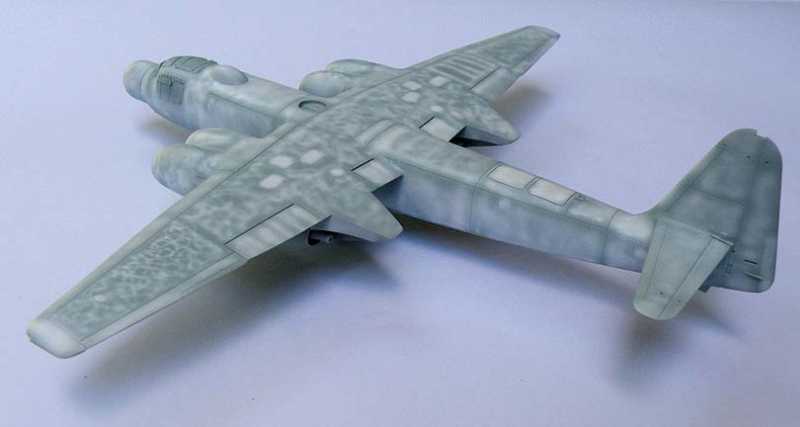
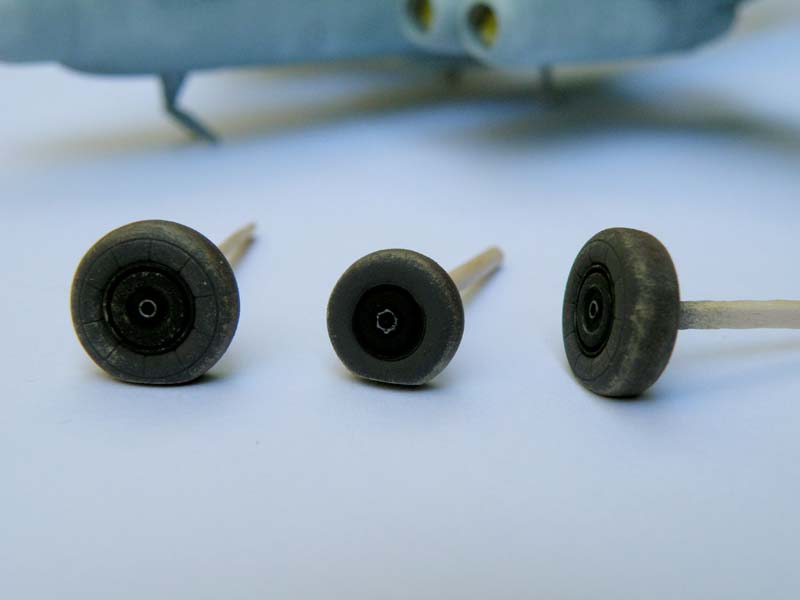
And below is a close-up of the wheels, they are fully weathered and ready to be put on the model.
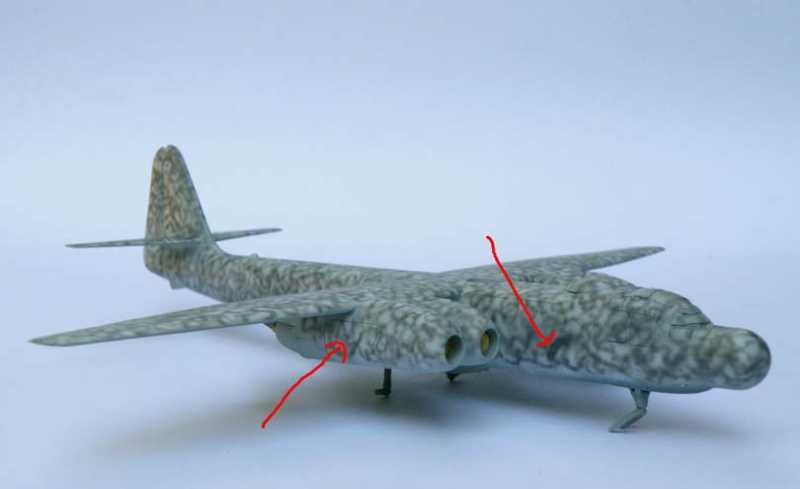
Here is an image of one of my paint mules and the Arado, the arrows on the paint mule point to the style of mottling I will attempt to paint on the Arado...this will not be easy to paint on the area between fuselage and engine nacelles because it is such a tight area. :hmmm

Matrixone
And below is a close-up of the wheels, they are fully weathered and ready to be put on the model.
Here is an image of one of my paint mules and the Arado, the arrows on the paint mule point to the style of mottling I will attempt to paint on the Arado...this will not be easy to paint on the area between fuselage and engine nacelles because it is such a tight area. :hmmm
Matrixone
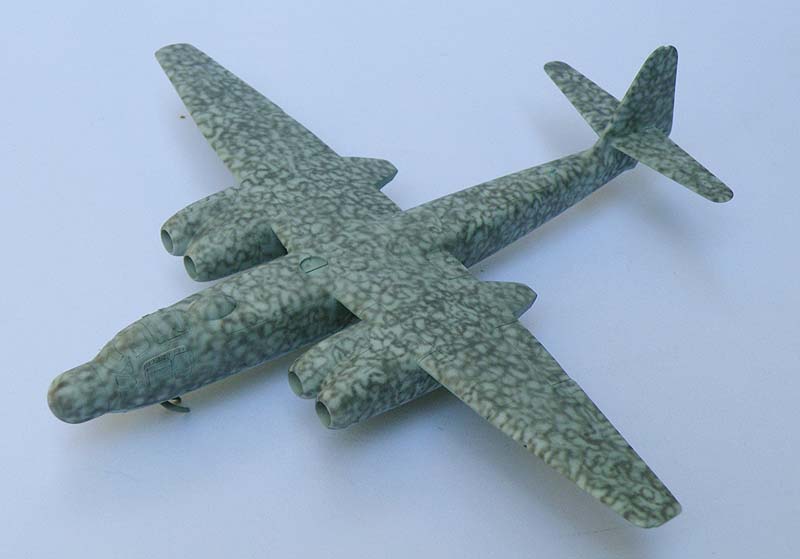
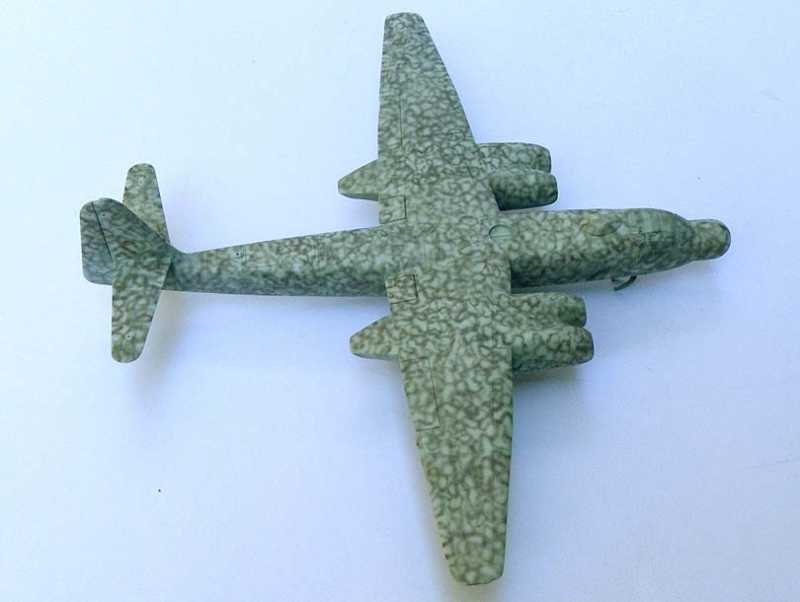
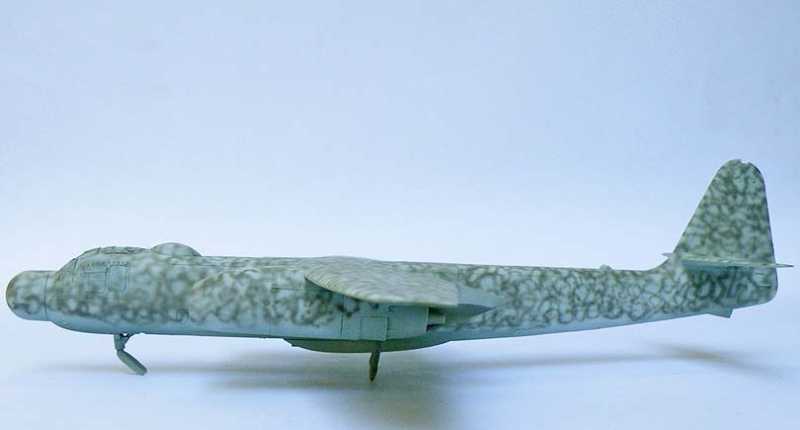
Okay, here is another update on this one...the 'scribble' style of camouflage pattern has been sprayed on this morning and this took me about 45 minutes to do.
Overall this was not that bad of a job to do but I have to admit trying to spray the scribble on the inside of the engine nacelles and the matching inside area of the fuselage about drove me batsh*t crazy...there is hardly any room to work with in there with an airbrush and I badly wanted to keep the size of the scribble to scale. Even though I was as careful as can be I did end up making a couple mistakes anyway and will have to correct them. :angry:
But aside from the goofs this airbrushing session turned out about as good as I could hope for...but of course if this model was in 1/48 scale this would have been MUCH easier. :laugh:
Matrixone
Makes me dizzy... :woohoo:
Looks good Les, know you'll get those spots taken care of. Almost see the need for a flex hose extension for the nozzle huh?
Looks good Les, know you'll get those spots taken care of. Almost see the need for a flex hose extension for the nozzle huh?
Thanks Bob,
I think a larger scale model would have helped more than anything. :laugh:
Were it not for the very poor fit of the engine nacelles the best solution would be to do part of the painting before the wings or engine nacelles were attached to the fuselage and then finish the rest of the painting afterwards.
Matrixone

+1
