
Steve Ski
Well-known member
54mm Resin, Sculpted by Vladimir Danilov, offered by Castle Miniatures.
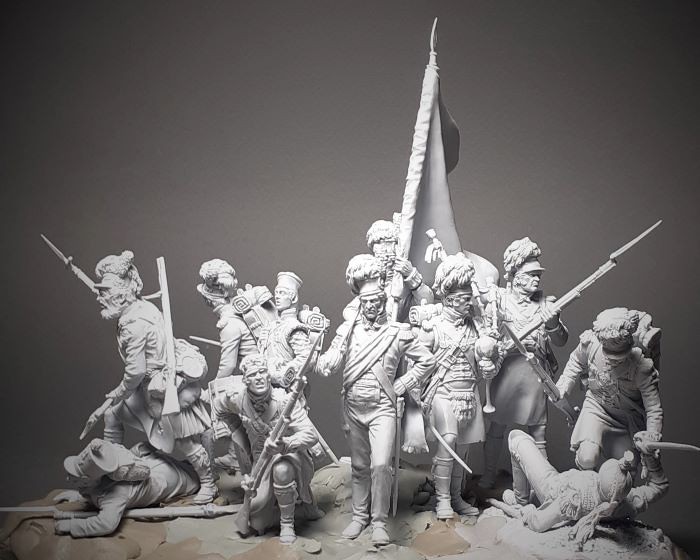
Like a fish out of water I am completely out of my element starting this set. The Battle of Waterloo is not my normal area of study, nor are the bright and brilliant colors something I’m use to painting. In fact, I’ve never done anything so elaborate or complex as this set of figures in such tight proximity to each other, or this color scheme. The sculpting is really impressive, to say the least. I can only hope I do it justice in the end.
So, rather than dip my big toe in the pool, I dove right into the deep end, head first. What else was I gonna do? I felt drawn to this set as soon as I saw it offered. It was a serious toss up over a few days of angst as to whether I would build a 1/35th scale UH-1N with a weapons load crew or this set of “Black Watch” figures at Waterloo. I had both scenarios laid out on the bench as I pondered each. Once my mind was made up it was straight off to research, and thankfully, Alexandre Khokhriakov and Castle Miniatures themselves provided plenty of study material.
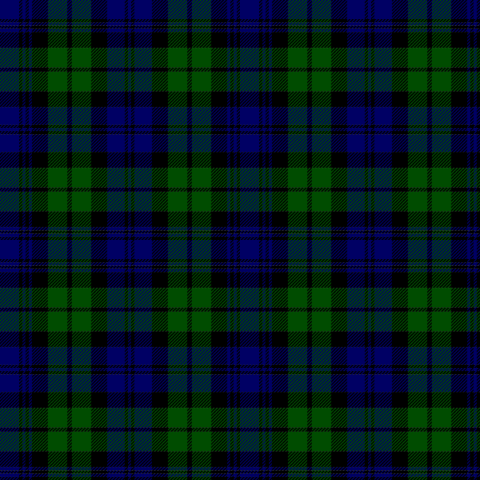
I figured if I could knock out a decent rendition of a Denison Smock camo pattern, I should be able to handle the Black Watch Campbell tartan, and the battle flag, and socks. Well, we’ll soon find out, won’t we? HA! I’ve watched a few gals paint flags for miniatures on YT, they’re incredible. These gals got talent, so I will be using their work as reference material on that portion of this build. This is all new to me!
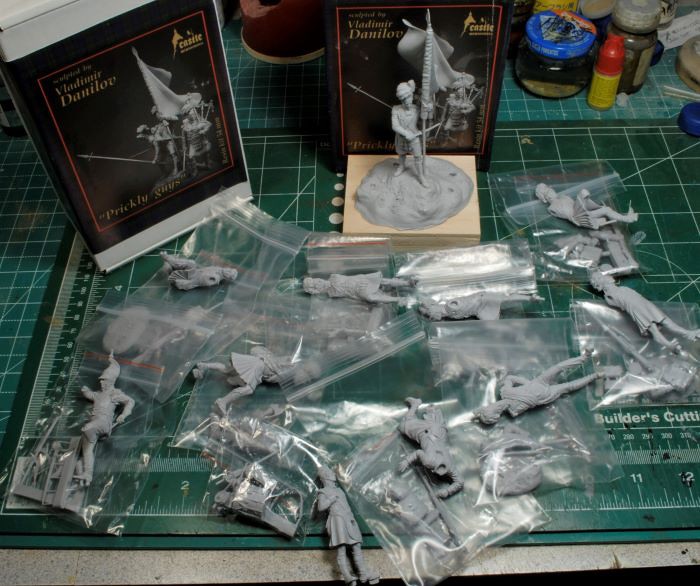
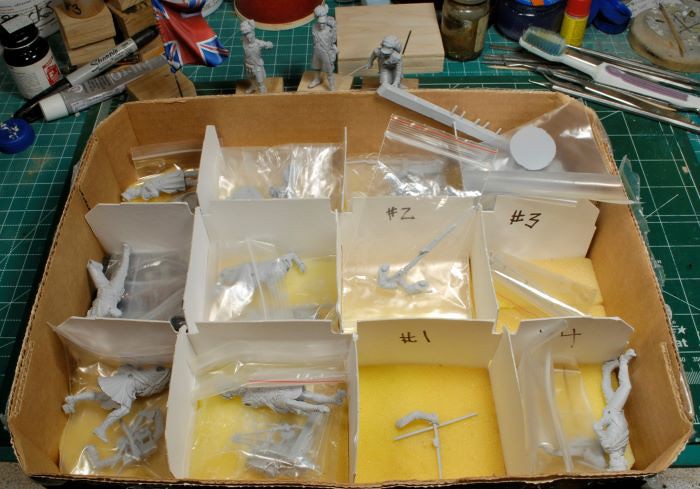
Eleven figures complete this dynamic battle scene, all cast in resin. I was impressed with how clean these figures were and the lack of any major issues to deal with. A little time spent carefully removing any seem lines or slag is all I’m finding necessary to get these figures ready for the brush. I decided to keep some kind of order with all these little parts by using a half pint mason jar crate with some added foam padding at the bottom of each divided section. I numbered these guys as they were being cleaned up and worked, just to keep track of who gets what part. So far, so good.
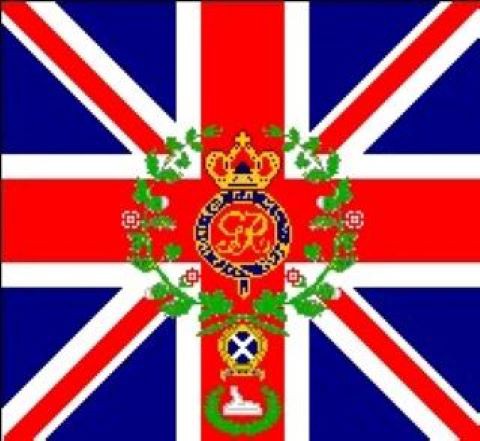
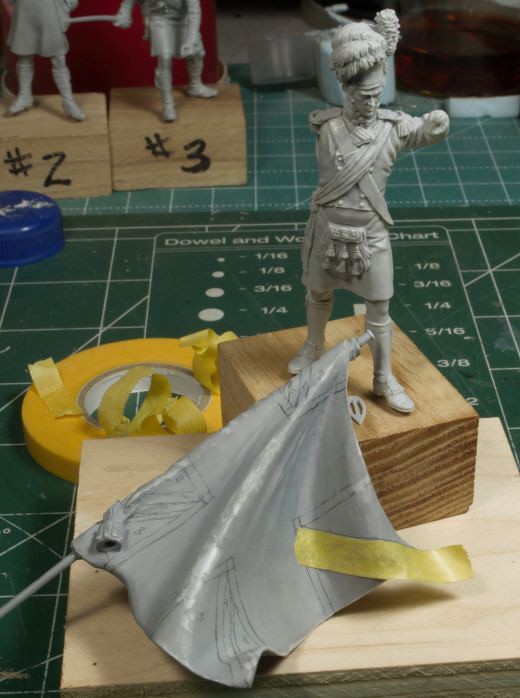
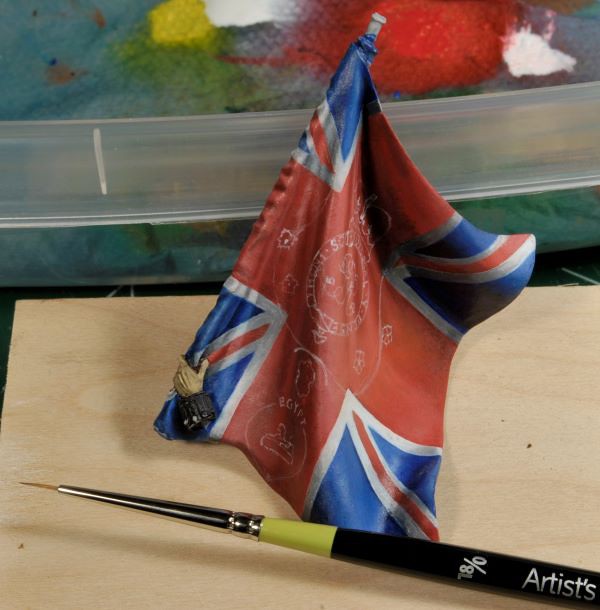
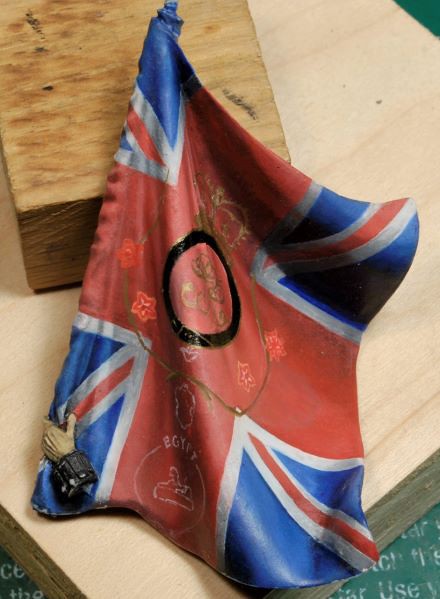
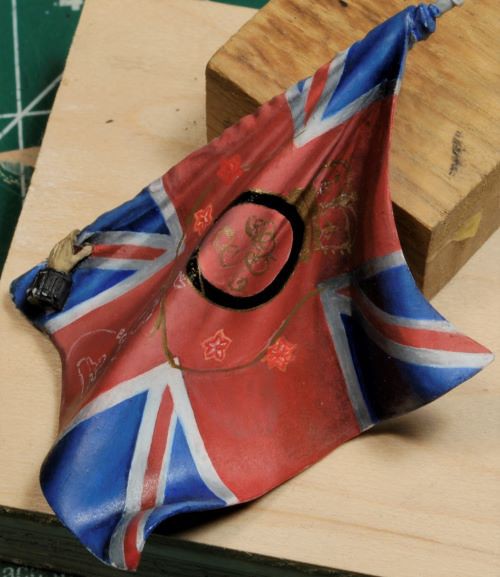
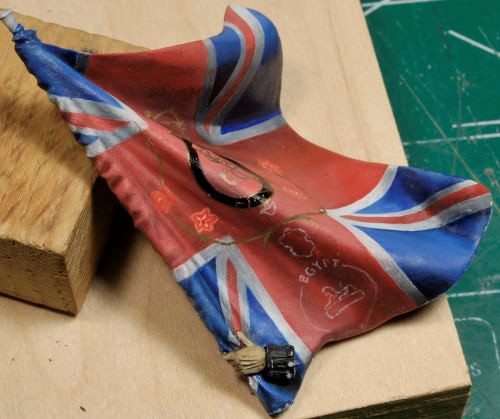
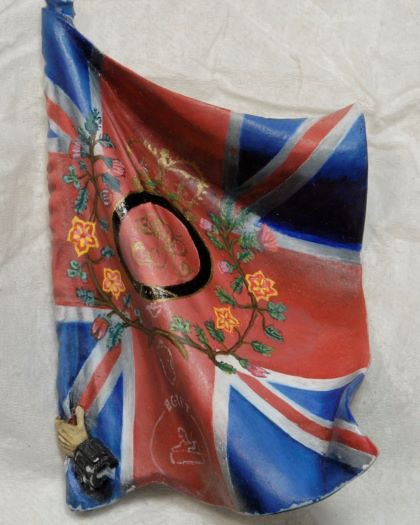
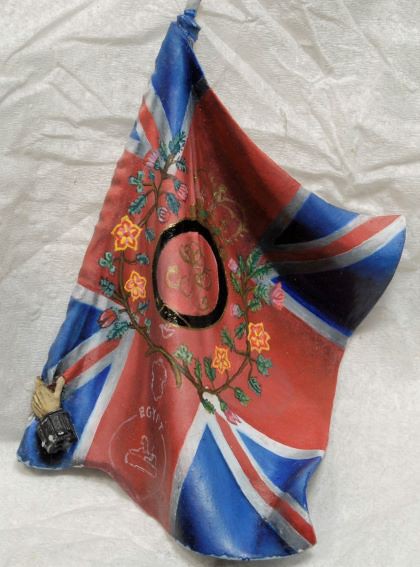
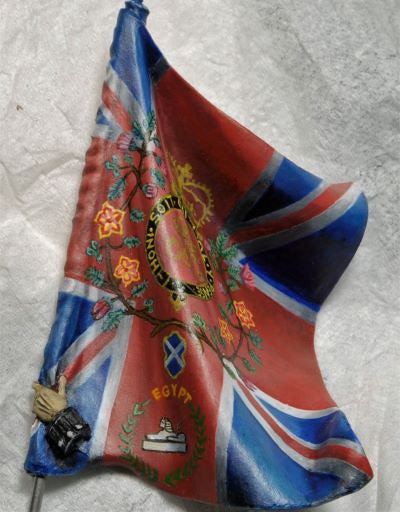
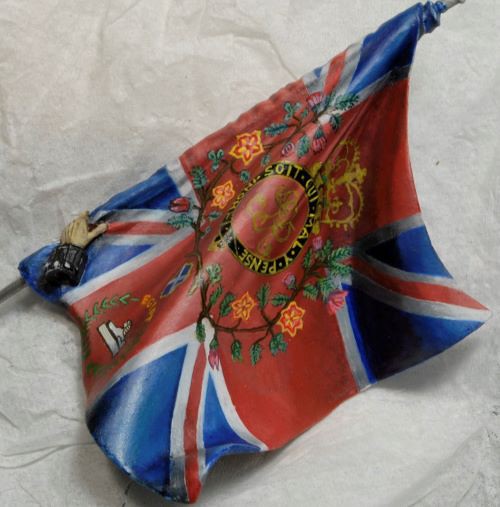
After cleaning three figures I decided to get started on the flag. I wanted to work the emblems and details in between the figure clean-up, (oils take time to dry), so I can spend as much time needed to get this flag correct. There’s going to be a lot of freehand work here and quite a bit of trial and error as well. I’ll seal the oils on this flag in a few days when it’s complete, then start laying out the emblems on both sides. This is gonna be a hoot, I can already tell. Wish me luck!
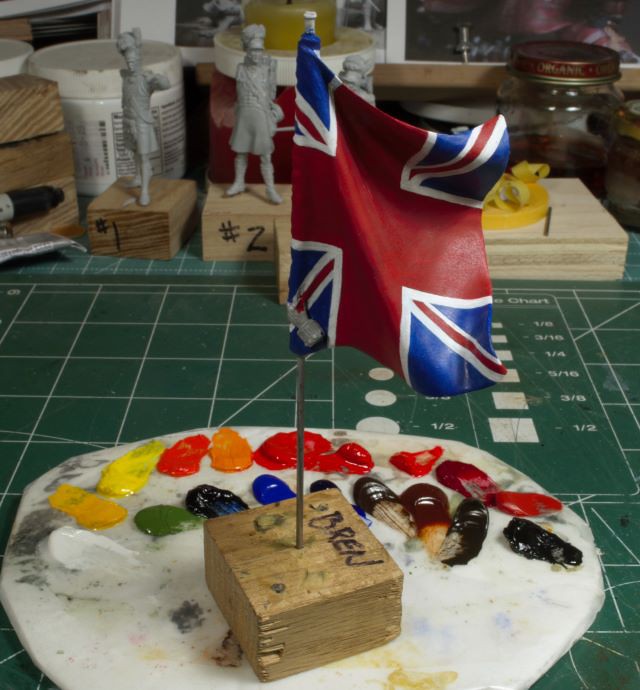
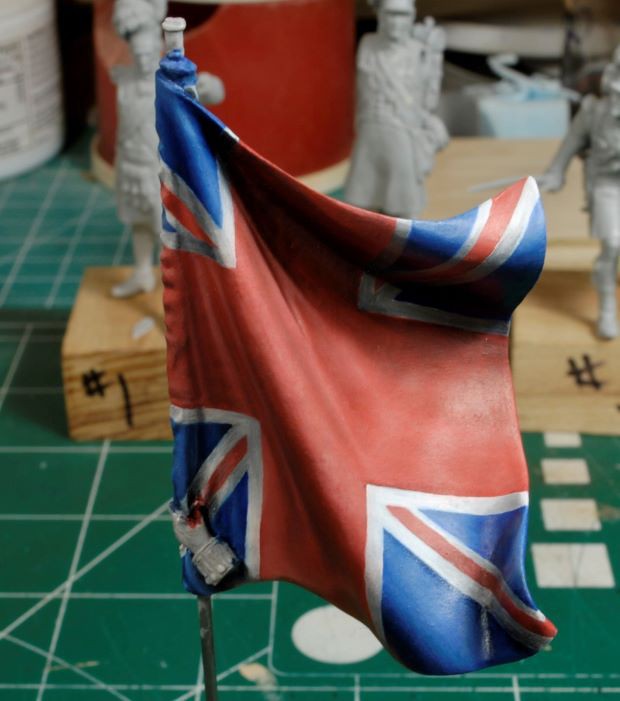
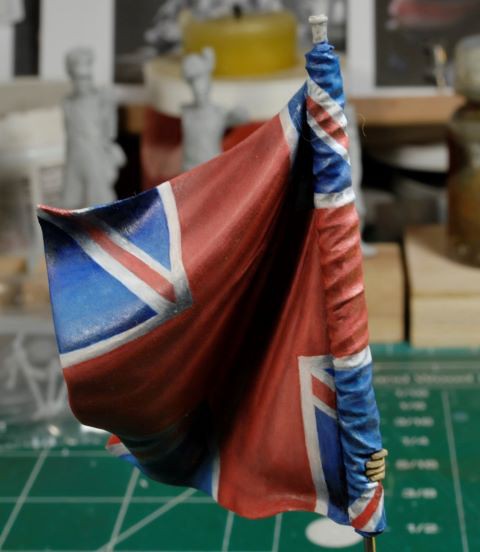
The basic layout of the colors was not too difficult, but only a matter of keeping every section in proper proportion. Tamiya’s model tape really helped work around those curves. I used Vallejo’s Model Colors; Red, Blue, and White acrylics for the base tones. Next was the standard oil applications of shadows and highlights. There are still a few areas of the white stripes that need attention, but this first side is pretty much complete. You can see the new palette of colors I have spread out for this project, mostly Windsor Newton oils.
I’m actually pretty excited to be working this set, it’s a challenge. How do we expand our talent, challenge the norm, work it and keep learning? And there you have it, and therefore,……….. I forge onward
More to follow soon and thanks for watchin. Cheers, Ski.
Like a fish out of water I am completely out of my element starting this set. The Battle of Waterloo is not my normal area of study, nor are the bright and brilliant colors something I’m use to painting. In fact, I’ve never done anything so elaborate or complex as this set of figures in such tight proximity to each other, or this color scheme. The sculpting is really impressive, to say the least. I can only hope I do it justice in the end.
So, rather than dip my big toe in the pool, I dove right into the deep end, head first. What else was I gonna do? I felt drawn to this set as soon as I saw it offered. It was a serious toss up over a few days of angst as to whether I would build a 1/35th scale UH-1N with a weapons load crew or this set of “Black Watch” figures at Waterloo. I had both scenarios laid out on the bench as I pondered each. Once my mind was made up it was straight off to research, and thankfully, Alexandre Khokhriakov and Castle Miniatures themselves provided plenty of study material.
I figured if I could knock out a decent rendition of a Denison Smock camo pattern, I should be able to handle the Black Watch Campbell tartan, and the battle flag, and socks. Well, we’ll soon find out, won’t we? HA! I’ve watched a few gals paint flags for miniatures on YT, they’re incredible. These gals got talent, so I will be using their work as reference material on that portion of this build. This is all new to me!
Eleven figures complete this dynamic battle scene, all cast in resin. I was impressed with how clean these figures were and the lack of any major issues to deal with. A little time spent carefully removing any seem lines or slag is all I’m finding necessary to get these figures ready for the brush. I decided to keep some kind of order with all these little parts by using a half pint mason jar crate with some added foam padding at the bottom of each divided section. I numbered these guys as they were being cleaned up and worked, just to keep track of who gets what part. So far, so good.
After cleaning three figures I decided to get started on the flag. I wanted to work the emblems and details in between the figure clean-up, (oils take time to dry), so I can spend as much time needed to get this flag correct. There’s going to be a lot of freehand work here and quite a bit of trial and error as well. I’ll seal the oils on this flag in a few days when it’s complete, then start laying out the emblems on both sides. This is gonna be a hoot, I can already tell. Wish me luck!
The basic layout of the colors was not too difficult, but only a matter of keeping every section in proper proportion. Tamiya’s model tape really helped work around those curves. I used Vallejo’s Model Colors; Red, Blue, and White acrylics for the base tones. Next was the standard oil applications of shadows and highlights. There are still a few areas of the white stripes that need attention, but this first side is pretty much complete. You can see the new palette of colors I have spread out for this project, mostly Windsor Newton oils.
I’m actually pretty excited to be working this set, it’s a challenge. How do we expand our talent, challenge the norm, work it and keep learning? And there you have it, and therefore,……….. I forge onward
More to follow soon and thanks for watchin. Cheers, Ski.
") A lot of people dont ...;
A lot of people dont ...;


 Wow....