
-
Modelers Alliance has updated the forum software on our website. We have migrated all post, content and user accounts but we could not migrate the passwords.
This requires that you manually reset your password.
Please click here, http://modelersalliance.org/forums/login to go to logon page and use the "Forgot your Password" option.
You are using an out of date browser. It may not display this or other websites correctly.
You should upgrade or use an alternative browser.
You should upgrade or use an alternative browser.
1/72 Petlyakov PE-2 - new attempt
- Thread starter Flyingbabydoc
- Start date
Flyingbabydoc
Well-known member
Wings of the Red Star (1): 1/72 Petlyakov PE-2
Thanks James I really appreciate the Support!")
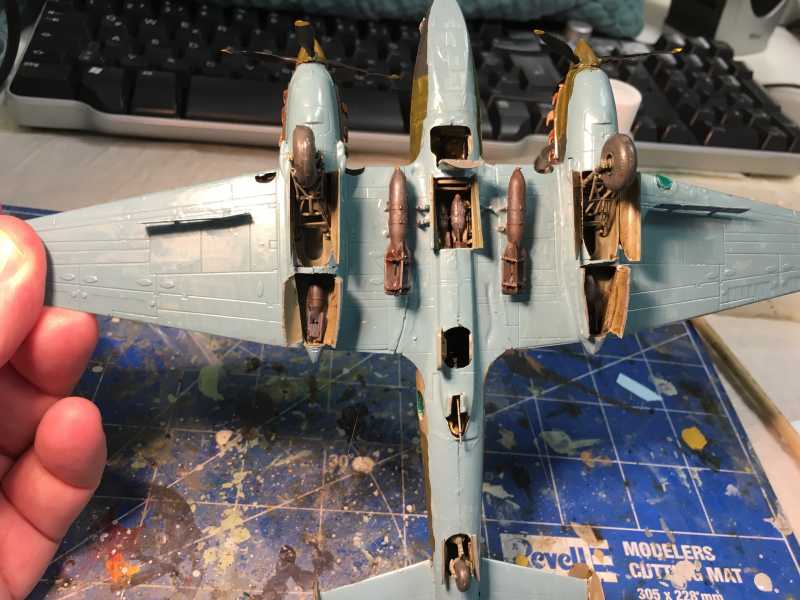
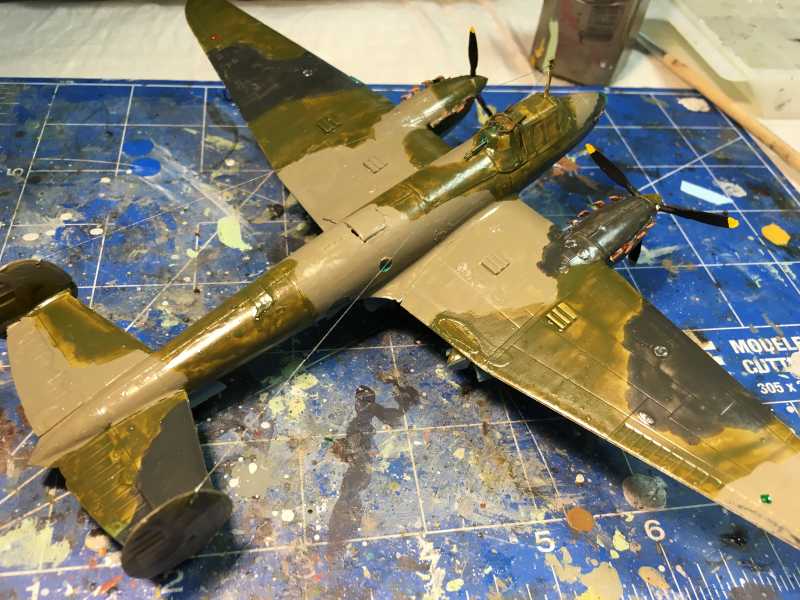
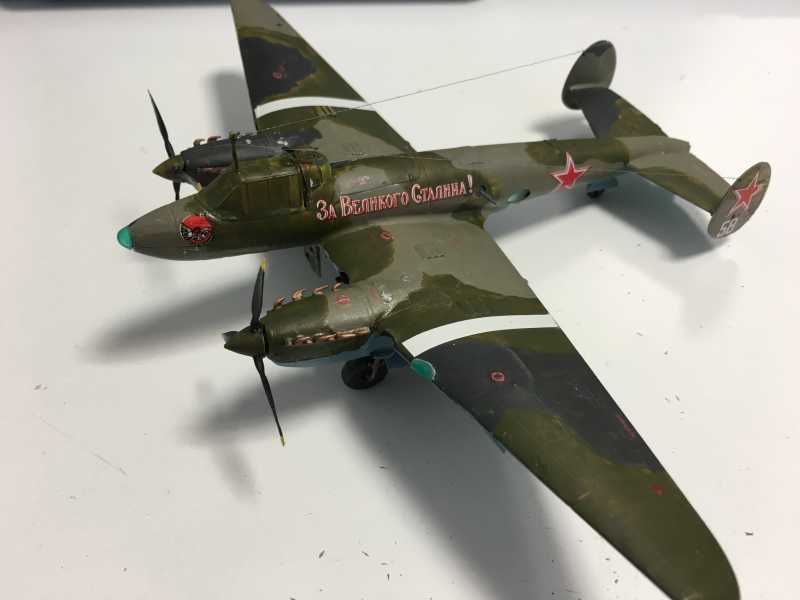
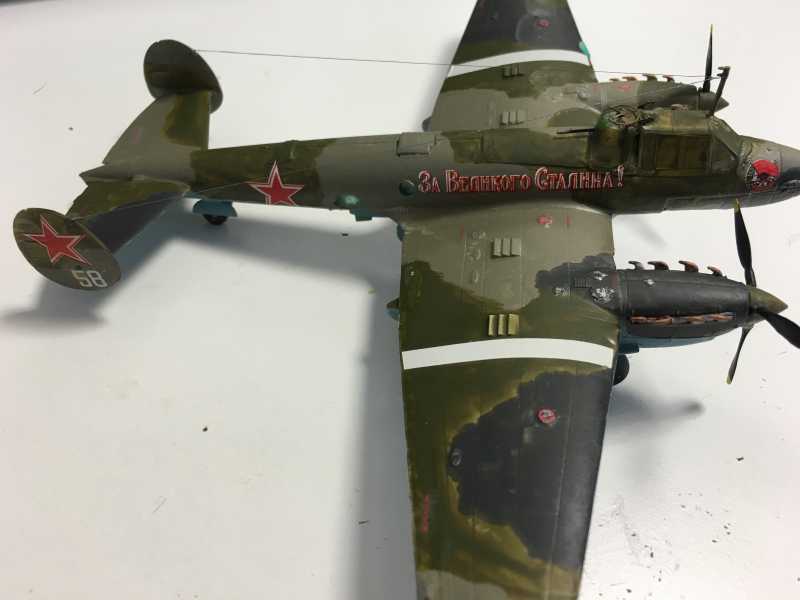
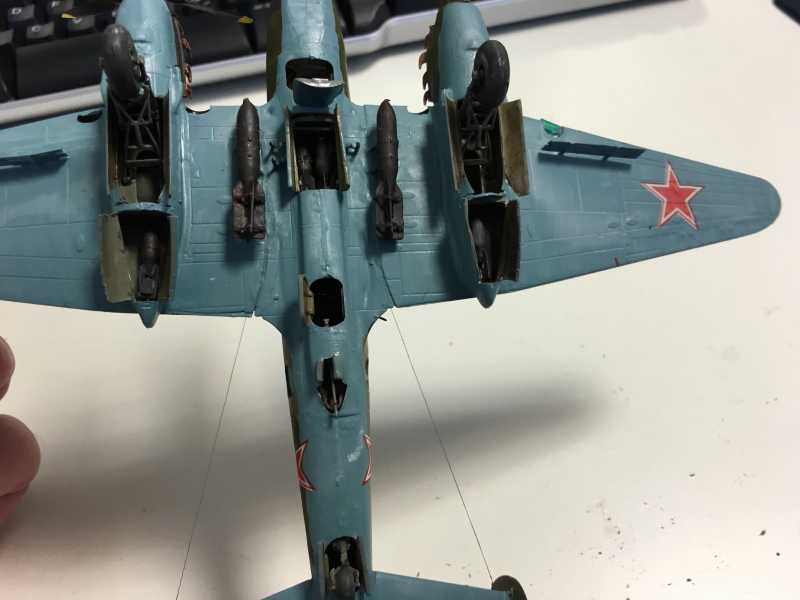
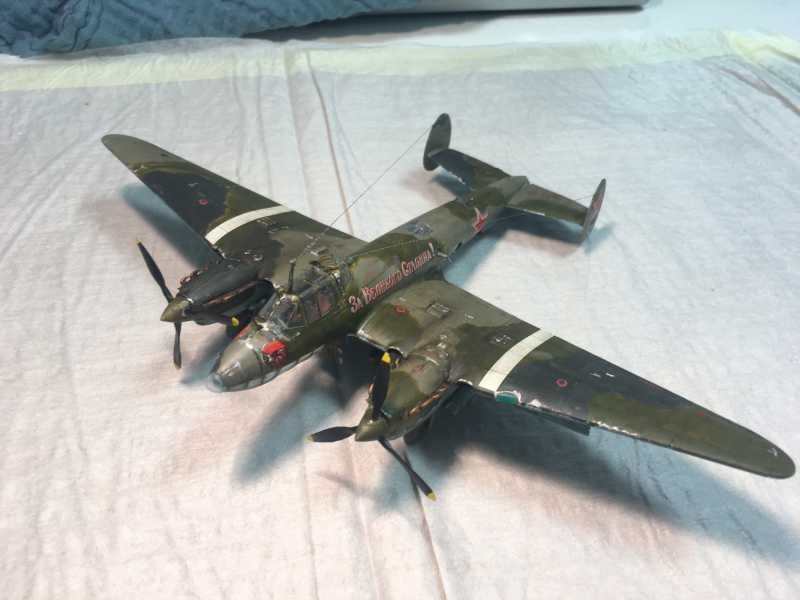
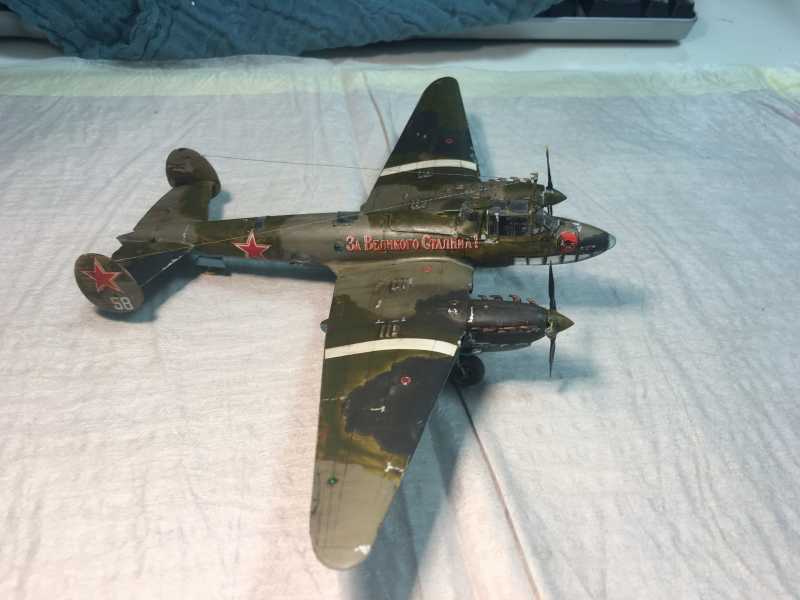
Indeed this is a beautiful aircraft, and perhaps in the Hands of one of you instead of a wannabe like myself it would turn ok. But, since I am not a quitter, here is the painting and decals. Now just some weathering and I am ready for something a bit more rewarding.
Thanks for looking. Comments are always appreciated.
Cheers
Alex
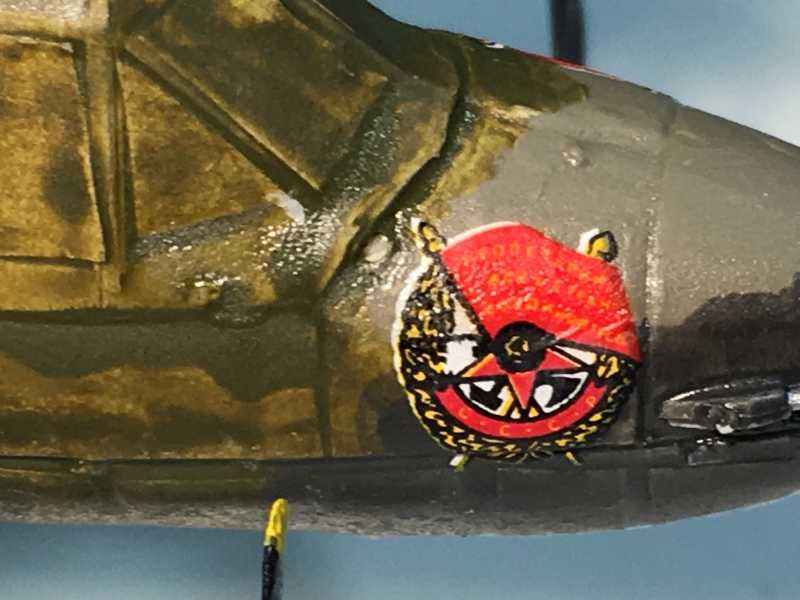
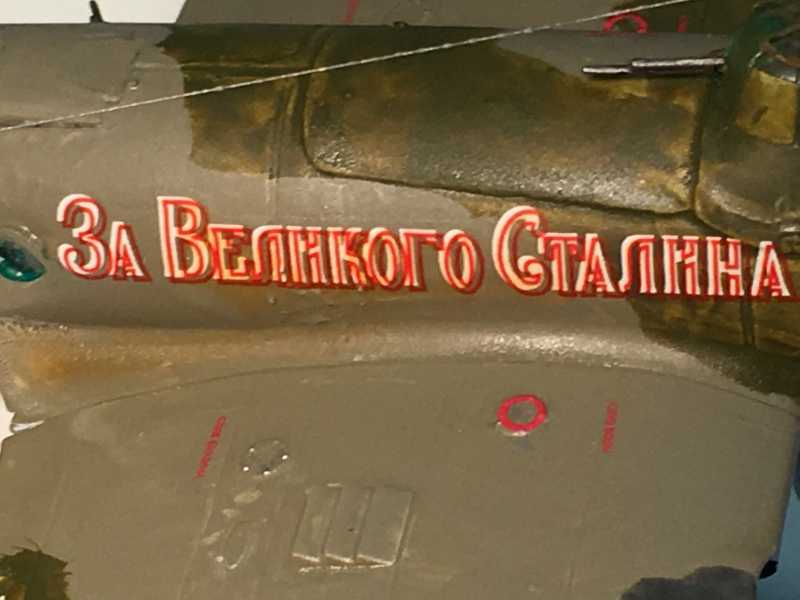
P.S. I like the "to the great Stalin" decal... they really had to suck up to him...

Thanks James I really appreciate the Support!
Indeed this is a beautiful aircraft, and perhaps in the Hands of one of you instead of a wannabe like myself it would turn ok. But, since I am not a quitter, here is the painting and decals. Now just some weathering and I am ready for something a bit more rewarding.
Thanks for looking. Comments are always appreciated.
Cheers
Alex
P.S. I like the "to the great Stalin" decal... they really had to suck up to him...
Duke Maddog
Well-known member
Wings of the Red Star (1): 1/72 Petlyakov PE-2
I like it Doc! Great camo scheme there. I might want to try one of these someday.
I like it Doc! Great camo scheme there. I might want to try one of these someday.
Wings of the Red Star (1): 1/72 Petlyakov PE-2
Good job Alex, those decals have a lot to be desired but you're doing a good job on this.
Good job Alex, those decals have a lot to be desired but you're doing a good job on this.
Flyingbabydoc
Well-known member
Wings of the Red Star (1): 1/72 Petlyakov PE-2
I appreciate your Support Mark and Bob,
These were Begemot Decals from Russia. Probably a bad Batch, I have ordered another one I will eventually get to Change These.
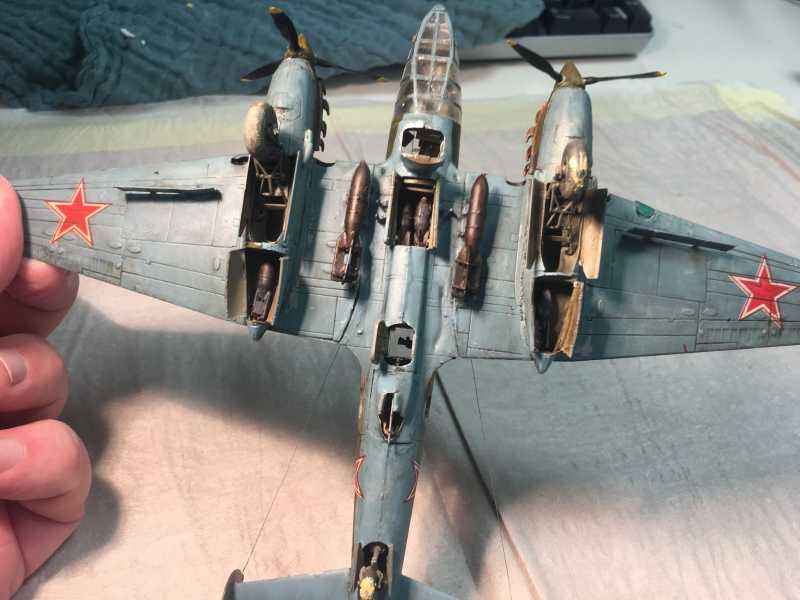
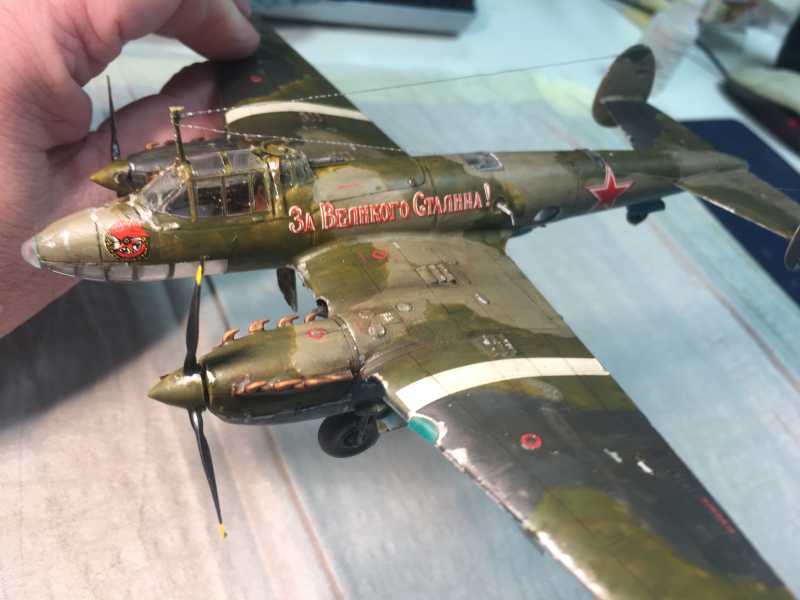
So I have finished this nightmare and now will put it to rest - I really thought the dumpster would be a good place for it.
At least I could practice the weathering a bit - not bad IMHO.
I will try again in the future with another PE2. Maybe it will be smoother. In the meantime, I am starting those Sturmoviks I mentioned before - check out the new Topic.
Many thanks once again
Cheers
Alex
I appreciate your Support Mark and Bob,
These were Begemot Decals from Russia. Probably a bad Batch, I have ordered another one I will eventually get to Change These.
So I have finished this nightmare and now will put it to rest - I really thought the dumpster would be a good place for it.
At least I could practice the weathering a bit - not bad IMHO.
I will try again in the future with another PE2. Maybe it will be smoother. In the meantime, I am starting those Sturmoviks I mentioned before - check out the new Topic.
Many thanks once again
Cheers
Alex
Wings of the Red Star (1): 1/72 Petlyakov PE-2
Good job though Alex, do the best you can and move on to the next.
Good job though Alex, do the best you can and move on to the next.
phantom II
Master at Arms
Wings of the Red Star (1): 1/72 Petlyakov PE-2
I really like the overall looks of this one . Too bad the kit is so rough.
Cheers, Christian B)
I really like the overall looks of this one . Too bad the kit is so rough.
Cheers, Christian B)
Flyingbabydoc
Well-known member
Hello dear friends,
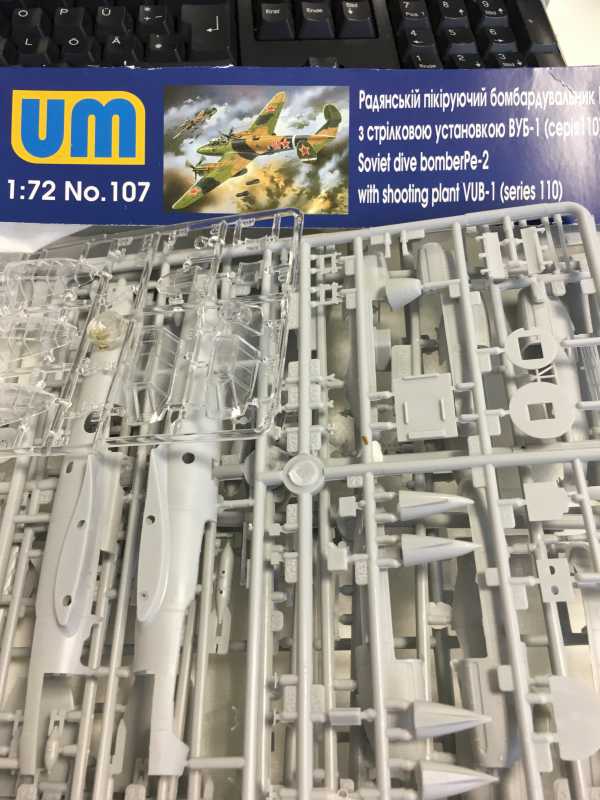
So I got so frustrated with this PE-2 that I have decided to try another one. It is such a beautiful airplane, so full of Details. I was perhaps a bit naive in dealing with this one, but now I am wiser. I will be Assembling another Unimodel 1/72 PE-2 with decals from Begemot (I ordered a new Batch, this one seems ok).
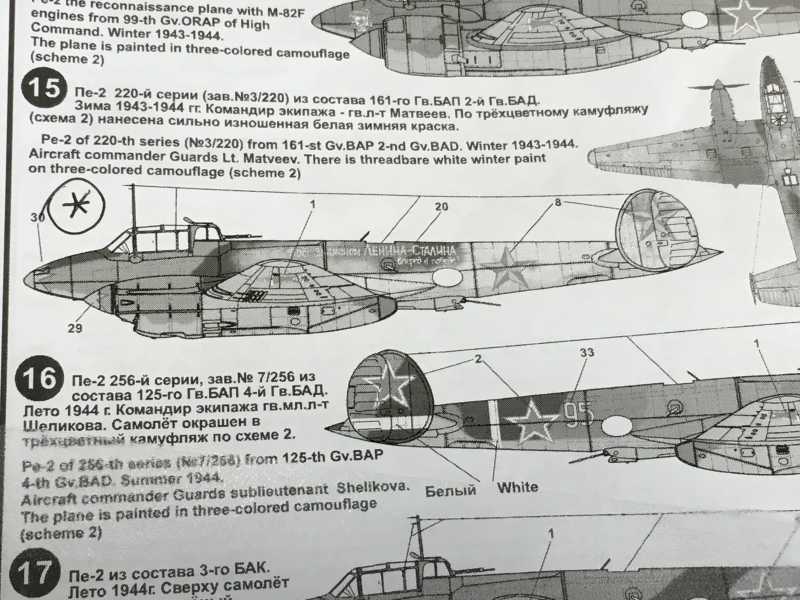
The airplane will be the one flown by Lt. Matveev from the 161.Gv.BAP during the winter of 1943/1944. It has a cool 3-tone Camouflage and some winter coating. Should be fun to paint!
Let's hope I can do a better Job.
Thanks for looking.
Cheers
Alex
So I got so frustrated with this PE-2 that I have decided to try another one. It is such a beautiful airplane, so full of Details. I was perhaps a bit naive in dealing with this one, but now I am wiser. I will be Assembling another Unimodel 1/72 PE-2 with decals from Begemot (I ordered a new Batch, this one seems ok).
The airplane will be the one flown by Lt. Matveev from the 161.Gv.BAP during the winter of 1943/1944. It has a cool 3-tone Camouflage and some winter coating. Should be fun to paint!
Let's hope I can do a better Job.
Thanks for looking.
Cheers
Alex
Heavens Eagle
Well-known member
What kind of adhesives/solvents do you use to assemble the model Alex?
I use various types of CA, sometimes mixed. For example; a drop of medium and a drop of super thin on a defunct gents sapphire watch crystal. Mixed and applied with a fine stainless steel wire. The wire is sharpened to a chisel end (with a slight angle) and polished. The wire pickes up any where from a small amount to a large blob (takes a little practice) The chisel end places the CA right where I want it to go. Large seams it is dip, place, dip, place, etc. until I have the seam filled. It also allows me to tack things in place then go back and add fine fillets and fill small cracks nicely.
When the wire gets coated with dried CA, I shave it off with a sharp blade. Not scrape, but shave, this keeps the polished surface on the wire intact. I also use a razor blade to cut the dried CA off of the sapphire crystal. Super hard smooth surface, can't hardly scratch it. Works perfectly for holding a drop or 2 of CA for applying.
PM me and I will try and get some photos for you to see what and how this works.
phantom II
Master at Arms
Waiting with expectation :drinks Italeri made one years ago but it did not have this much detail . Probably more buildable though.
Cheers, Christian B)
Flyingbabydoc
Well-known member
What kind of adhesives/solvents do you use to assemble the model Alex?
Hey Paul, These are the adhesives I use:
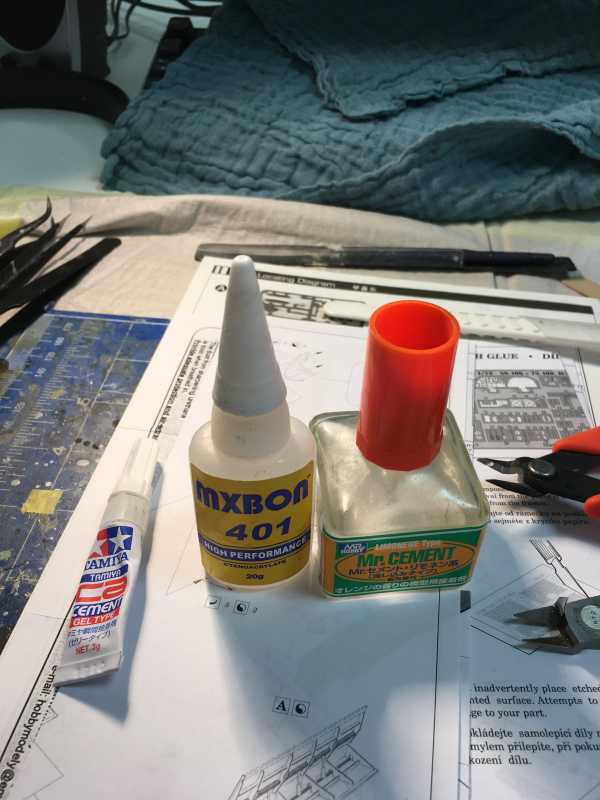
They are the "least toxic" or fume-inducing that I can endure. Other types were not possible to use. I really like your idea, I am just not sure I can use the same CA solvents as you use. I would be happy to check it out though. I will PM you my email address.
Thanks. No Progress on the PE-2 today, all my time and energy were devoted to that bloody engine (Sturmovik)
Cheers
Alex
Flyingbabydoc
Well-known member
Hello everyone
Many thanks.
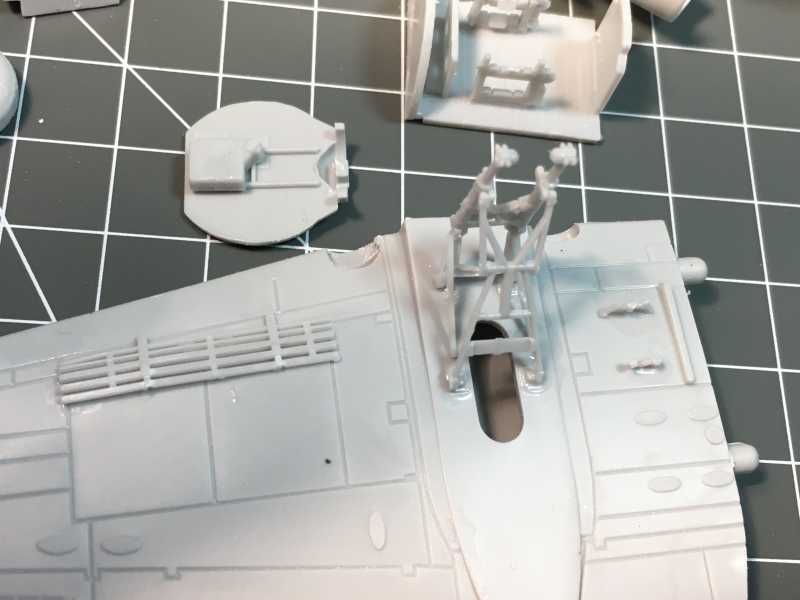
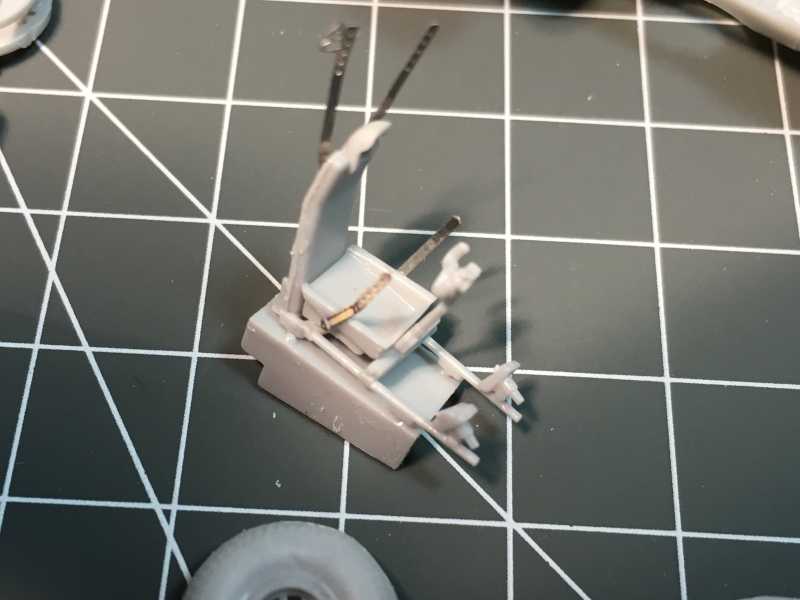
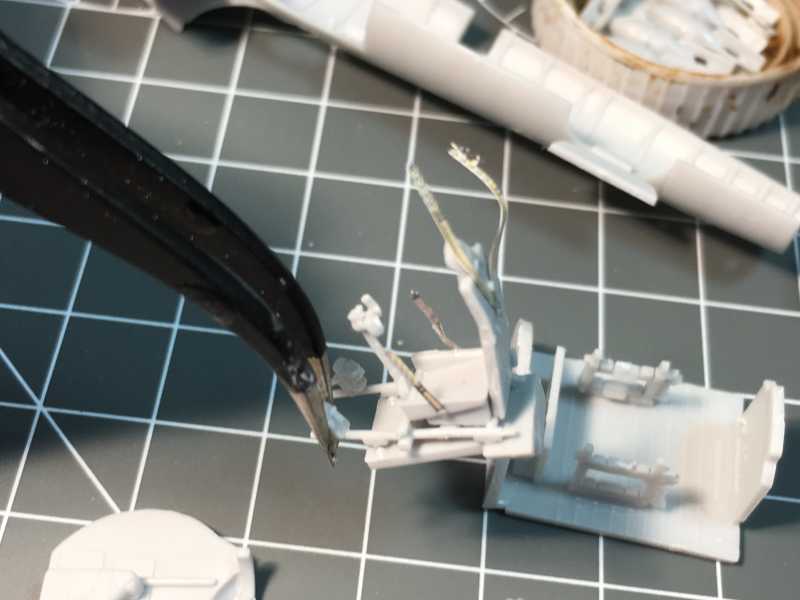
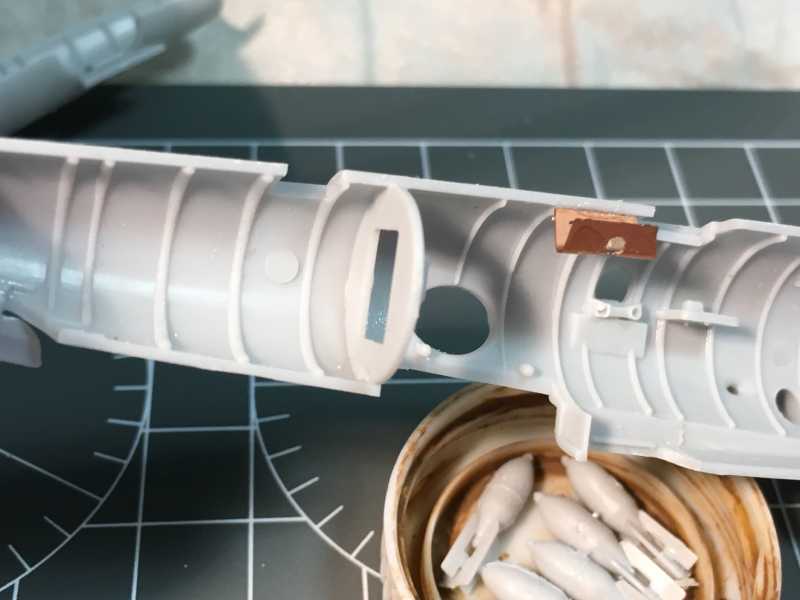
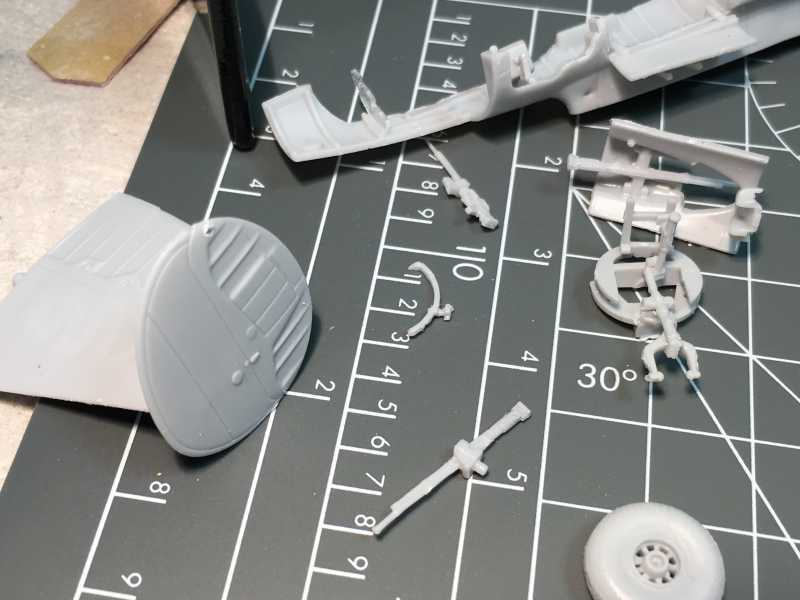
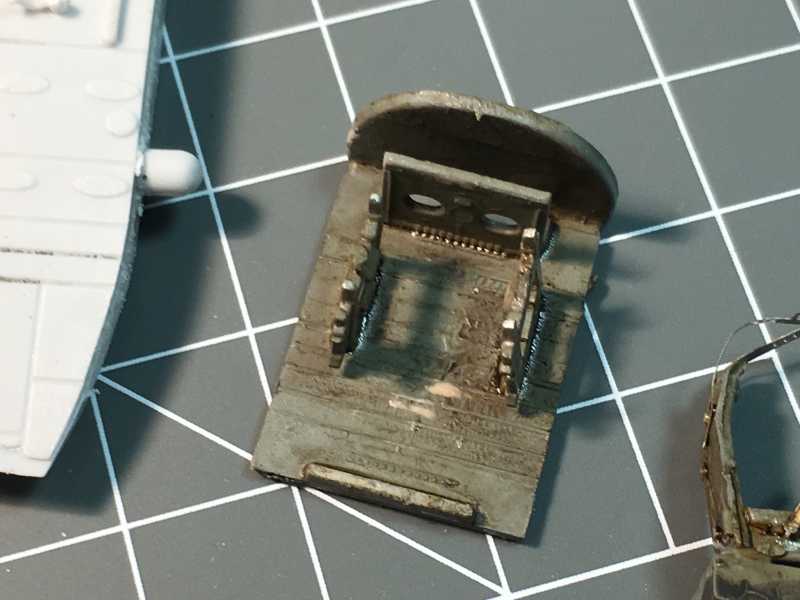
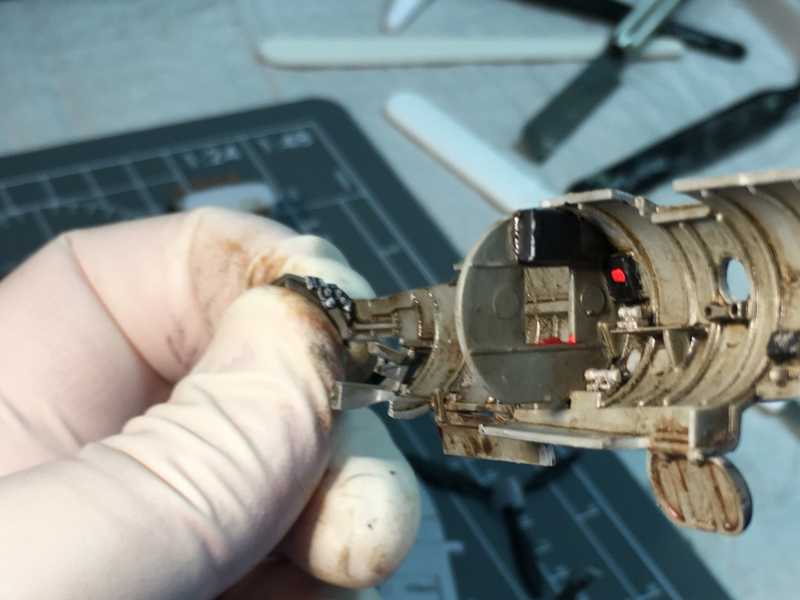
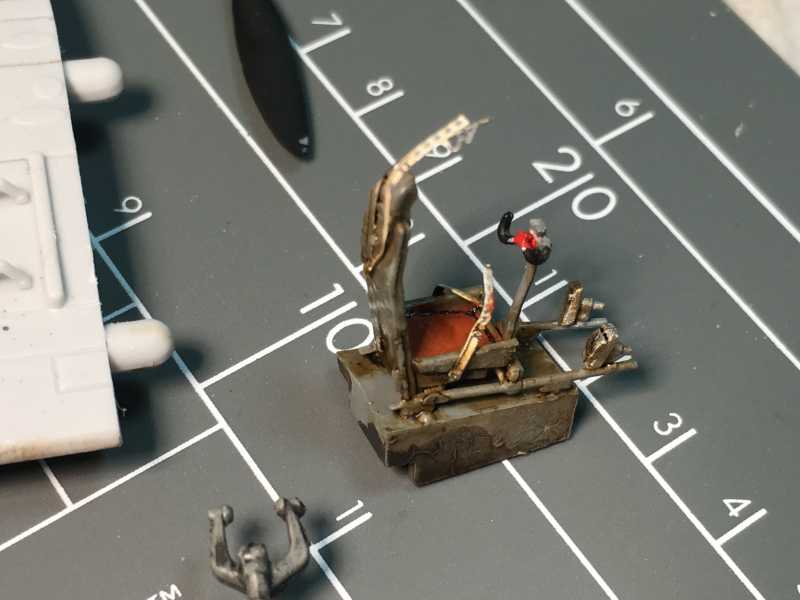
Well, it turns out that the kit was not rough. I was. In a big way...
I started assembly the next one much more carefully and now with the experience from the previous one I could see where I made the MANY mistakes.

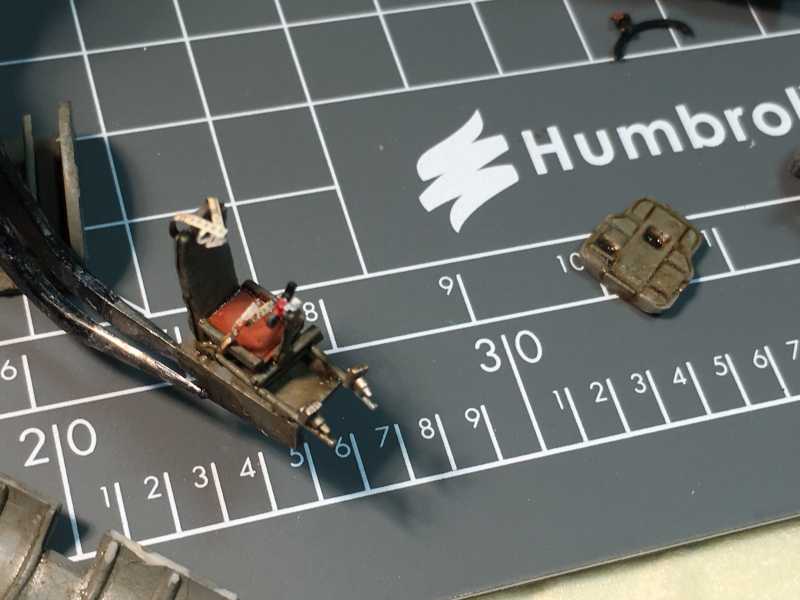
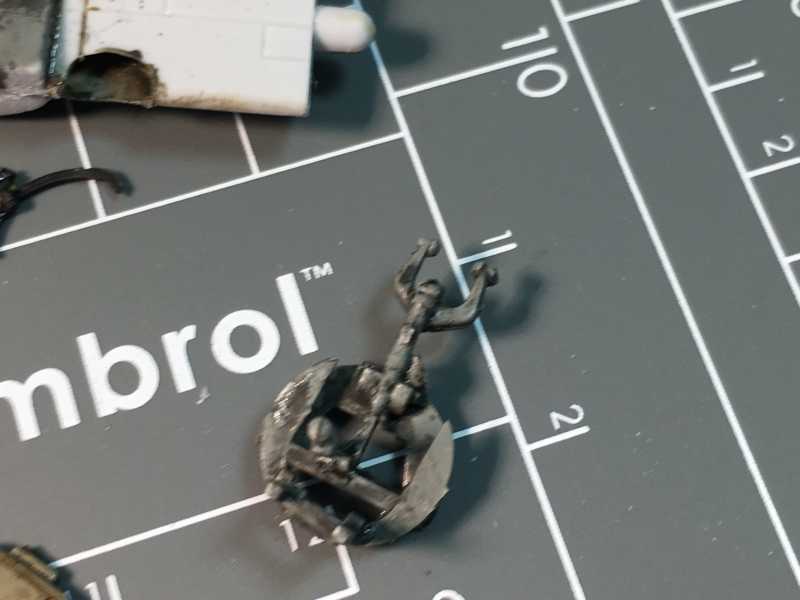
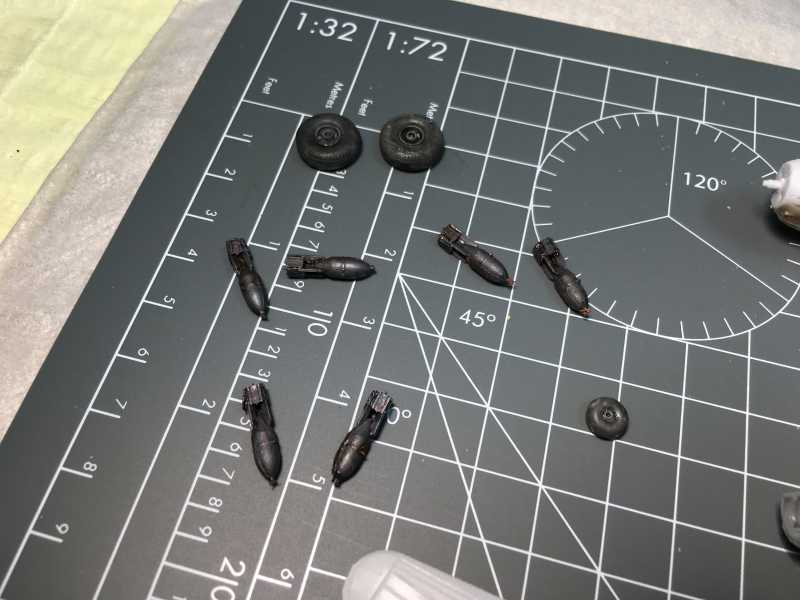
Now everything fit perfectly! Amazingly, it almost built itself.

Also, this new method (thanks Paul and Christian) of underwater sanding works out! I could sand everything and not die of Asthma. As you can see, it is much smoother (I think so at least).
I am excited. Can't wait to build it further.
Thanks for looking
Here the pics:

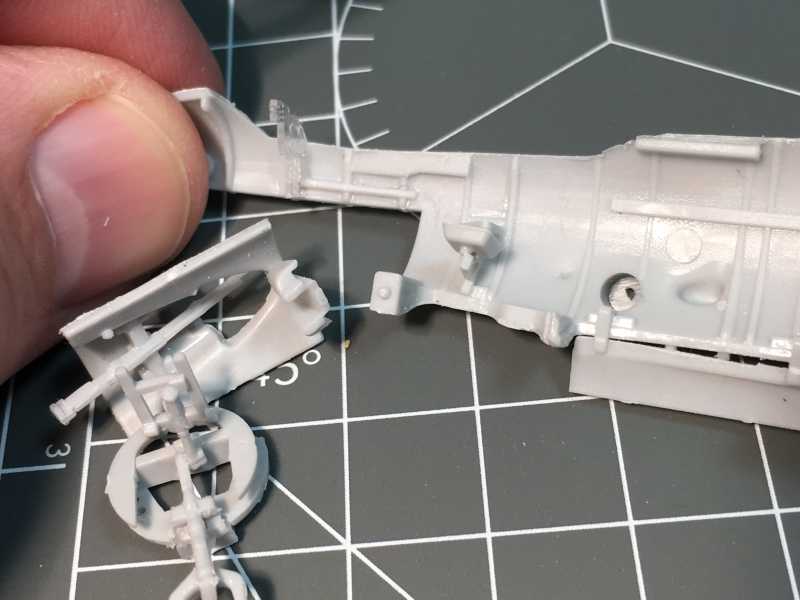
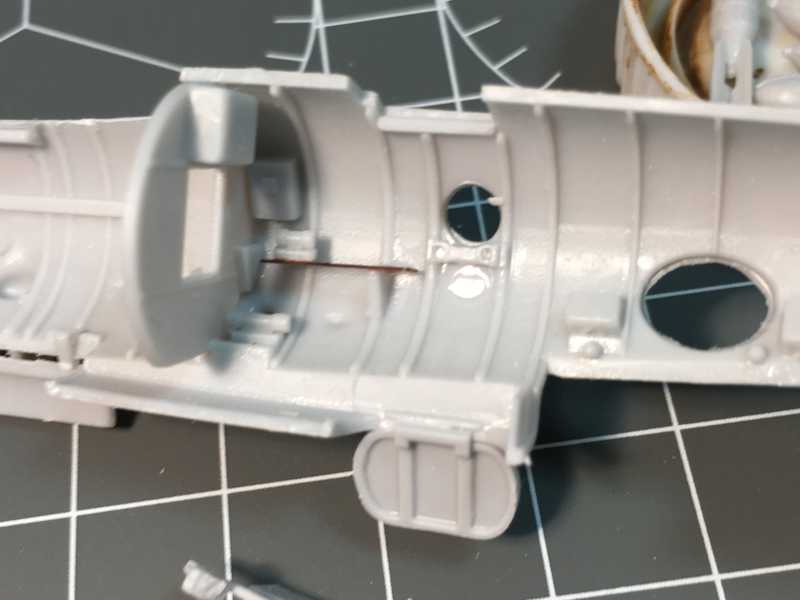
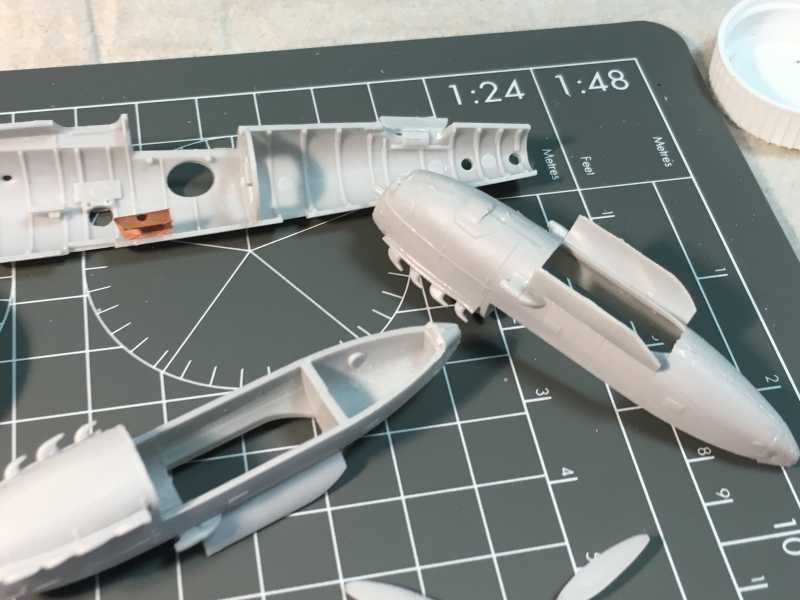
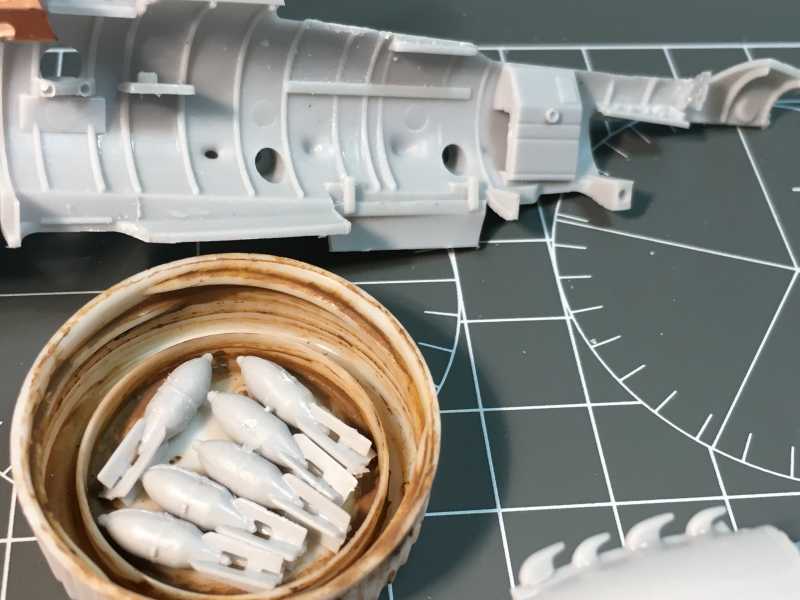
Cheers,
Alex
Many thanks.
Well, it turns out that the kit was not rough. I was. In a big way...
I started assembly the next one much more carefully and now with the experience from the previous one I could see where I made the MANY mistakes.
Now everything fit perfectly! Amazingly, it almost built itself.
Also, this new method (thanks Paul and Christian) of underwater sanding works out! I could sand everything and not die of Asthma. As you can see, it is much smoother (I think so at least).
I am excited. Can't wait to build it further.
Thanks for looking
Here the pics:
Cheers,
Alex
phantom II
Master at Arms
Well now , that was a pleasure to read and see
Keep up the good work Alex . Cheers, Christian B)
Keep up the good work Alex .
Cheers, Christian B)Heavens Eagle
Well-known member
Missed the post with the photos Alex. WOW! It is coming along much nicer! As time moves along you will find that you will slow a little on the building and take more time on the details. Glad the wet sanding is working for you. Your painting and build processes are improving all the time and I am looking forward to seeing how this build compares to the previous one.
I can agree on how CA can be rather toxic smelling. Using the watch crystals to place a drop or 2 on works fairly well. The thin wire applicator also limits the amount of CA fumes that get in the air. Lastly I set the crystal with the unused CA back out of the way so I don't set somethng in it. That helps keep me from smelling it too.
By the next day the CA on the crystal has usually set up. Many times it sets up within a couple of hours and there are no fumes. Also the thicker and slower setting CA doesn't seem to make as much smell as the super fast thin stuff. My mixes also seem to be less smelly and tend to take on some of the better traits of the 2 types being mixed. For example super thin and fast mixed with medium and a bit slower tends to give me thin and slower setting with less smell.
Duke Maddog
Well-known member
Wow, Doc! That is a tremendous improvement! This is a real thrill to watch. I'm enjoying this.
Flyingbabydoc
Well-known member
Thank you so much everyone, it means a lot to me coming from you.
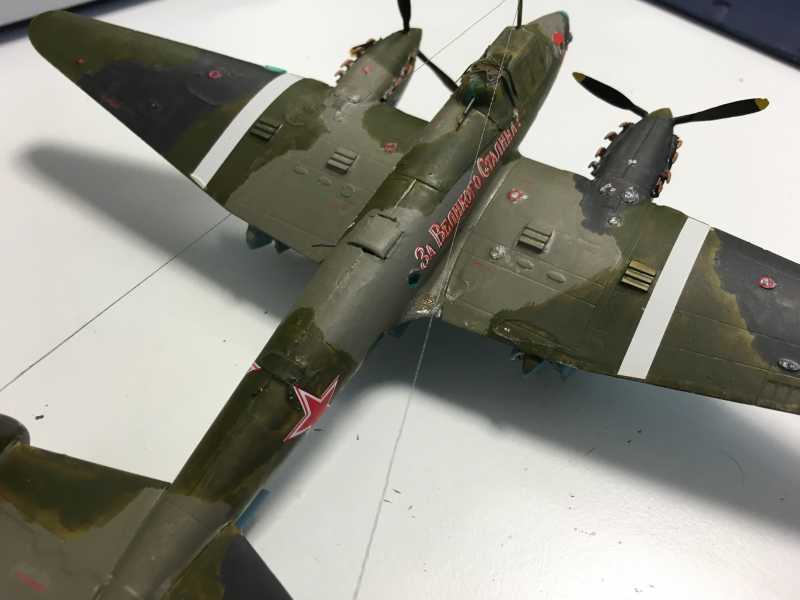
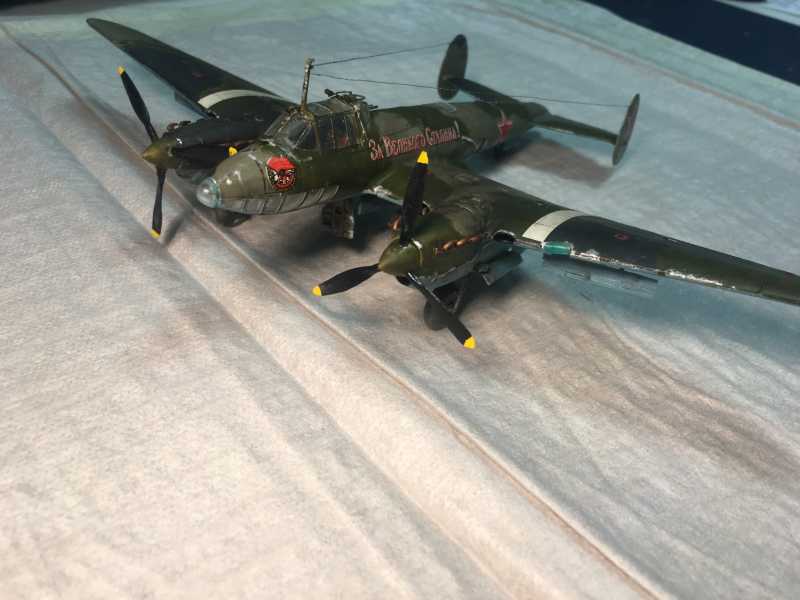
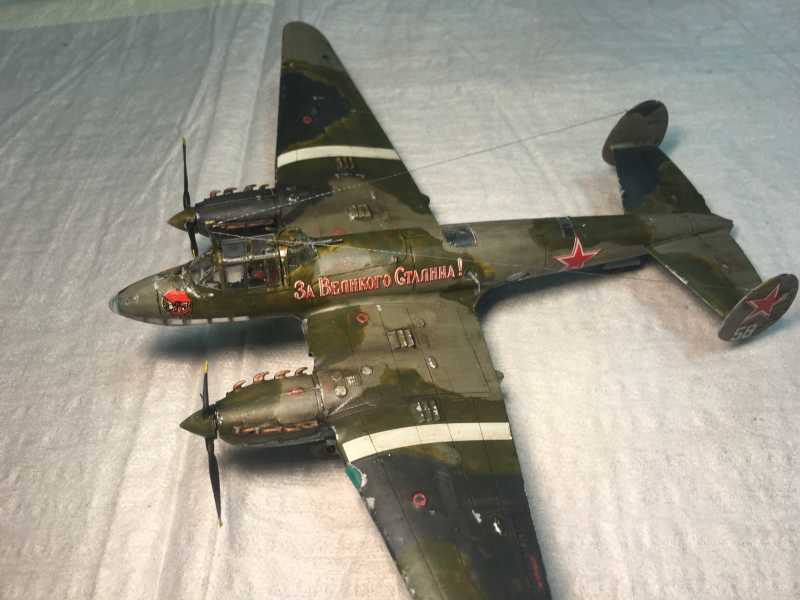
So I got the bird painted and weathered. Still a bit damp, Needs to dry more but all in all not bad I think. See for yourselves.
Cheers
Alex
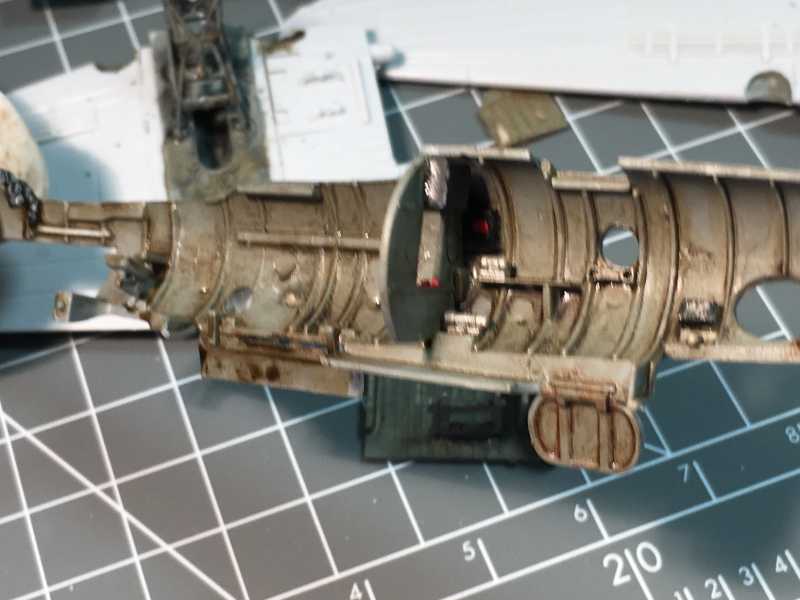
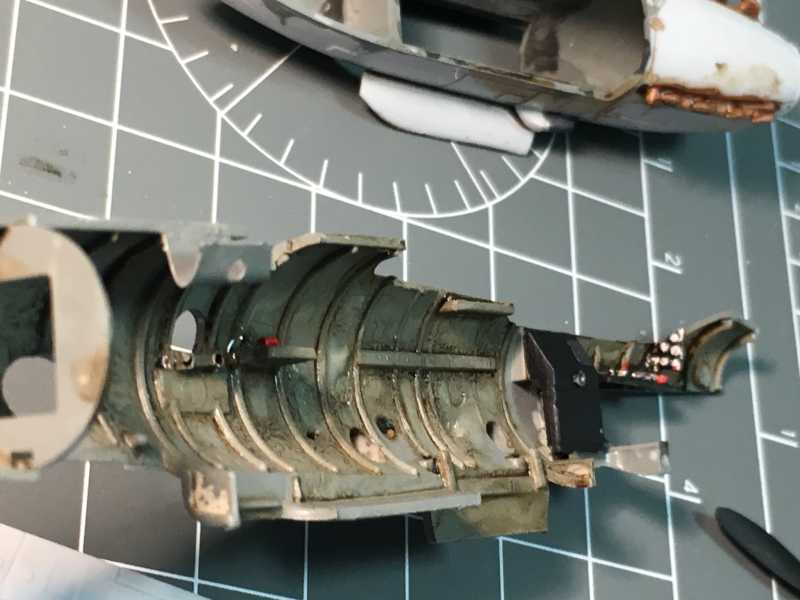
So I got the bird painted and weathered. Still a bit damp, Needs to dry more but all in all not bad I think. See for yourselves.
Cheers
Alex
Similar threads
- Replies
- 51
- Views
- 10K
- Replies
- 50
- Views
- 10K
- Article
- Replies
- 115
- Views
- 27K
- Replies
- 19
- Views
- 4K
- Replies
- 33
- Views
- 6K