Amazing Ian!
-
Modelers Alliance has updated the forum software on our website. We have migrated all post, content and user accounts but we could not migrate the passwords.
This requires that you manually reset your password.
Please click here, http://modelersalliance.org/forums/login to go to logon page and use the "Forgot your Password" option.
You are using an out of date browser. It may not display this or other websites correctly.
You should upgrade or use an alternative browser.
You should upgrade or use an alternative browser.
update 6th November.....1/72 RAZORCREST(from the Mandalorian)completed
- Thread starter Brokeneagle
- Start date
Brokeneagle
Master at Arms
Thanks MP and Steve.
More to come very soon as I have finished this now.
More to come very soon as I have finished this now.
Brokeneagle
Master at Arms
Finally completed the Razor Crest. It was only going to be a weeks build, maybe 12 hours, 70 hours later I finally completed it.
Some points to note on building one of these Revell kits.
I will add some progress shots here that I have not yet shown, then finish with the completed model on a base.
INTERIOR
The interior had some added details to enhance the kit, which had about 45% of what it really needed. The trouble was that once 'buttoned-up' you can't see anything ...........
 What it really needs to show the interior is some fibre optic soft lighting added.
I included a box on the floor from a 1/35 model and then later added another with a power unit, made from a 1/32 mustang petrol tank and some 1/35 German gas canisters and some sides with holes. Scratched up the floor as though cargo boxes had left their laoding marks and wires/tubes on the roof.
Completed adding the extra 'scratched dials and wires to the inner overhead canopy frame.


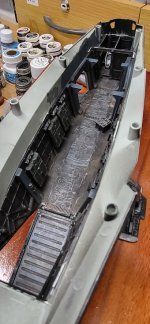
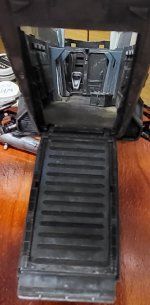
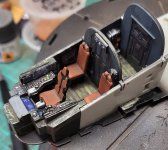
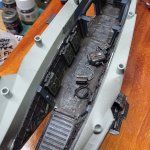
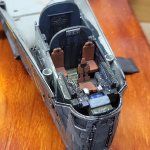
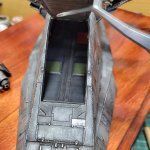

After the interior was finished and fitted to the hull I finished weathering the exterior with further staining around the gun pods, chips and stains on the stripes and also added the thin line to the inner length of the outer stripe.


Next up, the upper hull was added to the lower with the cockpit in place, as it is on the upper side of the storage area roof part. As I stated earlier make sure this is done at the start with a test fit, as I had to do some mods and fiddling to get it in place, then fill the large seam gap and re-paint after it was 'buttoned-up'. Very painful but thankfully I had some acrylic model paste, which the allowed me to easily wipe away the excess. However the line accross the front, below the cockpit, needed to retain some rectangular depressions and a thin line as per the actual TV show ship design, so I kept a certain amount of depth and shape.
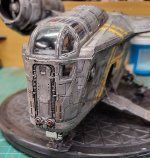
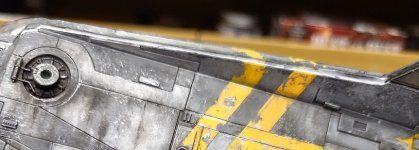

Painted
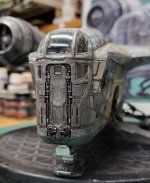
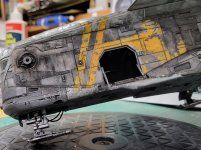
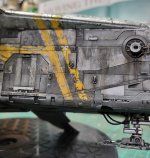
- you can also see where I have added the hydraulic fluid lines that appear on the [show] Razorcrest but are not included with the kit.
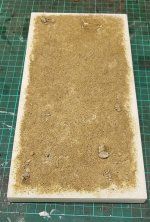
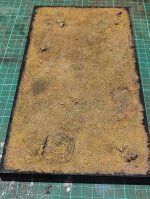
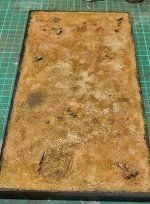
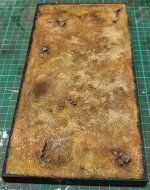
The base was then made from small section of hard insulation foam and some simple groundwork added to simulate a desert planet scene often used on the show. One aspect to watchout for is the ramp drop, as it drops lower than the landing gear when fixed in postion. You can either mod the length of the lifter / brace arms or make a shallow hole in the base.
I went with the hole.
I started the base with sand, painted it with a basic acrylic black, then ghosted with a dark brown, then lighter shades of brown to desert yellow and finished with pigments of similar colors. The edge of the base was finished with a satin black.


COMPLETED

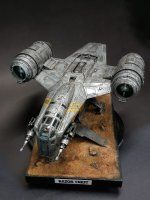
I used enamel based Silvers, Aluminiums, steel and Iron colors for the outside. There are about 10 layers for the metal hull ending in some dirt and dust layers aound some details.
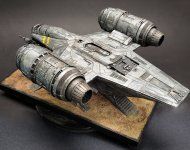
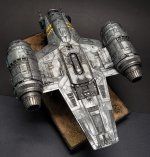


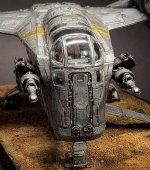
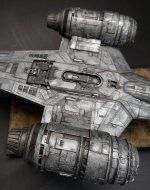


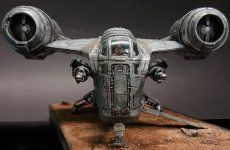
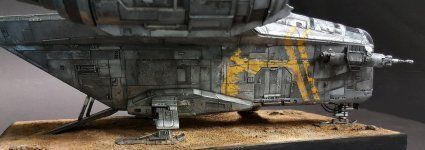


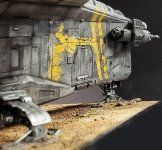

,
Some points to note on building one of these Revell kits.
- Leave the engines off until the last stage.
- Complete the cockpit and hull interior, paint and add canopies, then fully attach and seal the seam for the upper and lower fuselage halves before painting any of the silver exterior
- Don't attach the landing gear until the very end as it is extremely weak and actually needs some support in the form of a strong wire through the center (which is what I did).
- Don't bother adding extra details to any of the interior unless you are adding lighting as it cannot be seen.
I will add some progress shots here that I have not yet shown, then finish with the completed model on a base.
INTERIOR
The interior had some added details to enhance the kit, which had about 45% of what it really needed. The trouble was that once 'buttoned-up' you can't see anything ...........

 What it really needs to show the interior is some fibre optic soft lighting added.
I included a box on the floor from a 1/35 model and then later added another with a power unit, made from a 1/32 mustang petrol tank and some 1/35 German gas canisters and some sides with holes. Scratched up the floor as though cargo boxes had left their laoding marks and wires/tubes on the roof.
Completed adding the extra 'scratched dials and wires to the inner overhead canopy frame.


After the interior was finished and fitted to the hull I finished weathering the exterior with further staining around the gun pods, chips and stains on the stripes and also added the thin line to the inner length of the outer stripe.
Next up, the upper hull was added to the lower with the cockpit in place, as it is on the upper side of the storage area roof part. As I stated earlier make sure this is done at the start with a test fit, as I had to do some mods and fiddling to get it in place, then fill the large seam gap and re-paint after it was 'buttoned-up'. Very painful but thankfully I had some acrylic model paste, which the allowed me to easily wipe away the excess. However the line accross the front, below the cockpit, needed to retain some rectangular depressions and a thin line as per the actual TV show ship design, so I kept a certain amount of depth and shape.


Painted


- you can also see where I have added the hydraulic fluid lines that appear on the [show] Razorcrest but are not included with the kit.
The base was then made from small section of hard insulation foam and some simple groundwork added to simulate a desert planet scene often used on the show. One aspect to watchout for is the ramp drop, as it drops lower than the landing gear when fixed in postion. You can either mod the length of the lifter / brace arms or make a shallow hole in the base.
I went with the hole.
I started the base with sand, painted it with a basic acrylic black, then ghosted with a dark brown, then lighter shades of brown to desert yellow and finished with pigments of similar colors. The edge of the base was finished with a satin black.


COMPLETED
I used enamel based Silvers, Aluminiums, steel and Iron colors for the outside. There are about 10 layers for the metal hull ending in some dirt and dust layers aound some details.


,
Last edited:
Amazing transformation Ian, lovely work! 

centaur567
Well-known member
Wow!! Gary S.
Brokeneagle
Master at Arms
Thanks MP, Rhino, Barney and Gary. Appreciate the support. I will back back with a quick enhancement of the small one. It should be pretty easy as it is only small. 

Brokeneagle
Master at Arms
Thanks Steve.Classic work, Ian, classic!
Brokeneagle
Master at Arms
Thanks Piet.Real nice paint and weathering .View attachment 154479
Ruben Lopez
Active member
Wow! That finish looks incredible!
Duke Maddog
Well-known member
I am overwhelmed at the realism you show here. It almost looks like this would fire up and take off on it's own. I hope to get one of these, but I doubt I'll come anywhere close to the quality you've achieved here. Way to go! I bow to the Master! 


Brokeneagle
Master at Arms
Thanks RubenWow! That finish looks incredible!
Brokeneagle
Master at Arms
Thanks Duke, I appreciate your passion. If you need some direction on paint etc when doing yours don't hesitate to 'hit me up' on a PM here.I am overwhelmed at the realism you show here. It almost looks like this would fire up and take off on it's own. I hope to get one of these, but I doubt I'll come anywhere close to the quality you've achieved here. Way to go! I bow to the Master!


Similar threads
- Replies
- 24
- Views
- 3K


