• Modelers Alliance has updated the forum software on our website. We have migrated all post, content and user accounts but we could not migrate the passwords.
    This requires that you manually reset your password.
    Please click here, http://modelersalliance.org/forums/login to go to logon page and use the "Forgot your Password" option.

1/35 Pzr 4/70 A STUFF update 18 August 2026

Agree, BUT it is a video of German SPROCKETS!
:smack:
Ugh! NO! It more resembles this:

Broken wheel.jpg


This is MORE better!

JETSONS+SPACELY-2166345470.png
 
Last edited:
Ok, so taking this post back on to the subject .................:bat.
292fc03e-fcf4-48e4-afc8-48b7b5b463e3.jpg


The model needed to be short-tracked and get some other special bits to achive the look I wanted so off we go.
Sorry I built through a lot of the initial progress without thinking to photograph.
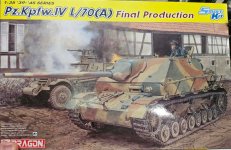
The Kit

9f4a16d7-2351-4cb8-8b1e-79e59bf7ec9b.jpg

The dragon kit has a lot more detail than the previous Tamiya kit but in many sections it is over engineered, and doesn't achieve the level of enjoyable model making that the Tamiya kit does.

It does faithfully depict the details of a late model version and has a very nice addition of 2 sets of mounting rails for the Thoma shields - 1 with notches for the shields and another without, depicting the plain mounting bars as they appear in 'real life' without any shields mounted.

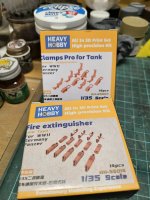
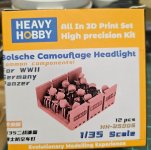
Some Extras
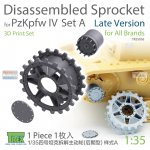
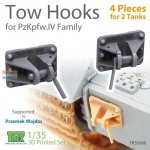
4c60b799-bb97-4393-82f6-82e9eb0b4e17.jpge52ad6ee-a43d-4541-9962-165334ff0d83.jpg11839cc4-d266-4ef4-aff4-d5b1587fd193.jpgtrxtr35036__64256.jpgtrxtr35066__96385.jpg


The extras should be fun and bring a bit more detailout of this kit bash modification.
The Build...........
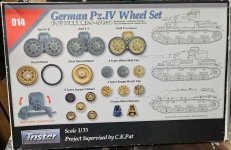
Initially I just constructed the chassis and modified the bogies as per the ref photos . Some' wear and tear' was added to the rubber tyres and the track links constructed. I used the semi late model reurn rollers from the Tristar wheel kit to go with something a bit different from the previous early Tamiya build - the return roller can't be identified properly so why not!
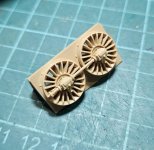
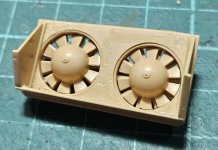
I also added the TREX drive sprocket mount to model a little more detail and set the model to a time before the photo. There is some nice detail already on the chassis, underneath where the Drive Sprocket covers are mounted. I will detial these further on the left side as opposided to the cover still on the left side.
2c1f0dd9-5ad1-4304-b9c3-5f7447edfbb5.jpg
3f67f94a-4759-44cc-9501-bb698ad21da7.jpg

ed52bdc6-7440-42f1-a795-b8a8d6918ce0.jpg

ac31af62-6277-4fa8-a876-4347de696c4a.jpg


TREX Tow Hooks were added to the front plate as well as weld beads in the corners of the front plate, which were non existent on the kit.
cda0e21a-60ca-46a0-adb7-bfac9b9c7394.jpg
b528b4be-f0cf-4991-99e9-e016f5c8204d.jpg

The
 
Last edited:
Just be wary that the roadwheels in this set are for Tristar's (now Hobby Boss') early Pz.Kpfw. IV series and are of the narrow type. They are NOT suitable for the wider tires, regardless of the wheel centers you use.
1786986147291.png


If I ever replace roadwheels, I used the AFV Club roadwheel set, available separately, from their Sd.Kfz. 164 kit:
1786986554295.png
 
Hello again for drive sprocket time!
The right side was changed to represent this stage of dismantlement.
c34b105f-3234-4a87-b229-9293c049a552.jpg

5afa691b-cff9-454d-b172-7e14b0b3e2a7.jpg7b800f81-da67-47ae-9058-1a17cc401c93.jpg658cfb0c-9234-4ce8-8ee3-7580513b209d.jpg
2b0b0673-9e6c-4fe6-8482-e4f137b619d1.jpg

426dbf53-852f-4ef6-91ee-285491a02464.jpg

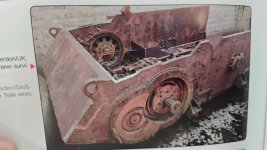
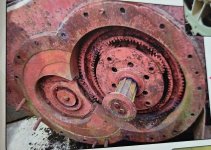
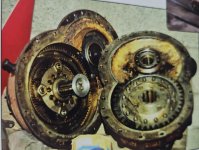
The left side will be modelled as per the photo with the drive sprocket and differential gearing cover removed. I initially planned to scratch build the 'diff' gearing details, starting with a backing part from the RFM Pz 4H full interior kit.
ec020aa2-51b4-4aac-9d03-7761c5da6b7f.jpg81b485fe-db24-429f-b58a-fa6020a21426.jpg
Saul has alerted me to an early Pz 4 Dragon kit that has this detail pre-molded into the hull, so he is sending me a spare hull he has which will enable me to cut out the detail and fit it to this hull.
The rear of the Chassis needed trimming down on the sides to accept the new rear deck I had cut off a Dragon Pzr 4 H kit for a previous build. This probably sounds counter productive but I will explain in a moment.
The photo shows the rear section with the top already trimmed down to accomadate the engine deck.
4059e826-b38f-4dae-8469-defb02a2380c.jpg
50e25f2f-04a5-4a48-913c-bcd94918ca61.jpg

So the reasonbehind this madness is pretty simple - the Dragon Pz4 H smart kit used harder plastic than my later Pz4 70/A and the details just come out better, so I had a previously cut off rear deck from another build, so it was easy.
The metal barrel was added without the breach detail, so I had to make sure it was set at the right length of exposure.
cccb1262-2b6f-4d5a-8089-018271823c19.jpg

79655adf-052d-4b7a-b406-4b259ff16eff.jpg

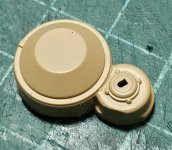
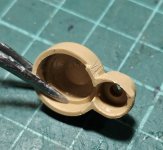
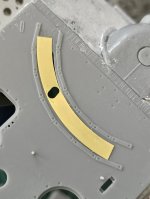
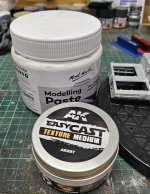
Texture was added to the Upper structure with AK Super cast texture but it is exactly the same as my much cheaper Model pastse from my local art shop - just thought I would give it a try. I found I needed to 'fall back on my traditional methods and add some Tamiya putty as well. I then added the additional parts to finish the roof and in doing so found the terrible fit of the PE cover for the Loaders periscope. I replaced it with a scratch built one in white plastic and added the securing tabs as well.

f3e53b14-16a2-4983-9dbb-844ec89326b5.jpg540ea964-f620-4b7f-bce7-b6c0854e52c9.jpg
954a80df-b720-443a-9e17-9172fdb71787.jpg

9c35ea30-53e6-4f5b-a816-b002d0f883d6.jpg
 
Last edited:
Back
Top