This is a summery of where I am with the F4F-4

Thanks to fellow knucklebuster Harv over at Swanny's I have all sorts of goodies to play with here. I may go with a little more just to get the life raft bay behind the cockpit. Harv was very generous when he loaded this bad boy up. A Full Big Ed set, bunches of resin parts for the cockpit, shoot, I think I got enough to finish out 2 or 3 cockpits, and I may do that just to see which one looks best. Enough .50 cals to deck out a couple of wings. Not to mention some wheels. Don't know what brand these are the labels are gone. But they sure look nice!
I have ambitious plans for this thing. All the things I didn't do the the one last year will be done now.
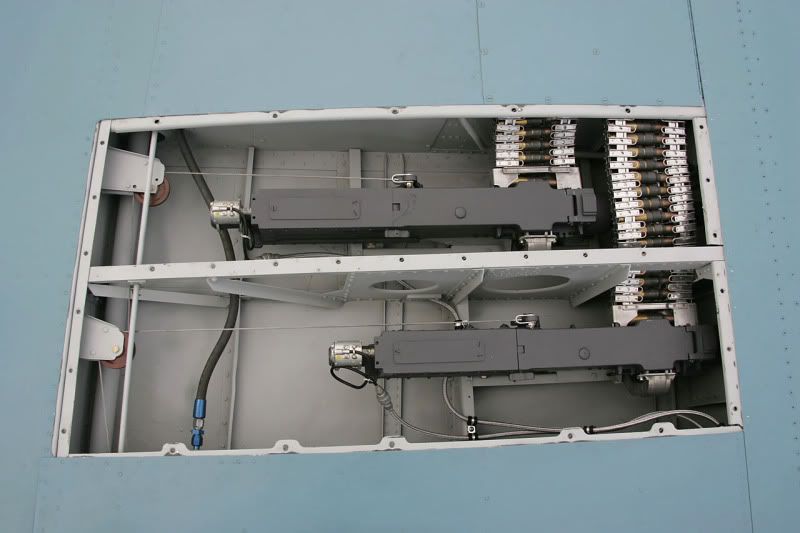
Fuel Tank under the cockpit, open radio compartment. Accessory bay opened all the way around exposing full detail of the rear end of the P&W R-1830-86. Open Gun panels and wings likely folded back. May have this one decked out for carrier operation.
And let the cutting begin!


Fully exposed cylinder heads under the cowl and duct work going back to the intercooler will be in order. Don't know if the frame work will be brass strips or styrene.
Now all I have to do is find someone who can do all this!!! ;D
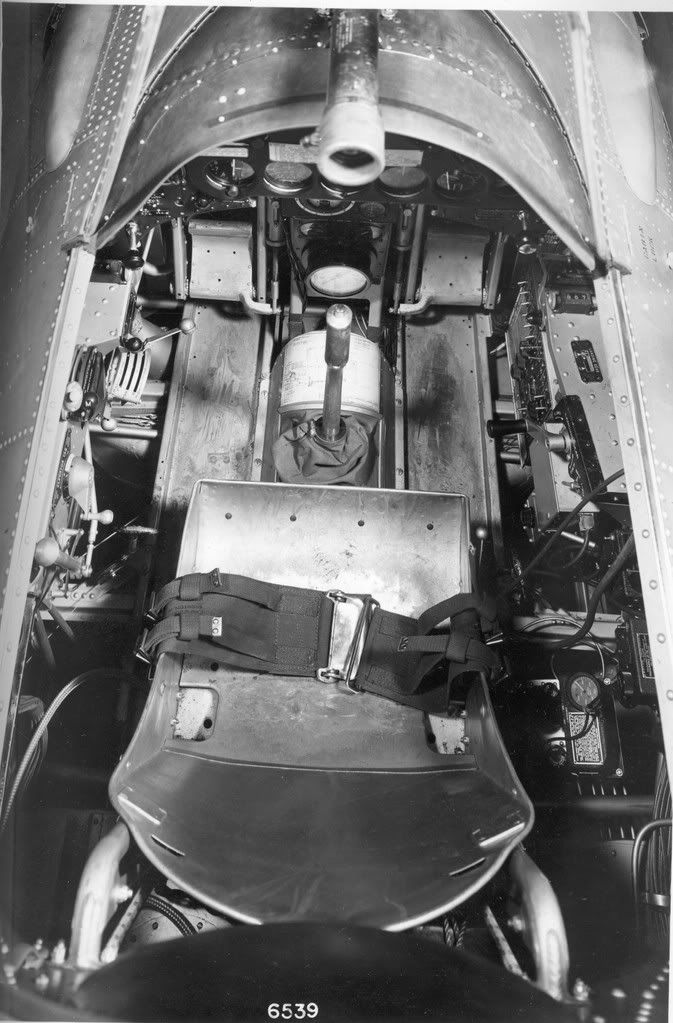
I had some options on the seat so I figured to explore them all
You can see the original here.

Here we have the Kit Seat, The Resin Seat and two PE Seats from the Big Ed set, one from the Cockpit set and the other from the Zoom Color set. First the kit seat, nothing out of the ordinary and you can see why there's a need for an upgrade. The Resin seat is not very close to what it should be. The first PE seat I tried to solder. Even scrubbing the Eduard PE didn't help it much, it's pretty firm but the solder still did not react well. The last one was constructed with CA.

It's my keeper...

And if you're wondering what i've done with the Cowl, well nothing much other than add some stock to the cut side to add the lip where the panels will attach. Not sure how ot proceed here so I'm going to build up the rest of the aircraft and then work on the cowl later when I understand how it attaches to the frame.
Thanks to fellow knucklebuster Harv over at Swanny's I have all sorts of goodies to play with here. I may go with a little more just to get the life raft bay behind the cockpit. Harv was very generous when he loaded this bad boy up. A Full Big Ed set, bunches of resin parts for the cockpit, shoot, I think I got enough to finish out 2 or 3 cockpits, and I may do that just to see which one looks best. Enough .50 cals to deck out a couple of wings. Not to mention some wheels. Don't know what brand these are the labels are gone. But they sure look nice!
I have ambitious plans for this thing. All the things I didn't do the the one last year will be done now.
Fuel Tank under the cockpit, open radio compartment. Accessory bay opened all the way around exposing full detail of the rear end of the P&W R-1830-86. Open Gun panels and wings likely folded back. May have this one decked out for carrier operation.
And let the cutting begin!
Fully exposed cylinder heads under the cowl and duct work going back to the intercooler will be in order. Don't know if the frame work will be brass strips or styrene.
Now all I have to do is find someone who can do all this!!! ;D
I had some options on the seat so I figured to explore them all
You can see the original here.
Here we have the Kit Seat, The Resin Seat and two PE Seats from the Big Ed set, one from the Cockpit set and the other from the Zoom Color set. First the kit seat, nothing out of the ordinary and you can see why there's a need for an upgrade. The Resin seat is not very close to what it should be. The first PE seat I tried to solder. Even scrubbing the Eduard PE didn't help it much, it's pretty firm but the solder still did not react well. The last one was constructed with CA.
It's my keeper...
And if you're wondering what i've done with the Cowl, well nothing much other than add some stock to the cut side to add the lip where the panels will attach. Not sure how ot proceed here so I'm going to build up the rest of the aircraft and then work on the cowl later when I understand how it attaches to the frame.
 ... :dry: ...
  ...
...