
-
Modelers Alliance has updated the forum software on our website. We have migrated all post, content and user accounts but we could not migrate the passwords.
This requires that you manually reset your password.
Please click here, http://modelersalliance.org/forums/login to go to logon page and use the "Forgot your Password" option.
You are using an out of date browser. It may not display this or other websites correctly.
You should upgrade or use an alternative browser.
You should upgrade or use an alternative browser.
Tamiya 1/48 scale Fw 190F-9
- Thread starter matrixone
- Start date

Thanks for the comments!
This kit continues to impress, its so well put together and thought out it could easily be a true one week build.")
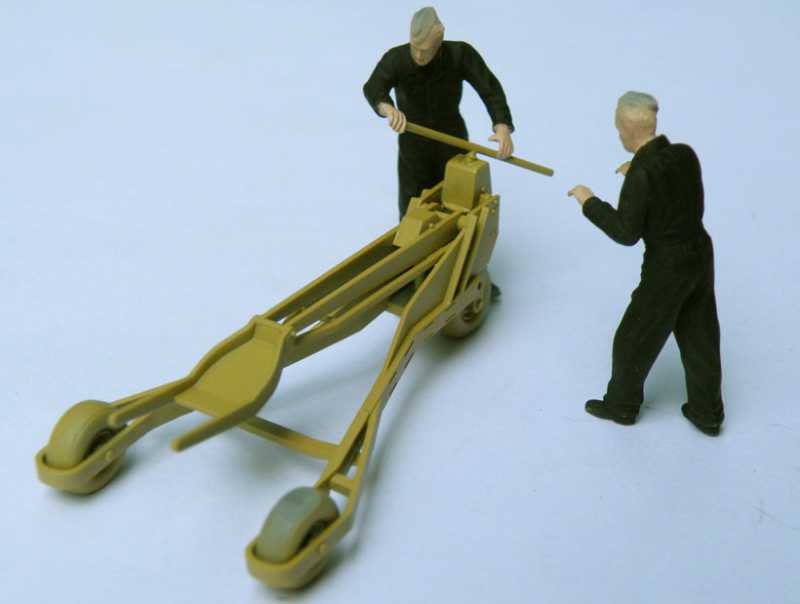
The bomb loading cart will get plenty of weathering and look beat up, remember at the late stages of the war the Luftwaffe was constantly moving from base to base and their equipment would tend to get that 'well used look' very quickly.
Matrixone
This kit continues to impress, its so well put together and thought out it could easily be a true one week build.
The bomb loading cart will get plenty of weathering and look beat up, remember at the late stages of the war the Luftwaffe was constantly moving from base to base and their equipment would tend to get that 'well used look' very quickly.
Matrixone
Thanks James!
Work on this model has been slow the past two weeks but is about to pick up the pace again once some of the other models I have been working on are nearly finished.
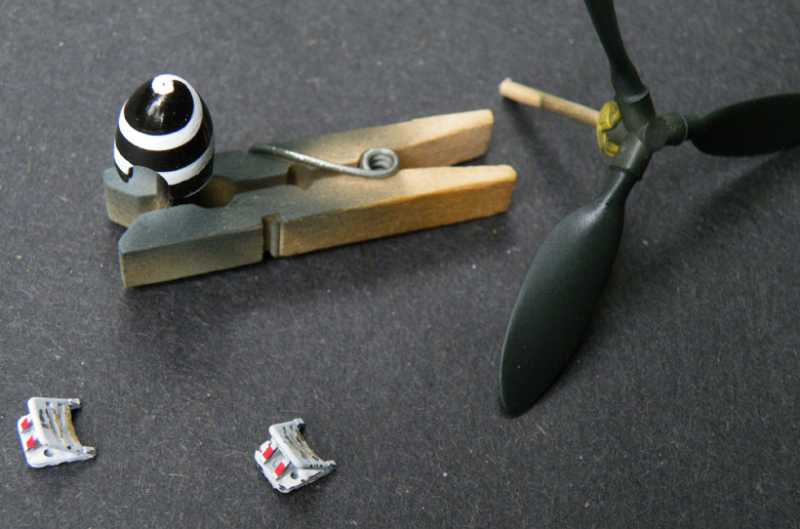
The spinner spiral was supposed to be done with the kit supplied decal but as I found out the hard way these new style Tamiya decals are sensitive to setting solution and part of the spiral decal melted and had to be scraped away, I hand painted flat white paint onto the spinner to fix it.
Tamiya includes wheel chocks in this kit and this is greatly appreciated by me, I can use these in my airfield pictures with many other models. The wheel chocks have been built, painted, and some weathering added to them. Next they will be given a coat of Future and then an oil pin wash to bring out more of the details.
Matrixone
Work on this model has been slow the past two weeks but is about to pick up the pace again once some of the other models I have been working on are nearly finished.
The spinner spiral was supposed to be done with the kit supplied decal but as I found out the hard way these new style Tamiya decals are sensitive to setting solution and part of the spiral decal melted and had to be scraped away, I hand painted flat white paint onto the spinner to fix it.
Tamiya includes wheel chocks in this kit and this is greatly appreciated by me, I can use these in my airfield pictures with many other models. The wheel chocks have been built, painted, and some weathering added to them. Next they will be given a coat of Future and then an oil pin wash to bring out more of the details.
Matrixone
Thanks Dave,
I admit I am a little burned out on 109's at the moment and this Fw 190F-9 kit is really looking good to me but I do have to finish up some of the Messerschmitts before I make more mistakes on them so work on this model will be slow for a while longer until some work table space is freed up.
Not pictured here is the work done on the main wheels and tail wheel, they are now painted and weathered and ready to be put on the model.
Matrixone
Firesmacker
Member
Great job, Les. I love that spinner!
Thanks Jeff!
Its been a little while since any work was done on this model. Since four of my other models under construction were recently finished I now have no excuses not to finish this one too.
The wings have been glued together, the seams on the leading edges were given the super glue treatment and sanded smooth and in the pictures below you can see the wings have been attached to the fuselage and some red glazing putty has been put on the seam line at the wing roots.
The red glazing putty is ideal for filling this type of seam line on Fw 190 models as it is easy to sand down without destroying the wing root detail but at the same time it feathers out really well.
After the glazing putty is sanded down Mr. Surfacer will be brushed on and then lightly wet sanded down with fine grit sandpaper for a smooth surface finish to get ready for paint.


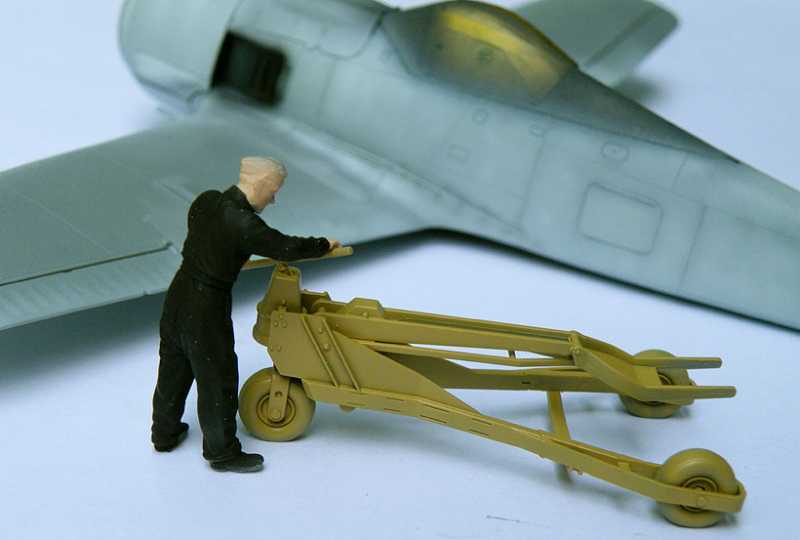
The ground crew figures were assembled earlier today and will start painting them later this week.
Matrixone
Its been a little while since any work was done on this model. Since four of my other models under construction were recently finished I now have no excuses not to finish this one too.
The wings have been glued together, the seams on the leading edges were given the super glue treatment and sanded smooth and in the pictures below you can see the wings have been attached to the fuselage and some red glazing putty has been put on the seam line at the wing roots.
The red glazing putty is ideal for filling this type of seam line on Fw 190 models as it is easy to sand down without destroying the wing root detail but at the same time it feathers out really well.
After the glazing putty is sanded down Mr. Surfacer will be brushed on and then lightly wet sanded down with fine grit sandpaper for a smooth surface finish to get ready for paint.
The ground crew figures were assembled earlier today and will start painting them later this week.
Matrixone
Thanks for sharing Les 
Most of the tedious work on this model is done so the fun can now begin...painting!
The canopy was masked and glued on, the masking job on this canopy was really easy since Tamiya provides masks for this, even though the masks are not pre-cut a fresh X-acto blade makes cutting them from the marked backing sheet a breeze.
The wheel wells have already been painted and weathered and I needed to mask them off from the painting to come so I used some thick white paper cut out in the shape of the landing gear doors as a way to mask off the wheel wells, the paper is being held on with ticky tack.
The front of the engine cowl also needed to be covered up before painting and I used paper held on with ticky tack similar to what I did with the wheel wells.

Matrixone
The canopy was masked and glued on, the masking job on this canopy was really easy since Tamiya provides masks for this, even though the masks are not pre-cut a fresh X-acto blade makes cutting them from the marked backing sheet a breeze.
The wheel wells have already been painted and weathered and I needed to mask them off from the painting to come so I used some thick white paper cut out in the shape of the landing gear doors as a way to mask off the wheel wells, the paper is being held on with ticky tack.
The front of the engine cowl also needed to be covered up before painting and I used paper held on with ticky tack similar to what I did with the wheel wells.
Matrixone
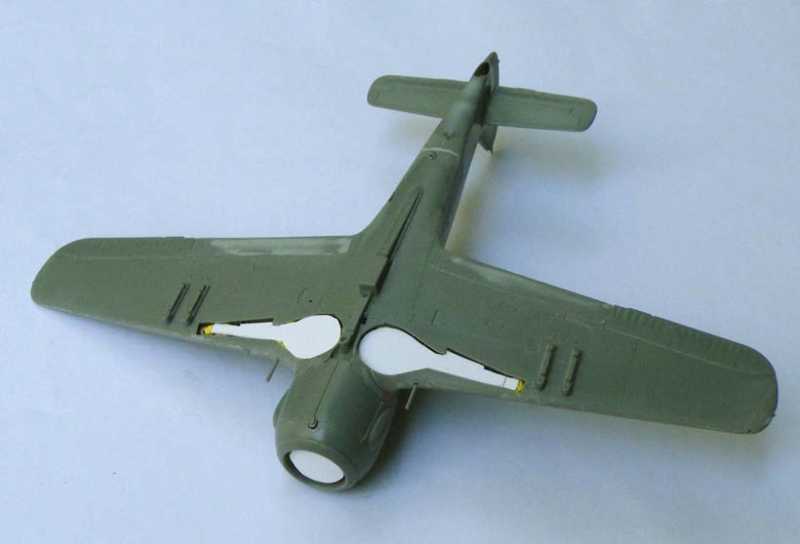
While I had the airbrush out today I also did some painting on this model too, the bomb loading cart was given its coat of dark yellow and the flesh color was sprayed on the hands and faces of the ground crew.
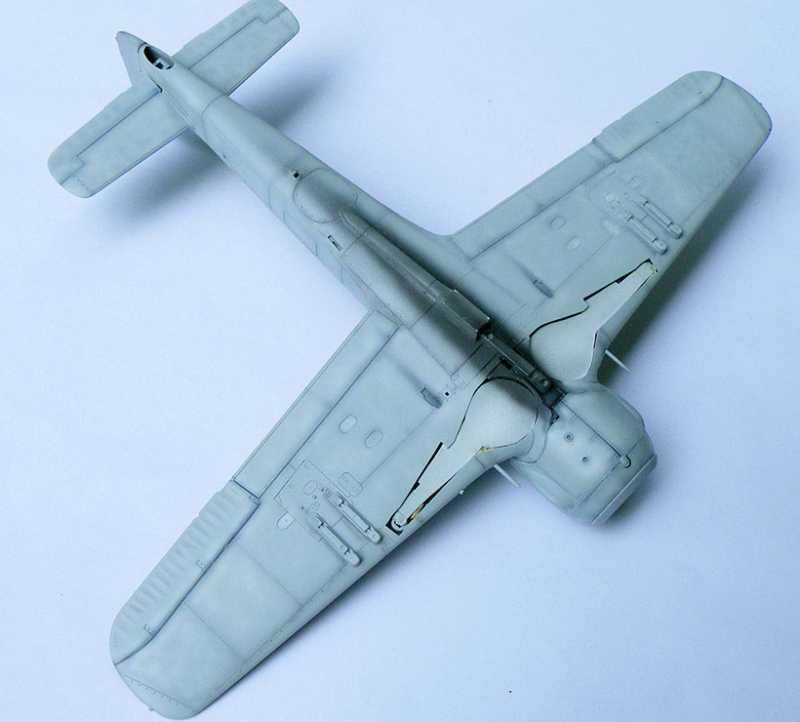
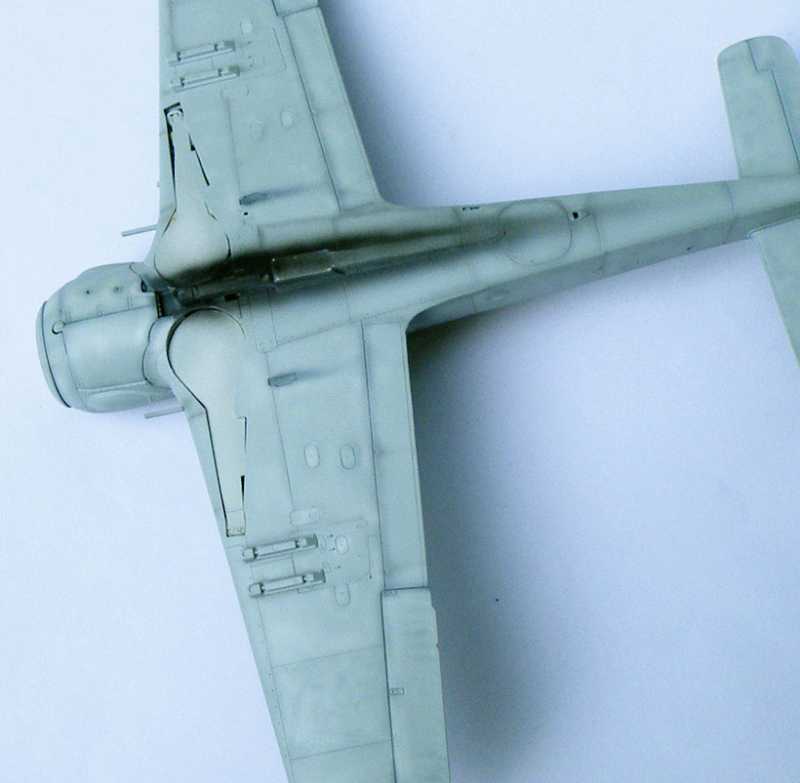
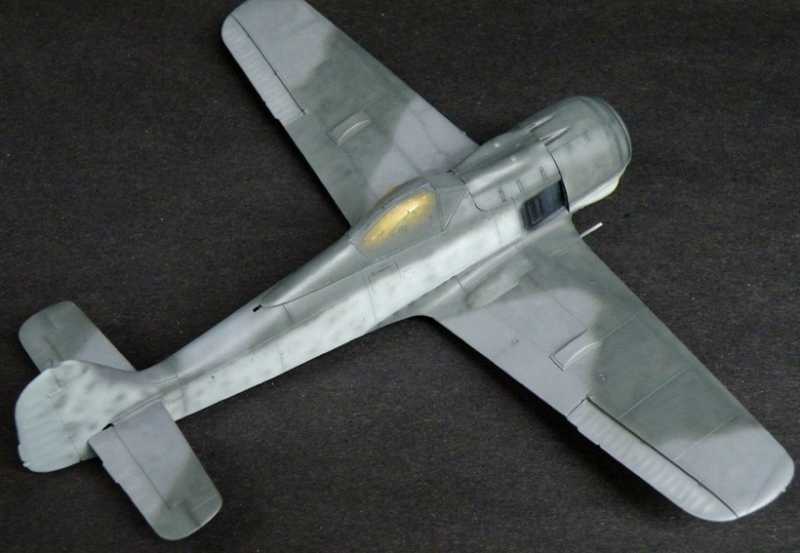
And here is the Fw 190F-9 after a thin base coat of pale RLM 76 and some pre-shading was added. After the paint is dry I will spray some white to highlight a few random places and then give the entire model a coat of thinned RLM 76 to blend everything together.
On the fin you can just barely make where I added some pre-mottling...this will not get much of the thinned RLM 76 treatment as I want this to more visible than the pre-shading.

The heavy exhaust stains on the undersurfaces will also not get covered up too much by the coat of RLM 76, most all radial engine Fw 190's had thick exhaust staining on them and my model will also have that feature.
Matrixone
And here is the Fw 190F-9 after a thin base coat of pale RLM 76 and some pre-shading was added. After the paint is dry I will spray some white to highlight a few random places and then give the entire model a coat of thinned RLM 76 to blend everything together.
On the fin you can just barely make where I added some pre-mottling...this will not get much of the thinned RLM 76 treatment as I want this to more visible than the pre-shading.
The heavy exhaust stains on the undersurfaces will also not get covered up too much by the coat of RLM 76, most all radial engine Fw 190's had thick exhaust staining on them and my model will also have that feature.
Matrixone
Thanks again James and Luiz.
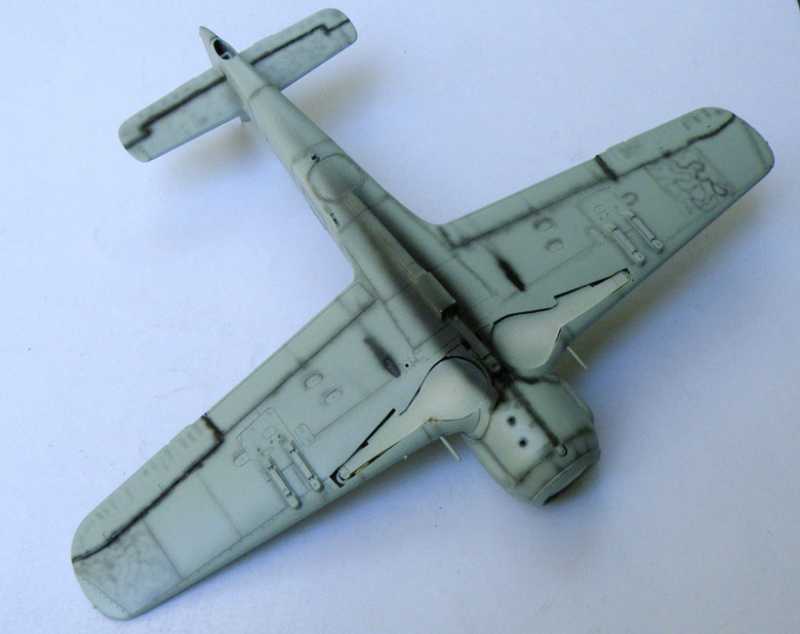
Like I did with the Revell Bf 109G-10, some highlights have been added with carefully sprayed on white paint.

And in the next three pictures you can see the highlights and pre-shading have been partly covered up by a coat of thinned pale RLM 76.

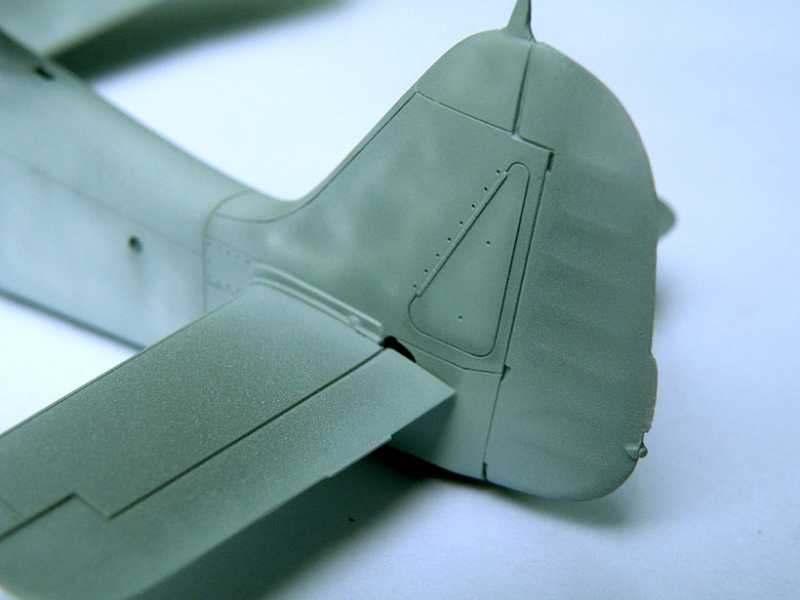
A close-up of the tail and the pre-mottling can be seen better...
The bomb loading cart and ground crew have been airbrushed, the rest of the painting on them will be done by brush.
Below is a full size Fw 190 spinner in original paint. Notice this spiral was hand painted and how thinly applied the black paint is...the RLM 70 base color can almost be seen.

Matrixone
Like I did with the Revell Bf 109G-10, some highlights have been added with carefully sprayed on white paint.
And in the next three pictures you can see the highlights and pre-shading have been partly covered up by a coat of thinned pale RLM 76.
A close-up of the tail and the pre-mottling can be seen better...
The bomb loading cart and ground crew have been airbrushed, the rest of the painting on them will be done by brush.
Below is a full size Fw 190 spinner in original paint. Notice this spiral was hand painted and how thinly applied the black paint is...the RLM 70 base color can almost be seen.
Matrixone

James,
I can only WISH I owned that spinner! I think it was for sale on e-bay, that's where the picture is from. The other pictures of the spinner show the RLM 70 tint better than the one I posted, I thought I saved them but can't find them now.
Luiz,
Since this build is strictly O.O.B. I will try and make it the best it can be by some careful airbrushing.
Matrixone
I can only WISH I owned that spinner!
I think it was for sale on e-bay, that's where the picture is from. The other pictures of the spinner show the RLM 70 tint better than the one I posted, I thought I saved them but can't find them now.Luiz,
Since this build is strictly O.O.B. I will try and make it the best it can be by some careful airbrushing.
Matrixone
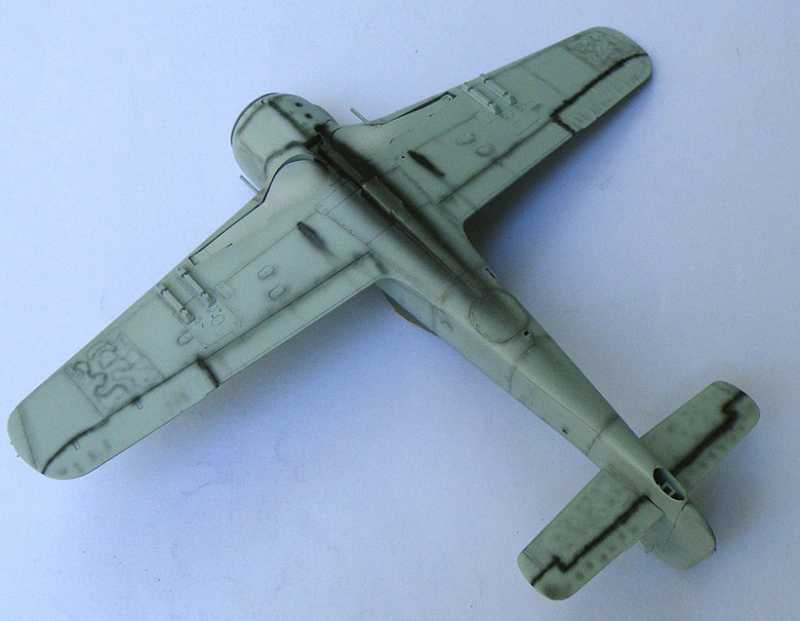
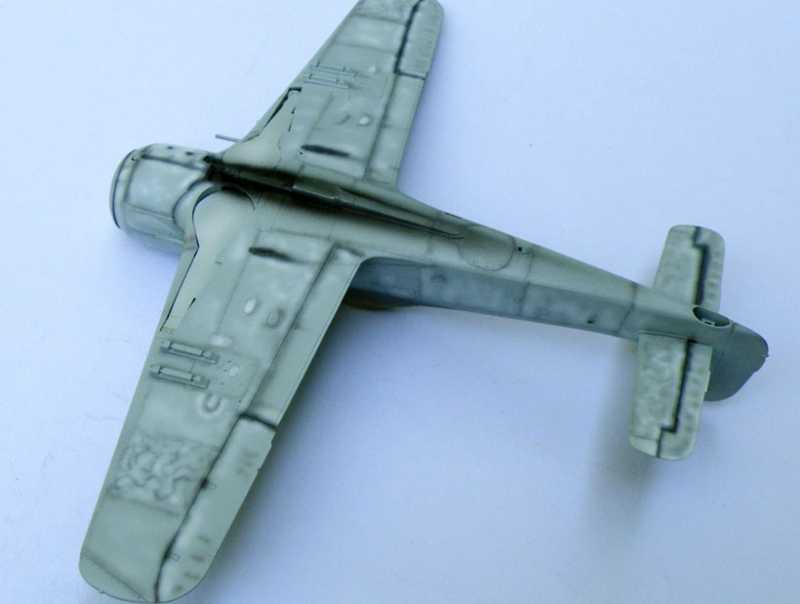
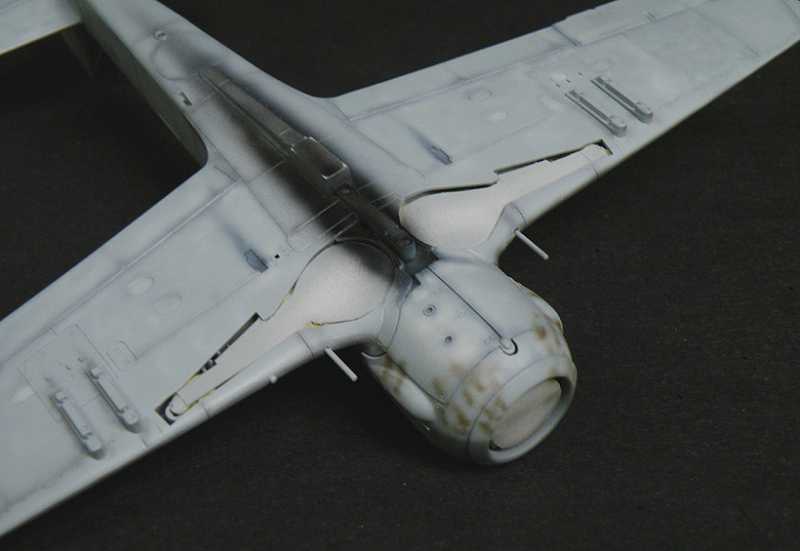
All the camouflage paint is on this model now, after the paint is fully dry I will do some masking so I can paint the rudder and the band around the engine cowling yellow.
Aside from the sharp edge on the wing roots the camouflage was airbrushed free handed, I wanted this model to look rather weather beaten so I had to do a lot of extra work.
With each of the top side camouflage colors I did the following:
1. paint the base color
2. add the pre-shading
3. spray on a thin coat of the original base color
4. with a lightened version of the base color some post fading was added
I have three different photographs of this aircraft and each photograph was taken in different lighting conditions which made it most difficult to work out just how much weathering would be needed on this model, I spent almost as much time looking at photographs as I did painting the model. :S
The lower part of the engine cowl had some field applied mottling added to it.


Matrixone
Aside from the sharp edge on the wing roots the camouflage was airbrushed free handed, I wanted this model to look rather weather beaten so I had to do a lot of extra work.
With each of the top side camouflage colors I did the following:
1. paint the base color
2. add the pre-shading
3. spray on a thin coat of the original base color
4. with a lightened version of the base color some post fading was added
I have three different photographs of this aircraft and each photograph was taken in different lighting conditions which made it most difficult to work out just how much weathering would be needed on this model, I spent almost as much time looking at photographs as I did painting the model. :S
The lower part of the engine cowl had some field applied mottling added to it.
Matrixone
A lot of work Les, looks fantastic.