
-
Modelers Alliance has updated the forum software on our website. We have migrated all post, content and user accounts but we could not migrate the passwords.
This requires that you manually reset your password.
Please click here, http://modelersalliance.org/forums/login to go to logon page and use the "Forgot your Password" option.
You are using an out of date browser. It may not display this or other websites correctly.
You should upgrade or use an alternative browser.
You should upgrade or use an alternative browser.
SCHNELLBOOT S-100
- Thread starter fledermaus
- Start date
phantom II
Master at Arms
Remarkable ! I really like the level of detail ! 
Cheers, Christian B)
Cheers, Christian B)
Moom puppy here it is.....")
Nerdling its better late than never
Yago, how are you my friend, yes we all have some crazyness inside :gogo
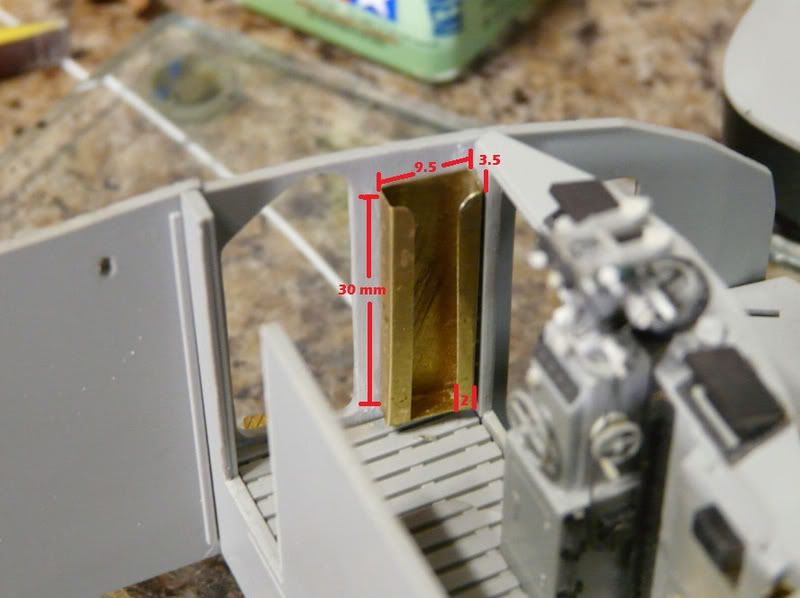
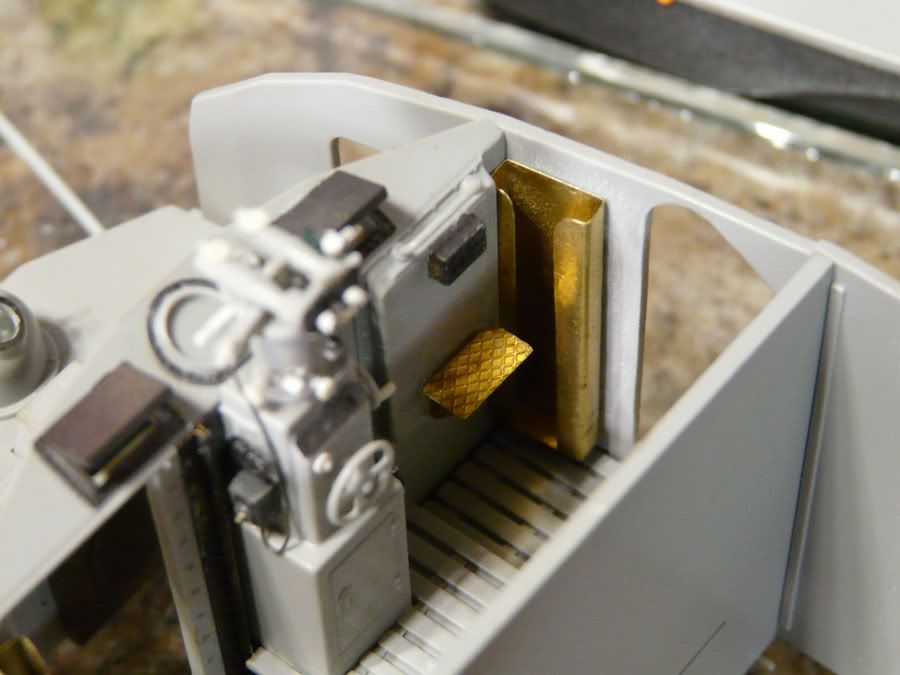
Hi my friends, as promised another update on the S-100. This time the ammo racks for the side machineguns. I used a .005 brass sheet to make it Here the left side rack with the measurements
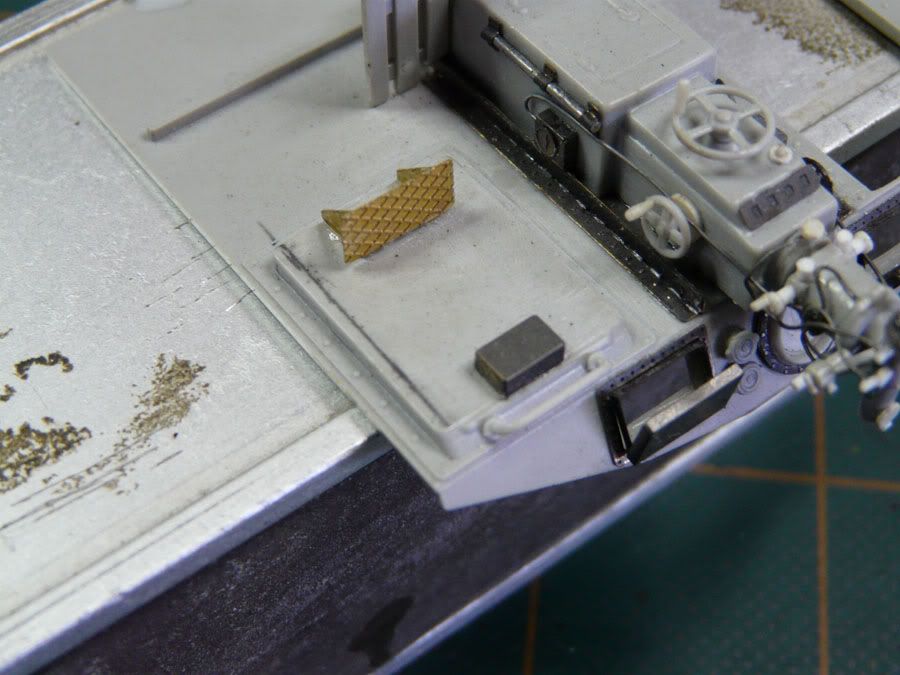
The right side needs to be modified to accommodate the rack; you need to remove 1mm from
the molded door for the rack to fit into the corner
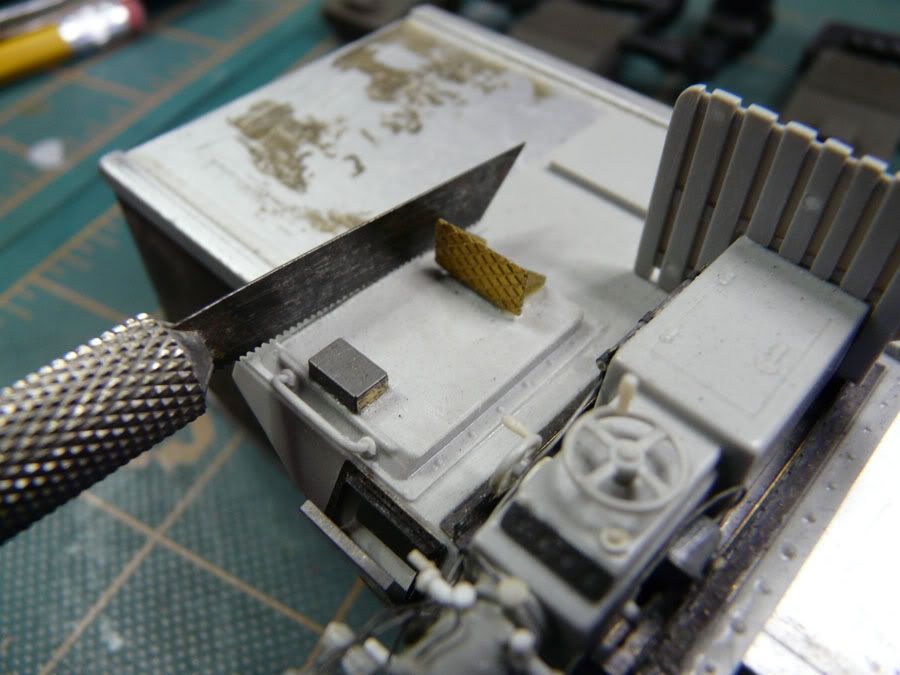
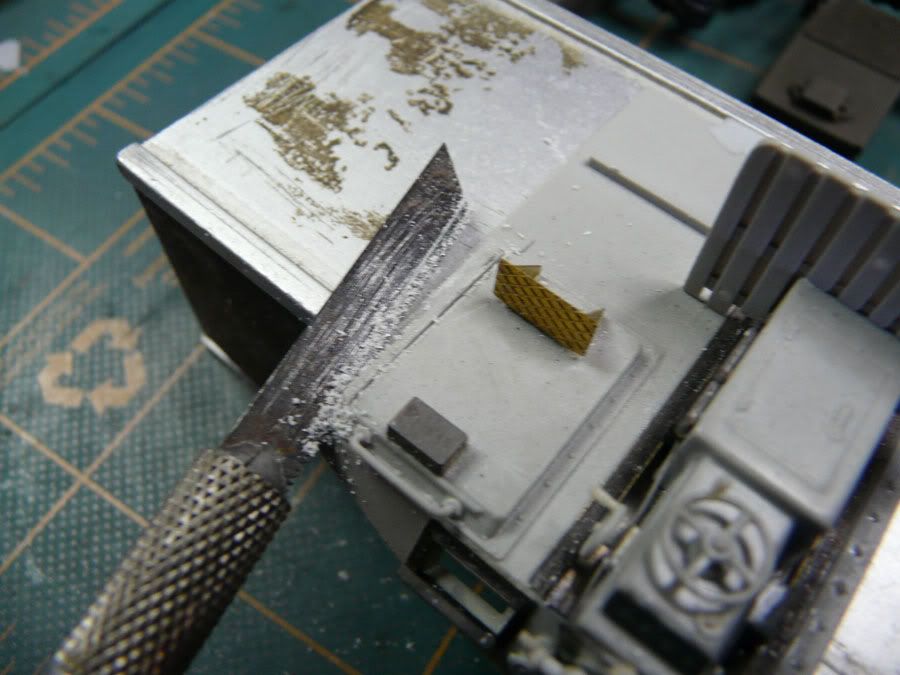
After the cut just sand smooth and redo the round edge
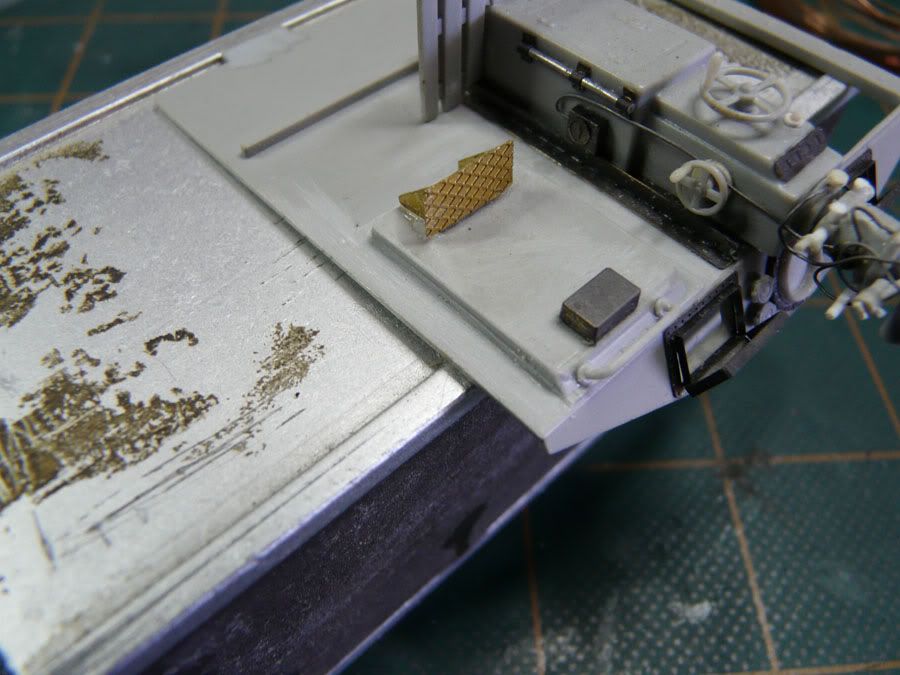
Now the rack fits perfectly
Now I reworked the seats, new supports where made using wire and two pieces of brass tube for the pivots
Here the original and the reworked one to the right
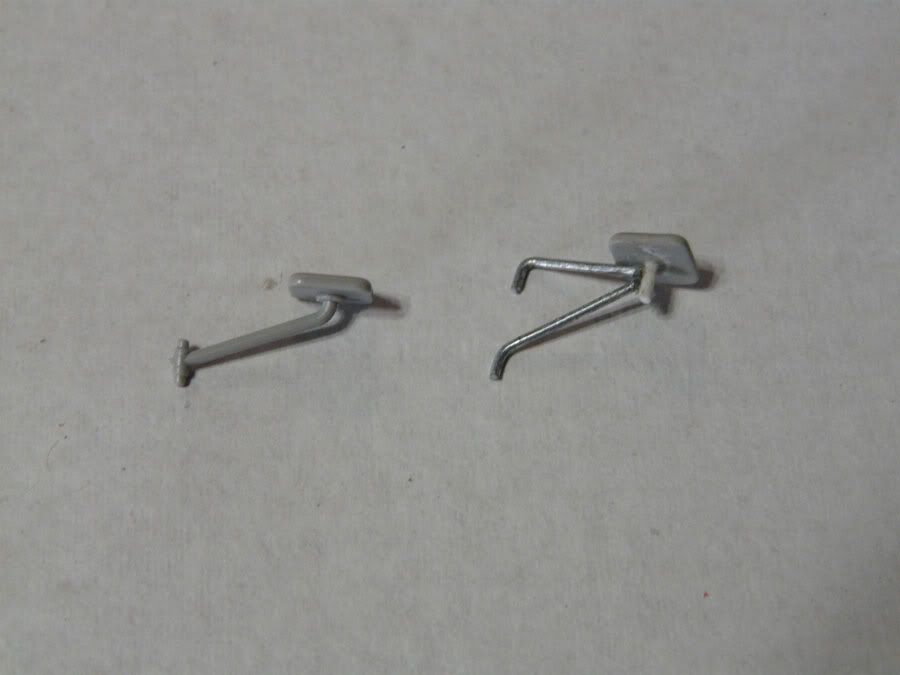
The new seat with the brass pivots; the two pieces are glued next to the ammo racks
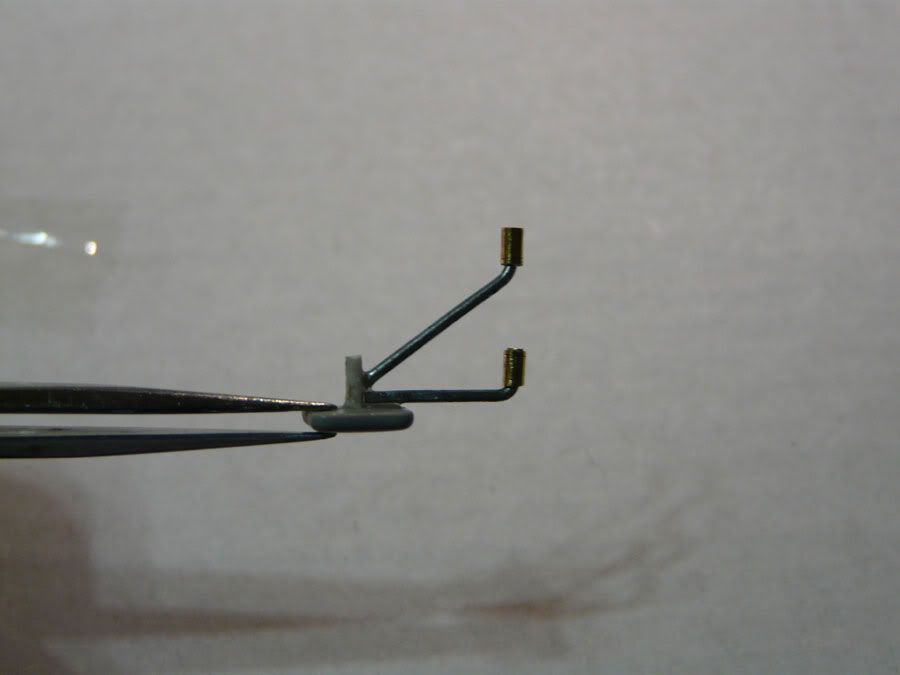

The seats are movable; a piece of angular strip is glued to limit the movement of the seat like in the original boat
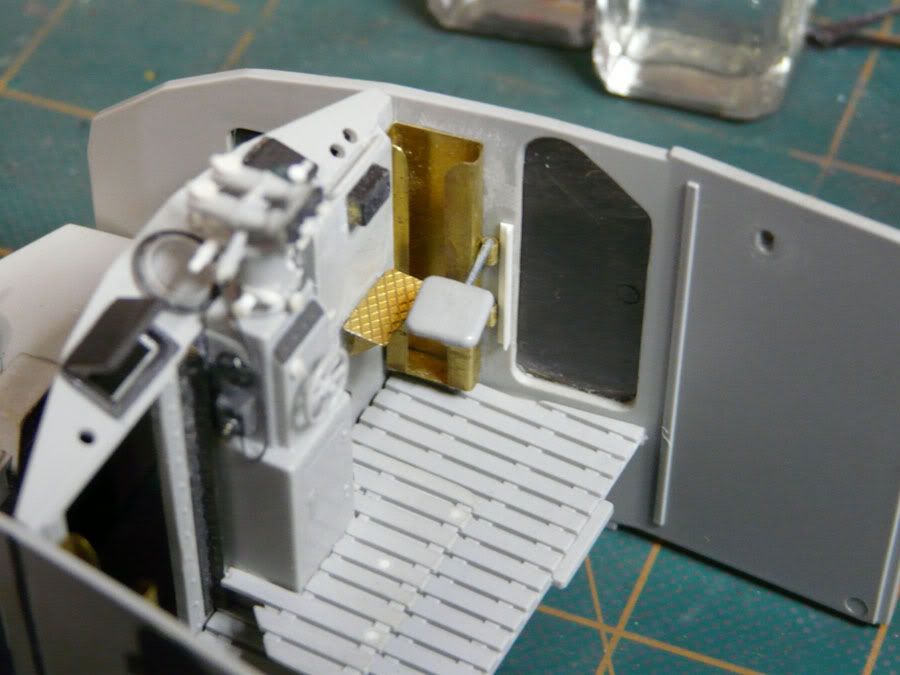
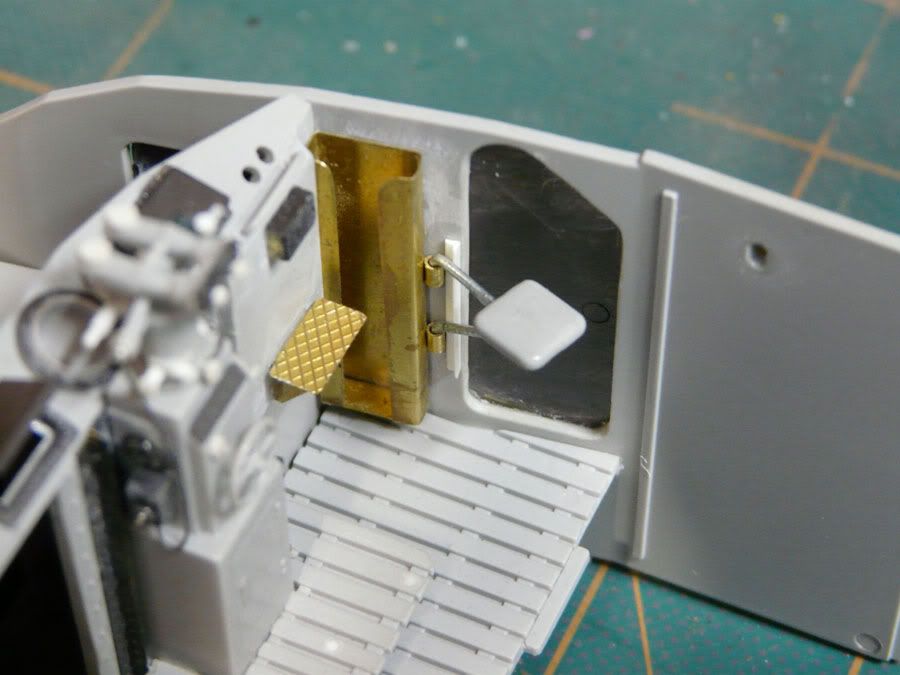
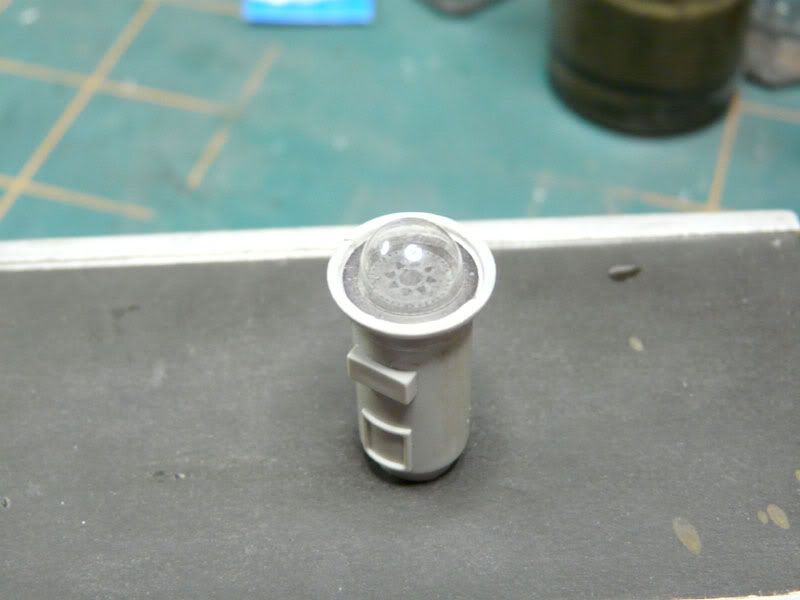
Next job was to cut the cover of the compass located at the middle of the boat to install the plate
From the Edward kit
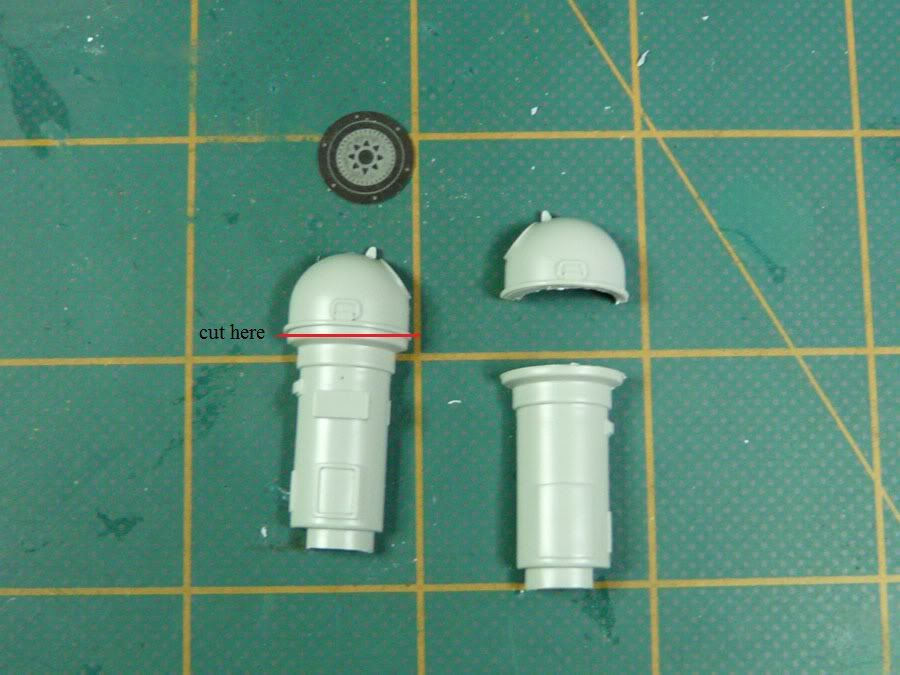
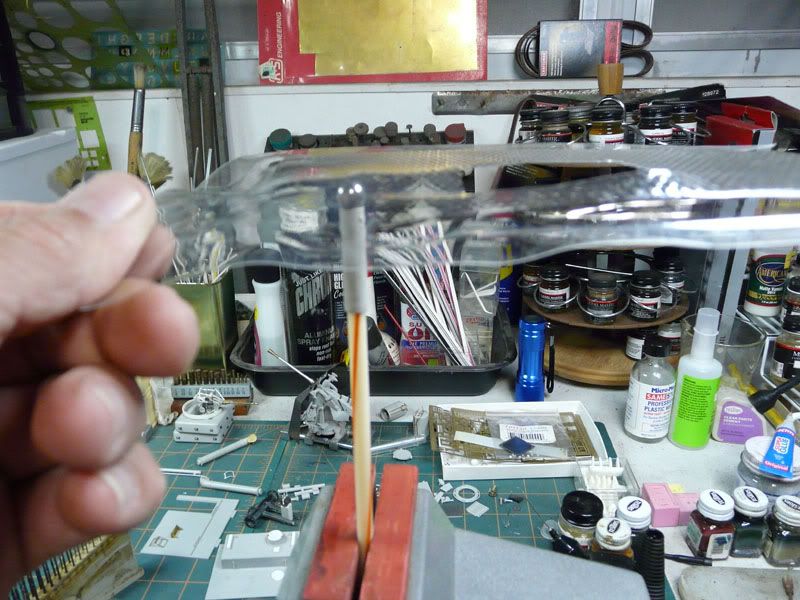
With the cover removed and the plate installed it was time to do the crystal dome
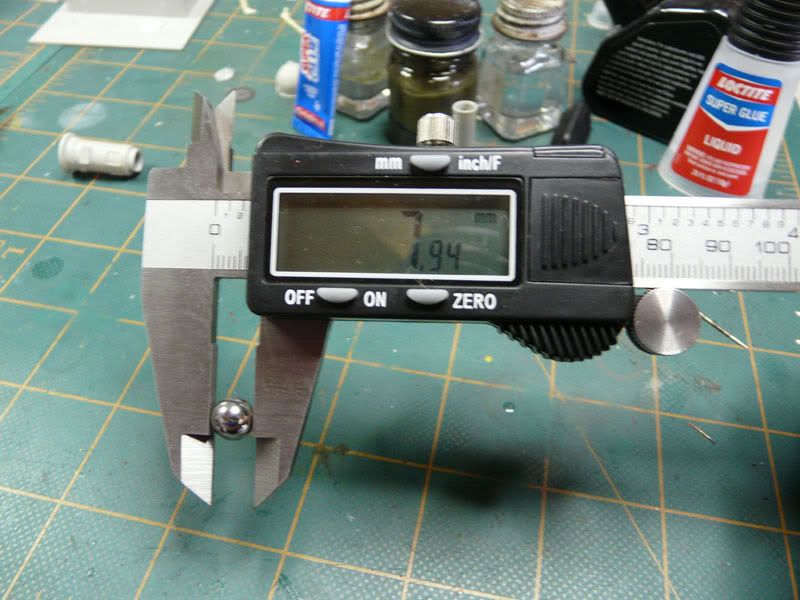
For this job I used a ball bearing closest to 8mm I found
This was glued to a plastic rod and placed on the vise, then used a piece of heated clear styrene
To form the dome around the ball
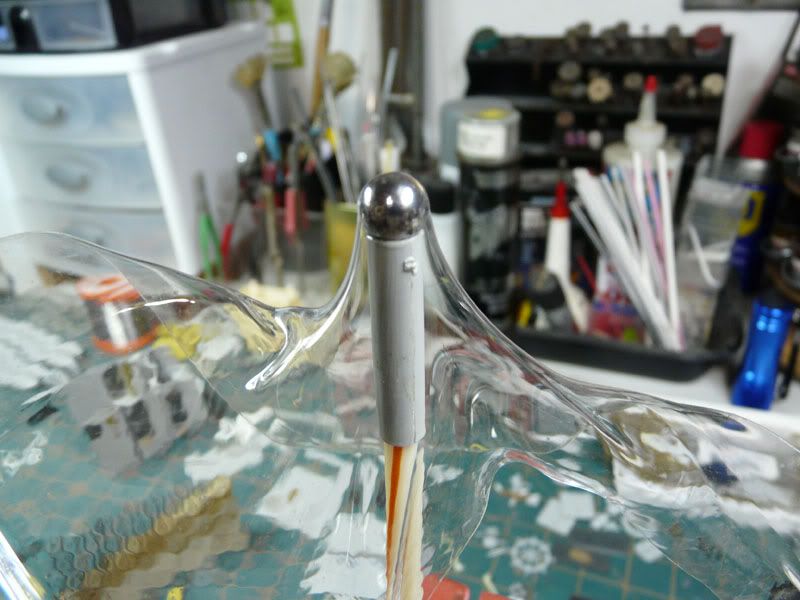
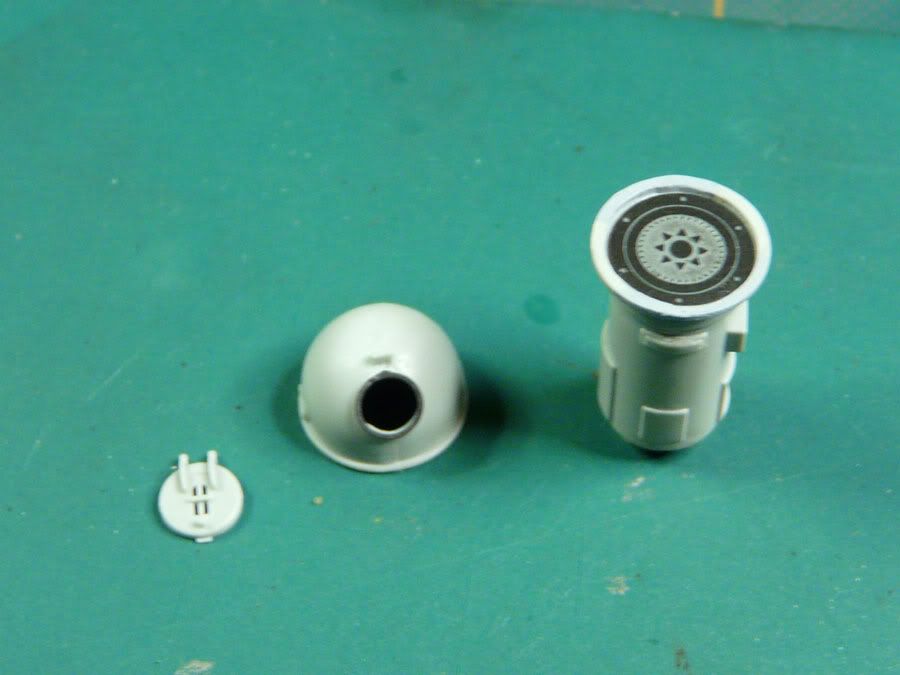
After that you just cut the dome from the plastic sheet and sand the edge smooth

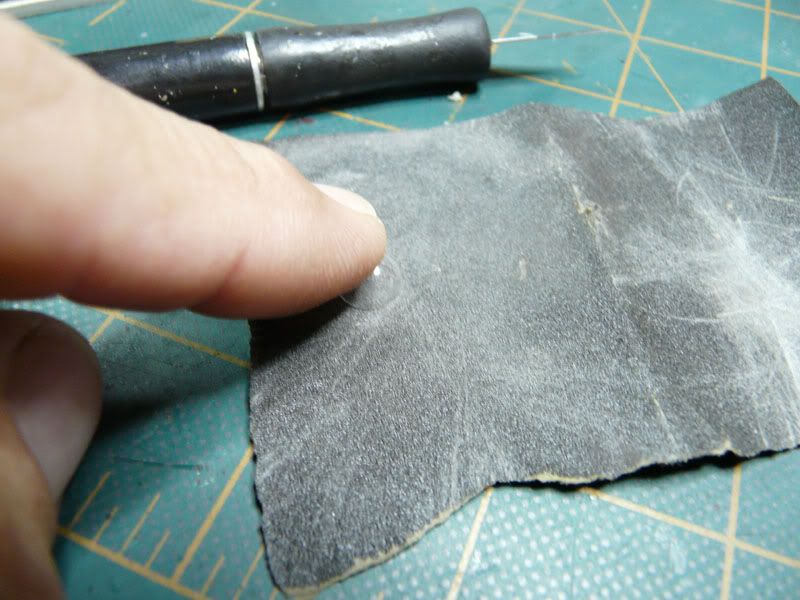
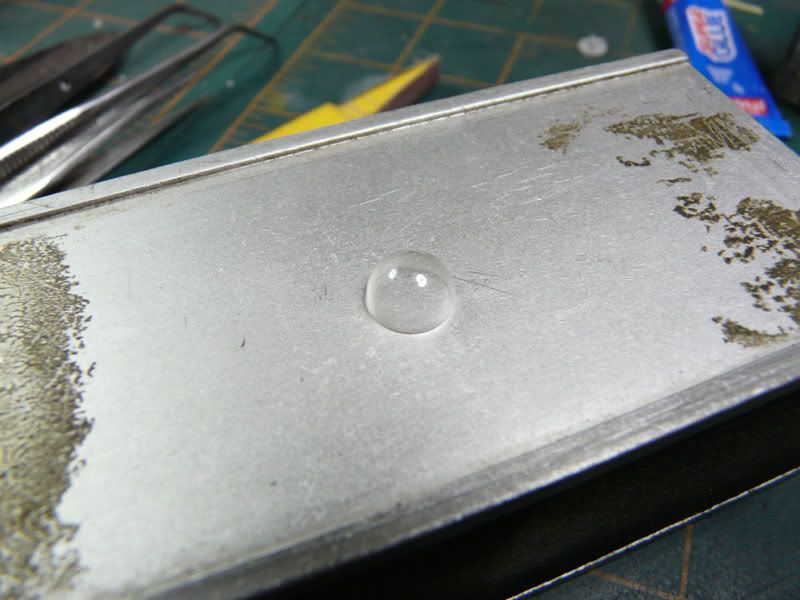
Now you just need to paint the dial and you’re done
The throttle controls are also modified, I did the new ones with styrene and parts from the
Edward set
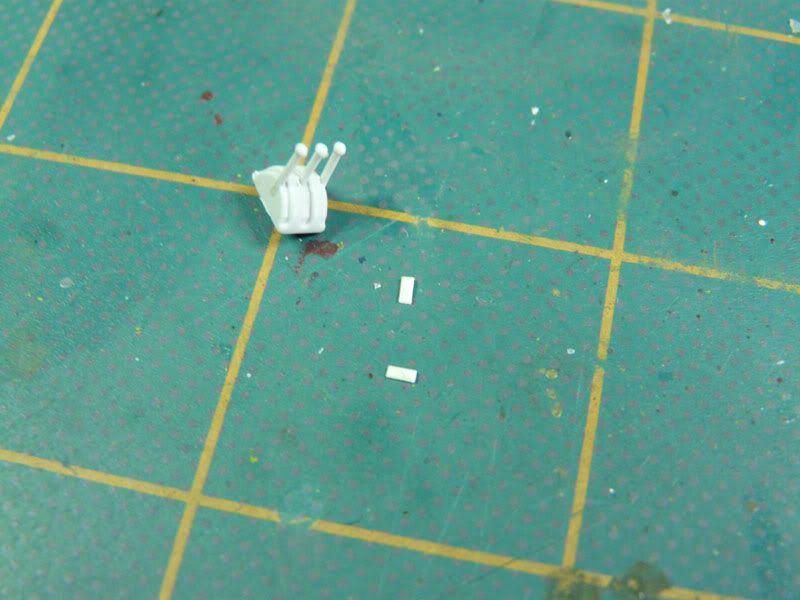
Using a styrene strip, make two pieces 2.25mm long and make one of the sides pointed
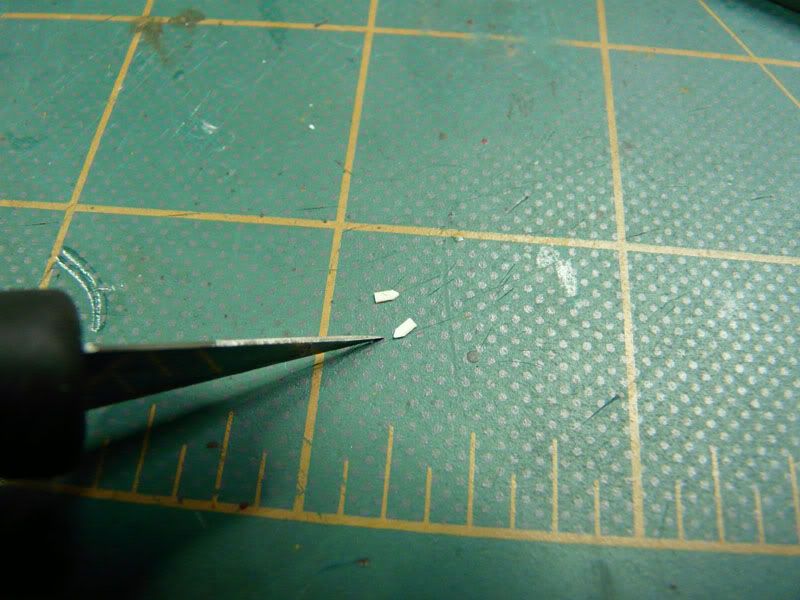
With .80mm styrene rod make the arms, one at each side
Glue the pointed pieces to each side
It should look like this

Now make a double pointed indicator for the center lever and Glue it to the center position
Using the original part cut the 3 levers and glue it to the top of the indicators, the left and right
ones should be glued a little to the center as in the photo
And there it is, a great improvement over the original
More coming soon, thanks for watching!
Abdin
You mean the compass don't work???

:woohoo: :woohoo:

Wonderful work :drinks
Adam Baker
Active member
Very impressive!
kryptosdaddy
Well-known member
just speechless here! Well not really, your level of detail here is nothing less than spectacular, but how will you you paint this when it's time? Amazing and too cool. :fencing
Gunfighter45
Member
Just tuned in to this. Wow! I can't think of anything that hasn't
been said.
Abdin, you are insane in the best way!
Still....Laura mentioned blackpowder torpedoes at the lake.... :hmmm
Staying on this channel...great work
Mike B)
been said.
Abdin, you are insane in the best way!
Still....Laura mentioned blackpowder torpedoes at the lake.... :hmmm
Staying on this channel...great work
Mike B)
fledermaus
Master at Arms
MoonPuppy I dont now why it dosnt want to work..... :idonno
Adam,Dusan thanks a lot
Kryptos I have being thinking about it from a long time now and still have to figure
out the diferent painting stages that will be needed to complete this proyect
Mike it will be the first Schnellboot to be sank in a lake :pp :laugh:
Adam,Dusan thanks a lot
Kryptos I have being thinking about it from a long time now and still have to figure
out the diferent painting stages that will be needed to complete this proyect
Mike it will be the first Schnellboot to be sank in a lake
:pp :laugh:fledermaus
Master at Arms
bagge, Gator and jugjunkie thanks a lot my friends :Hiay
fledermaus
Master at Arms
Hi my friends, here with a small update on the latest work on the schnellboot
I started now with the supports for the side machine guns, this are made with styrene and PH leftovers the styrene rods are .060
All the parts that make the support arms and the finished one on the side

The styrene is drilled to insert the cooper wire to make the pivot points


Here are all the measurements

Finished


A comparison with the reference photo

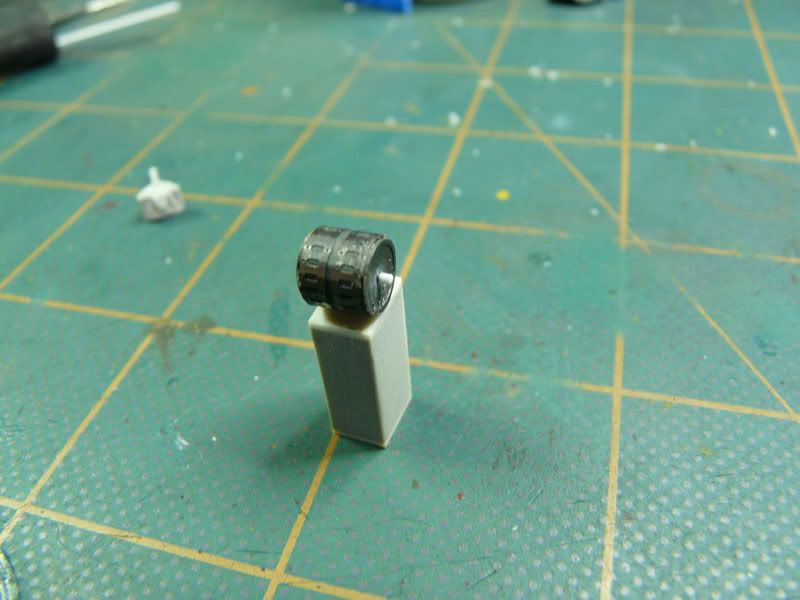
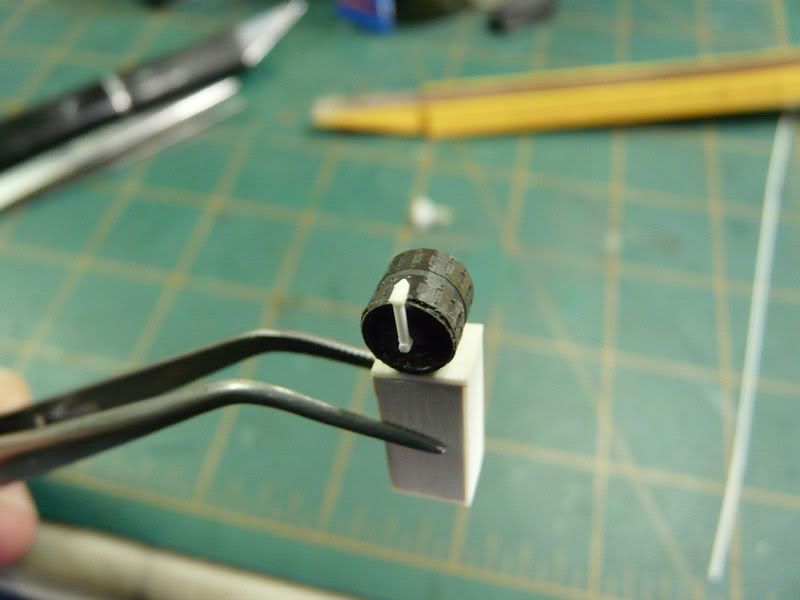
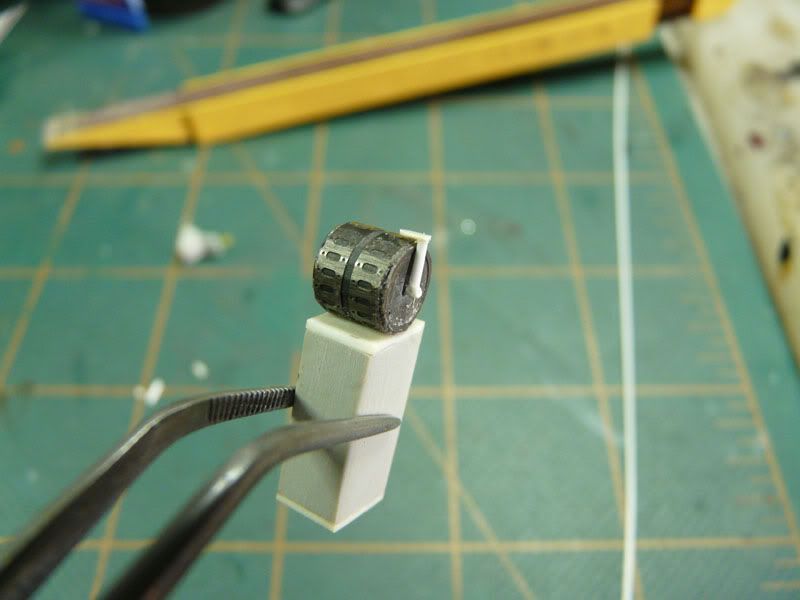
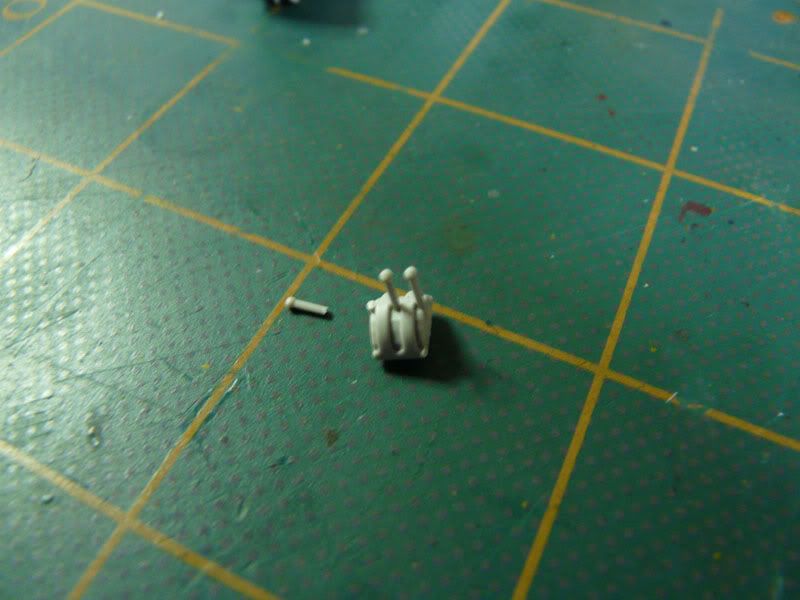
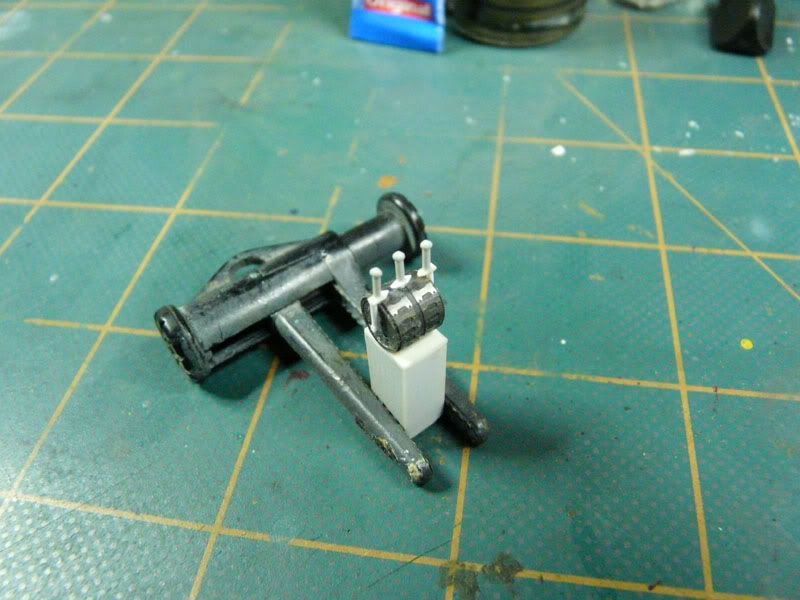
Now I assembled the resin machineguns from CMK just add the barrel in place


I drilled a hole to add the cocking pin with a small piece of styrene


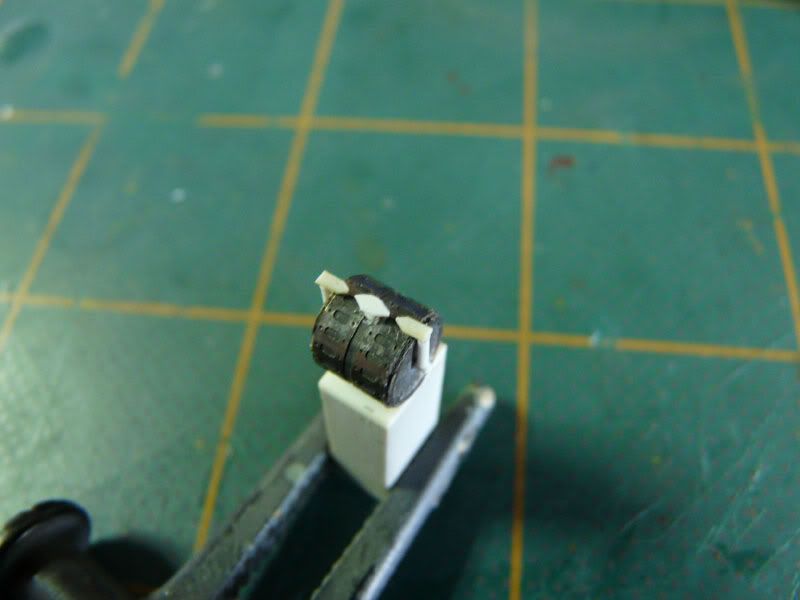
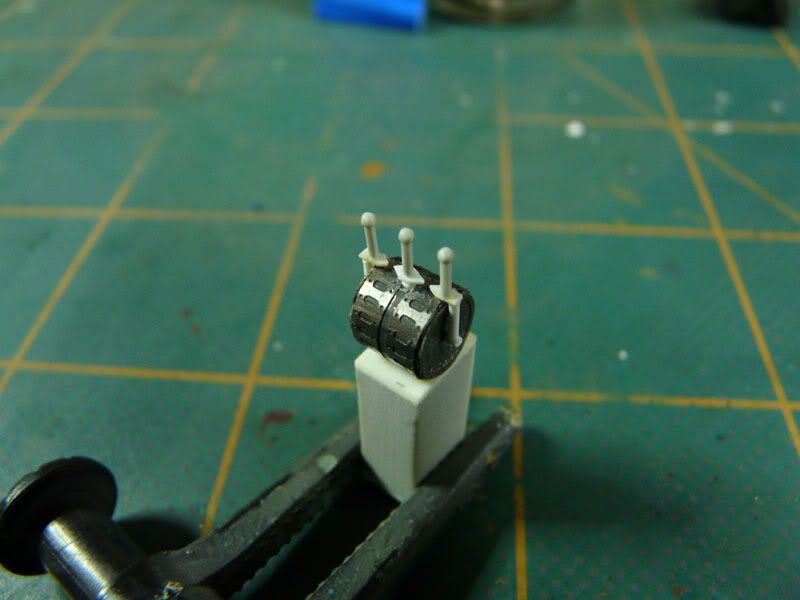
Here are a couple of photos of the machinegun on its place on the kallote with the resin ammo
Drums


Now I started adding the missing rivets to the kallote, at the end I finished removing all the original rivets and replacing it with the resin ones so it looks all the same

Now it looks like this…


Well that’s it for now, still lots to do, more coming soon!
Thanks!
Abdin
I started now with the supports for the side machine guns, this are made with styrene and PH leftovers the styrene rods are .060
All the parts that make the support arms and the finished one on the side
The styrene is drilled to insert the cooper wire to make the pivot points
Here are all the measurements
Finished
A comparison with the reference photo
Now I assembled the resin machineguns from CMK just add the barrel in place
I drilled a hole to add the cocking pin with a small piece of styrene
Here are a couple of photos of the machinegun on its place on the kallote with the resin ammo
Drums
Now I started adding the missing rivets to the kallote, at the end I finished removing all the original rivets and replacing it with the resin ones so it looks all the same
Now it looks like this…
Well that’s it for now, still lots to do, more coming soon!
Thanks!
Abdin
Brokeneagle
Master at Arms
B) B) B)
Yeah baby - what he said - fantastic detail and scratch work.
Ian.
Yeah baby - what he said - fantastic detail and scratch work.
Ian.
Yago Alonso
Member
Fledermaus....!
AWESOME WORK...
IS AMAZING!!!!!
Great details...
Yago.
AWESOME WORK...
IS AMAZING!!!!!
Great details...
Yago.
Simply fantastic detailing!
Bob
Bob
 WOW.....!
How did I miss this update? Simply Fantastico!
Regards,
Regards,
I missed it also! Wow!!!
Similar threads
- Replies
- 133
- Views
- 20K
- Replies
- 4
- Views
- 2K