• Modelers Alliance has updated the forum software on our website. We have migrated all post, content and user accounts but we could not migrate the passwords.
    This requires that you manually reset your password.
    Please click here, http://modelersalliance.org/forums/login to go to logon page and use the "Forgot your Password" option.

Phrozen Mega 8K S printer

You can look at photos all day long but you won't get a sense of how big this printer is until you see it in person. My previous printer was the Phrozen Mega 8K. The plate and vat on this are at least triple the size.
1000011611.jpg

I am glad I ordered several bottles of resin. I am looking forward to printing my first model. It may take some study before that happens!
 
I feel your pain.
Last week the LCD screen on the LPP proportioner took a dump and all the magic smoke came out. The files for the pressure vessel were shaky so I upgraded to the 2.0 version from Smooth-On. The re-boot took HOURS! Then as if that wasn't enough, all the pressure calibration spec's were metric. Evidently I downloaded the UK/Canada software.
The USB's are unusually silly bastiges.
Now I gotta do math and everything!
OMAFA!!
Funny, we were having to deal with Metric IP addresses this weekend, the ones in Canada eh? @jknaus
 
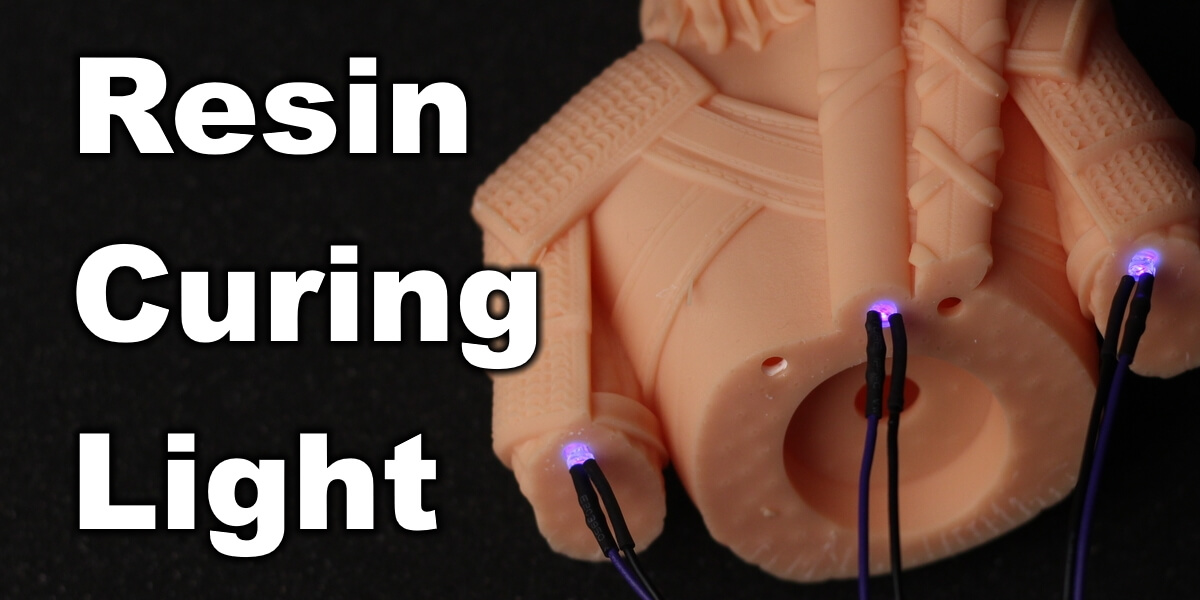
Just a thought for you. I would suggest making a small box and a UV LED circuit with maybe 6 or so inches of wire between the box and LED. That way you can cure the insides of you prints if they are hollow. It will prevent them exploding or cracking later on. I printed my box in PLA, but resin is fine. You just need 3x 1.5 VDC batteries, UV LED, wire, 220Ohm resister and a switch. Here is an easy circuit.
My boxis put away somewhere safe, just not sure where. Here is another not very good article which shows what I am trying to say, but he didnt make a box to hold the electronics.
James
 
Found my little box.
20240420_082934.jpg
20240420_082942.jpg
20240420_083018.jpg

When doing hollow prints I try to make the drain holes at least 4mm as the LED is 3mm. Then insert and turn on and wait a couple of minutes. Thats all it takes to ensure there is no uncured resin inside. Then there should be no issues with the resin expanding or gassing and cracking or destroying of your print. I guess I should put my screw inserts in and properly screw the lid down rather than this cobbled together sytem I have now.
James
 
Found my little box.
View attachment 168769View attachment 168770View attachment 168771
When doing hollow prints I try to make the drain holes at least 4mm as the LED is 3mm. Then insert and turn on and wait a couple of minutes. Thats all it takes to ensure there is no uncured resin inside. Then there should be no issues with the resin expanding or gassing and cracking or destroying of your print. I guess I should put my screw inserts in and properly screw the lid down rather than this cobbled together sytem I have now.
James
This is a great idea! I won't hollow out the tiny car parts but for larger figures I can see this as a smart move for curing the innards.
 
I guess this is the place to keep putting these images. I hope my resin gets here soon so I can test the printer and see if it is really fixed.
This is the Phalanx CIWS (close in weapons system...I think). There are four on my ship and two of them are somewhere in my studio. I had springs holding them together but they sprung the springs and sprang away into the atmosphere, never to be found. These are tiny things and am not sure the printer will print with any detail at all, but that remains to be seen! This is easily the most complex thing I have made so far. Y'all can tell me if it is correct. There were just some photos I could not see details

phalanxCIWS5.jpg
phalanxCIWS.jpg
phalanxCIWS1.jpg
phalanxCIWS2.jpg
phalanxCIWS3.jpg
phalanxCIWS4.jpg
 
Last edited:
Back
Top