
-
Modelers Alliance has updated the forum software on our website. We have migrated all post, content and user accounts but we could not migrate the passwords.
This requires that you manually reset your password.
Please click here, http://modelersalliance.org/forums/login to go to logon page and use the "Forgot your Password" option.
You are using an out of date browser. It may not display this or other websites correctly.
You should upgrade or use an alternative browser.
You should upgrade or use an alternative browser.
More Messerschmitts on the way...
- Thread starter matrixone
- Start date
Thank you James!
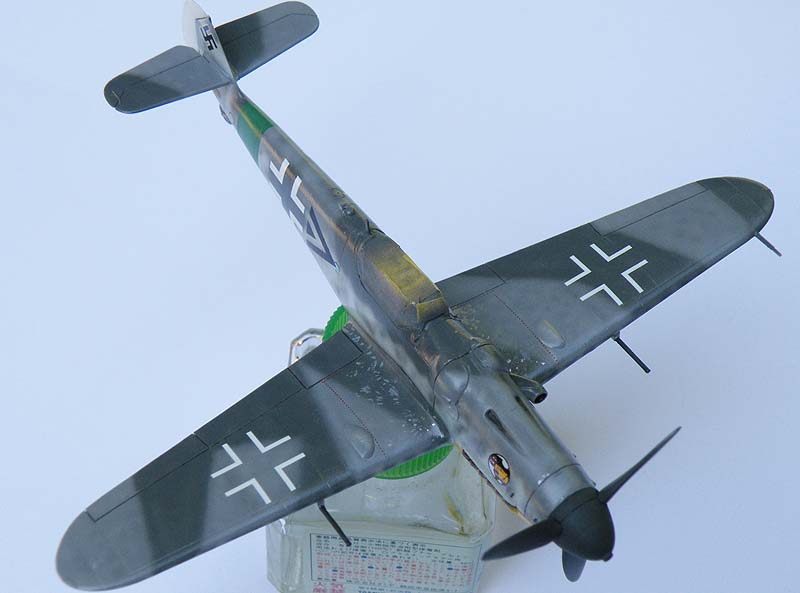
I do the weathering on my models throughout the build and don't just save it all for the end, real machines don't have all the wear and tear done on them all at once and you can't expect a model weathered that way to look too convincing.
When I weather my plane models the weathering usually starts with a combination of panel line pre-shading and highlighting random panels, I did this with the two models in this thread but they are so small it can barely be seen in my pics.
After I paint the basic camouflage pattern on a model I will often spray a lighter version of the base colors in a very tight mottle in the high wear areas like the wing roots and raised areas of the model that catch a lot of light. Once the markings are put on I like to use highly thinned paints of the base colors and lightly spray over the model to tone the markings down and help them look like they were painted on, I try to go for a random patchy look and not make it an even coat.
After most of the airbrush painting is done the model will get a light coat of Future to seal in the decals and protect the light airbrush painting work, after the Future is dry I use highly thinned oil paints and odorless thinner to highlight the panel lines and other details.
When the work with the oil paints is finished I will spray on a coat of flat clear and add the last of the weathering effects including airbrushing exhaust stains and using silver paint and a silver artists pencil to finish up any paint chipping on the wing roots and around access panels.
Matrixone
Thanks for looking in Gary! ")
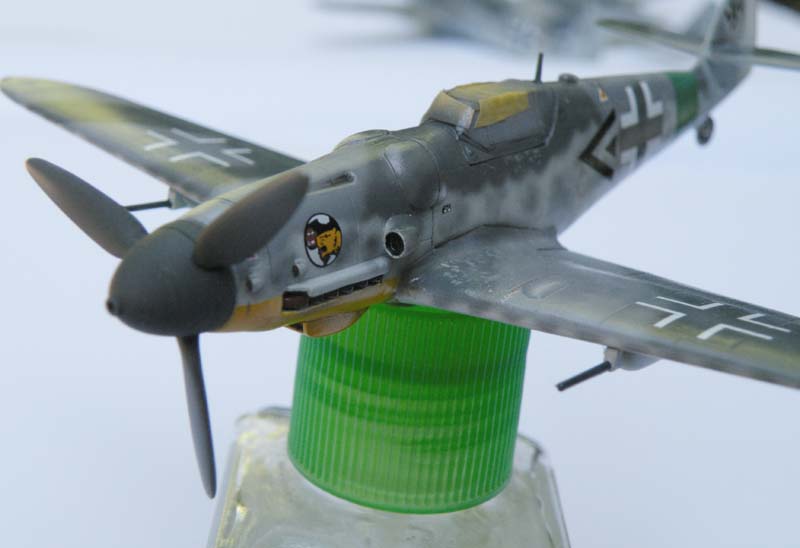
Today I am working with oil paints to add some weathering effects, this usually takes me a while to do because when I add weathering on my models I stop from time to time to step away from them and come back later with fresh eyes to check my work. Oil paints dry very slowly but that's a good thing because if I don't like what I see its ultra easy to remove them. If I like what I have done I use a hair dryer to speed up the drying time of the oil paint and move on to work on the rest of the model.
Matrixone
randy_ditton
Master at Arms
Hi Les, Wonderful looking planes Thank you for sharing your weathering techniques.
Randy
Thank you for sharing your weathering techniques.Randy
Thanks very much Randy!
James,
One more thing about weathering that I do that is different than the way most other people do it, I like to use a lot of natural light when adding weathering. I have several bright lights that give me a well lit workbench but when mixing paint colors and adding weathering effects to a model nothing beats using some natural light to really see what's going on your model. Sure you can add weathering to a model using nothing but indoor lighting but it looks better using some natural light too, mixing paint colors is a different story and it really should be done under natural daytime light.
Today its back to normal PNW weather here so its very dark today and I decided to hold off on adding the rest of the oil paints to the Messerschmitt's until it gets a little bit brighter.
Matrixone
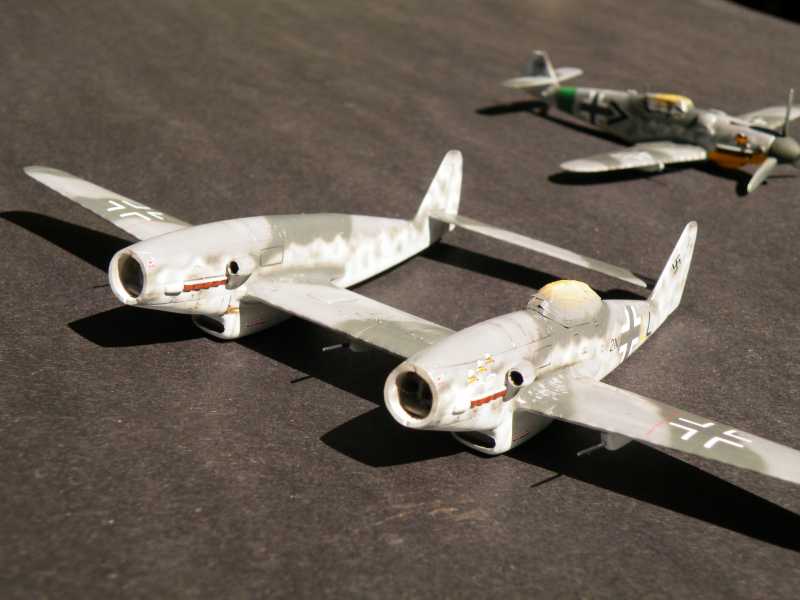
Thank you Ian, the Me 609 has a mix of 110 and 410 markings. I am trying to keep it plausible which is not always easy with 'paper projects'.
These models are not going to get much more weathering done on them since they are such basic low detailed kits I would be wasting my time trying to make them look better than they really are, there are some other kits I want to get started on soon.
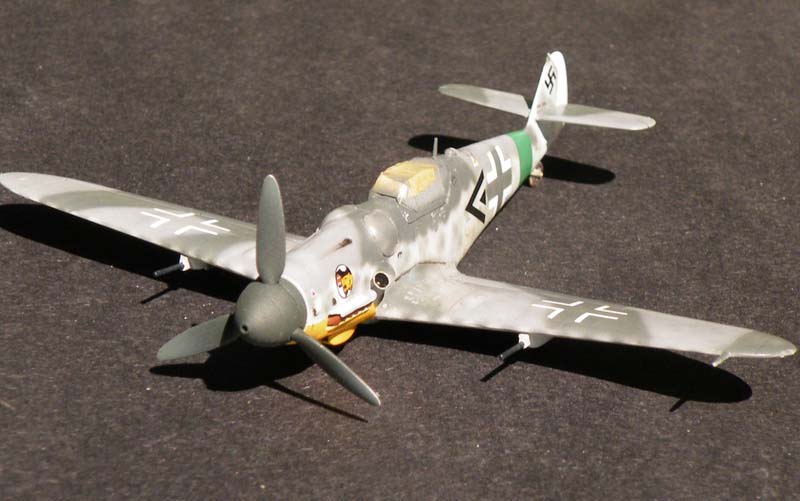
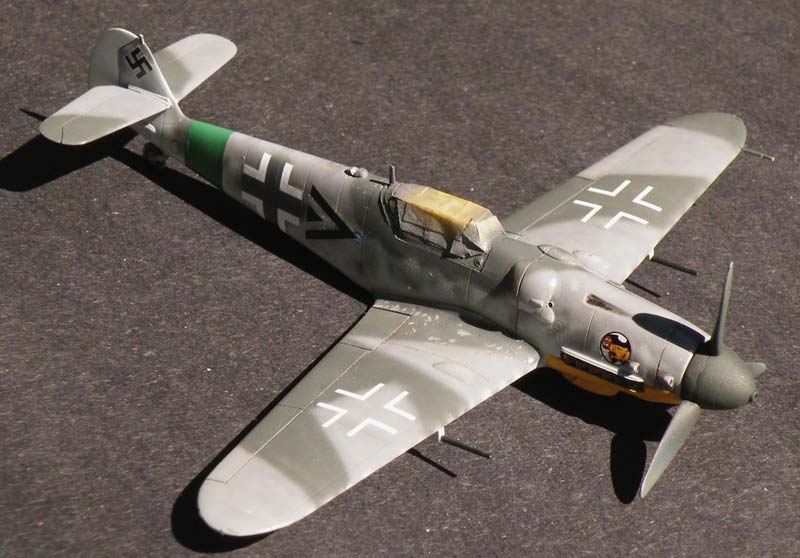
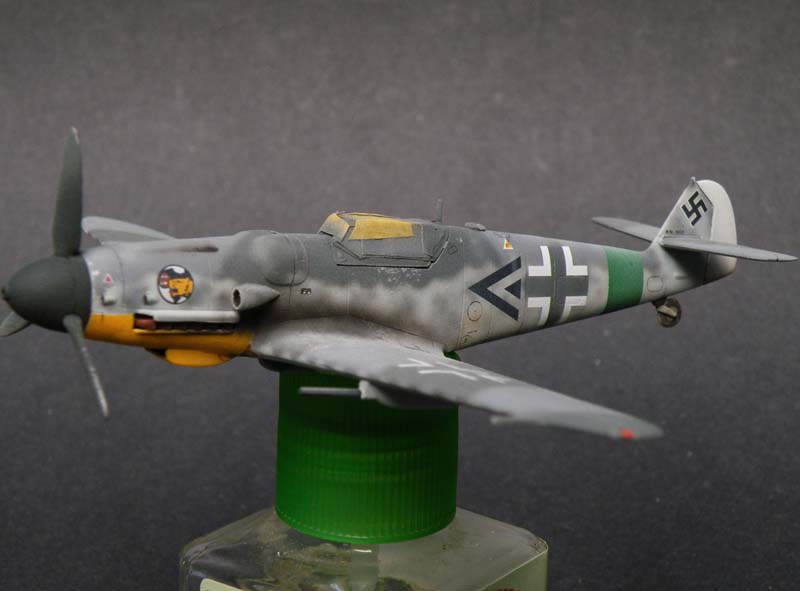
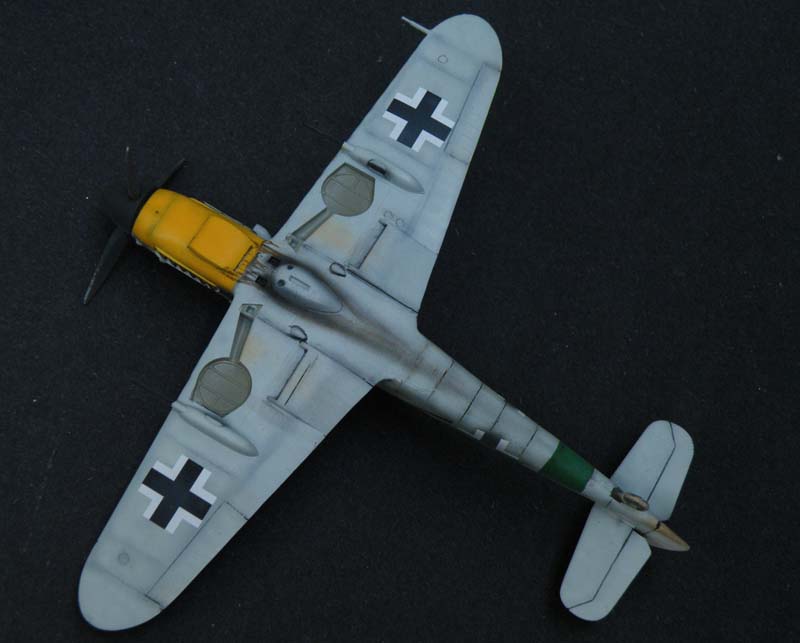
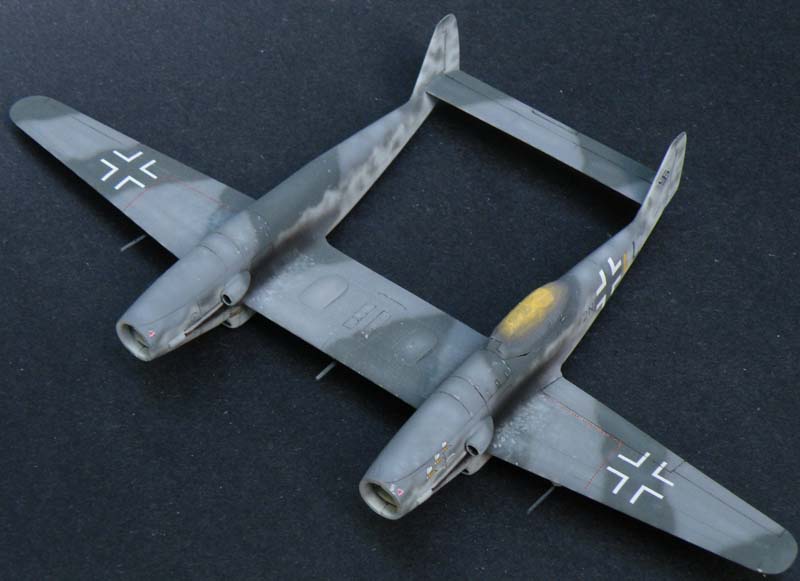
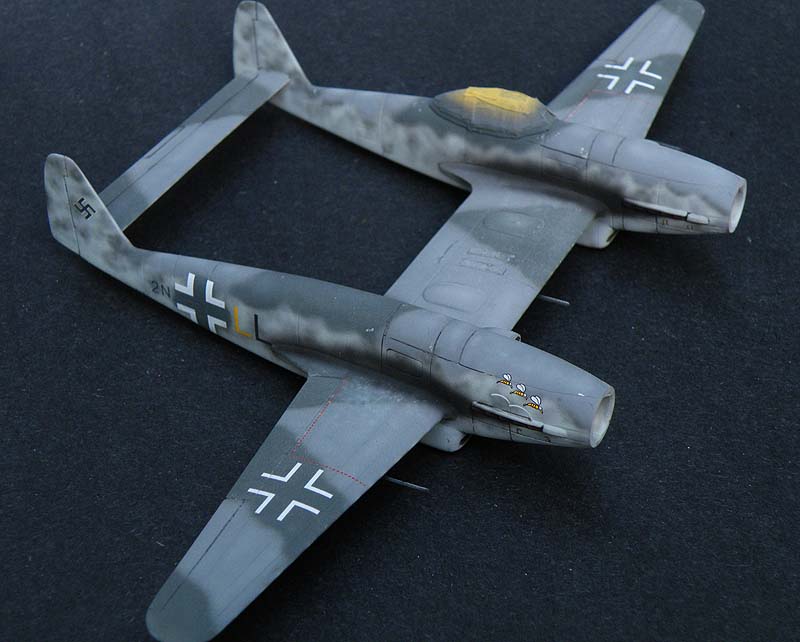
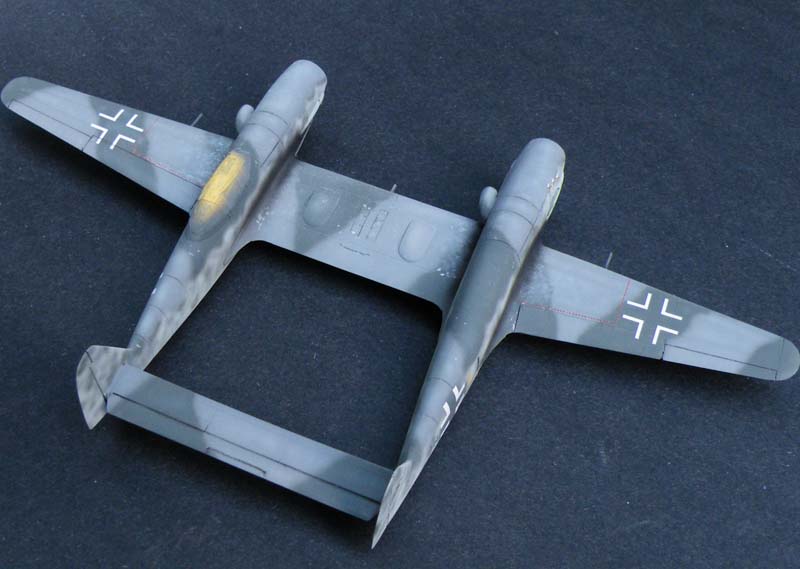
Here are the models after some work with oil paints...I decided to keep almost all panel line detailing near the engine cowls and undersurfaces.


Matrixone
These models are not going to get much more weathering done on them since they are such basic low detailed kits I would be wasting my time trying to make them look better than they really are, there are some other kits I want to get started on soon.
Here are the models after some work with oil paints...I decided to keep almost all panel line detailing near the engine cowls and undersurfaces.
Matrixone
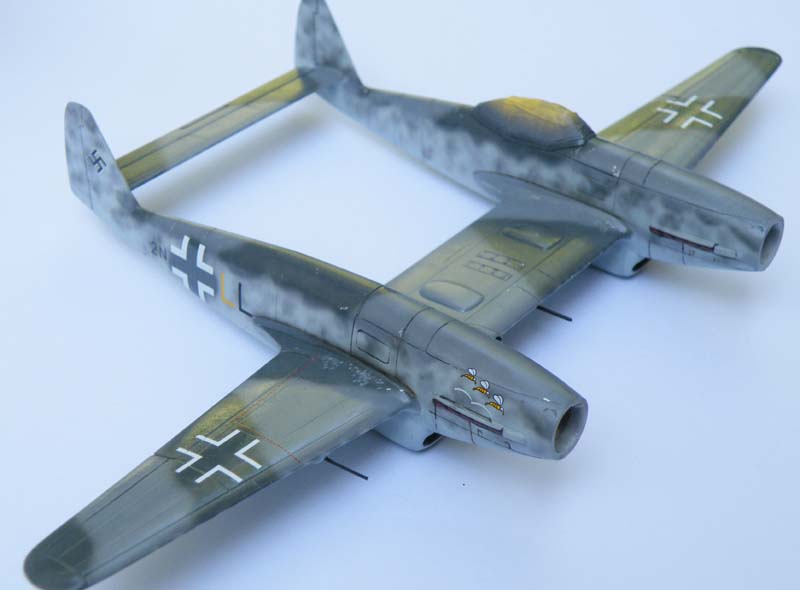
Work on these Messerschmitt's has slowed the past few days but will aim to get them done sometime this week.
Its hard to see here but I have sprayed tinted thinner over the markings to tone them down and also around the wing roots to add some wear and tear. Once the flat coat is sprayed on the subtle work I just did will show up much better.


Matrixone
Its hard to see here but I have sprayed tinted thinner over the markings to tone them down and also around the wing roots to add some wear and tear. Once the flat coat is sprayed on the subtle work I just did will show up much better.
Matrixone
Don't know how we missed your update the other day, they are looking great Les, what did you tint the thinner with?
Good stuff Les, thanks for the info.
I agree with you Ian, a flat coat can be a massive game changer on the finish of a model.
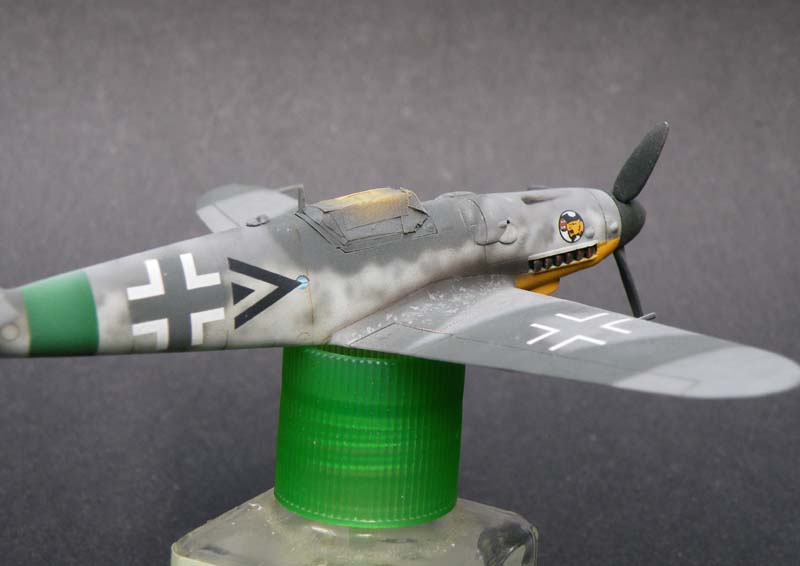
Before the flat coat was added the paint fading/dust effects I did on the Bf 109G was all but invisible, after the flat coat my 109 now looks like it spent some time in the MTO.
Matrixone
Before the flat coat was added the paint fading/dust effects I did on the Bf 109G was all but invisible, after the flat coat my 109 now looks like it spent some time in the MTO.
Matrixone
randy_ditton
Master at Arms
Really looking sweet Les
Randy
Randy
 . Great ideas to work from and I'll see if I can incorporate them. The 109's look awesome. Man you do nice work
 Similar threads
- Replies
- 50
- Views
- 10K
- Replies
- 39
- Views
- 12K