• Modelers Alliance has updated the forum software on our website. We have migrated all post, content and user accounts but we could not migrate the passwords.
    This requires that you manually reset your password.
    Please click here, http://modelersalliance.org/forums/login to go to logon page and use the "Forgot your Password" option.

Moon Pup's Mulligan

Hey MP, I have this kit as well.You haven't considered doing one of those captured KG200 versions in german dark green with yellow Nose and Tail?
 
It would be a fun one Ian but i'm bound by the Campaign Build to something that flew during the Operation Overlord time frame.

We have another Campaign that will kick off in August, Under New Management, that this would fall into, but i'm planning on a FW190 in US colors for that one. Maybe you'd like to get in with the Mustang in KG200??
 
I fixed the engine panels in place now. Need it to make sure alignment of the nose and engine are right. Dragon has some messed up idea of how to attach the engine supports and firewall. Not very well located like a Tamiya kit would be.
P51D002.jpg


P51D003.jpg

Test fitting to get Jerry Rutman's resin in place. Got to get in my mind hall all this fits inside.

Hope to start painting the innards this week.
 
One thing, I wish Dragon would have supplied alternate parts to be able to mount the prop without the engine in place.
 
One thing, I wish Dragon would have supplied alternate parts to be able to mount the prop without the engine in place.

40 thou sheet cut to the rough size of the nose opening. Then drill hole dead center and glue into the nose hole flush. Then prop just slides onto shaft in nose.
James
 
You noticed I had the engine in place already, right???

Cutting dead center takes skills. I'd rather cry about the manufacturer doing the work for me.

but that would work as a good jig to make sure the engine is lined up!

Thanks James.
 
You noticed I had the engine in place already, right???

Cutting dead center takes skills. I'd rather cry about the manufacturer doing the work for me.

but that would work as a good jig to make sure the engine is lined up!

Thanks James.

Yeah the way Dragon does things really bites sometimes. :angry: The way I get around it is to cut out the cowlings and detail the engine. :pp

:silly:
 
http://decals.kitreview.com/decals/amd48693_reviewrk_1.htm
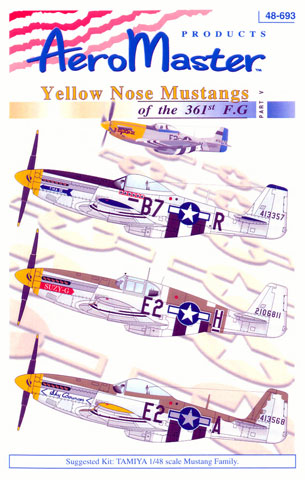
amd48693reviewrk_cover.jpg


http://www.modelingmadness.com/scotts/decals/rs/rs721049.htm

Sadly, they are not available in 1/32nd scale so...

EP32045a.jpg

or
AN32015a.jpg

are available... of course there are others.

Regards,
 
Dang...and it's the wrong series, the tail fillet is not there.

We'll figure it out shortly...Thanks Saul.
 
A few more choices in the correct series with fillet:
EAG32101.JPG


EAG32103.JPG


AMD32017.jpg


CAM32153.jpg


The fillet is not hard to remove but best not to as you need a smooth finish for Alclad.

Regards,
 
what, 5 page and just 1 post with in progress pics! :hmmm :hmmm
:laugh: :laugh:
nice work!
i love the "Missouri armada" decoration!
 
Good lord, this thing has gone 5 pages and I've only got 2 update pictures.

Here's what i have been working on. Doesn't look like much yet but we're getting there.

P51D004.jpg


Working with Jerry Rutman's resin and the Big Ed set I bought long time ago. as you can see, I'm mixing up the different stuff to get where I want to be.

The floor of the cockpit was first painted with a wood grain sealed with enamel clear coat, then acrylic flat black. Then I took a spotter brush with some windex on it and scrubbed off the wear spots.

The Yellow Chromate...yea, way too yellow. I don't have anything other than green. any suggestions on the mix I should do to get zinc chromate? I'm using oils on this, that's Cadmium Yellow.

Suggestions, comments and ROTFLYAO are welcome.
 
Back
Top