paddy
Well-known member
Wow !! disastrous week 
I decided to spray the body parts which went quite well

I then masked off the front of the tank using some bulk buy masking tape from some back street leezy model shop I should have guessed when i saw the junkies outside injecting Tamiya thinners into swollen veins i was entering a world of model hell !!
The front of the tank needs to be white and from the get go i had grave doubts about this because the method relies on a white decal matching and joining seamlessly the white paint...

Anyway although i had allowed 3 days for the red to dry the glue on the masking tape had literally eaten into the paint. Thus i scrapped the lot.
The up side is as all the parts are metal you just wipe them down with thinners and you have shiny parts ready to go again.

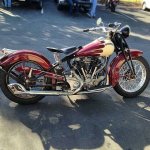
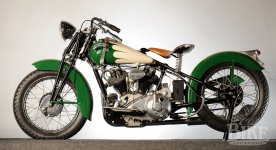
This is a definitive paint pattern for most big tank Crockers . there are variations on colours but the design is pretty much a Crocker trade mark


If you look at the MFH website at their demo model you can just see the join between paint and decal running vertical from the "o" of crocker

anyway however you do it, its not going to be easy.
I also started looking at the drive chain........oh dear.....
its made up with individual PE side plates and cast roller pins.


here you can see the bottom side plates fitted and the top/pins ready to be fitted above
I made a complete mess of this. You fix the plates in position by paining over the pins..... at first i didnt pain them over enough and the chain fell apart

This is
a disaster because at this stage you cant remount it on the jig as the pins are now removed from their spru, the second picture above shows the frame that holds the pins in place.
There are several sections of chain to be made so i tried another section and pained the thing over a little more and basically the pins just swell in the middle and bend. the chain is then rigid the pins are ultra soft, TBH armed with a tin of spinach and support from Olive Oil you could probably squash them in your fingers popeye style.
so a new chain has been summoned from spot model at a cost of slightly more than your average complete Tamiya 1/48 kit and i have a week or two to work out how to do this ( these rivet pins are less than 2mm long)
and just throw the cat amongst the pigeons...i think my choice of metallic red for the body sucks, its a nice colour but its not really 1940's so i need to think about that as well.

I wonder if dark blue might look better than black
I decided to spray the body parts which went quite well
I then masked off the front of the tank using some bulk buy masking tape from some back street leezy model shop
The front of the tank needs to be white and from the get go i had grave doubts about this because the method relies on a white decal matching and joining seamlessly the white paint...
Anyway although i had allowed 3 days for the red to dry the glue on the masking tape had literally eaten into the paint. Thus i scrapped the lot.
The up side is as all the parts are metal you just wipe them down with thinners and you have shiny parts ready to go again.
This is a definitive paint pattern for most big tank Crockers . there are variations on colours but the design is pretty much a Crocker trade mark


If you look at the MFH website at their demo model you can just see the join between paint and decal running vertical from the "o" of crocker
anyway however you do it, its not going to be easy.
I also started looking at the drive chain........oh dear.....
its made up with individual PE side plates and cast roller pins.
here you can see the bottom side plates fitted and the top/pins ready to be fitted above
I made a complete mess of this. You fix the plates in position by paining over the pins..... at first i didnt pain them over enough and the chain fell apart
This is
a disaster because at this stage you cant remount it on the jig as the pins are now removed from their spru, the second picture above shows the frame that holds the pins in place.
There are several sections of chain to be made so i tried another section and pained the thing over a little more and basically the pins just swell in the middle and bend. the chain is then rigid
so a new chain has been summoned from spot model at a cost of slightly more than your average complete Tamiya 1/48 kit and i have a week or two to work out how to do this ( these rivet pins are less than 2mm long)
and just throw the cat amongst the pigeons...i think my choice of metallic red for the body sucks, its a nice colour but its not really 1940's so i need to think about that as well.
I wonder if dark blue might look better than black


