
-
Modelers Alliance has updated the forum software on our website. We have migrated all post, content and user accounts but we could not migrate the passwords.
This requires that you manually reset your password.
Please click here, http://modelersalliance.org/forums/login to go to logon page and use the "Forgot your Password" option.
You are using an out of date browser. It may not display this or other websites correctly.
You should upgrade or use an alternative browser.
You should upgrade or use an alternative browser.
Maddog Manufacturing 2020 Production
- Thread starter Duke Maddog
- Start date
")
Duke Maddog
Well-known member
Thanks Frank! I agree... gotta build more helicopters!
Thanks James! yeah, I'm trying to keep busy....
Thanks James! yeah, I'm trying to keep busy....
Flyingbabydoc
Well-known member
Hey Mark,
Man you are a machine. So much going on. I particularly like your chopper. Looking Forward to seeing it completed.
We still get to see some old Huey from SAR flying over on Route to the Army medical Center here in Ulm. It is a nice and nostalgic view.
Carry on!
Cheers
Alex
Man you are a machine. So much going on. I particularly like your chopper. Looking Forward to seeing it completed.
We still get to see some old Huey from SAR flying over on Route to the Army medical Center here in Ulm. It is a nice and nostalgic view.
Carry on!
Cheers
Alex
Duke Maddog
Well-known member
Thanks Alex! That chopper has been fighting me his whole time. Fortunately, I have second, identical kit that I have been slowly cannibalizing to replace the pieces that keep flying off and disappearing. So far it's been nine pieces I've had to replace....
Makes me think I better coat the decals with Liquid Decal Film since my luck keeps running to the bad with this chopper model!
That is so cool you get to see them occasionally. We have some Hueys flying around here in SoCal too but none in military livery.
Thanks again for stopping in and commenting Alex!
Brokeneagle
Master at Arms
that wood grain looks really nice Mark.
I second that...excellent effect. Looks real!
Ian.
Duke Maddog
Well-known member
Thanks Ian!
Thanks Bob!
The molding on the model made it easy.
Thanks Bob!
The molding on the model made it easy.
Duke Maddog
Well-known member
Well, I hadn't realized how long it's been since I updated this. I have a lot of pics to show. Thanks to everyone telling me to stay home, I've been doing a lot of work in the Hobby Room. So, you've been warned, this is gonna be a ling and tedious one! I hope I don't bore you too badly....
Here's the results of all my latest work, starting with my aircraft...
On my Gotha Go-244, I shot a light blue underneath the plane, hitting all underside and vertical surfaces possible:
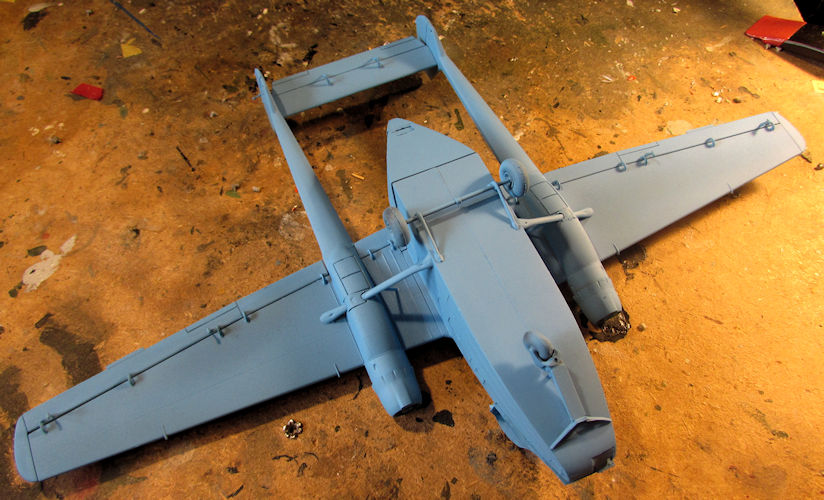
It looks more stark than it is, but I am still hoping it'll tone down a bit later on.
After that dried, I masked off the underside as much as possible to prepare for upper surface painting:
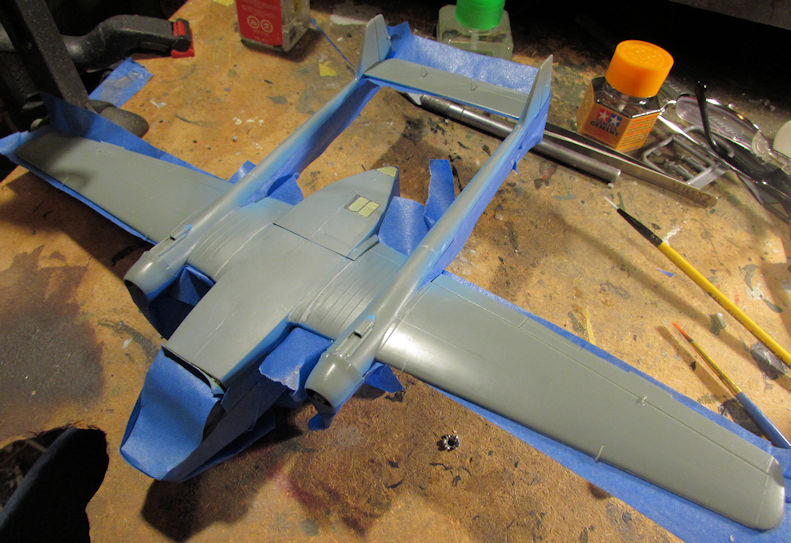
That was harder than expected. I hope to get some paint shot this coming week.
Next, I masked off the German helicopter with Silly Putty and shot the second color:
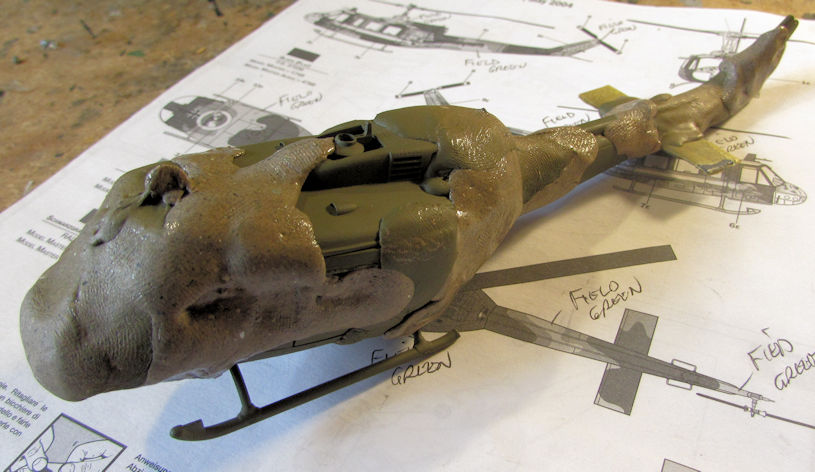
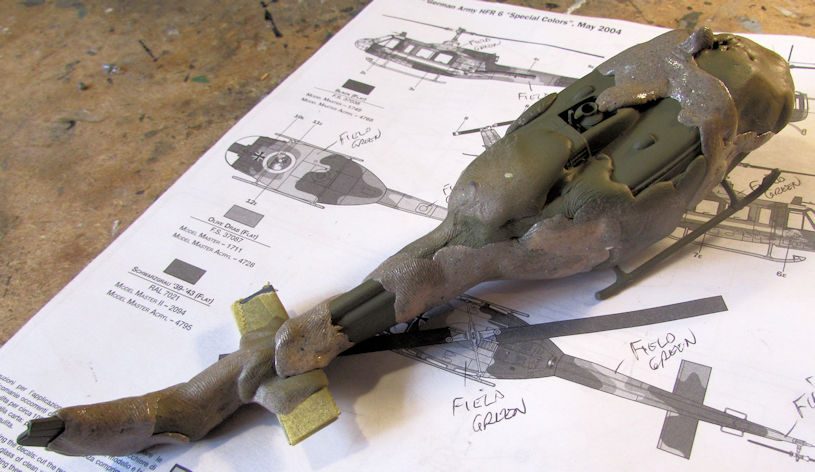
Later, when that was dry; more masking and then the third color. I didn't have a medium green so I improvised:
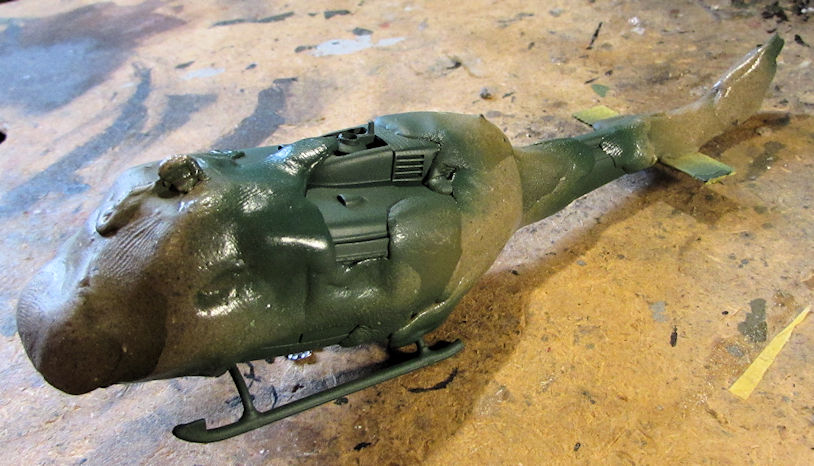
Once all that was dry, off came the Silly Putty and here she is in all her three-tone glory:
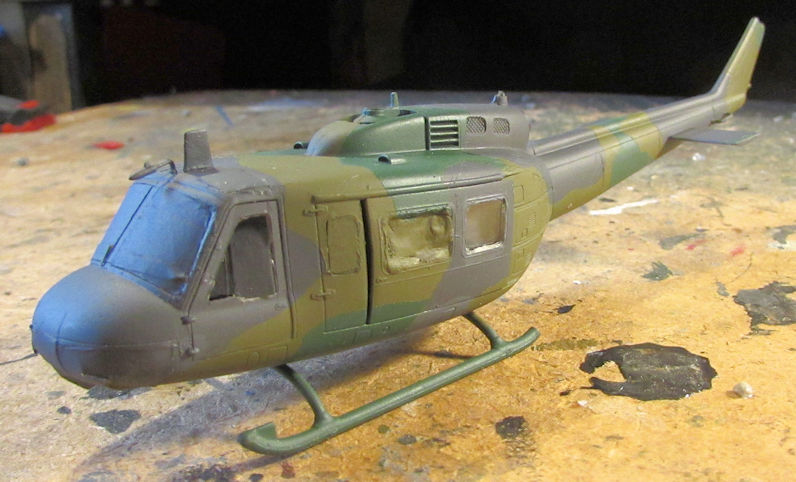
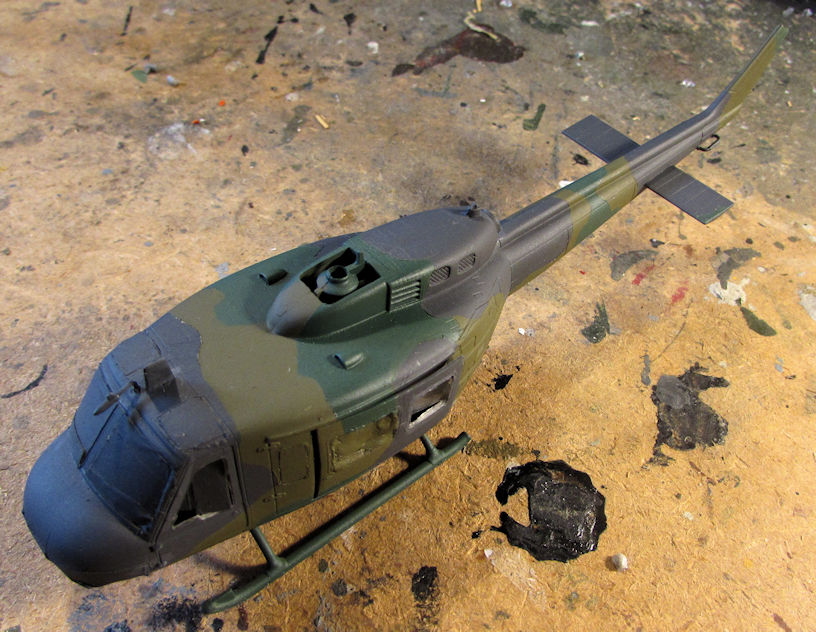
You can see how well the Micro Crystal Clear worked for holding windows in. Yeah. I got them fixed later; this time with Gator Grip glue.
After that, I pulled out my Israeli F-16 I Sufa and started the decals on it. I got most of the walk lines and other detail stencils on the top and bottom:
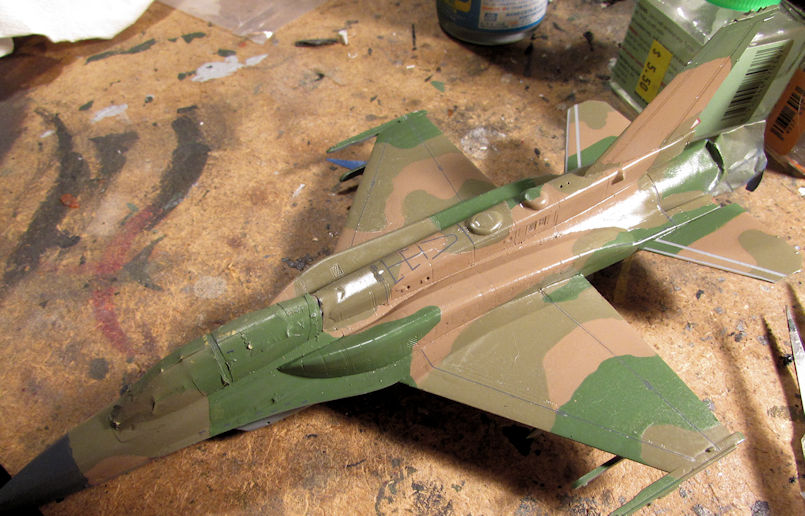
I then let that sit and dry. I plan on clearcoating that again and then applying the remaining decals.
Moving on, I decided to answer the siren song of the C-54 that had been singing to me to start. Thanks to another friend working on this, that singing became louder so down it came. Naturally, I started with the pilots' seats:

Yeah, they are that small, and four pieces each...
Next was the cockpit that they sit in. This was fairly easy:
Later I dry fit the seats in place to see if they would hamper my attempts to paint this later. They would so they didn't get glued in here:
Next I assembled all the secondary cabin nooks behind the cockpit and added them to the floor of the rear cabin:
Yeah, after careful review, I won't be painting any of that given that none of it will be seen through the windows. I won't be assembling all the troop seats in the main cabin either as this will be all closed up. Still, I had to dry-fit the assembled cockpit to the rear cabin assembly:
That's all I got done on that. The next model I pulled out was an even bigger plane, the A-400 Grizzly used in Europe. Mine has the option to make it a German bird so that is what I'll make it. After all, my Germans are my largest force right now!
I started once again with the cockpit as before:
This model also has a full interior enclosed in an interior shell just like the C-54 does. Here's one half of it here:
As this bird will be all closed up as well, I won't be painting that interior. Next I assembled the tail, only dry-fitting the horizontal surfaces. You can see how big that is too:
I then assembled all these greeblies which go on the underside of the wing:
And here is the wing I'll be adding those to. Check out the wingspan:
I already added those fences to the underside of the wing; they'll be seen in the next update.
Moving on, I then started my monster of a kit, the An-124; first assembling the cockpit:
Fortunately, that is all the interior this model has. However, I do have to assemble all the wheels. Here is the first ones after assembly:
Now, each of those outer circles are the wheel halves. The inner, smaller circles are the hubs that go inside those circles. You can see the lower wheel halves with the hubs installed. Here are all the wheel halves on that sprue already done:
That's four wheels. Sixteen more to go....
I decided that was enough so I moved on to assemble the main landing gear wells:
That was harder than expected, but they are done. That's as far as I got on that plane. In fact, that was enough on all planes for now, so I started on my armor.
On the bench I had about ten small scale armor models that were within spitting distance of being done. Time to bring them over the finish line.
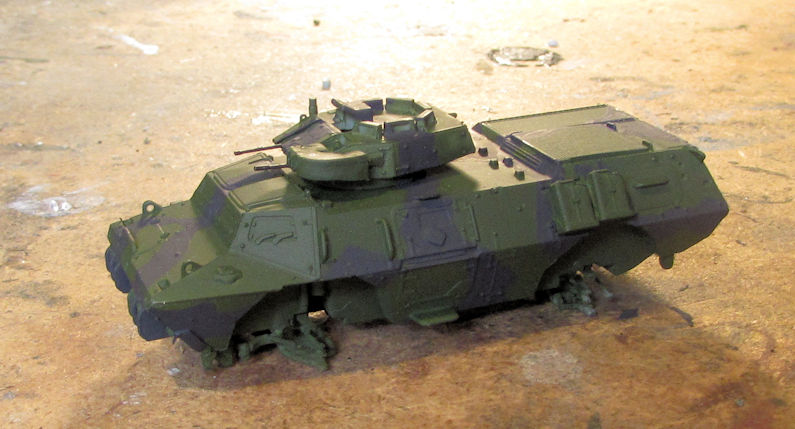
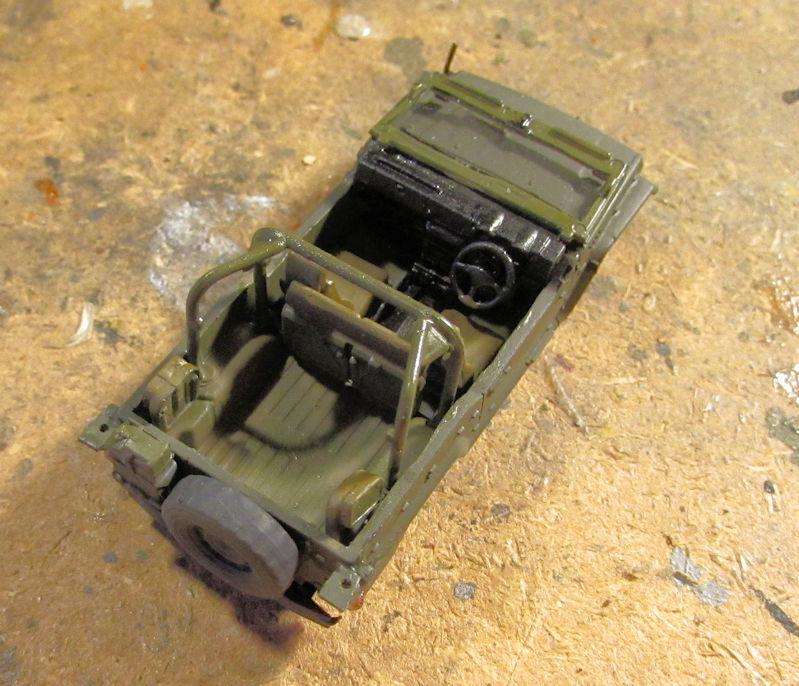
My first one was my US M-1117 Guardian. I had a base coat on it so I decided to brush paint the second of three camo colors:
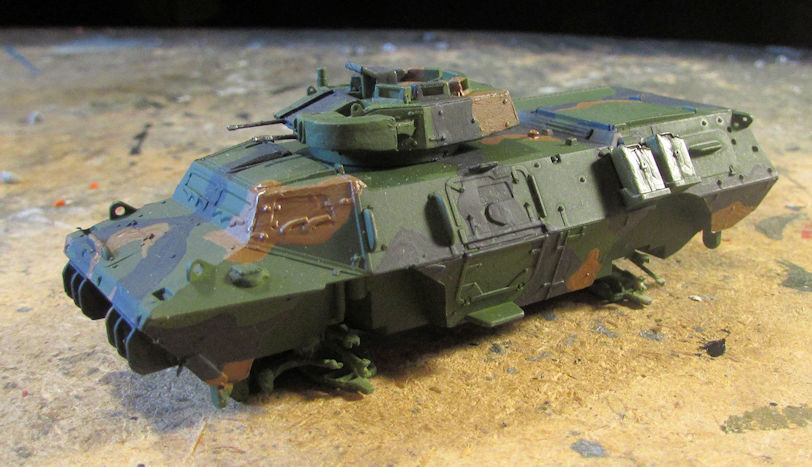
Later, I did the second color and a number of details:
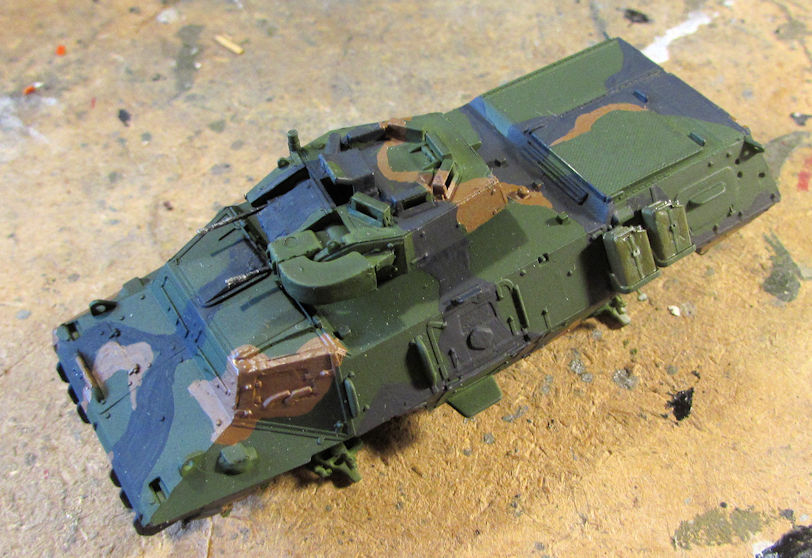
After all that was dry, and before I added the wheels; I shot some dirt weathering on the underside and in the wheel wells:
After that, I added the wheels, decals, detail parts and finished the weathering. This little car is done now.
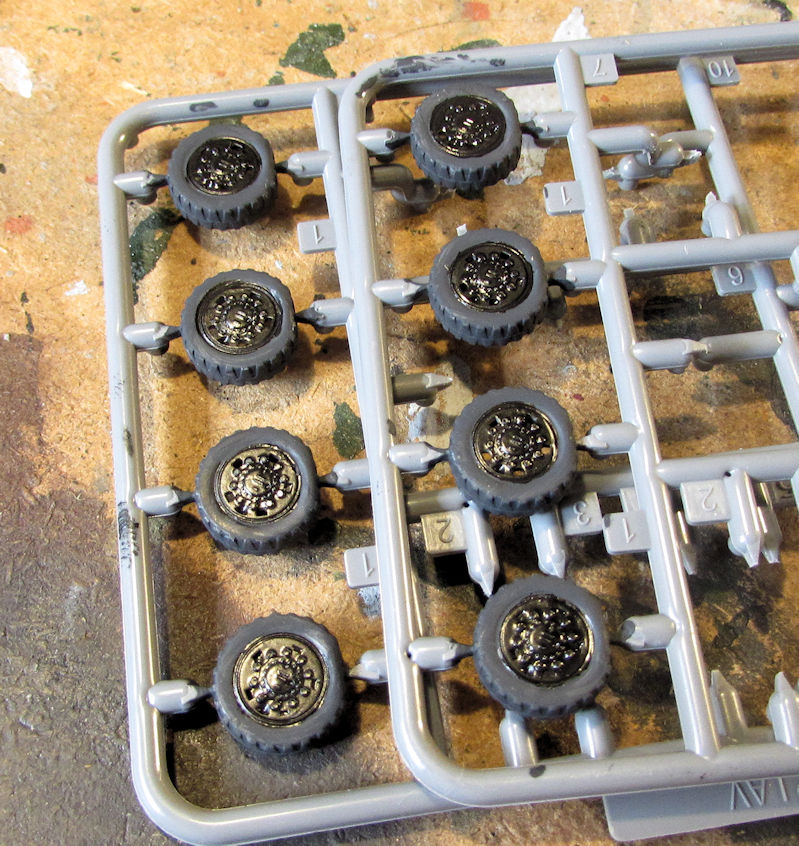
Next, I worked on the three half-ton trucks for my JGSDF. I started out by painting all the wheels on the sprues:
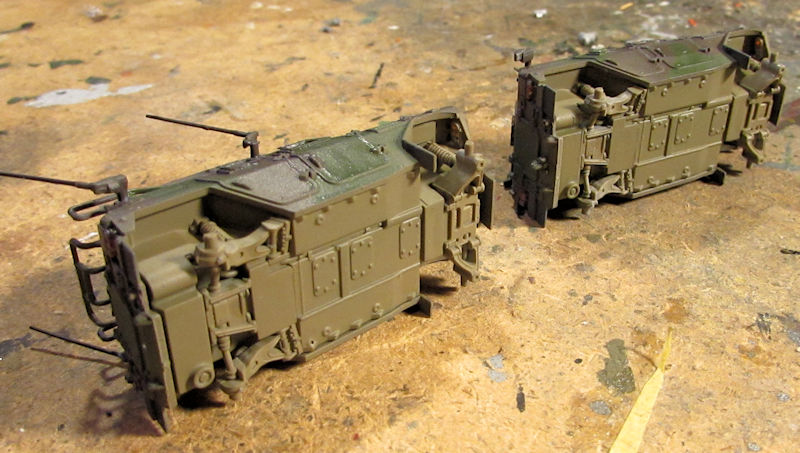
After that, I added the windows and other detail parts to these trucks, thereby showing the variants that are available:
From back to front these are a light scout, liaison and cargo trucks.
When I dirtied up the M-1117, I also dirtied up these underneath and in the wheel wells:
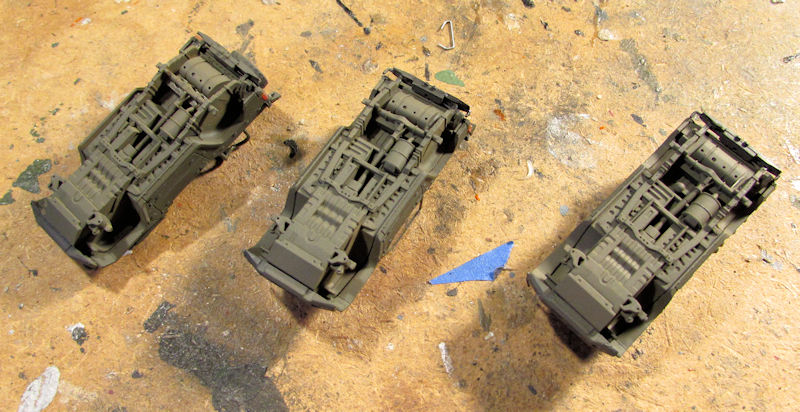
Even though it’s not that visible here, I also dirtied up the cargo bed of the one truck:
Next I worked on the two Light Armored Vehicles, completing the camouflage pattern and removing the Silly Putty, and then adding the detail parts to them:
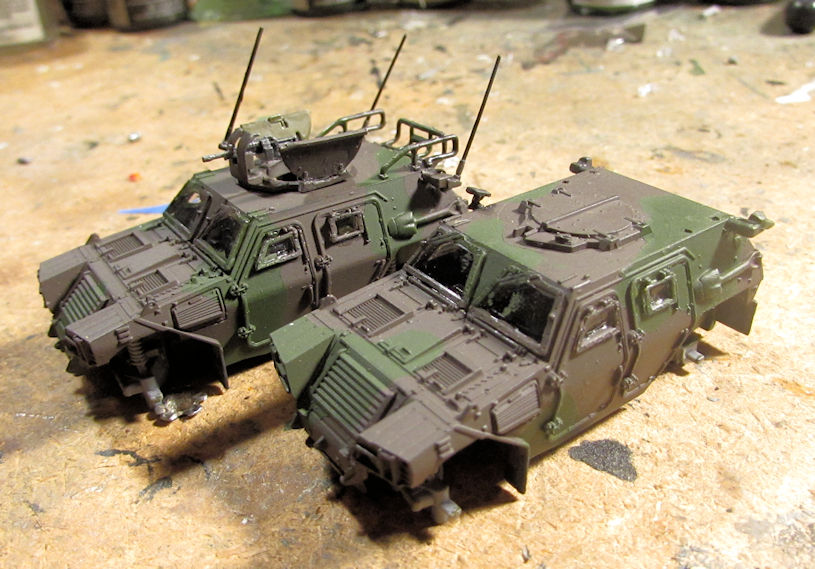
I then painted the wheels and tires like I did with the half ton trucks:
Later I dirtied up the bottom and wheel wells of these two:
After that came the clear coat and decals on these:
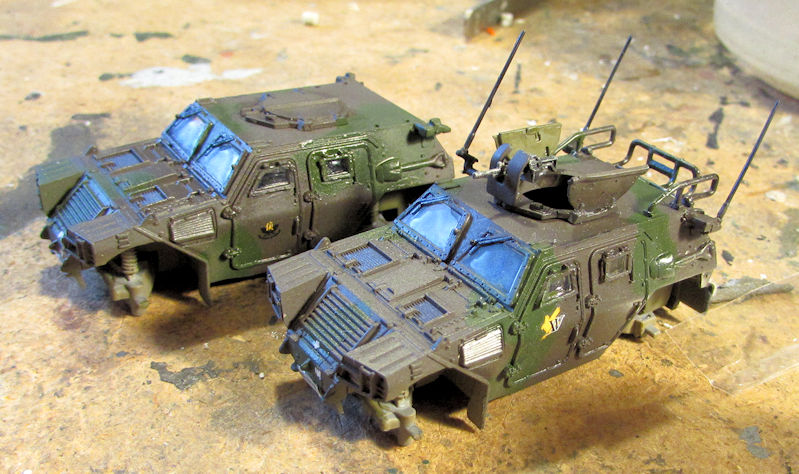
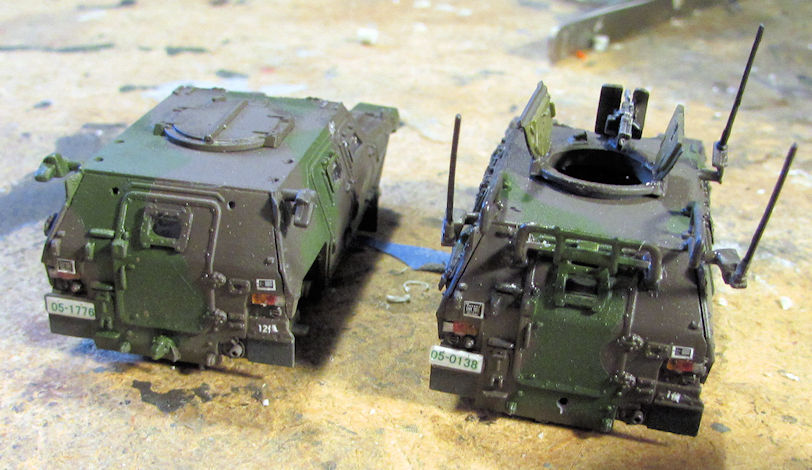
Afterward came dull coat, weathering and details to finish these off.
Next are the two Type 87 anti-aircraft vehicles. I also shot the second camouflage color and then removed the Silly Putty:

Later I painted the guns and radar on these:
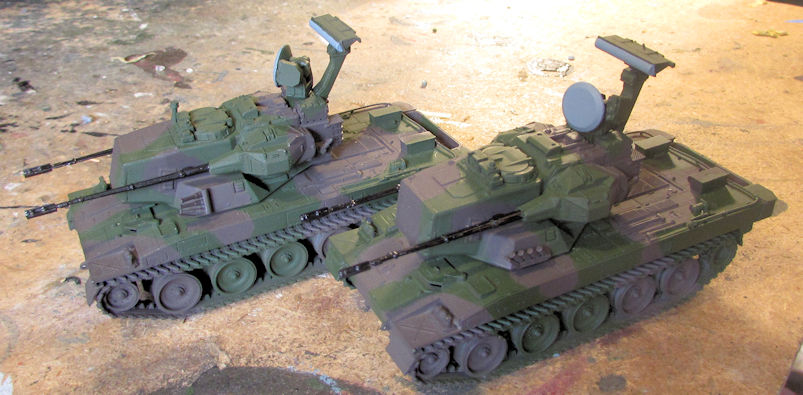
When that dried, I shot the clear coat on these for decals:
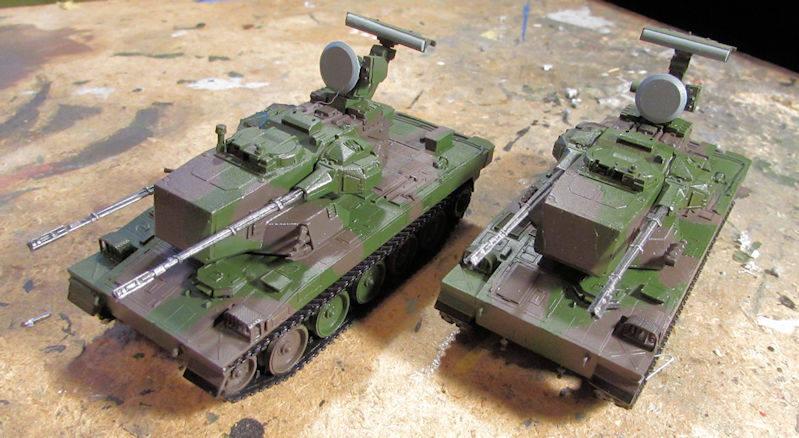
And finally decals:
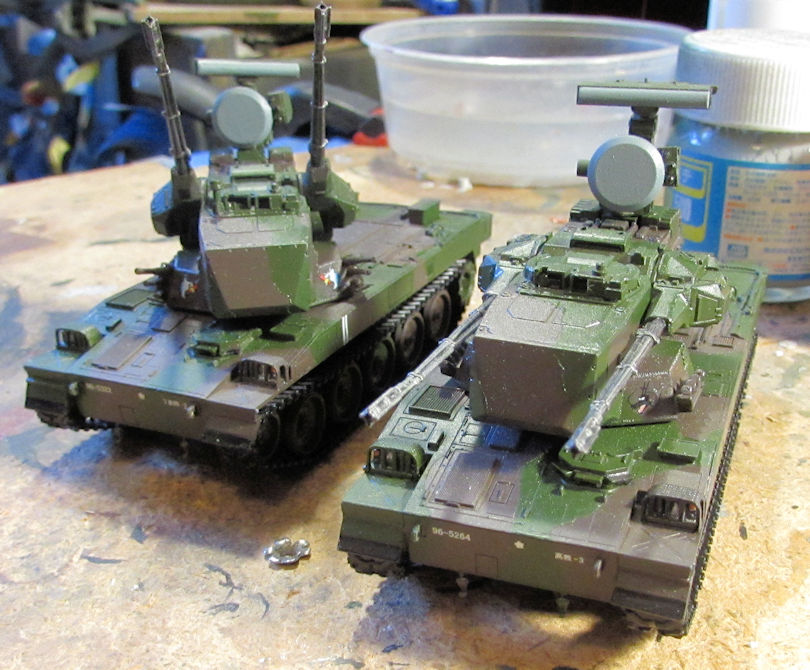
Afterward was the dull coat, detail painting and weathering to finish these off.
Finally, I shot the final color on the camouflage pattern for the Two Type 99 Self Propelled Guns. After Silly Putty was removed they looked thusly:
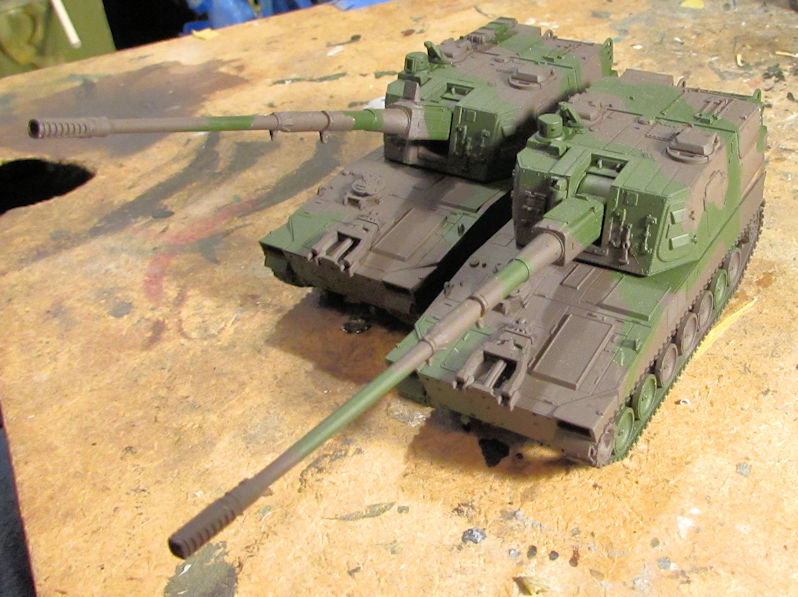
Afterward, I glossed them like the others:
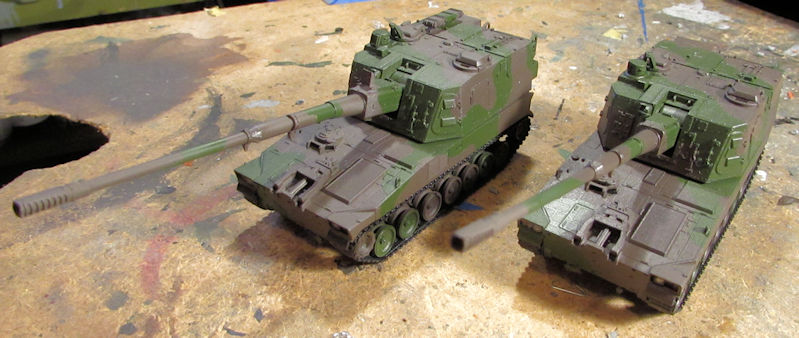
And then the decals went on:
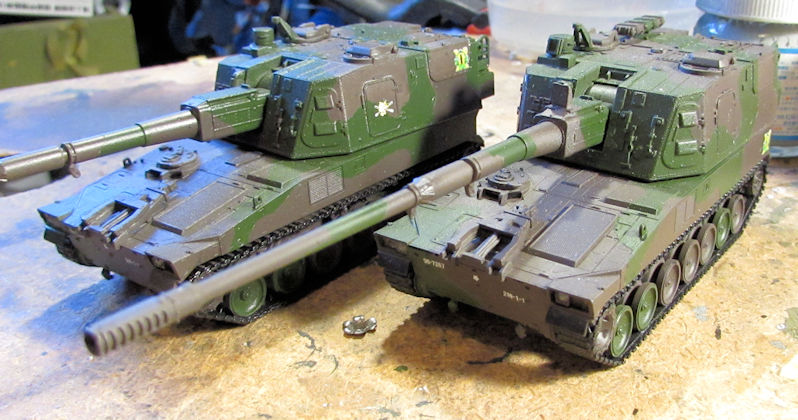
Once they were dry, I dull coated them, added details and then weathered these two to finish them off.
So, I was able to get these last ten vehicles finished on Saturday afternoon. Later on I’ll try to get those finished pic posted. Until then, enjoy the tour; if it isn’t too boring. At least I gave you all something to do while staying at home to avoid the beer virus! LOL!
Thanks again for looking in, comments are welcome.
Here's the results of all my latest work, starting with my aircraft...
On my Gotha Go-244, I shot a light blue underneath the plane, hitting all underside and vertical surfaces possible:
It looks more stark than it is, but I am still hoping it'll tone down a bit later on.
After that dried, I masked off the underside as much as possible to prepare for upper surface painting:
That was harder than expected. I hope to get some paint shot this coming week.
Next, I masked off the German helicopter with Silly Putty and shot the second color:
Later, when that was dry; more masking and then the third color. I didn't have a medium green so I improvised:
Once all that was dry, off came the Silly Putty and here she is in all her three-tone glory:
You can see how well the Micro Crystal Clear worked for holding windows in. Yeah. I got them fixed later; this time with Gator Grip glue.
After that, I pulled out my Israeli F-16 I Sufa and started the decals on it. I got most of the walk lines and other detail stencils on the top and bottom:
I then let that sit and dry. I plan on clearcoating that again and then applying the remaining decals.
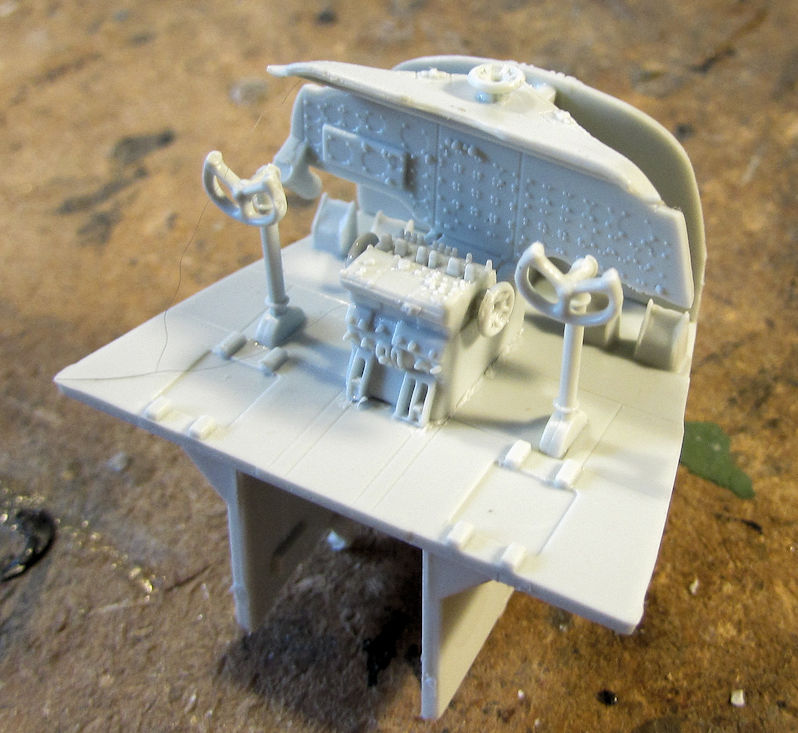
Moving on, I decided to answer the siren song of the C-54 that had been singing to me to start. Thanks to another friend working on this, that singing became louder so down it came. Naturally, I started with the pilots' seats:
Yeah, they are that small, and four pieces each...
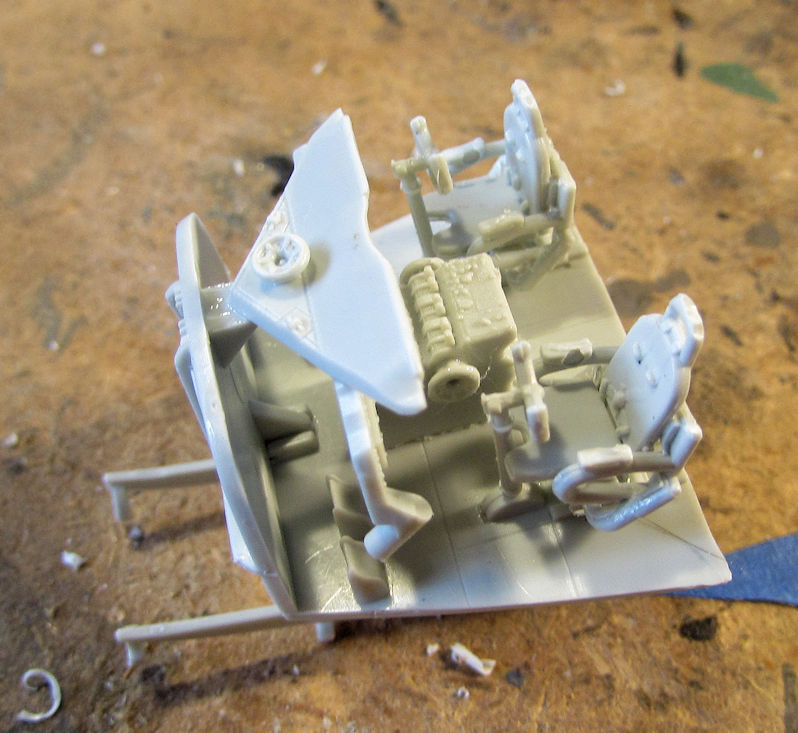
Next was the cockpit that they sit in. This was fairly easy:
Later I dry fit the seats in place to see if they would hamper my attempts to paint this later. They would so they didn't get glued in here:
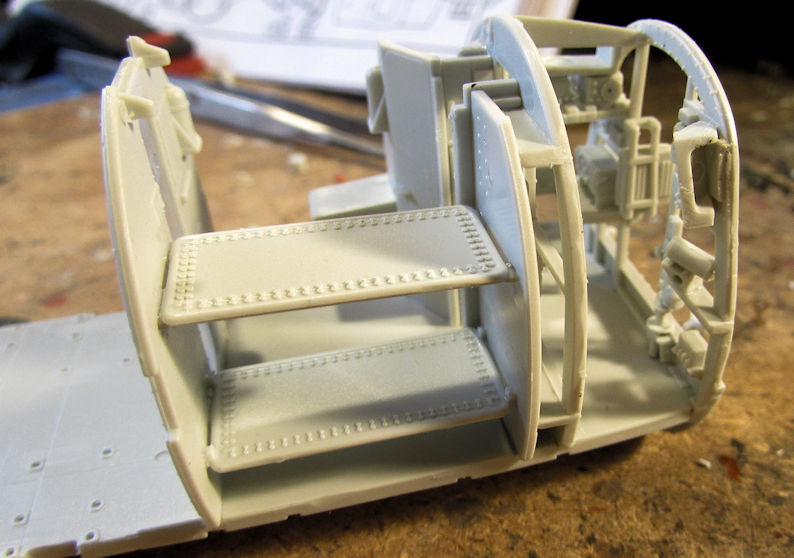
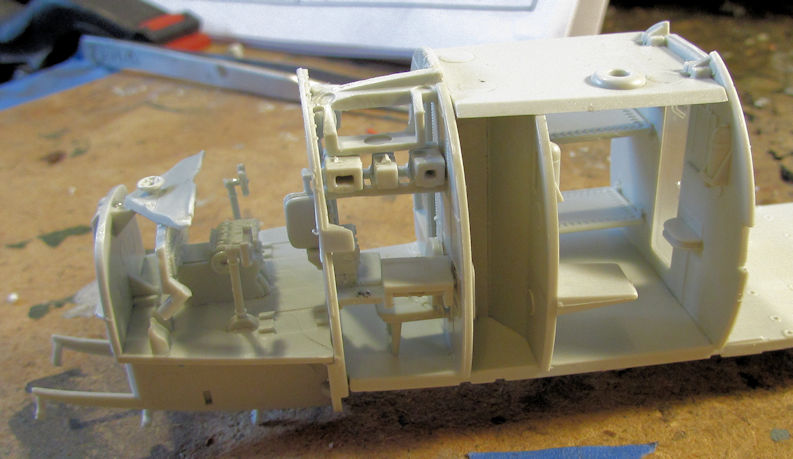
Next I assembled all the secondary cabin nooks behind the cockpit and added them to the floor of the rear cabin:
Yeah, after careful review, I won't be painting any of that given that none of it will be seen through the windows. I won't be assembling all the troop seats in the main cabin either as this will be all closed up. Still, I had to dry-fit the assembled cockpit to the rear cabin assembly:
That's all I got done on that. The next model I pulled out was an even bigger plane, the A-400 Grizzly used in Europe. Mine has the option to make it a German bird so that is what I'll make it. After all, my Germans are my largest force right now!
I started once again with the cockpit as before:
This model also has a full interior enclosed in an interior shell just like the C-54 does. Here's one half of it here:
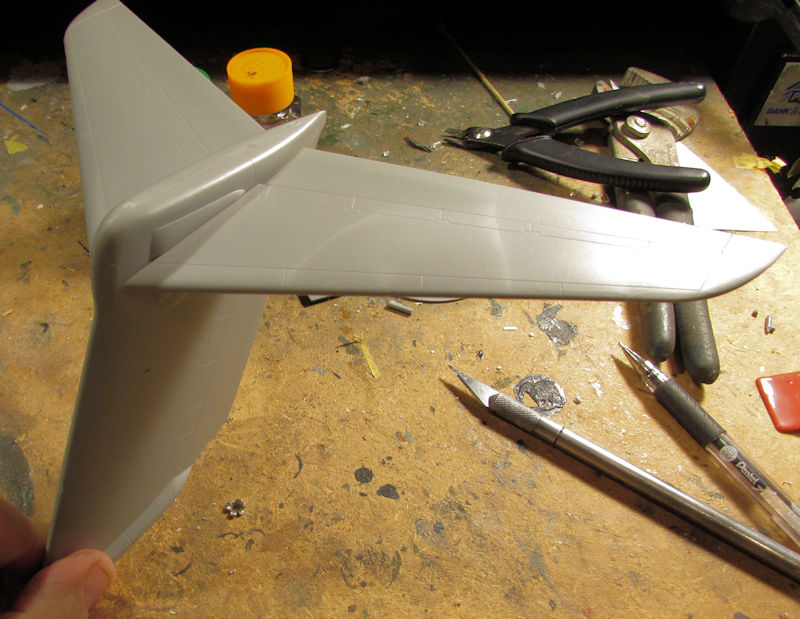
As this bird will be all closed up as well, I won't be painting that interior. Next I assembled the tail, only dry-fitting the horizontal surfaces. You can see how big that is too:
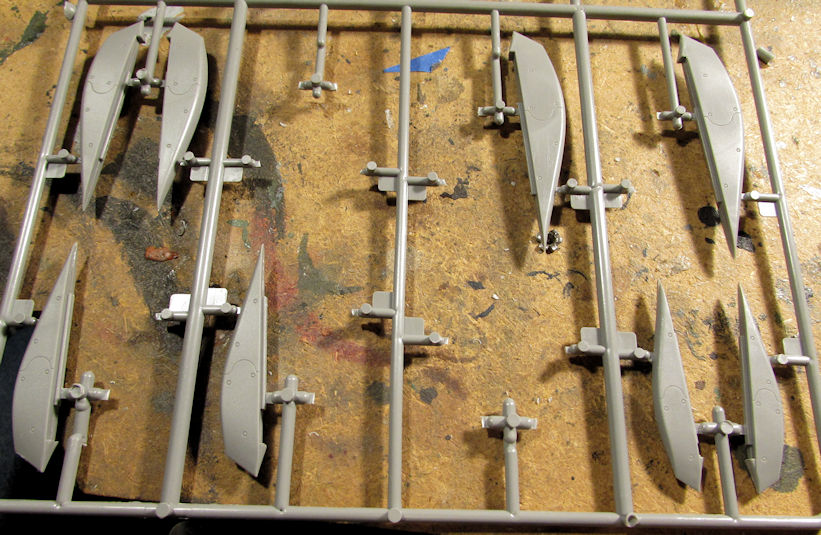
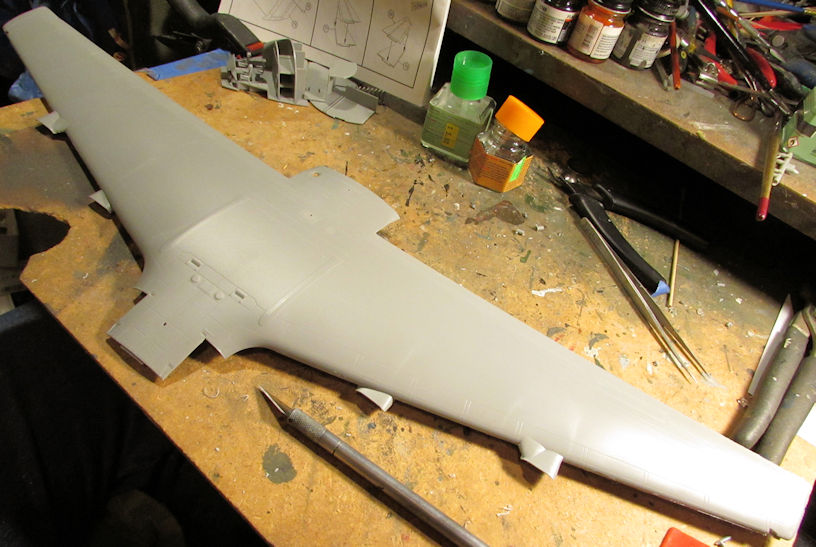
I then assembled all these greeblies which go on the underside of the wing:
And here is the wing I'll be adding those to. Check out the wingspan:
I already added those fences to the underside of the wing; they'll be seen in the next update.
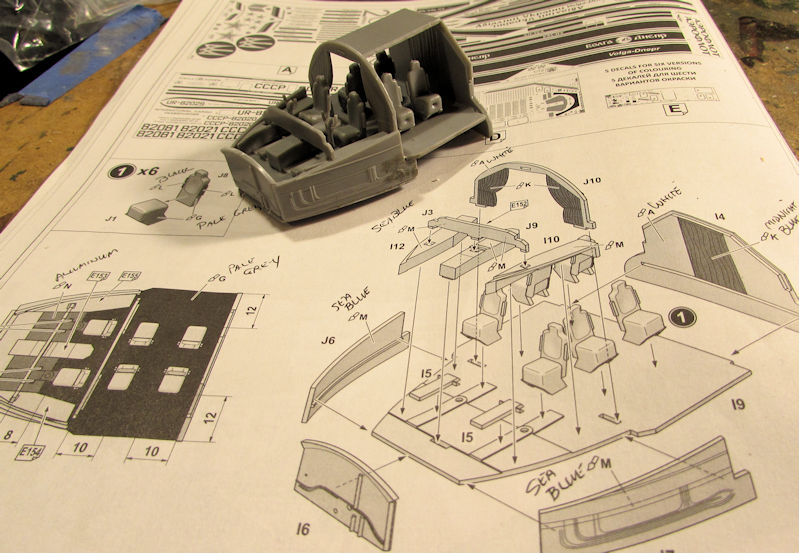
Moving on, I then started my monster of a kit, the An-124; first assembling the cockpit:
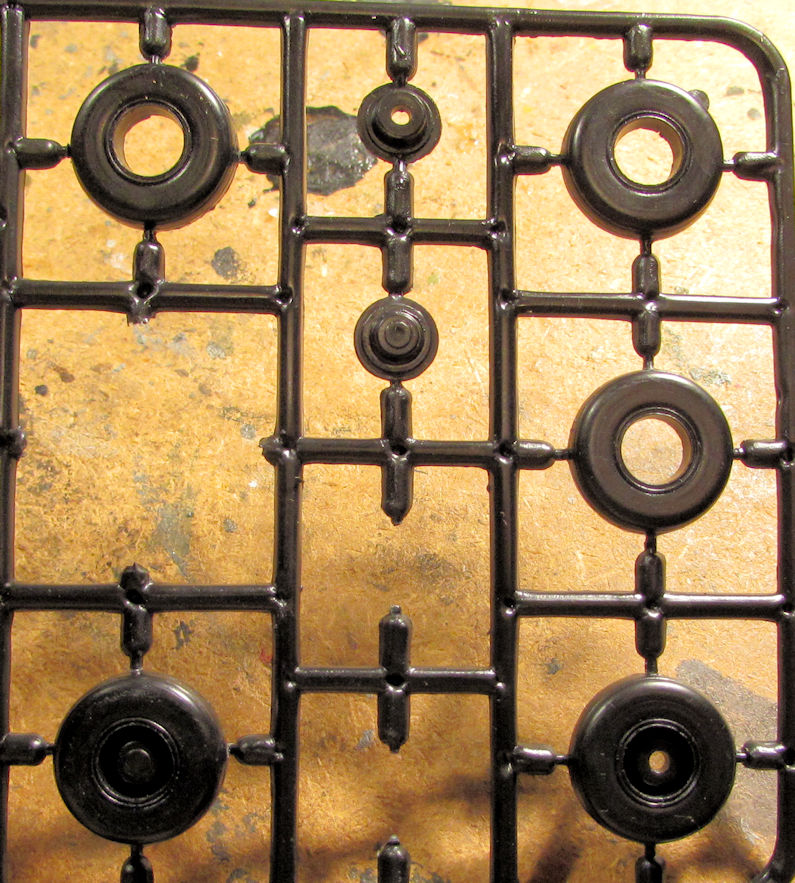
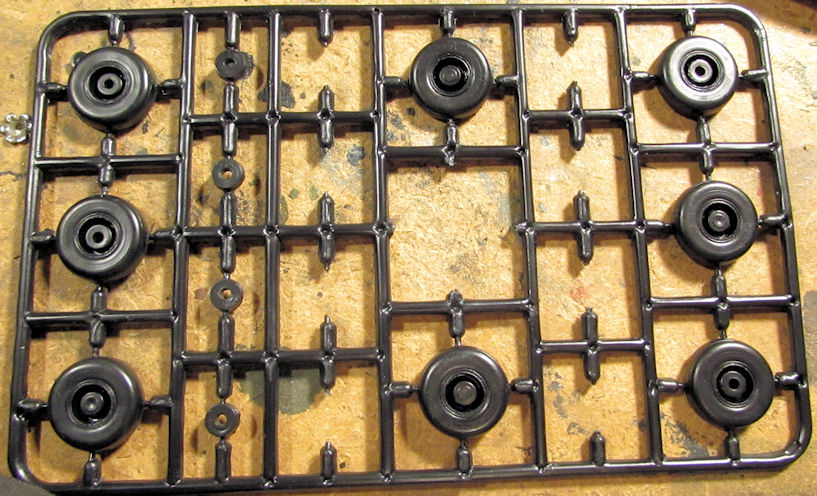
Fortunately, that is all the interior this model has. However, I do have to assemble all the wheels. Here is the first ones after assembly:
Now, each of those outer circles are the wheel halves. The inner, smaller circles are the hubs that go inside those circles. You can see the lower wheel halves with the hubs installed. Here are all the wheel halves on that sprue already done:
That's four wheels. Sixteen more to go....
I decided that was enough so I moved on to assemble the main landing gear wells:
That was harder than expected, but they are done. That's as far as I got on that plane. In fact, that was enough on all planes for now, so I started on my armor.
On the bench I had about ten small scale armor models that were within spitting distance of being done. Time to bring them over the finish line.
My first one was my US M-1117 Guardian. I had a base coat on it so I decided to brush paint the second of three camo colors:
Later, I did the second color and a number of details:
After all that was dry, and before I added the wheels; I shot some dirt weathering on the underside and in the wheel wells:
After that, I added the wheels, decals, detail parts and finished the weathering. This little car is done now.
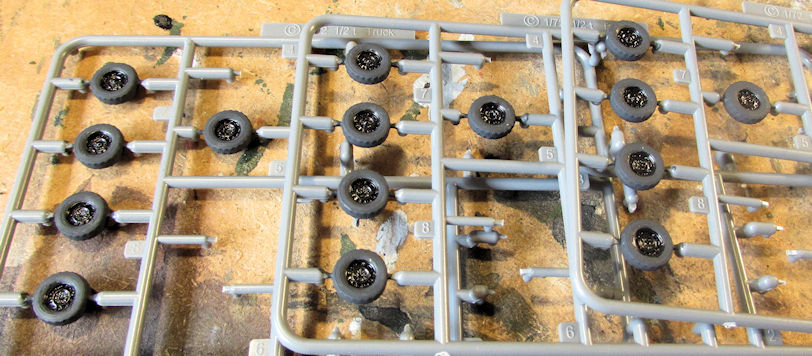
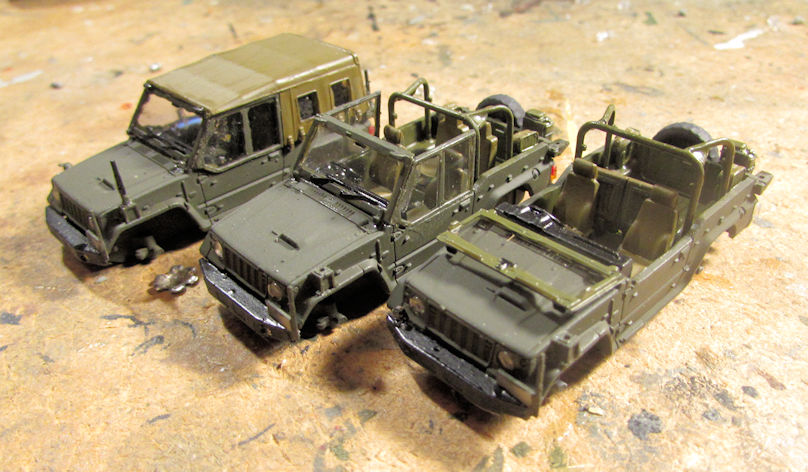
Next, I worked on the three half-ton trucks for my JGSDF. I started out by painting all the wheels on the sprues:
After that, I added the windows and other detail parts to these trucks, thereby showing the variants that are available:
From back to front these are a light scout, liaison and cargo trucks.
When I dirtied up the M-1117, I also dirtied up these underneath and in the wheel wells:
Even though it’s not that visible here, I also dirtied up the cargo bed of the one truck:
Next I worked on the two Light Armored Vehicles, completing the camouflage pattern and removing the Silly Putty, and then adding the detail parts to them:
I then painted the wheels and tires like I did with the half ton trucks:
Later I dirtied up the bottom and wheel wells of these two:
After that came the clear coat and decals on these:
Afterward came dull coat, weathering and details to finish these off.
Next are the two Type 87 anti-aircraft vehicles. I also shot the second camouflage color and then removed the Silly Putty:
Later I painted the guns and radar on these:
When that dried, I shot the clear coat on these for decals:
And finally decals:
Afterward was the dull coat, detail painting and weathering to finish these off.
Finally, I shot the final color on the camouflage pattern for the Two Type 99 Self Propelled Guns. After Silly Putty was removed they looked thusly:
Afterward, I glossed them like the others:
And then the decals went on:
Once they were dry, I dull coated them, added details and then weathered these two to finish them off.
So, I was able to get these last ten vehicles finished on Saturday afternoon. Later on I’ll try to get those finished pic posted. Until then, enjoy the tour; if it isn’t too boring. At least I gave you all something to do while staying at home to avoid the beer virus! LOL!
Thanks again for looking in, comments are welcome.


Duke Maddog
Well-known member
Thanks Frank! Yeah, I've already finished 21 to date. With this self quarantine going on, I might even surpass that!
Thanks Helios! I need to 'oil' this machine a bit more though. Seems I've suddenly experienced a not-so-slight drop in the mojo despite a perfectly good reason to stay in the hobby room....
Thanks Helios! I need to 'oil' this machine a bit more though. Seems I've suddenly experienced a not-so-slight drop in the mojo despite a perfectly good reason to stay in the hobby room....
MM2CVS9
Active member
Thanks Frank! Yeah, I've already finished 21 to date. With this self quarantine going on, I might even surpass that!
Thanks Helios! I need to 'oil' this machine a bit more though. Seems I've suddenly experienced a not-so-slight drop in the mojo despite a perfectly good reason to stay in the hobby room....
When I get in a funk, I just have to look at what you've accomplished to re-energize.
EJ
Duke Maddog
Well-known member
Thanks EJ! I just recently posted many of these in a finished Thread. Feel free to check them out.
Meanwhile, with everyone strongly suggesting self quarantine; I should be getting a lot more done in the coming weeks. Stay tuned.
Meanwhile, with everyone strongly suggesting self quarantine; I should be getting a lot more done in the coming weeks. Stay tuned.
Duke Maddog
Well-known member
Okay, here's an update. Once the Gallery is done and the SSL# applied, I will hotlink from the gallery. Until then, I have opened a Postimage account and I will now post my latest progress I've made during this latest few weeks of self-quarantine. Just to get some pics posted after all; it's been awhile and I have a lot to show.
That reminds me of a joke: During period of lockdown there will be a pretty good baby boom about nine months from now. In 2033 and later years they will all be known as the "quaranteens"! LOL!
Okay, now back to your regularly scheduled program here.
I'll be starting with my aircraft. Some of these may be repeats; if so I apologize, I just forgot where I left off.
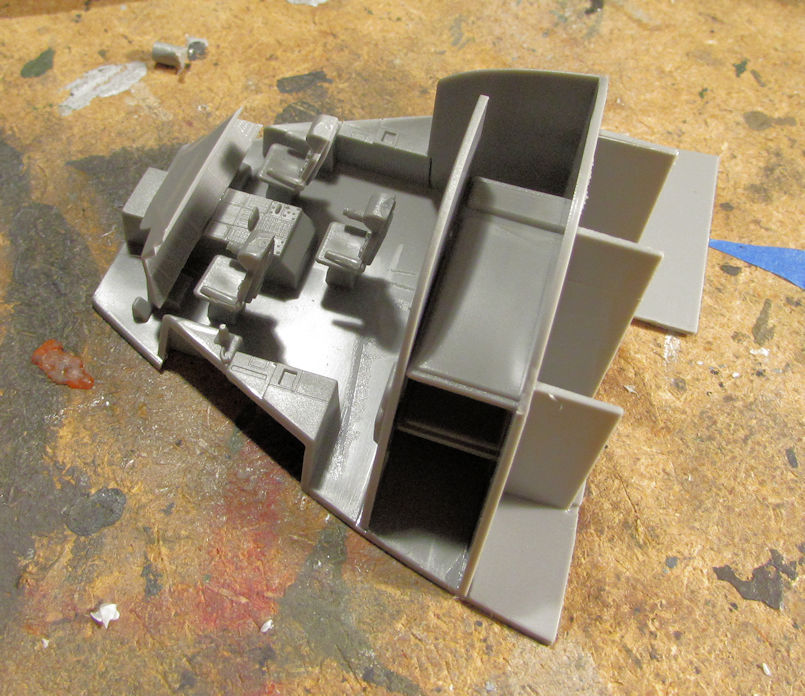
This first one in our tour is the Airbus A-400 Grizzly transport.
After painting the cockpit, I assembled all the remaining interior parts together to get further along on this. Here is the interior cockpit and cargo bay floor enclosed inside the inner fuselage halves:
Check out this interior... it's the last time it's going to be seen as I'm closing this bird right up. That's why it isn't painted:
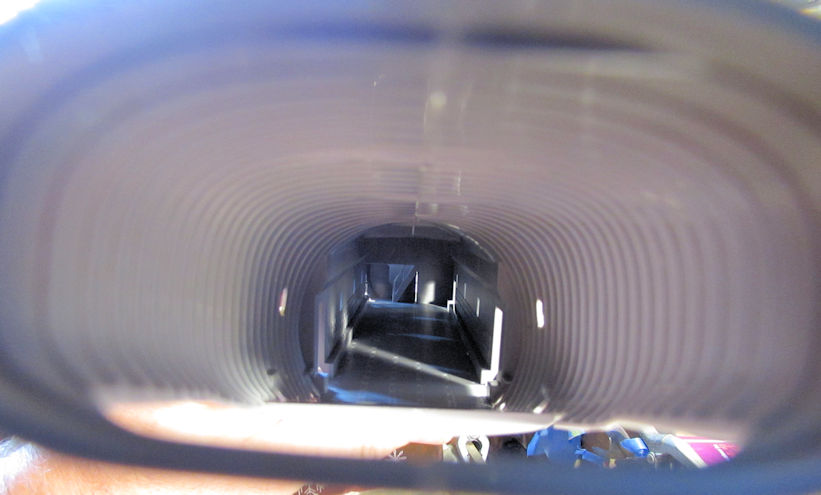
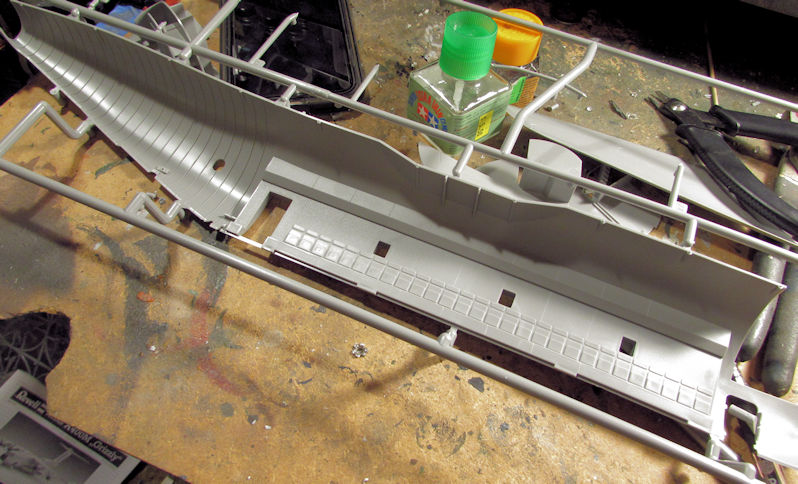
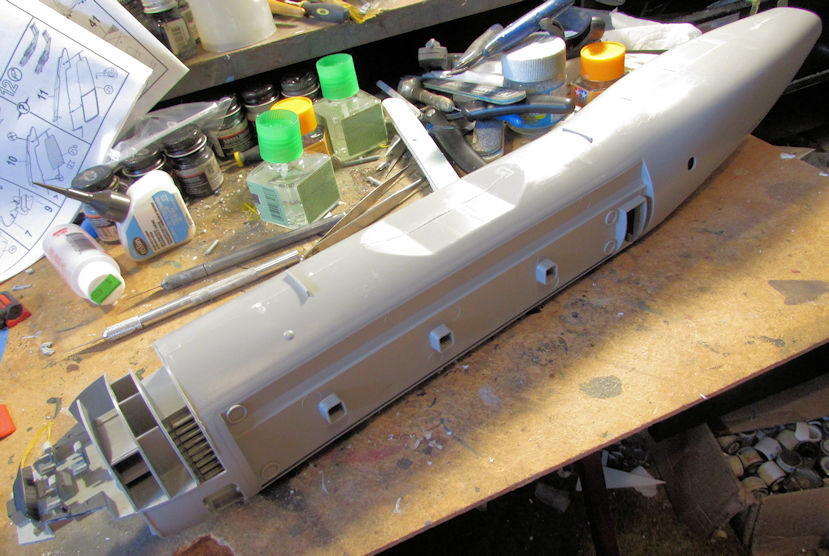
This is how the interior fuselage tube fits inside the outer fuselage. It's only dry-fit into place so I can see what issues I'll have:
Finally, after dry-fitting this all together, I found out how many issues I'm going to have. I also can see how big this monster is:
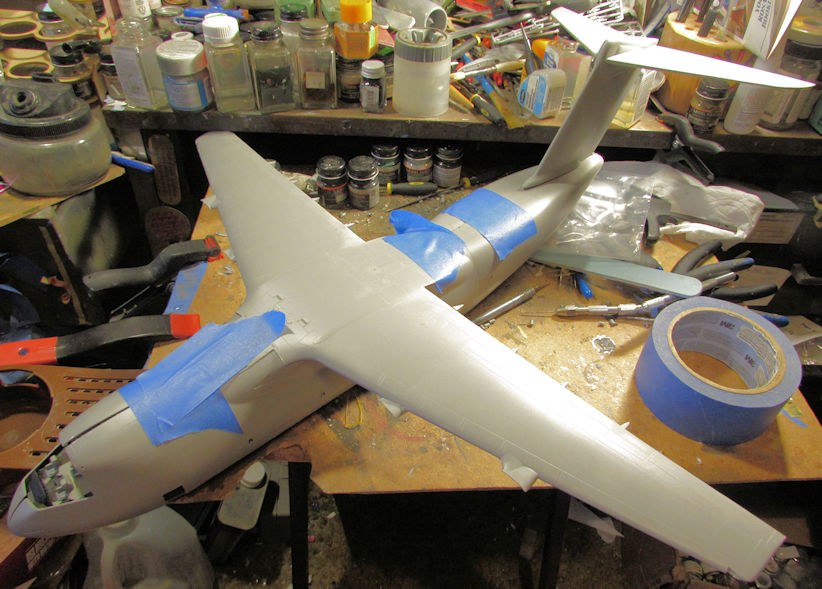
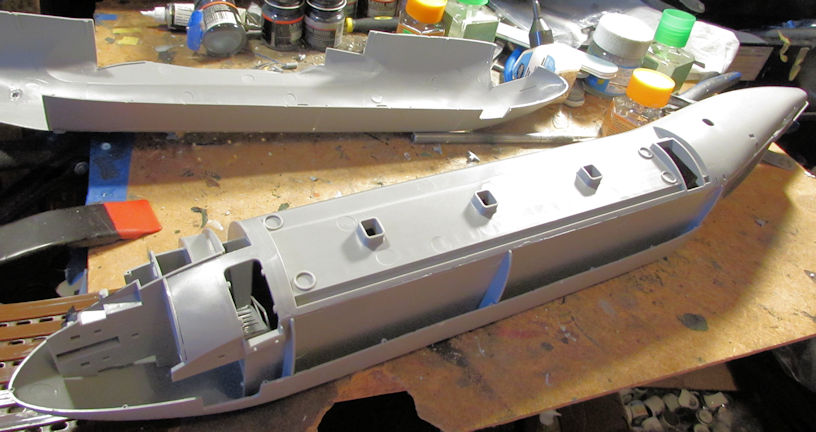
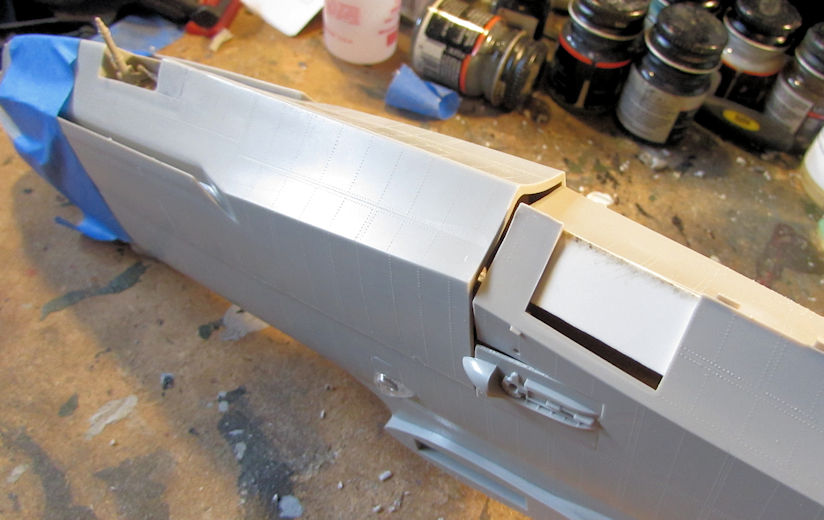
Okay, that is enough of that. The next one I tried to move forward on was my Shinmeiwa float plane. I did manage to get the main fuselage together with the cockpit cemented inside. I then also dry-fit the assembled wings and the tail to see how this bird was going to look:

One major issue was found when I taped the lower tub under the forward part of the fuselage assembly. Not sure how I'm going to fix this yet so this bird went back on the shelf for now:
After all that, I started the decals on my Israeli Sufa; starting with the stencils and walkway stripes. They are a bit difficult to see on this but here's where I'm at so far:

Meanwhile, during all this, I've been working on the Russian AN-124 Condor.
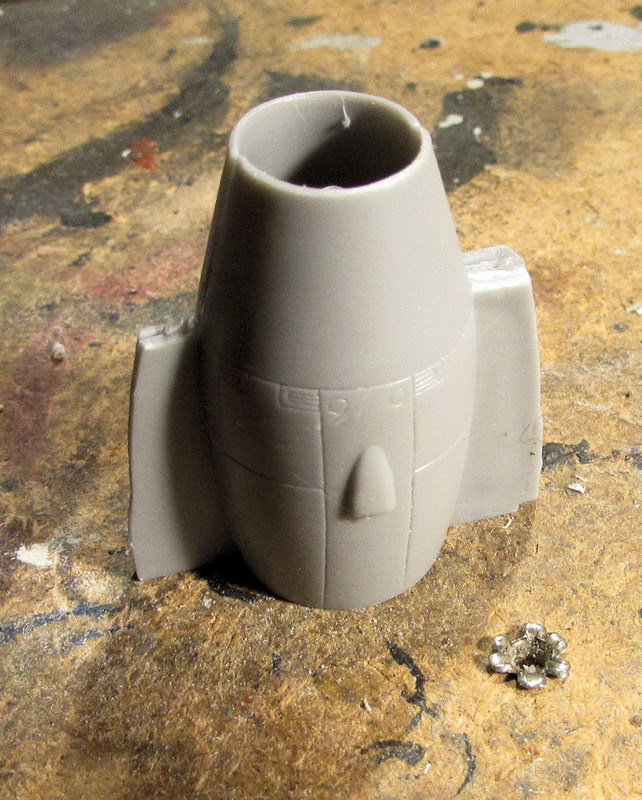
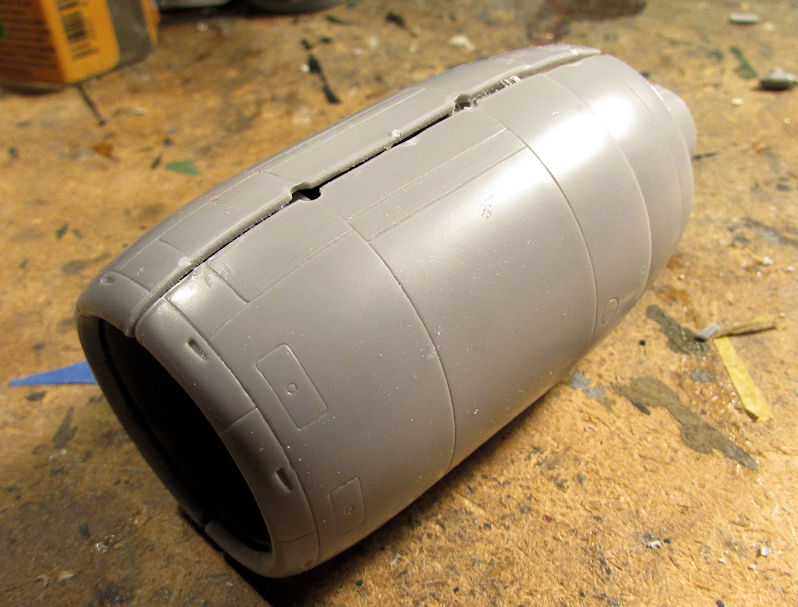
I started on one of the engines. This is only the rear part of it right here and that assembly has five parts to it:
Here are the remaining parts to finish this engine, some of which are already added to the rear section:
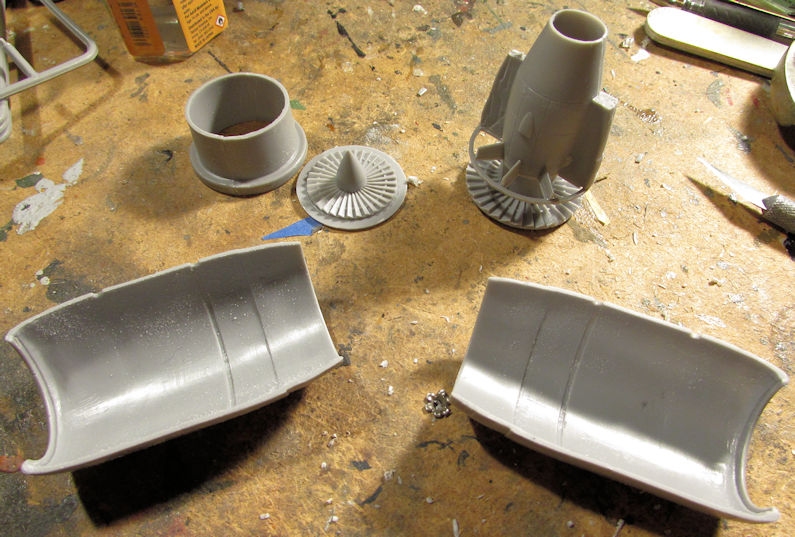
This is how they are all supposed to fit inside... in theory:
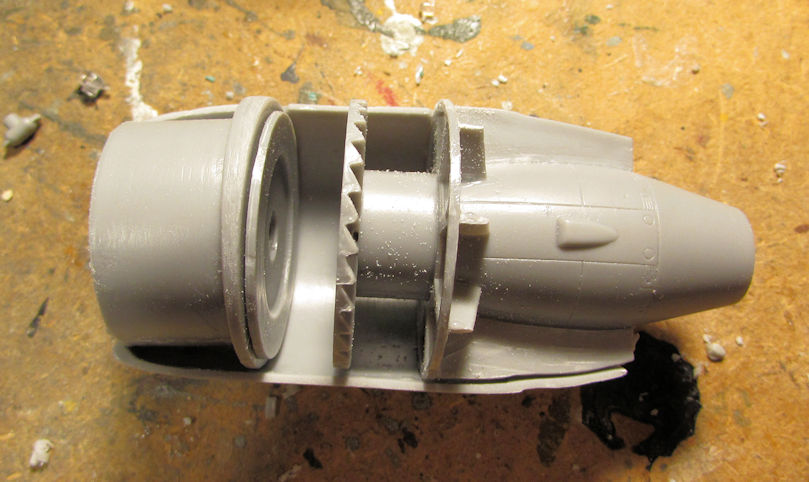
This is reality; even after extensive reseating of parts and sanding down of all interior parts:
Finally after three days of sanding and refitting; I managed to get this closed up enough to add the pylon to it:
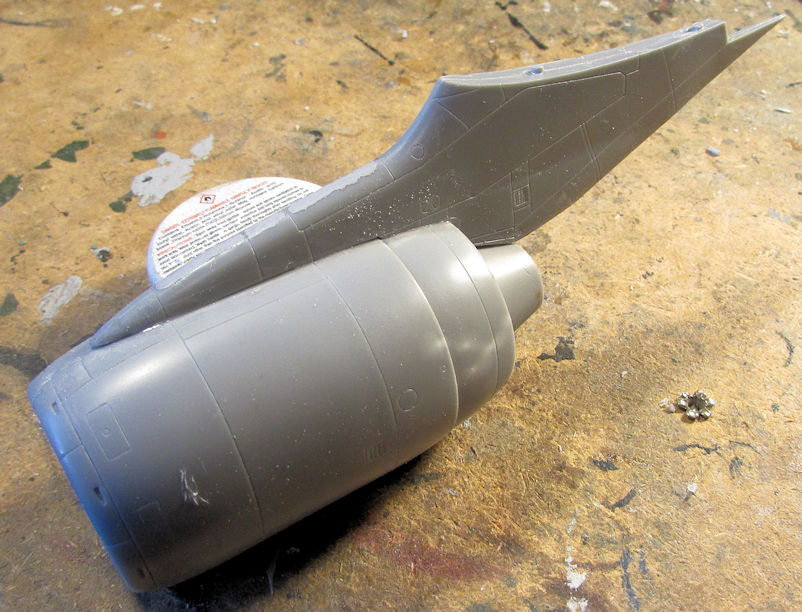
That was just one engine! Man, this is gonna be a long build!
So, I continued on, assembling most of the wing fillets and some additional pylons. Most all the halved parts had to be sanded on the join edges before glue was applied in order to get them to fit properly. You can see the second engine clamped together in this pic too:
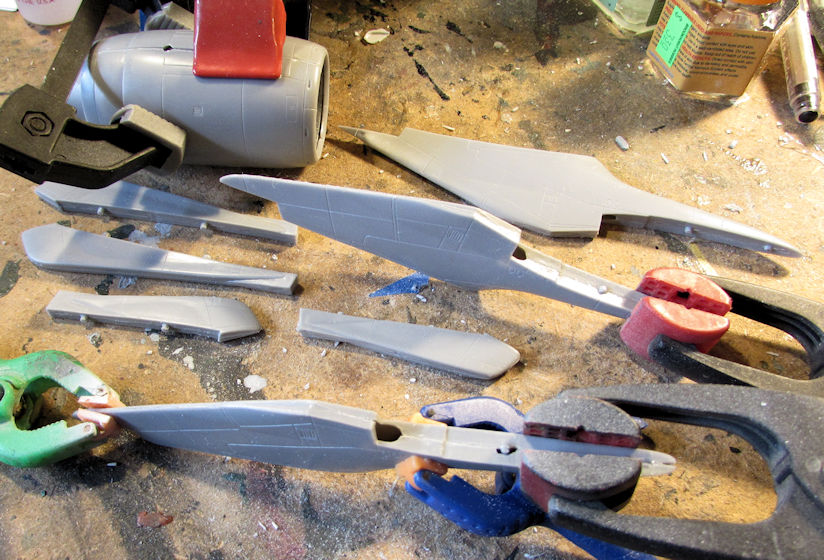
In the next post I'll be showing the progress I made on my armor since only 20 pics can added per post...
That reminds me of a joke: During period of lockdown there will be a pretty good baby boom about nine months from now. In 2033 and later years they will all be known as the "quaranteens"! LOL!
Okay, now back to your regularly scheduled program here.
I'll be starting with my aircraft. Some of these may be repeats; if so I apologize, I just forgot where I left off.
This first one in our tour is the Airbus A-400 Grizzly transport.
After painting the cockpit, I assembled all the remaining interior parts together to get further along on this. Here is the interior cockpit and cargo bay floor enclosed inside the inner fuselage halves:
Check out this interior... it's the last time it's going to be seen as I'm closing this bird right up. That's why it isn't painted:
This is how the interior fuselage tube fits inside the outer fuselage. It's only dry-fit into place so I can see what issues I'll have:
Finally, after dry-fitting this all together, I found out how many issues I'm going to have. I also can see how big this monster is:
Okay, that is enough of that. The next one I tried to move forward on was my Shinmeiwa float plane. I did manage to get the main fuselage together with the cockpit cemented inside. I then also dry-fit the assembled wings and the tail to see how this bird was going to look:
One major issue was found when I taped the lower tub under the forward part of the fuselage assembly. Not sure how I'm going to fix this yet so this bird went back on the shelf for now:
After all that, I started the decals on my Israeli Sufa; starting with the stencils and walkway stripes. They are a bit difficult to see on this but here's where I'm at so far:
Meanwhile, during all this, I've been working on the Russian AN-124 Condor.
I started on one of the engines. This is only the rear part of it right here and that assembly has five parts to it:
Here are the remaining parts to finish this engine, some of which are already added to the rear section:
This is how they are all supposed to fit inside... in theory:
This is reality; even after extensive reseating of parts and sanding down of all interior parts:
Finally after three days of sanding and refitting; I managed to get this closed up enough to add the pylon to it:
That was just one engine! Man, this is gonna be a long build!
So, I continued on, assembling most of the wing fillets and some additional pylons. Most all the halved parts had to be sanded on the join edges before glue was applied in order to get them to fit properly. You can see the second engine clamped together in this pic too:
In the next post I'll be showing the progress I made on my armor since only 20 pics can added per post...
Duke Maddog
Well-known member
Okay, here is the progress I made on my military vehicles. Since I had finished ten of them recently, it was time to get started on some more. I had wanted to add a few more Abrams and a Paladin to the force so they got started. I also had two tank transporters to build for a tank transporter group build on the Missing Lynx Braille Scale Forums so I also started them.
Let's start with the M-109A6 Paladin. I started with the lower hull of course. I had to add all these torsion bars and try to get them lined up properly. What a pain! I think I got close enough:
Next I decided to try and assemble the turret. Of course I also wanted to make the gun elevate too and I had an idea. So I pulled out the parts only to find this:
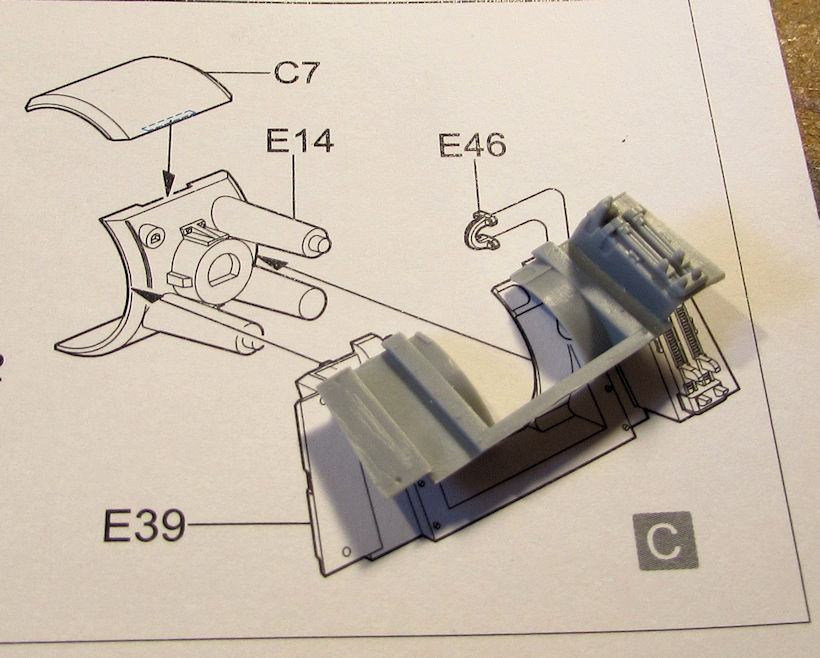
That's right: part E-14 is completely missing! Well, I have two additional kits of this very same model (one is going to be made Israeli) so I have a spare kit to cannibalize for this additional part. I just have to find it in the stash. Until then, I moved on...
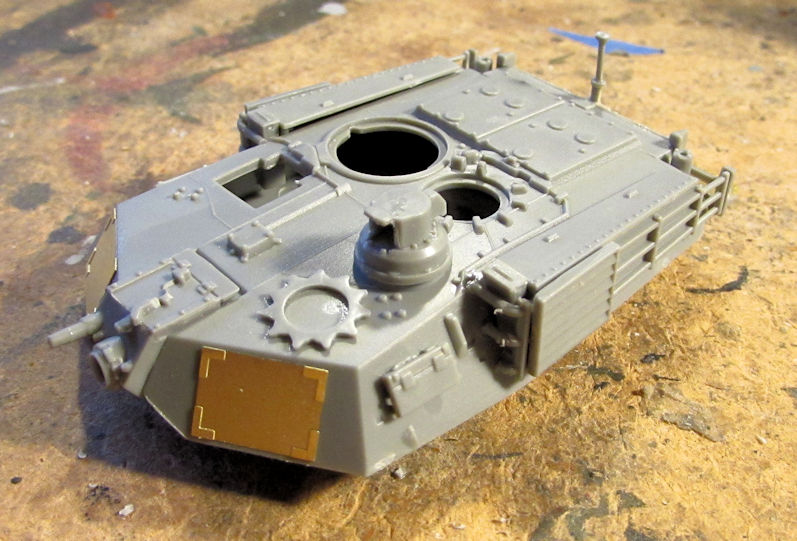
I have two Flyhawk Abrams in the stash to make an Abrams SEP. One will have a mine roller on it; the other without. I also have the Tiger Models Abrams that I'll be making a SEP TUSK I Abrams.
Here's the SEP Abrams started here. I had to do the torsion bars again. This is getting tiresome! I'm hoping I got the, all lined up well enough:
Next was the gun assembly, fairly straightforward:
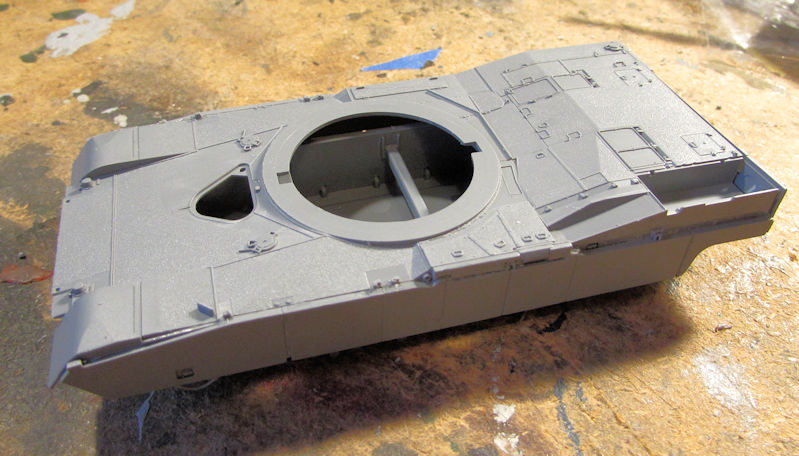
I then added the sides to the upper hull. There's more to add to this but it is started:
Here is the upper hull sitting on the lower hull. Looks good so far:
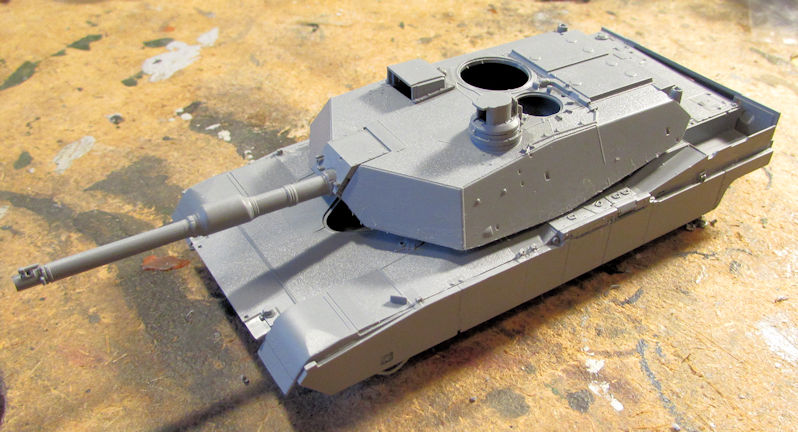
Later I added the turret to see how it's coming along:
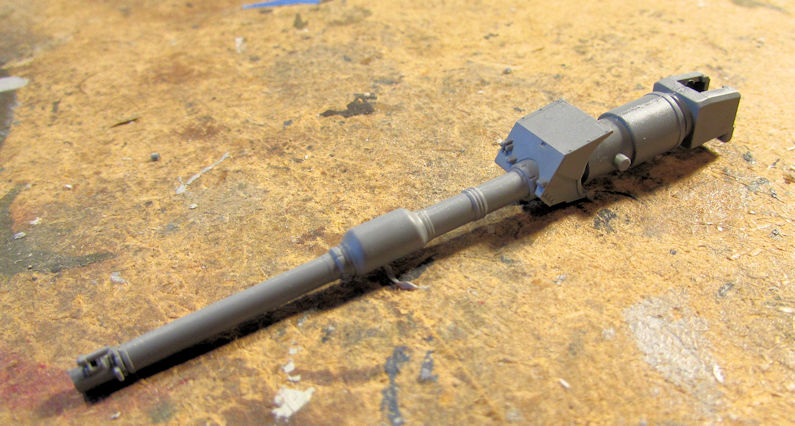
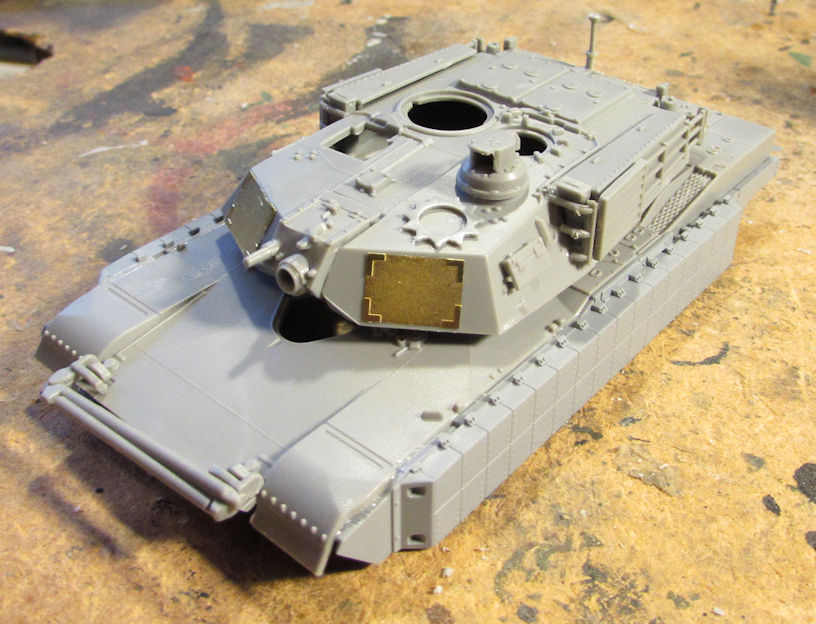
Moving along, I started the Tiger Model SEP TUSK I Abrams. This time I started with the gun. This is the "three gold leaf" kit that has everything, including this metal gun. I had to add three resin parts and three photo-etch parts to this gun. A fourth resin part goes on later:

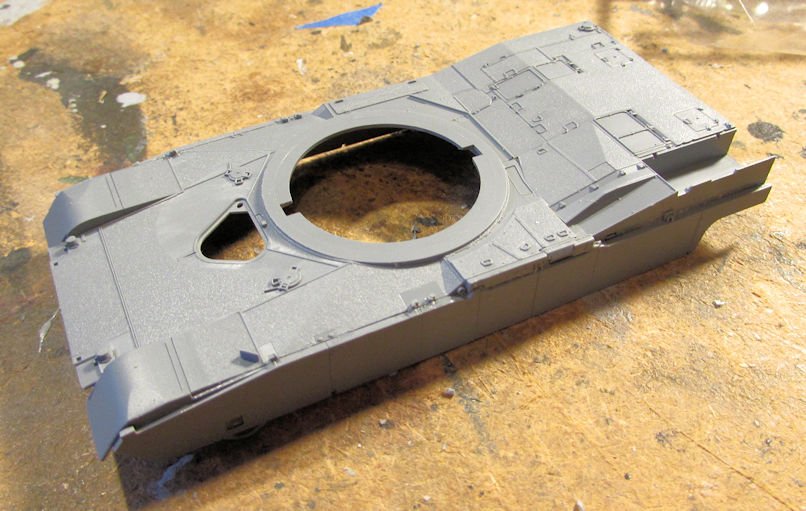
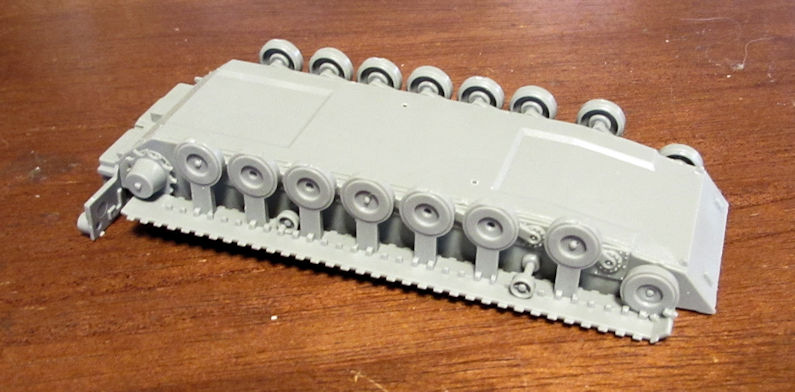
Next was the lower hull again. This time, Tiger Models made the suspension and roadwheels exceptionally easy to assemble:
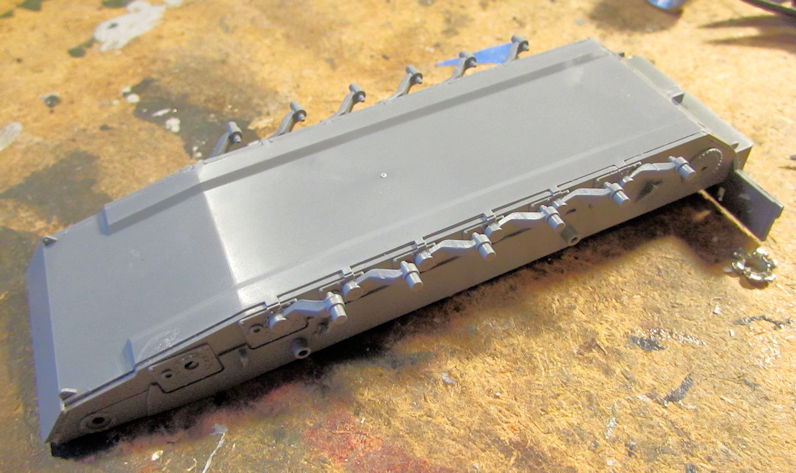
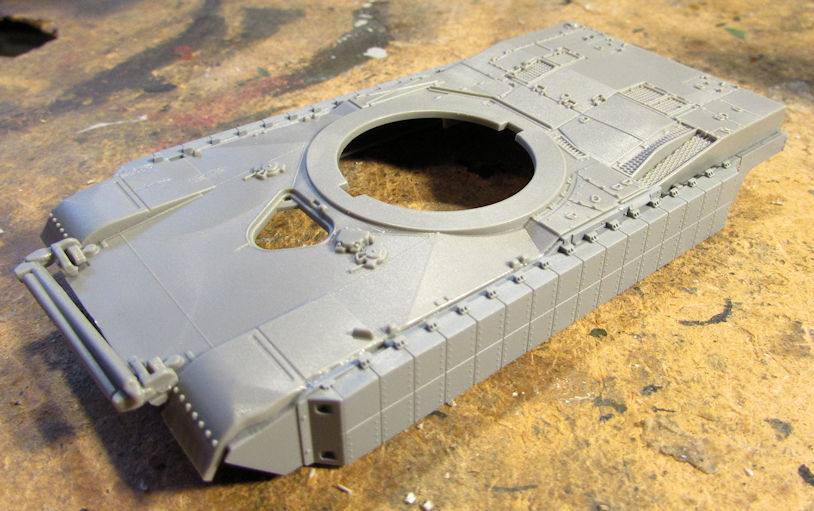
Next I did the upper hull, adding a few of the detail pieces and the side skirts:
Finally, I got started on the turret. There was a lot of P/E to add, and I've only done about a third of the detail parts to this:
Finally, here's a shot of this thing all dry-fit together on the upper hull:
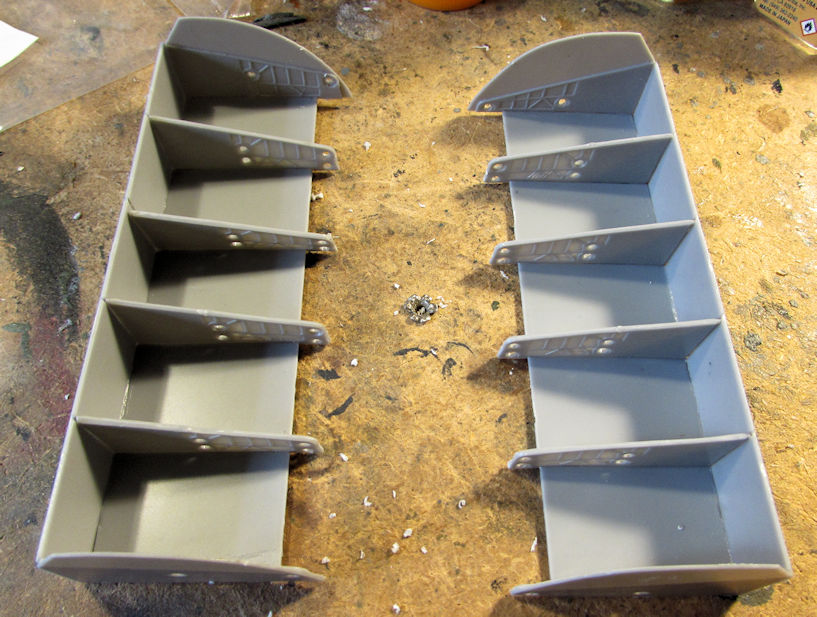
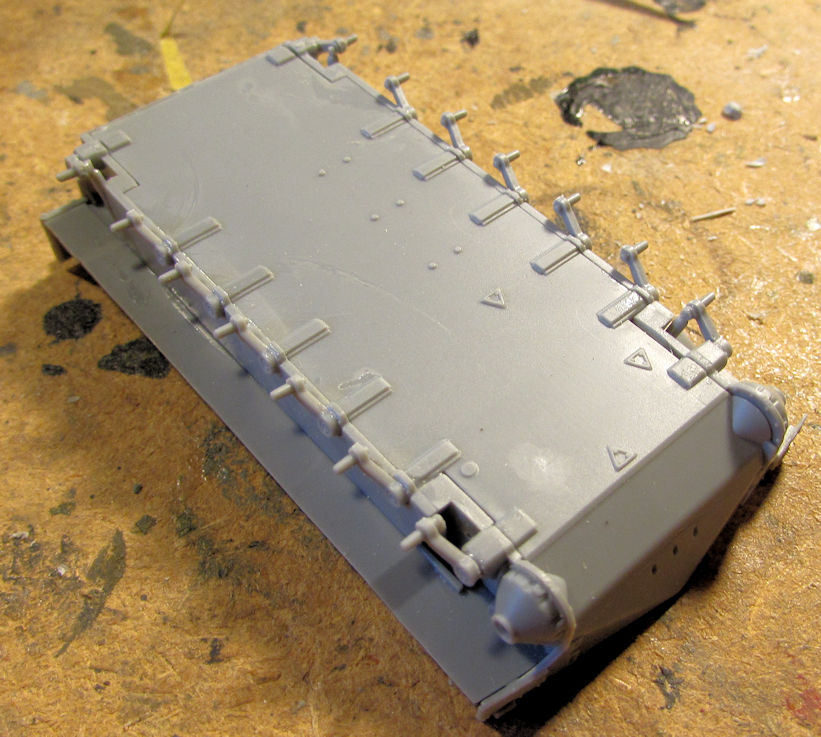
Finally on to the two tank transporters. This first one is the HEMMTT tractor with the trailer. I did something a bit different on these two tank transporters: I started the trailers first. Here's the HEMMTT trailer mostly assembled up to the wheels:
Next I did the cab; adding the windows and assembling the interior:
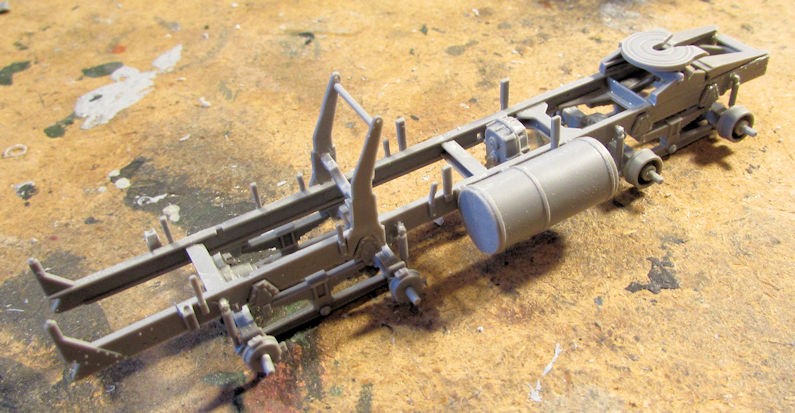
Next up was the chassis. Here it is after two steps; just before assembling the engine:
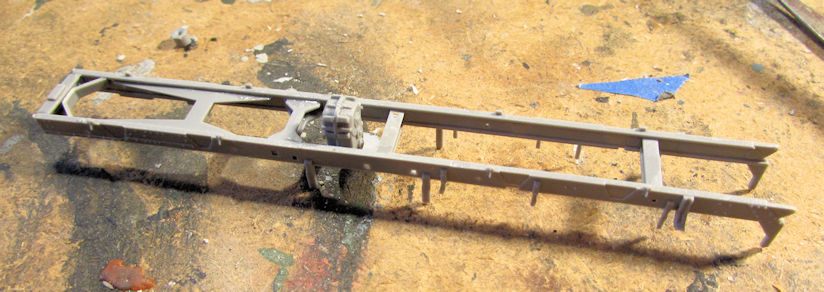
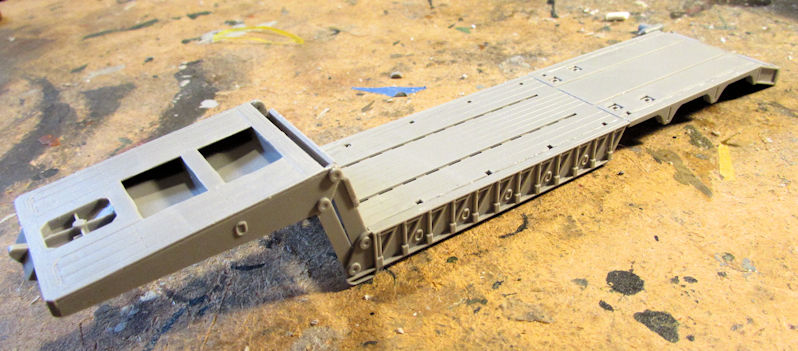
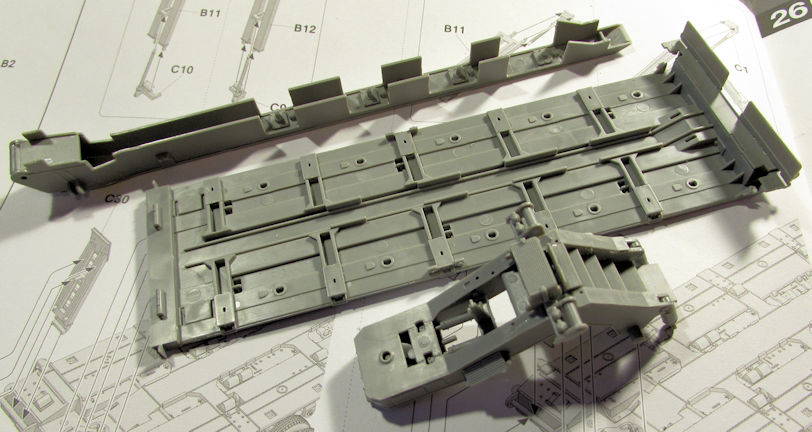
After this I started on the trailer for the M-1070. I got most of the main part assembled. The center part is only dry-fit; I have some linkages to add inside first before gluing that down:
Now, when I started the neck portion of the trailer; the first piece I cut off broke right away:
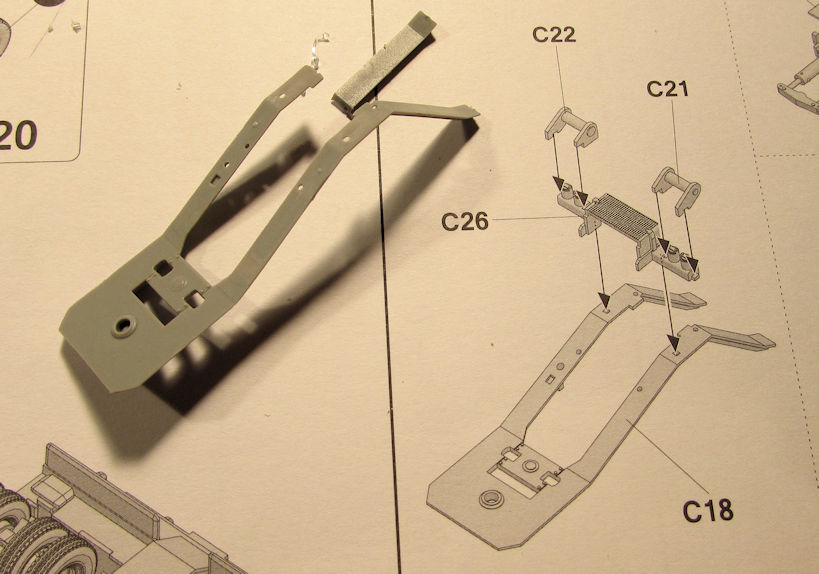
Later, after assembly, you couldn't see the break, so all worked out in the end. Here is the trailer with all three major assemblies waiting for completion:
And that is where I have stopped so far. I hope I didn't bore you with this huge update. Take care now and thanks for looking in; comments are welcome.
Let's start with the M-109A6 Paladin. I started with the lower hull of course. I had to add all these torsion bars and try to get them lined up properly. What a pain! I think I got close enough:
Next I decided to try and assemble the turret. Of course I also wanted to make the gun elevate too and I had an idea. So I pulled out the parts only to find this:
That's right: part E-14 is completely missing! Well, I have two additional kits of this very same model (one is going to be made Israeli) so I have a spare kit to cannibalize for this additional part. I just have to find it in the stash. Until then, I moved on...
I have two Flyhawk Abrams in the stash to make an Abrams SEP. One will have a mine roller on it; the other without. I also have the Tiger Models Abrams that I'll be making a SEP TUSK I Abrams.
Here's the SEP Abrams started here. I had to do the torsion bars again. This is getting tiresome! I'm hoping I got the, all lined up well enough:
Next was the gun assembly, fairly straightforward:
I then added the sides to the upper hull. There's more to add to this but it is started:
Here is the upper hull sitting on the lower hull. Looks good so far:
Later I added the turret to see how it's coming along:
Moving along, I started the Tiger Model SEP TUSK I Abrams. This time I started with the gun. This is the "three gold leaf" kit that has everything, including this metal gun. I had to add three resin parts and three photo-etch parts to this gun. A fourth resin part goes on later:
Next was the lower hull again. This time, Tiger Models made the suspension and roadwheels exceptionally easy to assemble:
Next I did the upper hull, adding a few of the detail pieces and the side skirts:
Finally, I got started on the turret. There was a lot of P/E to add, and I've only done about a third of the detail parts to this:
Finally, here's a shot of this thing all dry-fit together on the upper hull:
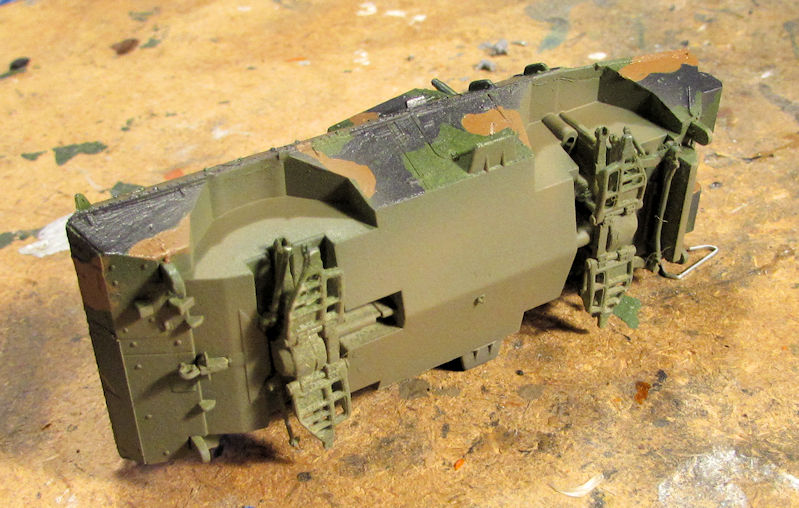
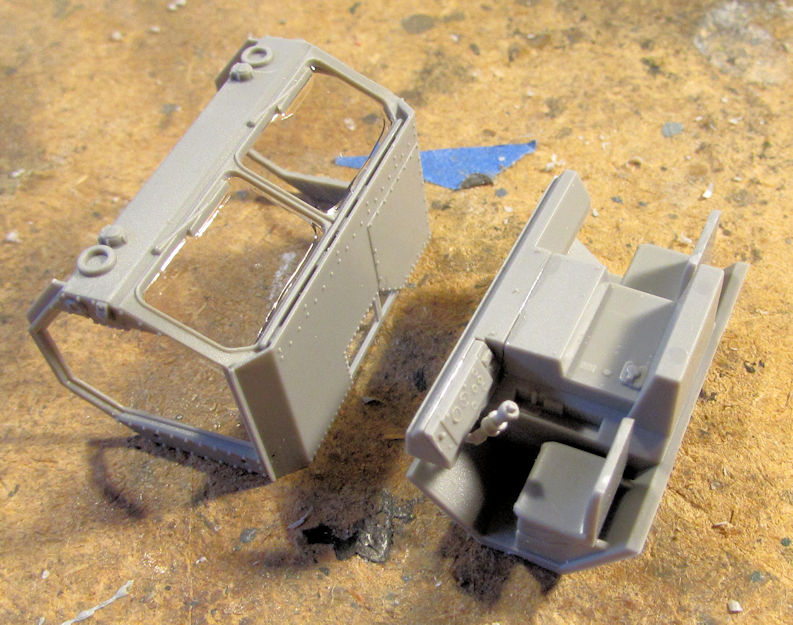
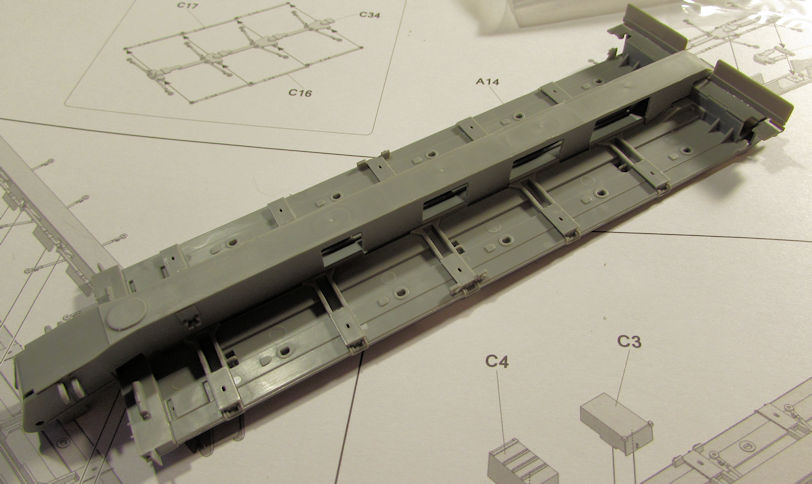
Finally on to the two tank transporters. This first one is the HEMMTT tractor with the trailer. I did something a bit different on these two tank transporters: I started the trailers first. Here's the HEMMTT trailer mostly assembled up to the wheels:
Next I did the cab; adding the windows and assembling the interior:
Next up was the chassis. Here it is after two steps; just before assembling the engine:
After this I started on the trailer for the M-1070. I got most of the main part assembled. The center part is only dry-fit; I have some linkages to add inside first before gluing that down:
Now, when I started the neck portion of the trailer; the first piece I cut off broke right away:
Later, after assembly, you couldn't see the break, so all worked out in the end. Here is the trailer with all three major assemblies waiting for completion:
And that is where I have stopped so far. I hope I didn't bore you with this huge update. Take care now and thanks for looking in; comments are welcome.
I don't think all your images are coming through Mark. I don't know why you don't just Attach the images to the post.
Nice update Mark!
Still as busy as ever I see! Nice work!
Nice to see you at the Shinmeiwa again. If you like, I'll pull mine out and see if my kit has the same issue, maybe I can come up with a suggestion!
Still as busy as ever I see! Nice work!
One major issue was found when I taped the lower tub under the forward part of the fuselage assembly. Not sure how I'm going to fix this yet so this bird went back on the shelf for now:
Nice to see you at the Shinmeiwa again. If you like, I'll pull mine out and see if my kit has the same issue, maybe I can come up with a suggestion!
Heavens Eagle
Well-known member
Wow Mark! You have been going to town! It's all looking good!

Duke Maddog
Well-known member
Bob, thanks for the comment, but all the pics showed up fine. It's just when I tried to post everything in one post; the Forums sent a message: "Ooops! You have too many pictures. Please only post 20 pictures per post" so I broke the post into two posts. I don't use the attachment feature because I post on four other Forums too; and to save me loads of time (especially when I have a lot to show like now), I tend to do one post; add the pics to it; then copy and paste the completed post onto the other boards. I apologize if this is an issue. I had been doing that for years here, using MA as a 'base' to make the original post and then copying it and pasting it on all the other boards. Attachments don't transfer that way. So far, using this Postimage has worked and all my pics showed up so at least this has been helpful to allow me to continue showing my progress on all the boards I frequent. I am silently hoping and praying that once the new Gallery is fully finished, that I can go back to the old way again.
Sharkman, thanks! I have been tired of that Shinmeiwa taking up space. I would love to see how you deal with that issue if you can dig yours out. Any information is most helpful.
Thanks Paul! Surprisingly enough in this stay-at-home atmosphere; I've been finding it difficult to get into my Hobby Rom more often. I feel I should be further along. Oh well, I still have time.
No the don't.Attachments don't transfer that way.
Yep, we'll see soon.I am silently hoping and praying that once the new Gallery is fully finished, that I can go back to the old way again.
Heavens Eagle
Well-known member
Yeah, Mark, I am a bit the same way, I could spend all day in there, but decaling kind of puts me off so I do some then it's time for something else. Like I have been replaying the original S.T.A.L.K.E.R. game. It takes place in the Chernobyl area in the Ukraine. This time around I noticed the Hein attack helicopters all have Ukraine markings on them. (Yellow circle with a blue center) The graphics are a little dated, but it is still an interesting game.
Similar threads
- Replies
- 20
- Views
- 2K
- Replies
- 1
- Views
- 496
- Replies
- 41
- Views
- 8K