• Modelers Alliance has updated the forum software on our website. We have migrated all post, content and user accounts but we could not migrate the passwords.
    This requires that you manually reset your password.
    Please click here, http://modelersalliance.org/forums/login to go to logon page and use the "Forgot your Password" option.

Hobby Boss Pzkpfw. II Ausf. J VK16.01 COMPLETE!

Iron Mike

Master At Arms And Resident Curmudgeon
So it's been a crazy year and a very hot summer and things have not progressed at my bench as I expected. I have several small builds and a couple old bones on the bench, but it's been too hot to paint and I wanted something to glue together. Rummaging through the stash, I found the Hobby Boss VK16.01 I had bought several years ago. It interested me greatly, so I broke it out a couple weekends ago. I took some in progress photos with my iPhone and a few with my SLR, so some of the sequencing of the photos may be wonky, but it's better than radio, right?

IMG_1551.JPG

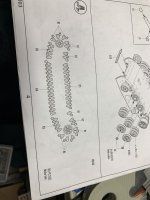
The kit has ten frets of parts, one of photo etch, link and length tracks and a basic set of decals. I added metal barrels from Master and will add a few details along the way.

IMG_1552.JPG


Interleaved road wheels on this one. The swing arms line up easily and quickly. Very little flash.
IMG_1553.JPG
IMG_1554.JPG
IMG_1555.JPG

The PE is well engraved and isn't that flimsy stuff.
IMG_1556.JPG

I made weld beads from .020 styrene rod, softened with liquid cement and textured with the back of a hobby knife blade.
IMG_0851.jpg

More suspension photos.
IMG_1557.JPG

Mocking up the fenders, Betram says hey!
IMG_1558.JPG
IMG_1559.JPG
IMG_1560.JPG
IMG_1561.JPG

So there's more to come, going to paint this one gray. Thanks for coming by!
:Drinks:
 
I really dig this! I also got this kit as well. Planning on doing a build video for it. Yours is just awesome there Mike!! :ro:
 
Very cool. I have wondered about this but just never got interested. Will watch the build and maybe one day try one. Keep it up Mike.
James
 
Thanks guys! This is a great little kit so far, the fit is spot on and the PE fits perfectly. Looking forward to paint and tracks. Stay tuned and thanks for coming by.:Drinks:
 
Okay, so when we left this project, things were progressing smoothly. I primed the model with my usual Badger Stynylrez on a very dark and dreary Saturday afternoon, so I had a clamp on light shining across the bench so I could see better. When I took the airbrush inside to clean it, I did something I never do, I left the painted parts on the bench. My wife had dinner ready, so I went back out after cleaning the airbrush and shut down all the paint booth. The next morning, I went out to get a base coat on the little tank and found this.

IMG_0919.JPG

The 150 watt bulb in the work light had it's way with my turret.

IMG_0920 (2).JPG

IMG_0921.JPG

I had set the paint stand to the side of the bench, never thinking about where the light was. D'OH!!! Eric was kind enough to send me the Alan Panzer II J kit, but the turrets are completely different.
IMG_0925.JPG

IMG_0926.JPG

I tell you, it was enough to make a preacher cuss. My friend, Greg, found the contact information for Hobby Boss and suggested I contact them. Within two days, Hobby Boss sent me information on how much the parts cost and how to order them. I shot them at PayPal payment and within two weeks (yes, that's right), I had replacement parts all the way from China. Three sprues and shipping cost me $14USD.
IMG_1031.JPG

Happy to be back on track, I rescued the metal barrels from the melted parts and assembled the new turret.
IMG_1041.JPG

IMG_1042.JPG

That's my story and I'm sticking to it, much more to come, thanks for coming by.

:Drinks:
 
tenor.gif

When you said different I didn't think the turrets were THAT different. Its like an entirely different vehicle.
 
It was definitely a setback, but Hobby Boss' customer service really was outstanding. Here's a peek at a little more progress.

IMG_1085.JPG

Tamiya German Gray base coat.

IMG_1086.JPG

Kit link and length tracks.
IMG_1087.JPG
IMG_1088.JPG

IMG_1089.JPG

The tracks were pretty easy to use, clip them from the sprue as close as you can, quick zip zip with the sanding stick and slide them together. A little Tamiya Extra Thin to hold them together, wait a few minutes, then wrap the run around the running gear. That's a bingo!
More to come, thanks for coming by! :Drinks:
 
Thanks guys! Another quickie update.

Tracks off.
IMG_1112.JPG

IMG_1113.JPG


Tracks were painted with Tamiya Dark Iron and the highlights are Model Air Gunmetal.
IMG_1116.JPG

IMG_1117.JPG

While that was drying, out to the paint shop for highlights and shadows.

IMG_1118.JPG

IMG_1119.JPG

IMG_1120.JPG

IMG_1121.JPG

Much more to come, thanks for stopping by. :Drinks:
 
Back
Top