• Modelers Alliance has updated the forum software on our website. We have migrated all post, content and user accounts but we could not migrate the passwords.
    This requires that you manually reset your password.
    Please click here, http://modelersalliance.org/forums/login to go to logon page and use the "Forgot your Password" option.

GERMAN RECCE TANK

reconron

Active member
CROKY tired? :laugh: [see 'members lounge']

I DO build models.
I am busy with DRAGON's AUFKLäRUNGSPANZER 38[t] mit 2cm Kw.K.38...{that's a mouth full isn't it.}
Ronsmodel001.jpg


Here you have a photo with some stuff I am using.
Next time I will tell you about the problems I came across.

Greetings,Ron.
 
Ooooh...can't wait to see this. I love the 38t family of vehicles.

Is that some Griffon PE I spy under the kitbox?

Tom
 
@ TOM: It is a metalbarrel to replace the one in the DRAGON kit.
The strange thing about it is that it is a bit longer then the DRAGON kit part.
Can anybody tel me ,is GRIFFON wrong or DRAGON?

I replaced the barrel by the GRIFFON one and I don't like to replace the replacement.
But I still like to know. :unsure:

Greetings,Ron.
 
Ron, it depends if you bought the Flak or KwK. The Flakrohr is 1.3m long while the KwK is only 1.0 meter long. The turret could mount either.

Regards,
 
Hi, back to my German recce tank.
Had some troubles with it.
Here is one.

toren.jpg


When I put the turret inside the tank and turned it around something bad happend.
Kit parts H26/H27-the turretseats hit the driver and co-driver seats in the inside compartment so they where bended almost broken.[did happen this to the real thing also?]:eek:hmy:

I replaced the rods from the kit parts with some thinner metalwire.
This is not very visible ones the turret is in place.[I am not happy with this, but I thought it is a solution]

Oh yeah,..the replacement GRIFFON barrel is a Kw.k [so it is a.... TANKgun not a ANTI-AIRCRAFT one.]

Greetings,Ron.
 
Ron, Don't worry about what your turret hits internally. I did the Sd.Kfz 250/9 by Dragon and had the same problem with ammo cans placed on the interior side walls. :angry: A little bit of jiggling sorted that out. As the same turret is shared with your tank, 234/1 and the 250/9 Ausf B it was more common for it to have the 20mm Kwk than the 20mm Flak. The only difference between the 2 is the barrel length as Saul said. The Kwk also used a smaller 10 round magazine rather than the standard Flak one. This is more due to space restrictions than anything else. have fun. Dean
 
Hi, back to my German recce tank.
Had some troubles with it.
Here is one.

toren.jpg


When I put the turret inside the tank and turned it around something bad happend.
Kit parts H26/H27-the turretseats hit the driver and co-driver seats in the inside compartment so they where bended almost broken.[did happen this to the real thing also?]:eek:hmy:

I replaced the rods from the kit parts with some thinner metalwire.
This is not very visible ones the turret is in place.[I am not happy with this, but I thought it is a solution]

Oh yeah,..the replacement GRIFFON barrel is a Kw.k [so it is a.... TANKgun not a ANTI-AIRCRAFT one.]

Greetings,Ron.
 
When I did see the photo I noticed my eyes are getting worse; have to use sandpaper on kitparts h40/h39[the rods on the turrets left and right side]:pinch:
In the photo you see already some scratches and paintchips.
Have to brushpaint again at some places.:S [those Freaking eyes:evil: ]

So long for a very small update, maybe more this weekend[ yeah,yeah...with photo I know you all like photo's don't you]
Tough SCALE MODEL CHALLENGE is also this weekend[and I like to go there]:D

Greetings,Ron
 
WELCOME BACK TO MY AUFKLÄRUNGSPANZER 38{T} MIT 2CM Kw.K.38. Or SONDER KRAFTFAHRZEUG HUNDERTVIERZIG/EINS VERDAMMTNOCHMAL......{LET'S TRIGGER THE GERMAN SPEAKING MEMBERS}:evil: :D


Another problem I ran into ,was the weathering inside the interrieur.
I brush painted it with Vallejo end then used a MIGwash, the problem was;...the Vallejopaint peeled of.
Maybe the wash was to strong, maybe I should have protected it with a varnish, this never happened to me before.
I don,t know what caused it.
I fixed it ,by applying some new paint layer and did it again.This time it worked fine.
Then I chipped it, now it looks better.
On the floor there is a rubber piece I painted with a dark grey,that got some pigments I rubbed in.

Reccatank.jpg


Hope you like it so far {sorry for the not so clear photo,I only have this camera}.
Tomorrow there is the Scale Model Challenge,so no update then, maybe later this week.

Greetings,Ron.
 
Hi,back after a while on the recce tank.

Recce_tank_1.jpg


Here you see the use of pigments from several brands on the lower part, but I am not done yet.
I always like to use dust and mud on my models.
The yellow pigment seems to be over done ,I will correct that later.


Recca_tank_6.jpg


The turret,had some troubles with that....
One thing that happened,and I can't blame DRAGON for that,is that after the paint job I glued the upper and under part together and I spoiled glue on the outside of it......there goes my paintwork down the drain!:evil:
So with big joy I did it again......:gogo

Recce_tank_2.jpg


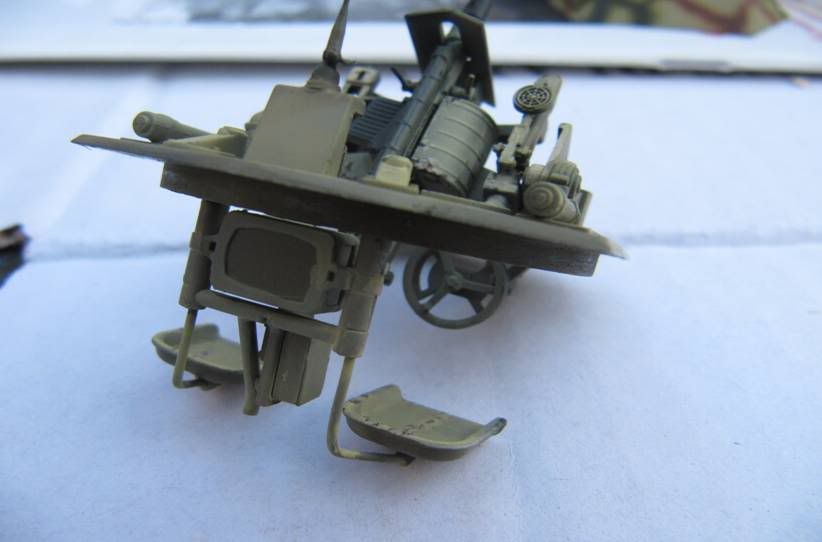
I added an 50round magazine on the machinegun 42 from a older Dragon German weapon set.
The paintwork on both ,the machinegun and the machinecanon,is done with a layer of HUMBROL METAL COAT 27004 on top of normal flat black.
You can polish the METAL COAT with a cottonbud......I really like that stuff.:)
The rings on the gunbarrel are just masked of with tape before I used the MC.

Recce_tank_3.jpg


The antenna is from ABER ,a star antenna from them will also be used on the AFV side.
By the way you could also use a mg34 or a mg34tankmachinegun insted of the mg42.

Recce_tank_4.jpg


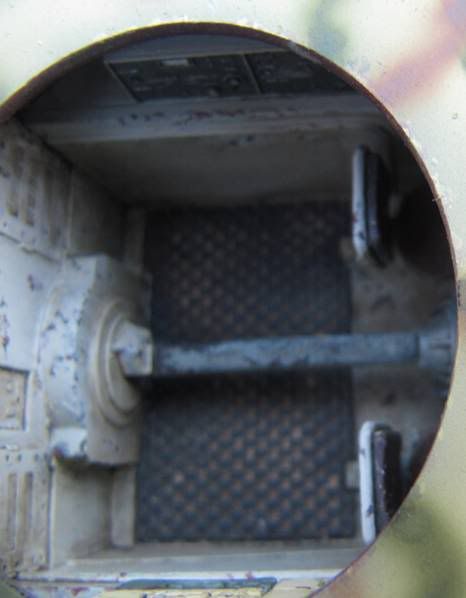
A no good picture....I painted one magazine box fieldgrey,just for contrast.
many things on the inside you can't see afterwards when the turret is fitted...just did it for the fun part.

Recce_tank_5.jpg


A few wheels...some weathered using washes and pigments.
The camo waves barely vissible.

Recce_tank_7.jpg


A no good picture[again].
The towcable is from SKP Model,again I used HUMBROL METAL COAT,the normal metal on this one,ofcourse I polished it.

Well kids,that's it for now.[sorry for making you wait so long]

Greetings,Ron.
 
<object width="480" height="385"><param name="movie" value="http://www.youtube.com/v/eBAAZXxgvO4?fs=1&hl=nl_NL"></param><param name="allowFullScreen" value="true"></param><param name="allowscriptaccess" value="always"></param><embed src="http://www.youtube.com/v/eBAAZXxgvO4?fs=1&hl=nl_NL" type="application/x-shockwave-flash" allowscriptaccess="always" allowfullscreen="true" width="480" height="385"></embed></object>

Just trying something new [for me that is].

There must be a easy way.......right?[without a lot of text that is]

Greetings,ron.

Hiya Ron. Just copy the address from the top of the web page and paste.

http://www.youtube.com/watch?v=eBAAZXxgvO4&feature=player_embedded

James
 
Hi everybody,
Here is some MUD and DUST and some more weathering using plaster,pigments,forrestsoil and coffee.
german_recca_tank_deel_1.jpg


THA WHEELS;
Used a graphitepencil for the worn wheelrims.
german_recce_tank_deel_2.jpg


Sanded the FRIUL sprockets back to the metal.
german_recce_tank_deel_3.jpg


Side view
german_recce_tank_deel_4.jpg


Front view.
Still have a piece of paper in the drivers vision block from masking of before airbrushing.
german_recce_tank_deel_5.jpg


Some ruststaining on the motorcompartiment.[the back of the drivers seat is missing,will glue it back,...it happened while drybrushing]
german_recce_tank_deel_6.jpg


Another sideview,
Tools will be painted later on.
german_recce_tank_deel_7.jpg


Last picture so far...
german_recce_tank_deel_8.jpg


That's it so far...I will come back....[but you know be by now,it will take some time,...please wait a time]:laugh:

Greetings,Ron.
 
Back
Top