• Modelers Alliance has updated the forum software on our website. We have migrated all post, content and user accounts but we could not migrate the passwords.
    This requires that you manually reset your password.
    Please click here, http://modelersalliance.org/forums/login to go to logon page and use the "Forgot your Password" option.

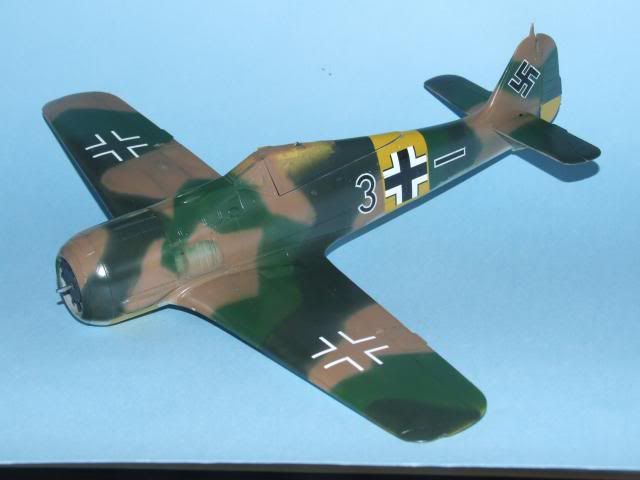
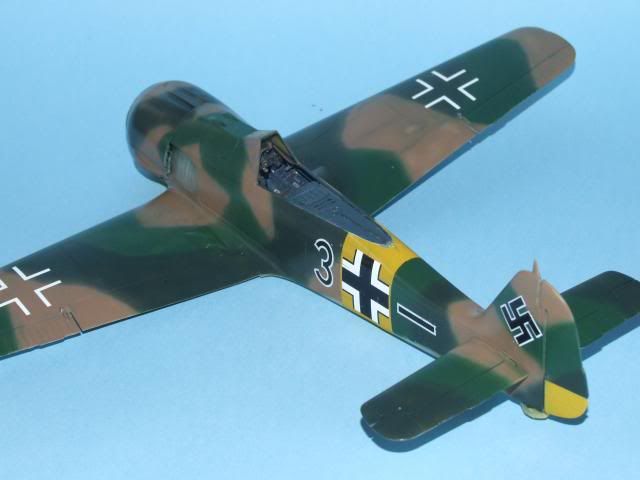
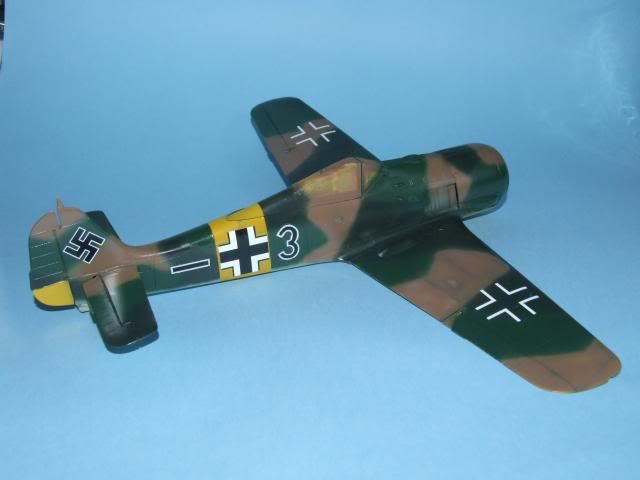
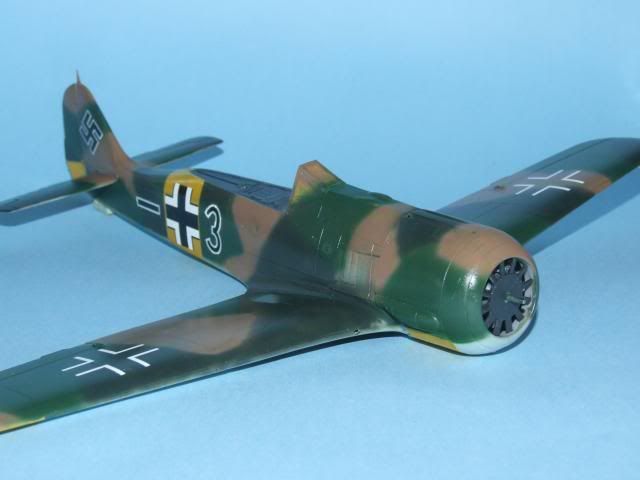
Fw190A-5 JG54 * * F I N I S H E D * * (More pics)

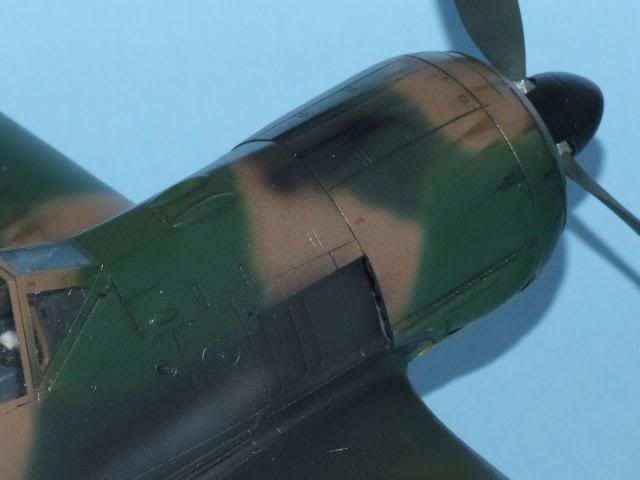
Fw190A-5 JG54 - Camo done

Wow, thanks guys for the very positive comments, I honestly wasn't expecting that :blush: - Have to say it's growing only slowly on me and I'm still not completely certain on the overall 'look' of the camo scheme.

Next I'll be glossing the whole thing and decaling. Another interesting fact that came-up as part of the research is that after the airframes were oversprayed in their 'summer uniform' only the basic crosses and codes were painted back, no stencilling. That's going to cut-down on the bench time later :coolio

Once again thanks for all the kind words, really appreciate it.

Stay tuned.

Ian
 
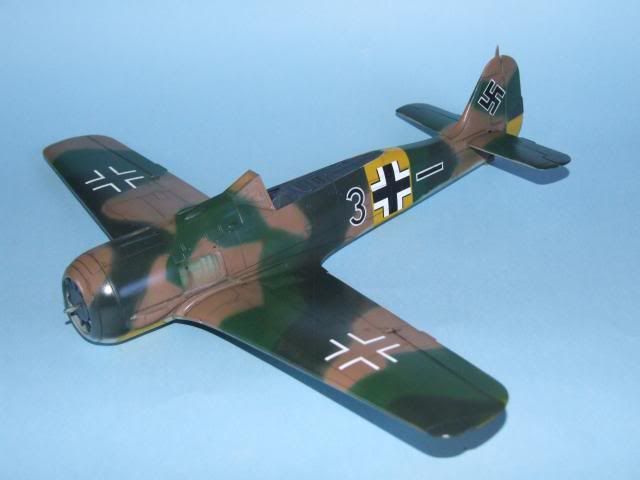
Fw190A-5 JG54 - Decals done

Combination of the superb Eagle Cals sheet and the Jurassic era MicroScale sheet !!


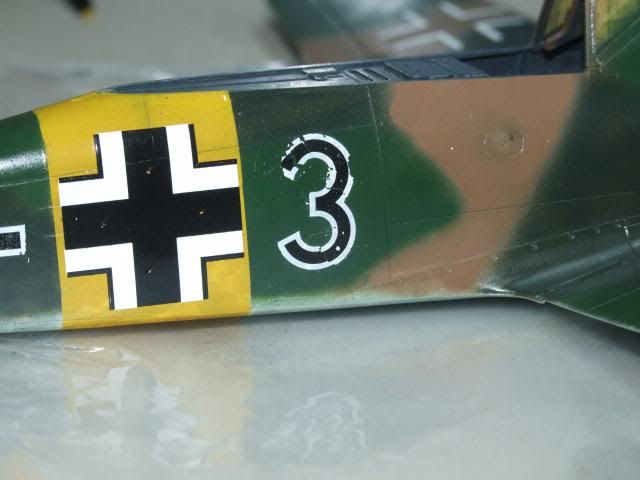
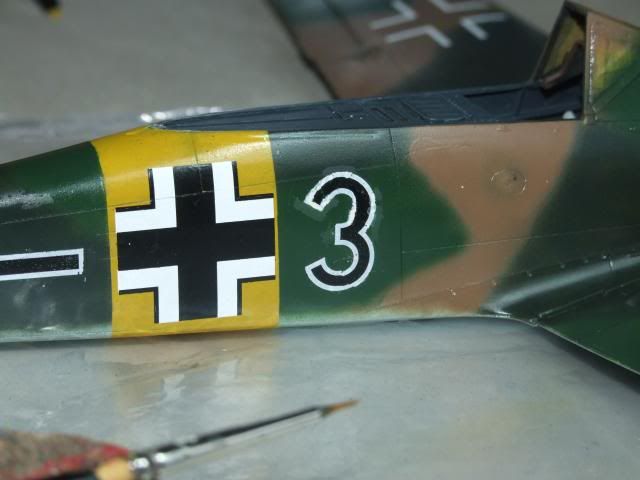
The only wee problem with the ancient MicroScale decals was when one of the 3's fractured at the edge:


But with a little patience, a daylight bulb, a good size 0 sable brush and a steady hand it's all repaired and looks pretty good from 3ft away !!


All for the moment. Next the oil wash and a little light post-shading/weathering. Thanks as ever for taking the time to look and/or comment.

Ian
 
Fw190A-5 JG54 - Decals done

Weather over those decals and some layers of clear coat should hide any imperfections on that decal Ian, nice repair job (y)
 
Fw190A-5 JG54 - Decals done

Ian

Nice touch-up I don't have steady enough hands to accomplish what you did. well done :ro:

James
 
Fw190A-5 JG54 - Decals done

Combination of the superb Eagle Cals sheet and the Jurassic era MicroScale sheet !!


The only wee problem with the ancient MicroScale decals was when one of the 3's fractured at the edge:


But with a little patience, a daylight bulb, a good size 0 sable brush and a steady hand it's all repaired and looks pretty good from 3ft away !!


All for the moment. Next the oil wash and a little light post-shading/weathering. Thanks as ever for taking the time to look and/or comment.

Ian

Very nice save :good: Next time you have ancient decals you might want to use some Microscale decal film before removing them from the backing.
I have had some of their decals completely disintegrate when coming off the paper backing.

Cheers, Christian B)
 
Fw190A-5 JG54 - Decals done

The non-standard colors and camouflage pattern looks great on your Fw 190. (y)

Don't worry about the pre-shading being covered up, with the Revolution BR you can easily spray some tinted thinner on some of the uppersurface panels to add some weathering to the paint work...not as good (or easy) as pre-shading but the results are about the same.


Matrixone
 
Fw190A-5 JG54 - Panel wash

Just a simple dark grey/brown oil wash into the panel lines, nothing too radical:


Can't really see it on the upper surfaces, but it's definitely there.


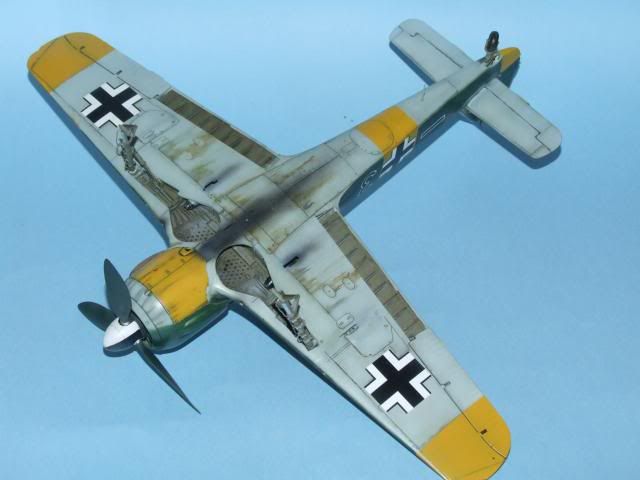
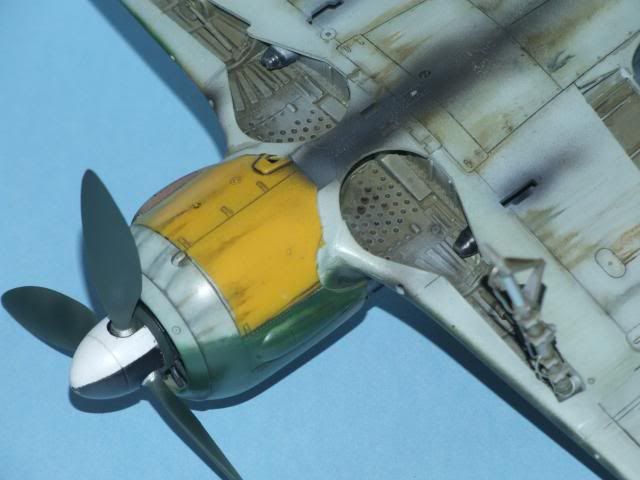
You can see it much more clearly on the RLM76 undersides. More light weathering to come and some exhaust stains... stay tuned, folks.

Ian
 
Fw190A-5 JG54 - Standing tall !!

Been a couple of weeks since I worked on the Fw. This is the limit of the weathering that I'm going to do. Barely any on the upper surfaces other than a couple of 'fluid leaks' and an exhaust plume.

This is simply because the A-5's were only issued from April '43, and by the time JG54 started getting them in the early summer and then have them 'customised' in the paint shop, by the time they made it 'down south' to the North Kursk region where they would be based, they would be virtually 'showroom clean' on the topsides....

....the undersides, however:


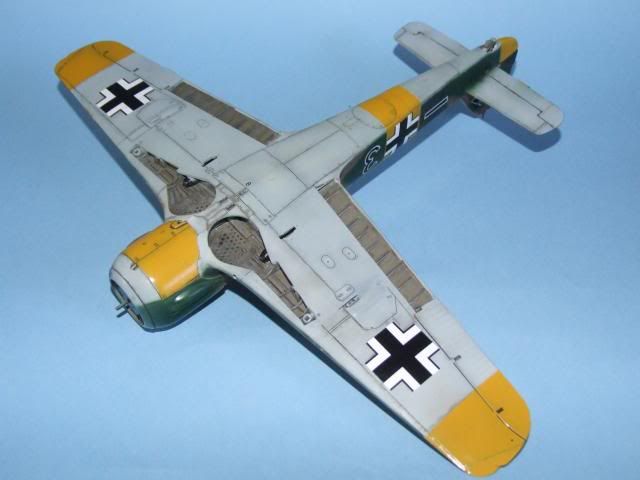
The underside colour remained RLM76, so that will show three or four months worth of hard work:


Still a little way to go, small details to paint like the trim tabs, pitot, gun barrels, that sort of thing. Need also to build-up the cockpit headrest and roll bar, and of course add the shoulder straps and carefully thread the radio aerial. Still plenty of opportunities to scr*w-the-pooch, yet.

Thanks for taking the time to look and/or comment.

Ian
 
Fw190A-5 JG54 - Standing tall !!

That's looking quite nice . Lovely smudge marks . (y) (y)

I like an airplane that has been flying :)

Cheers, Christian B)
 
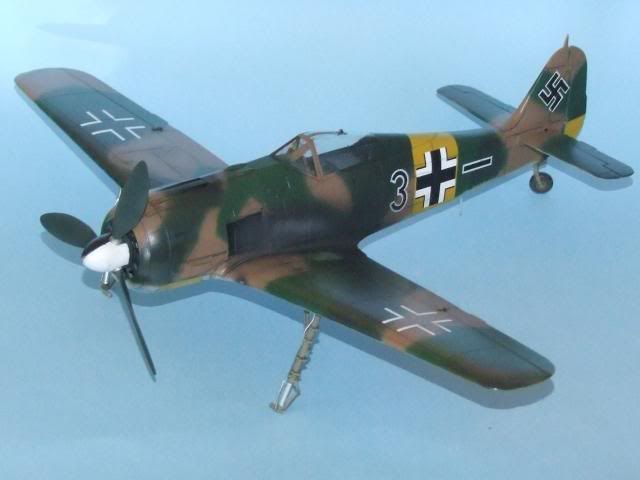
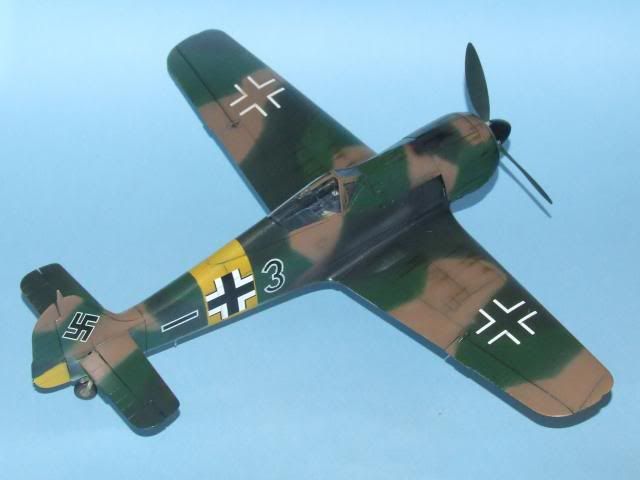
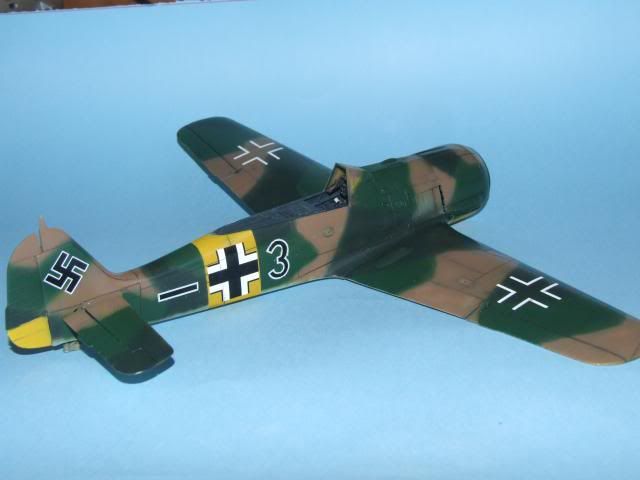
Fw190A-5 JG54 * * F I N I S H E D * *

Kit: Hasegawa 1:32 ‘Nowotny’ edition.
Paint: All Tamiya & Lifecolour acrylics. MIG weathering pigments (wheels & tyres).
Decals: Eagle Cals, MicroScale & kit.
Extras: Eduard ‘Zoom’ set. Cut & dropped elevators. Cut & repositioned tail wheel & rudder. Brake lines from various gauges of fuse wire. Master MG17 barrels (not in photo).


Focke-Wulf Fw190A-5
5 Staffel I/JG54
Operation ‘Zitadelle’
Summer 1943


….and we’re done. Only a couple of pics for now as the batteries in my camera are just about dead and there's no more AA batteries in the bl**dy house !! - More pics later this evening my time.

Thoroughly enjoyed this project. Kit went together with the minimum of fuss. Camouflage came-out exactly as it looked in my head before I began, something that doesn’t happen too often.

Thanks to everyone here who's cheered-me-on from the touchline. As ever happy to take any questions, criticism and comments. Thanks for taking the time to comment and/or look.

Ian
 
Fw190A-5 JG54 * * F I N I S H E D * *

She looks stunning Ian. Looking forward to the rest of the photos. (y) (y)
 
Back
Top