• Modelers Alliance has updated the forum software on our website. We have migrated all post, content and user accounts but we could not migrate the passwords.
    This requires that you manually reset your password.
    Please click here, http://modelersalliance.org/forums/login to go to logon page and use the "Forgot your Password" option.

Eduard Hellcat (Finished)

ausf

Master at Arms
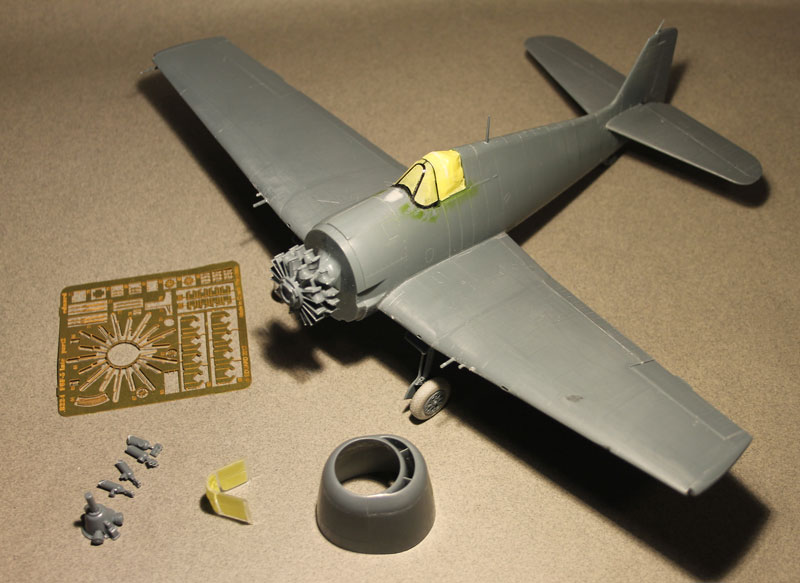
In my 'headlong into modeling' phase, I started (and will finish) the 1/48 Eduard Hellcat ProfiPack.

I love the PE and details, but have to say there's a big difference in engineering between this and the WnW offerings. Things don't seem to fit as well, nor are the register/connection points really clear (instructions either, but I'm used to that with DML).

But, this is modeling, I should stop whinning and build it.

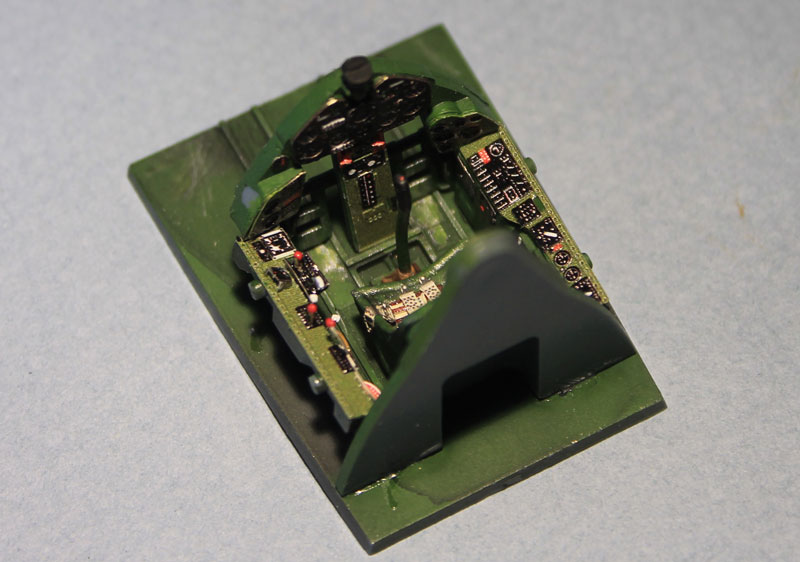
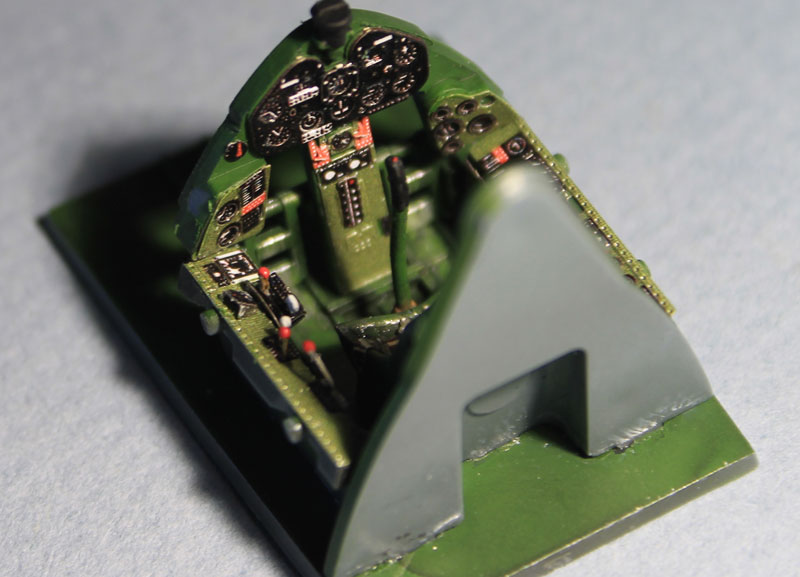
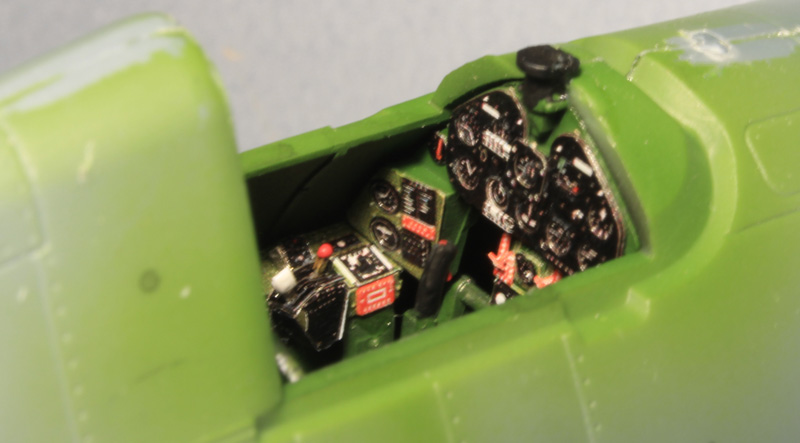
Starting with the cockpit, I primed black and oversprayed with Vallejo Zinc Chromate (don't know if that's accurate), then some dry drushing of steel, oily steel and aluminum, followed by a black wash. Went together easily enough, it's hard to get a good photo in focus. Most of the dry brushing doesn't read well.

hacc07ee.jpg


hd2d3368.jpg


h6a3faeb.jpg
 
Eduard Hellcat

Don't get me started with fit issues and Eduards...Looks good Jeff.

Issue I have with the painted PE is in some cases it could be wrong and the method they use to print some colors make it look like Sunday morning comics page. Press on Jeff, looking swell :pilot
 
Eduard Hellcat

Looking mighty nice to me (y)

I'm like Bob , about the pre colored PE. Nice when it's right but sometimes the colors are questionable :hmmm

Cheers, Christian B)
 
Eduard Hellcat

I've built two Eduard Hellcats and I can't saw enough good things about them. There were a few issues along the way but there always are. One thing to watch is the alignment of the wings. Eduard offers a cool idea which completely alleviated the need to putty any seams, but getting everything aligned was a bit of a bear. Cockpit is looking good - you're off to a fantastic start!

Mike
 
Eduard Hellcat

Thanks for the kind words guys.

Mike, I hear you regarding the fit.
 
Eduard Hellcat

I forgot to mention that I had issues with the cowl being too small to fit correctly once its all assembled. I seem to recall that it was only a problem for 1 or 2 of the cowl options, but not all of them. Its been a little while now. Here is the link to my build over on ARC and I showed the cowl fix that I used and where the problem is (I also posted it in your Hellcat help thread). Hope it helps.

Hellcat Build on ARC


Mike
 
Eduard Hellcat

Thanks Mike. I saw it in the other thread, but I glued it up last night and then discovered it was too tight to fit the fuse.

I have it assembled for the most part. Some putty on one wing root, I guess I clamped the wing too tightly near the flaps. Not exatcly a design I can wrap my head around, but I'm muddling through it.

I washed the resin wheels with some other sprues for a different project, being super careful not to lose them, but the two outer caps are on their way to a sewage treatment plant. :S
Fortunately, the styrene wheel part was easily adapted so I could still use the resin wheel and it's beautiful tread pattern and "Firestone" emblem.

Not as easy to build as the Albie in terms of engineering, fit and quality, but it'll certainly be easier to paint/decal.
 
Eduard Hellcat

A little progress...

I assembled as much as I thought I could before painting without disrupting anything, not sure if this is the way to do it with AC, but it's live and learn time. I can paint the engine in place and will separately paint the PE screen and plug wires and install later.
Since the entire underside, LG, wheel wells, etc is the same color, I figured it was okay to slap it all together. I left the exhausts off until final assembly.

The black seen in the windscreen frame is the undercoat beneath the interior green on the inner frame. (just realized I forgot to spray the canopy. :bang head For the second time. :bang head :bang head ).

hd7cfbe9.jpg


I mixed Vallejo's Intermediate Blue and Dark Grey Blue in a 40/60 ratio which produced an almost dead match for FS35042. I then mixed a ratio of 75/25 for highlights and thinned some straight Dk Grey Blue for pre shading.

Here's the pre shade over primer:

h2a6a956.jpg


And with the Sea Blue and highlight, not yet glossy. I can't get a good pic because it's so dead flat right now, but I there is a very subtle effect happening. Of course a monochromatic paint job was not the best choice for me at this stage, but when has that stopped me from doing something? :blink

hd97d58b.jpg


I was expecting a more bluish build when I started, but this is the color according to what I have as a reference. Again, this is just for fun, so it doesn't matter too much. I'm really curious to see how much the color will change with the gloss coat. I'm guessing it will get a lot deeper.

I washed out a lot of the shading in the panel lines, I assume a dark wash after decals is the way to bring it back?
 
Eduard Hellcat


Yep or you could try some post shading, depends how 'washed-out' you want for your final finish. Can I give you a friendly heads-up on that ??

A lot of folks finish their 'Cats with the VF-27 sharks mouth design, and who can blame them it looks very cool. However VF-27 went aboard USS Princeton in July '44, the ship was sunk on the morning of 24th October, the first day of the Battle of Leyte Gulf. Hence, if you were planning on doing a VF-27, it wouldn't have been too dirty & faded.

Like I say, just a friendly heads-up.

Ian.
 
Eduard Hellcat

Didn't know that Ian, thanks.

Jeff I generally paint the engine as a sub assembly, install it with cowl in place and mask off the opening of the cowl and paint it whole. Of course what you're doing isn't wrong if it works for you. Long as you're gitin'er done. Don't forget to paint the inside of the cowl! Ask me how I know...

I won't take my Hellcat to a show because I forgot to paint the inside of the cowl.
 
Eduard Hellcat

Thanks Ian, that's a great bit of info. When I cracked the kit, I decided on Winters' ship from the Lexington (or maybe Essex off the top of my head) because it was the earliest of the decal options for this late model. Plus it was part of the Marianas Turkey Shoot. I'm not going too heavy on fading or weather here since it's a carrier based craft. Maybe some bare metal where it would be handled heavy and exhaust staining, don't know yet. Being an armor modeler, heavy weather is my favorite, but I'll save that for a Jug or something that spent it's off time in the trenches, not in a hold. I certainly want to go wild with a 'Canal based F4U or SBD one day. Sun-fading, coral dust. :zen

Bob, I remember you mentioned that when I first bought this kit. I even puttied the seam inside the cowl in honor of you. I was going to post a pic once I painted it. :Hiay

I agree on the engine as well, I just figured since I'll be pre-painting the plug wires off it and they go between the end piece and the cylinders it couldn't hurt to have the block in place. I wanted to add the cowl post painting because of the exhausts. I didn't think I could reach them post assembly to get the rust on 'em. Turns out the engine was a great hand hold during painting.

I installed the antennae and pitot tube before hand, worried I'd snap it off while painting, but also thought I'd botch the paint if I added it later. What's the normal way of that, pre or post assembly?

Same with gear, I assume that goes on after too, but it was nice to be able to set the model down on it's feet. I want to figure this stuff out before I start the 109 of 190 next in line.
 
Eduard Hellcat

Be careful with paint chipping - the gloss sea blue was very durable and didn't chip easily. I'm sure there was some, but use restraint.

Really good looking build. :drinks

Mike
 
Back
Top