• Modelers Alliance has updated the forum software on our website. We have migrated all post, content and user accounts but we could not migrate the passwords.
    This requires that you manually reset your password.
    Please click here, http://modelersalliance.org/forums/login to go to logon page and use the "Forgot your Password" option.

Colossus-Building the Bismarck-Trumpeter 1/200th

The Bismark parts you just showed are looking quite good Laurence!

As to working with plexiglass and acrylic sheet, I can help you there. Have some experience with the stuff and could give you some thoughts pointers and options.

Thanks Paul (y)

The cover will be approx 1,600mm long x 500mm wide x 500mm high.

For this, I will buy 2 x sheets that are 1,800 x 1,000 x 3mm thick.

I will see how much this business wants to cut them for me, and then it's game on - need to glue the whole thing together etc. Any advice would be appreciated :D
 
Oh!, and $1800 for a display case? What was it hand crafted wood with lights? Really?

GOT_to_be_Kidding.jpg


$1,000 to have the cover professionally done with 6mm thick plexiglass - the base is going to be made of wood, then the "water" made of celluclay. Plan could be improved, of course, but that's the idea for now.
 
To glue Acrylic, Lexan, or Plexiglass you need to get a can of WeldOn3. It is a solvent made especially for gluing clear acrylics together without crazing. I use it all the time instead of Tenax and the other bonders. It works great on styrene and PVC as well as vinyl. My last 16oz can cost $12.00

The edges of the plastic panes need to be as smooth as you can make them. File or sand them till they are smooth as any deep scratches will become air bubbles. You will end up with some small air bubbles at the joins but should have no crazing of the plastic no matter how much you slop the solvent on. The 3mm (1/8th inch) acrylic should be just fine. The top center might sag slightly in the center but you will get that with any acrylic even the thicker stuff over time.

When you get all the parts ready, just tape them together at the corners and in a couple of spots along the longer sides. Tack it together in between the tape and let it set for about 30 minutes, then remove the tape and finish the bonding. I can take some photos of items I have built from acrylic and glued together with WeldOn3. It really works well.

It will be quite large with the lengths of 63 inches and the width/heights of 20 inches (for us US guys) I can work in metric, just can't visualize the larger sizes that well, nothing to compare it with.

Excellent advice Paul, thank you very much for that.

I will try to get it professionally cut at the business that quoted me that ridiculous amount. They manufacture all sorts, I am sure they could cut it and put it together for me. If it is a decent amount, then I will pay it and get it done without too much effort. Otherwise, I will have to do it myself. Given the size, I am not too happy with that idea, but, we shall see next week.

I'll post some updates soon (I hope).

Thank you,

Laurence
 
Looking great Lawrence! That PE work is going to be tedious but worth the effort !

That's what keeps me going, the fact that the PE makes all the difference. Once I get the base and cover out of the way, the build will resume at full speed if I can :D


Laurence
 
While working on the diorama base - made of wood by yours truly, found some time to put other little things together.

The intention was to make good on all the camo stripes on the hull and superstructure, line them up nicely, but, given the heavy rain and winds over the past few days, painting on the balcony has been impossible. As such, I worked on other areas.

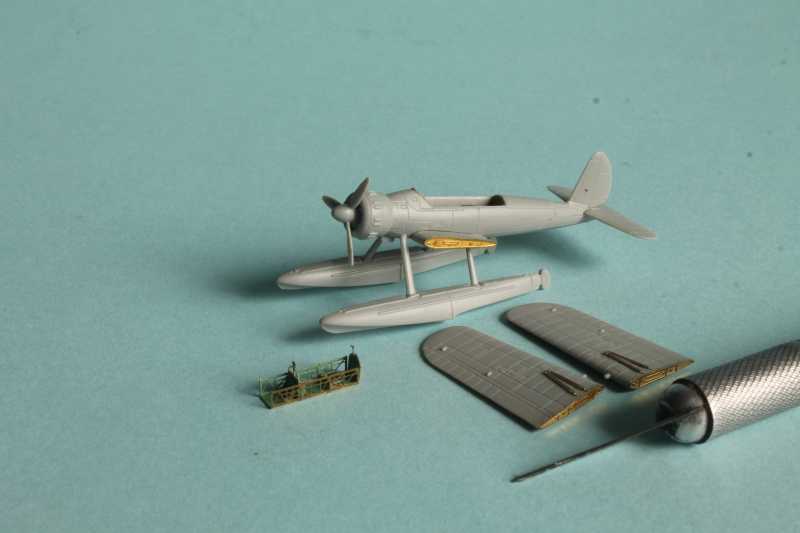
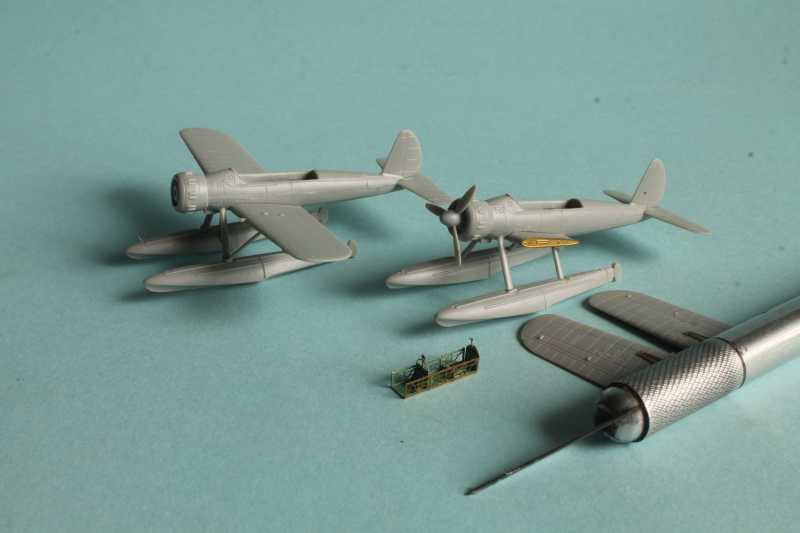
Sea planes - Bismarck had four Arado 196. The MK detail kit gives the option to show the planes with folded wings too, so, I will be showing one plane on the catapult, ready to be stowed away in the hangars, and one or two planes with folded wings, already in the hangars. There were three hangars on the Bismarck 2 x 1 plane each, 1 x 2 planes.


hc48dfd7.JPG


That's what it looks like in 1/200th scale - cockpit is PE too, the dash is not in yet, also PE. Everything else cockpit (except for the MG) is already there and impossibly small - there are 8 pieces of PE there in the photo for the stuff that goes in the cockpit. This will obviously be one plane with folded wings.


h8feb3b5.JPG


Two planes, I will show one being pulled from the catapult, getting ready to be stowed away.


h7110c93.JPG


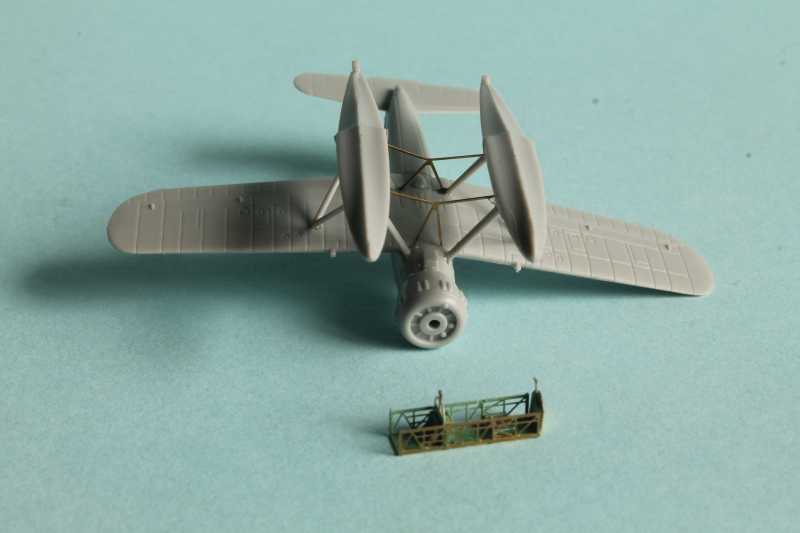
More PE bits showing here.


he286a40.JPG


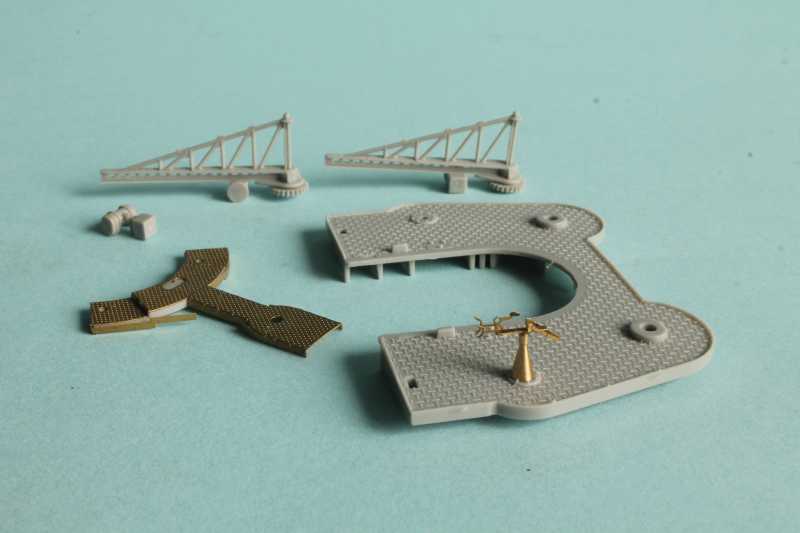
These are parts of the smoke stack - there is a ton of PE. When done, the smoke stack will have over 150 pieces of plastic and PE. That's over 10% of the whole kit AND MK1 detail kit. Madness.


Thanks for watching.

I never get tired of looking at this build. (y)
 
Wow!!!

That is going to be amazing when completed. I can't wait to see it in water! It should be incredibly realistic!!~!

(y) (y) (y) (y) (y) (y) (y) (y) (y) (y)

Keep goin' Buddy,

Bob
 
You are doing quite well with the micro PE there Laurence! It should look fabulous when done! All I can say is you must have a couple of good well maintained tweezers to handle that micro stuff.

WOW-flaming.gif
 
Thank you MP, Mike, Luiz, Bob, Paul and Mark - I can honestly say that the kind words here are really special.

Things have been crazy lately, was hoping for smooth sailing, but it doesn't always work as planned, we all know that.

Despite all that, I am moving forward, a lot more randomly than I would have liked. When the base is done, hopefully by the end of this week, I will have a cover done, probably thick cardboard, to protect it from collecting dust, then I should resume building it in a much more structured way - one section at a time, rather than bits and pieces here and there.


Thank you all for your support,

Laurence
 
Time for a small update...while working on the base, which might still require couple more weeks, focused on putting other elements together on the model.

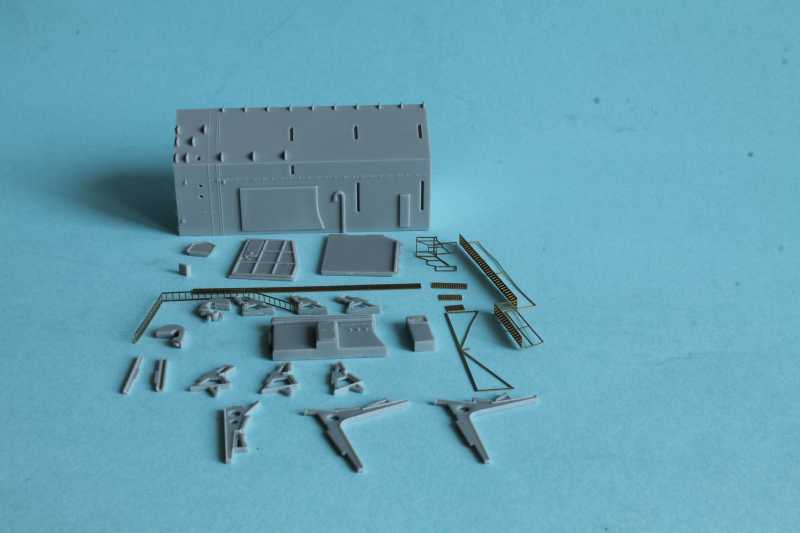
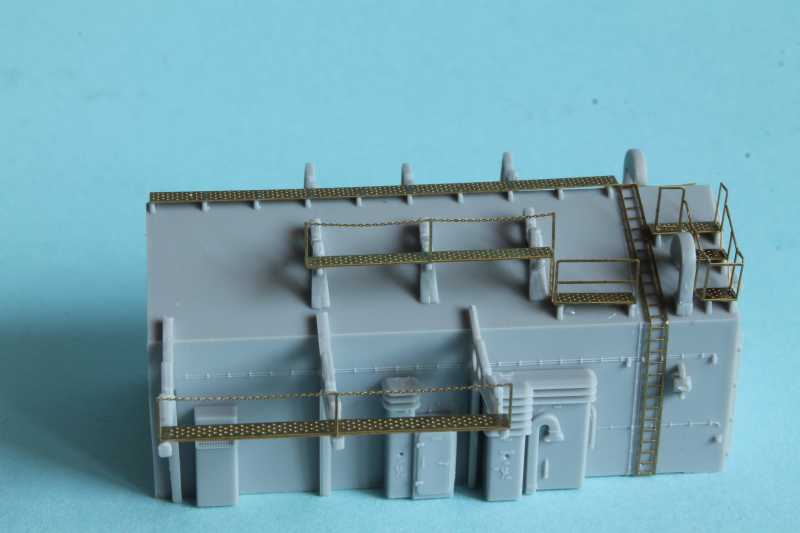
These are two of the three hangars that Bismarck had - a mix of PE parts and plastic. The PE parts in the MK1 detail kit are more elaborate and they look better.

These are all the parts that form each hangar:


h040f263.JPG


The completed hangar


h4f54fc5.JPG


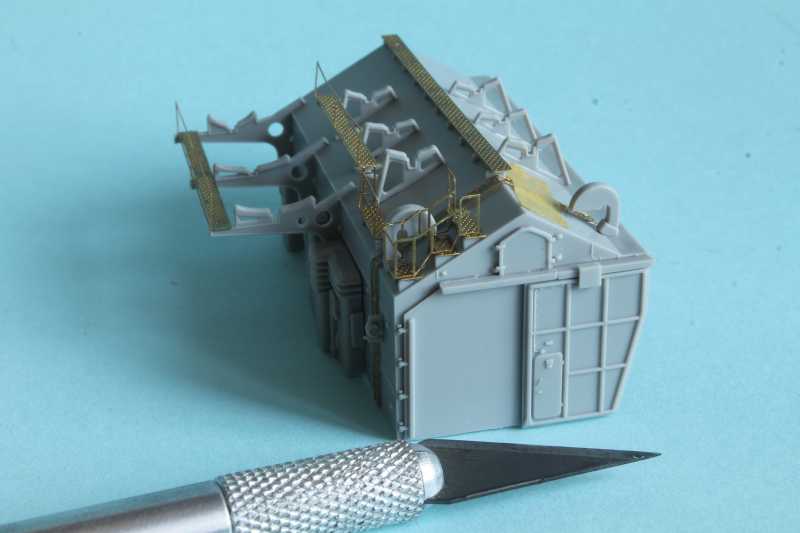
To put things into perspective, here's the size compared to that of a well known tool :D


hfbde71e.JPG


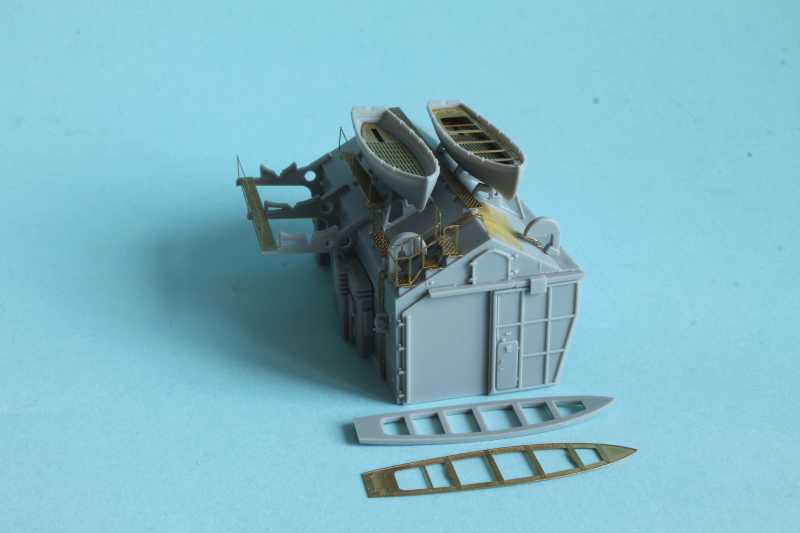
hcf8574e.JPG


Lifeboats were placed on top the hangars - here are two of the 8m long boats - in front the hangar are two pieces - one plastic, from the kit, and one PE from the detail kit. The difference is significant.


That's it for now, thanks for watching.


Laurence
 
Back
Top