Skinny_Mike
Well-known member
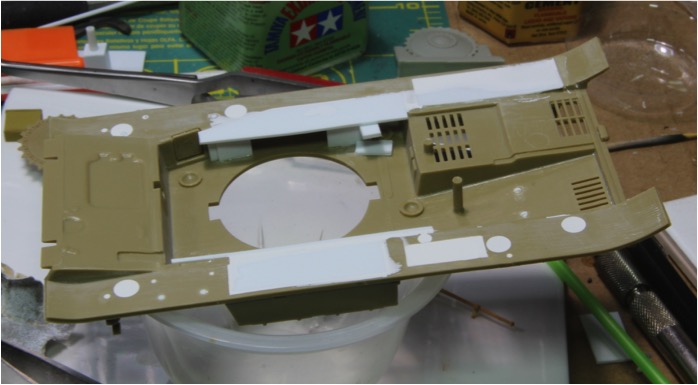
Howdy fellow students! Well I have kind of given up of the Panzer IV build for this special lesson. Truth is I lost a week or two on it and I didn’t want to rush to get it done. It’s a great kit, but it needs some care and patience so as to not screw it up. Besides, the lessons learned here will be easily transferrable.
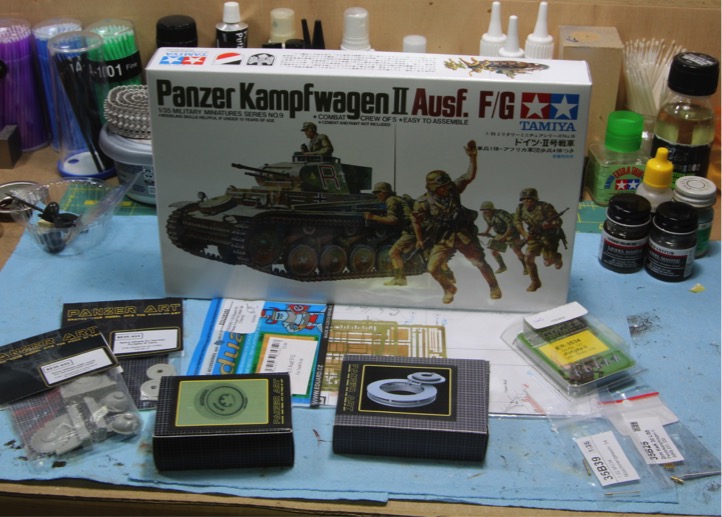
So I decided on another kit. This time I went with the Tamiya Panzer II F/G. This is a cheap kit ($12 at Amazon) that should go together relatively quickly. But of course, me being me, I had to get some aftermarket to go with it! In the end, not everything here is going to be used. I also plan a few scratched details to enhance the build.
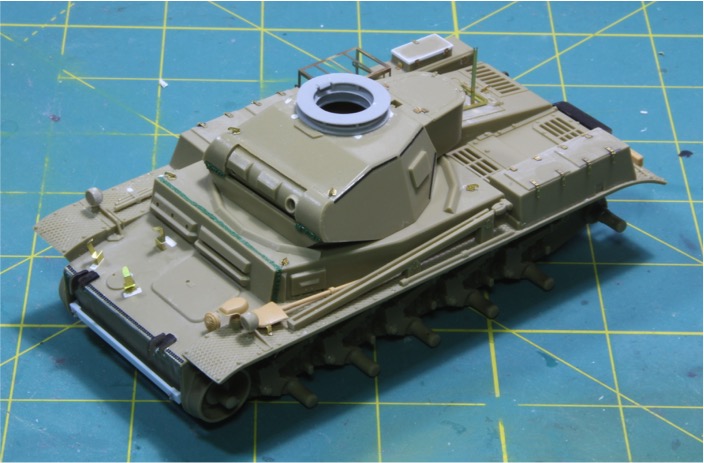
First step was getting the rear plate assembled. Easy enough. I chose to leave the exhaust off so it can be painted and weathered seperatly.
I did notice the terrible looking molded in pin for the trailer hitch. I figured this would be an easy fix, so I scraped out the molded pin, drilled out the top and bottom then made a new pin from some bent brass rod. Pretty easy enhancement and it adds quite a bit I think.
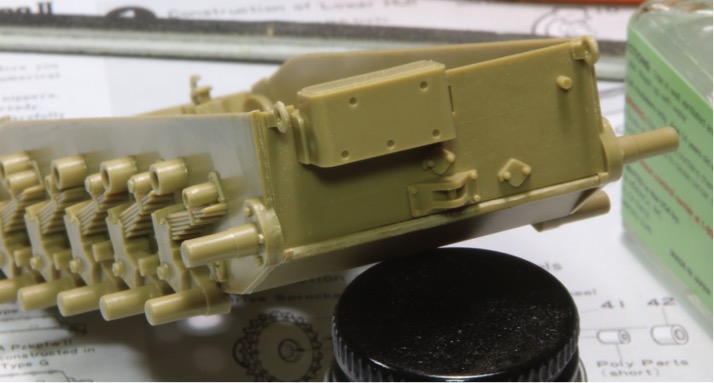
I decided against using the final drive housings as they didn’t fit quite right, and one of the drive wheels was warped, so I stayed with the kit parts. Once everything on the front side was assembled cured, I added some weld beads to the front plate using epoxy putty. This took a few tries and in the end I suspect they are a little big, but they do look pretty good in my opinion.
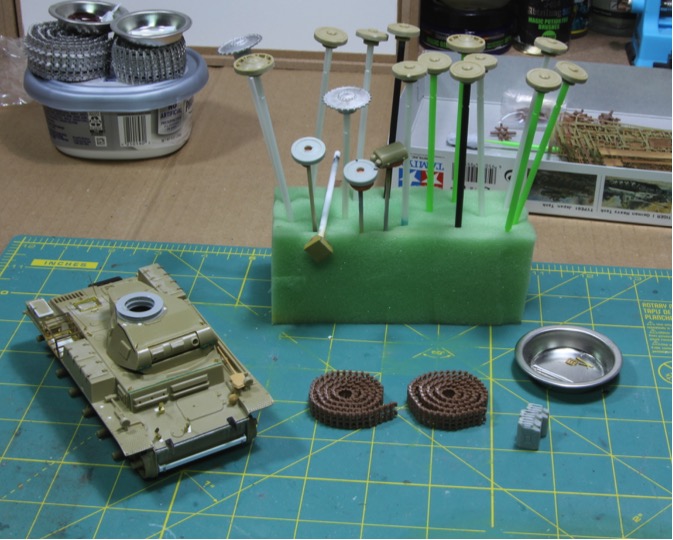
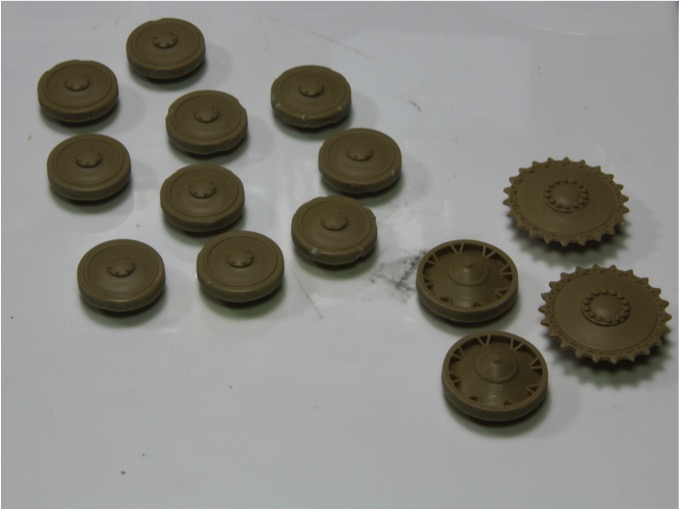
Next up I assembled all of the wheels and since we are doing a desert tank, I beat up the rubber on the road wheels using my knife blade. I tried to be random and beat up some more then others. Should help add some personality in the end.
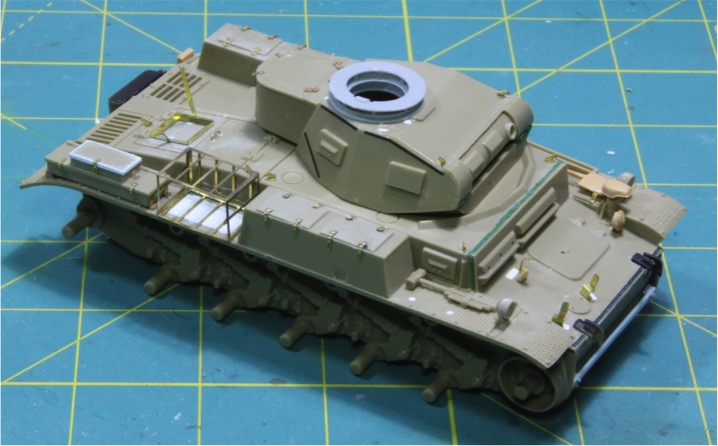
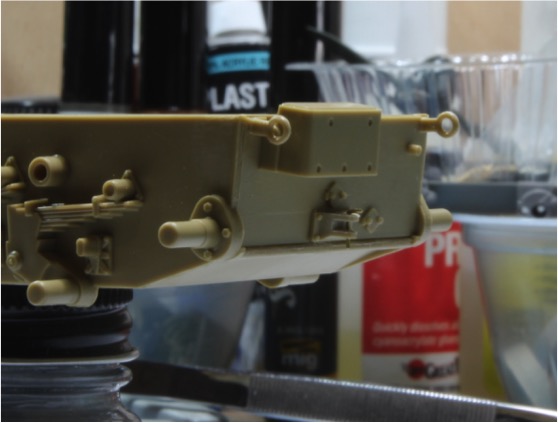
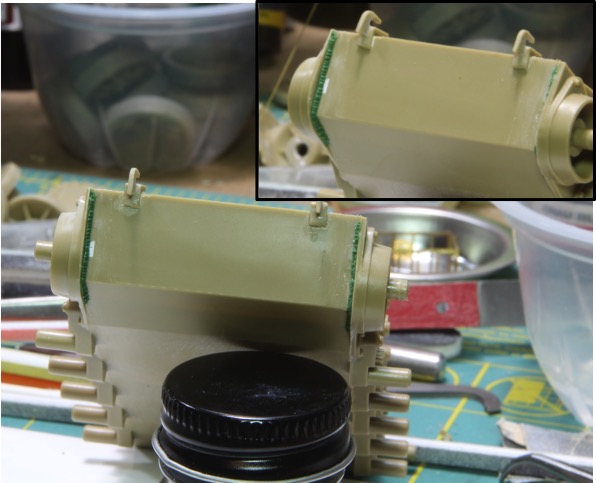
Next up is the turret. The kit turret is made up od a molded top with a bottom plate. The commander’s cupola molded on. I planned to use the Panzer Art cupola so I had to remove the molded on parts. The kit has some weld beads on the front and rear plates, but is missing a number of other weld beads that were pretty obvious in my reference photos. I ended up using Archer weld beads for the turret plates and some epoxy putty for the welds on the front plates. I also added some Eduard photo etch to the turret and the stowage box.
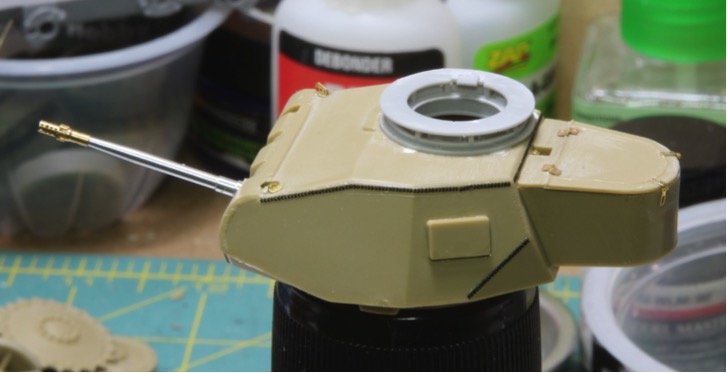
The 2cm barrel is from RB productions and comes in two pieces, the turned aluminum barrel and the brass muzzle break. I also have the RB productions MG34 barrel for the coax MG. The gun is just dry fitted for now.
Well there we are. I hope to have the top of the hull completed this weekend and should be able to catch up next weekend.
Thanks for looking
Mike
So I decided on another kit. This time I went with the Tamiya Panzer II F/G. This is a cheap kit ($12 at Amazon) that should go together relatively quickly. But of course, me being me, I had to get some aftermarket to go with it! In the end, not everything here is going to be used. I also plan a few scratched details to enhance the build.
First step was getting the rear plate assembled. Easy enough. I chose to leave the exhaust off so it can be painted and weathered seperatly.
I did notice the terrible looking molded in pin for the trailer hitch. I figured this would be an easy fix, so I scraped out the molded pin, drilled out the top and bottom then made a new pin from some bent brass rod. Pretty easy enhancement and it adds quite a bit I think.
I decided against using the final drive housings as they didn’t fit quite right, and one of the drive wheels was warped, so I stayed with the kit parts. Once everything on the front side was assembled cured, I added some weld beads to the front plate using epoxy putty. This took a few tries and in the end I suspect they are a little big, but they do look pretty good in my opinion.
Next up I assembled all of the wheels and since we are doing a desert tank, I beat up the rubber on the road wheels using my knife blade. I tried to be random and beat up some more then others. Should help add some personality in the end.
Next up is the turret. The kit turret is made up od a molded top with a bottom plate. The commander’s cupola molded on. I planned to use the Panzer Art cupola so I had to remove the molded on parts. The kit has some weld beads on the front and rear plates, but is missing a number of other weld beads that were pretty obvious in my reference photos. I ended up using Archer weld beads for the turret plates and some epoxy putty for the welds on the front plates. I also added some Eduard photo etch to the turret and the stowage box.
The 2cm barrel is from RB productions and comes in two pieces, the turned aluminum barrel and the brass muzzle break. I also have the RB productions MG34 barrel for the coax MG. The gun is just dry fitted for now.
Well there we are. I hope to have the top of the hull completed this weekend and should be able to catch up next weekend.
Thanks for looking
Mike


") :laugh:
:laugh: