NASCAR ain't what it was, let me say that...
-
Modelers Alliance has updated the forum software on our website. We have migrated all post, content and user accounts but we could not migrate the passwords.
This requires that you manually reset your password.
Please click here, http://modelersalliance.org/forums/login to go to logon page and use the "Forgot your Password" option.
You are using an out of date browser. It may not display this or other websites correctly.
You should upgrade or use an alternative browser.
You should upgrade or use an alternative browser.
All Righty ... What's on the bench today?
- Thread starter panzerace007
- Start date
Duke Maddog
Well-known member
Nice work on all these projects guys! There's some good looking models going on here.
This is my latest progress on a number of my models I finally got to work on.
I'll start with my aircraft....
To start with, I finished the interior on the USAF Jetstream. It may not be accurate, but nothing much will be seen through those tiny windows anyway:

Once that was done, I closed everything up:

Then I saw all those sink marks everywhere. Time to bring out the Mr. Surfacer 500....


Later on I'll get that sanded.
Thanks to a good friend, I managed to finally get the burner cans on my F/A-18 Hornet! They will need some touch up, but I'll now be able to finish this soon:

I also masked off the tail end of the F-15 Strike Eagle to add the bare steel plating to the aft engine covers:


I finished up the Eagle burner cans, adding some Tamiya blue weathering powder for exhaust nozzles to make them look more 'burned':

First time I ever used that stuff for this. I'm not sure it turned out the best but hey, it's done.
Here's the tail of this bird after I shot the steel. Somehow a lot of dust got kicked up so I'll have to buff this more smooth:


Finally, because I was painting OD green on something else, I decided to use the remaining paint in the airbrush on the F-102 Dagger. I only masked and shot the wings so far. I'll need to re-shoot more on the fuselage later:

Moving on to my ships, I started doing the many tiny detail parts on my Russian carrier Baku. These are tiny radar assemblies with six parts to each one, yet you can see the half-assembled part right here in the sprue by the instructions explaining how to build these. My Exacto is strategically placed for scale reference and to helpfully point to the assembly I'm trying to do:

I have to make four of them. While these half-assemblies were drying, I moved on and added more to the superstructure/bridge assembly of this carrier. Newest parts in lighter grey:

I also added about five more parts to the fore deck on the bow:

I later assembled the two main guns and dry-fit them to the hull along with the superstructure to see how this was coming along and motivate myself to finish it:

I also started the assembly of the air wing but since they are all in clear plastic, I'll wait till they're painted first to before trying to photograph them.
Moving along again to my armor, I did make some small progress. Before, I had tried to seal some seams on the tank part of the fuel truck in my USAAF supply set. I finally got the OD green shot on that:

I may still have to fix a few things on that but at least the worst of it is fixed.
The SchturmTiger is now completed with all the photo etch parts on it. I also scratch built a new vision port for the driver since the kit one had gone on a trip to Oblivion. Mine is most likely too big, but it's on there and I'm done:

I tried shooting a base coat of Panzer Dunklegelb on this but I appear to have thinned the paint too much. I'll wait till this dries, probably shoot a primer grey on it and then try again:

Finally, since I was shooting paint on tanks, I decided to basecoat the two little Japanese tanks I'm doing. The Type 89 Early got a coat of grey. This was an experiment since I lost the color call out sheet for this tank; I have no idea the proper color to paint this so I'm trying different ones to see what looks best. This shade I think is too light:

The other tank is camouflaged so; using the darkest-to-lightest practice, I shot the dark brown coat on the Type 89 Late tank:

That will get the Silly Putty treatment later. While I had the brown out, I also shot the remaining ten Mules for the 20-Mule Team. I didn't shoot pics of them since they look just like the first ten when I shot them with a basecoat.
Finally, I continued some experiments with my Star Destroyer to see what was the best way to bring out all that detail the most. First I shot a coat of Camouflage Grey over the whole thing:


My first experiment involved Promodeler Wash. I slathered it on thick like it suggested:

Later I wiped it off with a damp paper towel. It didn't turn out the way I expected it to so I played around with the Promodeler wash and camouflage grey drybrushing until I got this result on the bottom:

Pics don't show this to good effect here but I'm quite happy with this result.
Well, that's the latest update on my progress so far. I'm glad to finally see some of these move forward. I just wish I could get some of these done faster. I'll keep working on them. Meanwhile, comments are welcome, thanks for looking in.
This is my latest progress on a number of my models I finally got to work on.
I'll start with my aircraft....
To start with, I finished the interior on the USAF Jetstream. It may not be accurate, but nothing much will be seen through those tiny windows anyway:

Once that was done, I closed everything up:

Then I saw all those sink marks everywhere. Time to bring out the Mr. Surfacer 500....


Later on I'll get that sanded.
Thanks to a good friend, I managed to finally get the burner cans on my F/A-18 Hornet! They will need some touch up, but I'll now be able to finish this soon:

I also masked off the tail end of the F-15 Strike Eagle to add the bare steel plating to the aft engine covers:


I finished up the Eagle burner cans, adding some Tamiya blue weathering powder for exhaust nozzles to make them look more 'burned':

First time I ever used that stuff for this. I'm not sure it turned out the best but hey, it's done.
Here's the tail of this bird after I shot the steel. Somehow a lot of dust got kicked up so I'll have to buff this more smooth:


Finally, because I was painting OD green on something else, I decided to use the remaining paint in the airbrush on the F-102 Dagger. I only masked and shot the wings so far. I'll need to re-shoot more on the fuselage later:

Moving on to my ships, I started doing the many tiny detail parts on my Russian carrier Baku. These are tiny radar assemblies with six parts to each one, yet you can see the half-assembled part right here in the sprue by the instructions explaining how to build these. My Exacto is strategically placed for scale reference and to helpfully point to the assembly I'm trying to do:

I have to make four of them. While these half-assemblies were drying, I moved on and added more to the superstructure/bridge assembly of this carrier. Newest parts in lighter grey:

I also added about five more parts to the fore deck on the bow:

I later assembled the two main guns and dry-fit them to the hull along with the superstructure to see how this was coming along and motivate myself to finish it:

I also started the assembly of the air wing but since they are all in clear plastic, I'll wait till they're painted first to before trying to photograph them.
Moving along again to my armor, I did make some small progress. Before, I had tried to seal some seams on the tank part of the fuel truck in my USAAF supply set. I finally got the OD green shot on that:

I may still have to fix a few things on that but at least the worst of it is fixed.
The SchturmTiger is now completed with all the photo etch parts on it. I also scratch built a new vision port for the driver since the kit one had gone on a trip to Oblivion. Mine is most likely too big, but it's on there and I'm done:

I tried shooting a base coat of Panzer Dunklegelb on this but I appear to have thinned the paint too much. I'll wait till this dries, probably shoot a primer grey on it and then try again:

Finally, since I was shooting paint on tanks, I decided to basecoat the two little Japanese tanks I'm doing. The Type 89 Early got a coat of grey. This was an experiment since I lost the color call out sheet for this tank; I have no idea the proper color to paint this so I'm trying different ones to see what looks best. This shade I think is too light:

The other tank is camouflaged so; using the darkest-to-lightest practice, I shot the dark brown coat on the Type 89 Late tank:

That will get the Silly Putty treatment later. While I had the brown out, I also shot the remaining ten Mules for the 20-Mule Team. I didn't shoot pics of them since they look just like the first ten when I shot them with a basecoat.
Finally, I continued some experiments with my Star Destroyer to see what was the best way to bring out all that detail the most. First I shot a coat of Camouflage Grey over the whole thing:


My first experiment involved Promodeler Wash. I slathered it on thick like it suggested:

Later I wiped it off with a damp paper towel. It didn't turn out the way I expected it to so I played around with the Promodeler wash and camouflage grey drybrushing until I got this result on the bottom:

Pics don't show this to good effect here but I'm quite happy with this result.
Well, that's the latest update on my progress so far. I'm glad to finally see some of these move forward. I just wish I could get some of these done faster. I'll keep working on them. Meanwhile, comments are welcome, thanks for looking in.
Duke Maddog
Well-known member
Thanks guys! I appreciate the comments.
EJ, I agree, I almost went blind trying to assemble the clear plastic parts on this air wing! I even debated going through my spares to find some extra aircraft there to add to this. They certainly would have been easier! Still, I kept going. I just need to paint them now.
EJ, I agree, I almost went blind trying to assemble the clear plastic parts on this air wing! I even debated going through my spares to find some extra aircraft there to add to this. They certainly would have been easier! Still, I kept going. I just need to paint them now.
Duke,
You are one prolific Dude!


Bob
You are one prolific Dude!
Bob
White_Wolf
Master at Arms
Yep. Model Making Machine Mark 
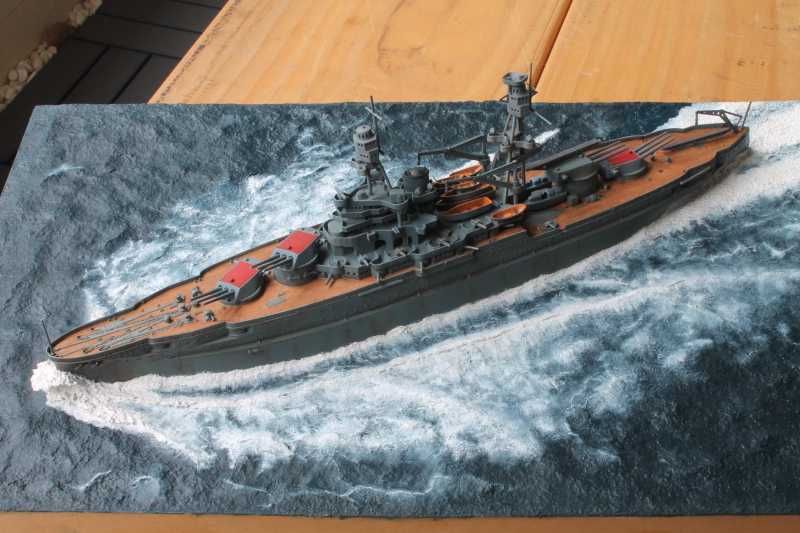
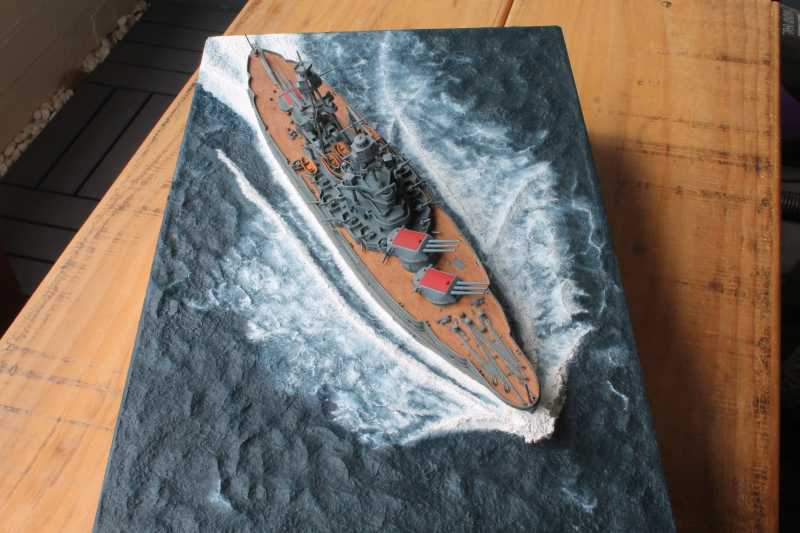
On the bench - Arizona - small dio - Two Days Till Sun Rise 5th of Dec 1941
Still some work to do, but getting there ....
Laurence
On the bench - Arizona - small dio - Two Days Till Sun Rise 5th of Dec 1941
Still some work to do, but getting there ....


Laurence
Duke Maddog
Well-known member
Duke,
You are one prolific Dude!


Bob
Thanks Bob! Now to bring some of these home....
Lawrence, what amazing work you did there on that Arizona. Way to go!
ij001
Well-known member
Great work Laurence. Looks pretty much done to my eye, so what's left to do ??
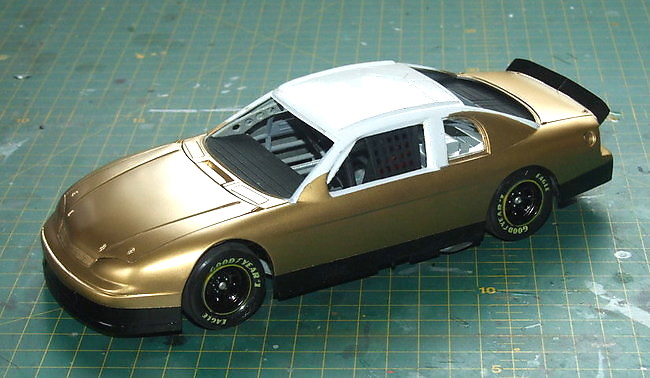
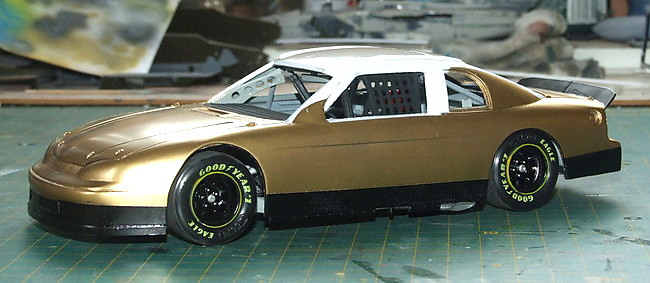
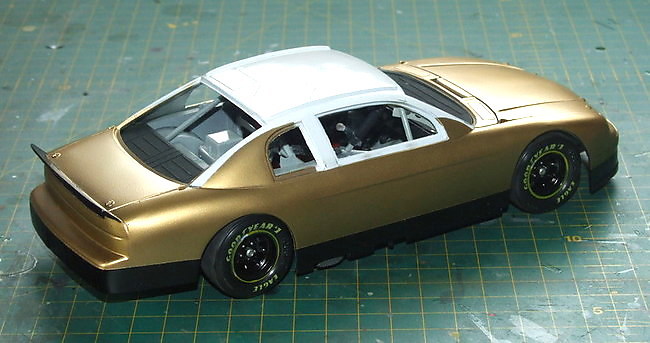
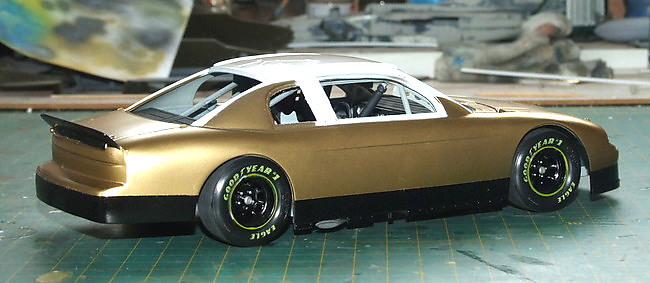
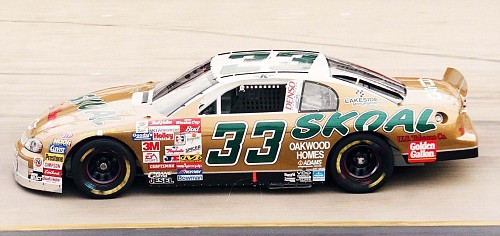
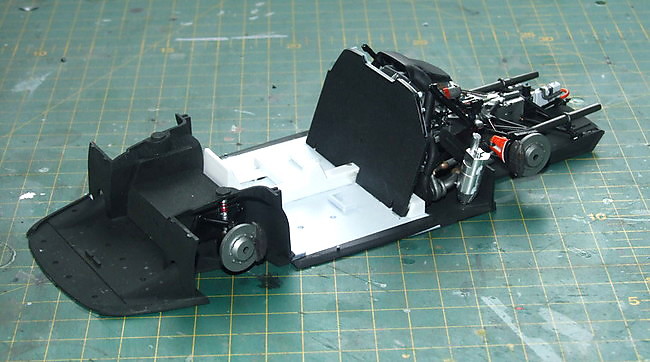
As for me, the NASCAR Chevy is finished in the paint booth - I don't have a paint booth but it sounds cool :smack - and the engine/transmission for 911 GT1 is now glued in to the chassis plate. All that lovely detail on the front of the block lost forever !!
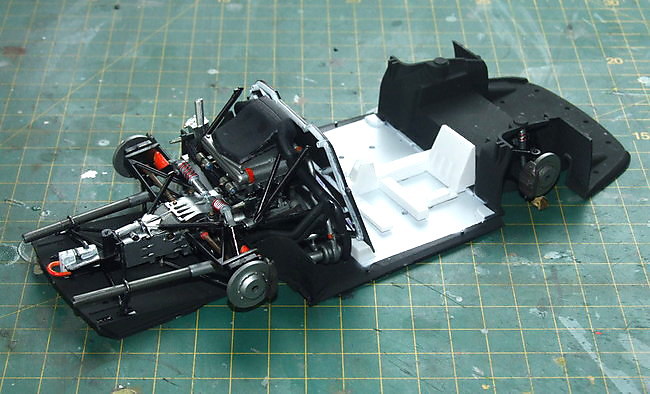
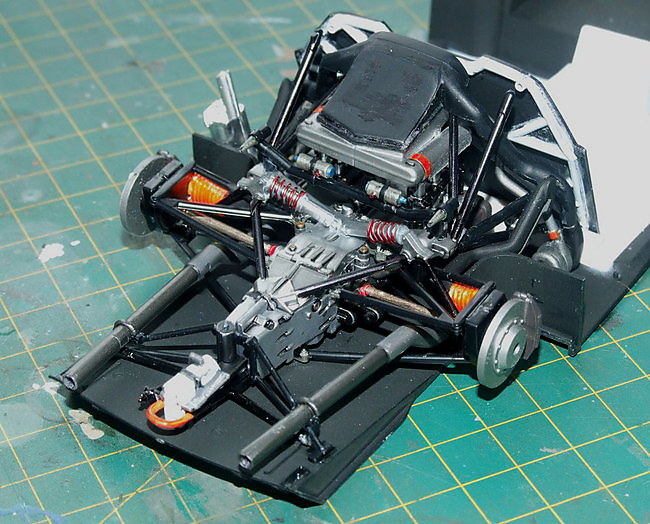
Ian.
As for me, the NASCAR Chevy is finished in the paint booth - I don't have a paint booth but it sounds cool :smack - and the engine/transmission for 911 GT1 is now glued in to the chassis plate. All that lovely detail on the front of the block lost forever !!


Ian.
White_Wolf
Master at Arms
Thanks Ian, left to do,quite a bit .... raw umber wash on the superstructure, finish the water, finish the box, plaques ... have to make this look the best I can
Duke Maddog
Well-known member
Exquisite work on those cars! Way to go!
ij001
Well-known member
All my current (wheeled) projects in one place !!
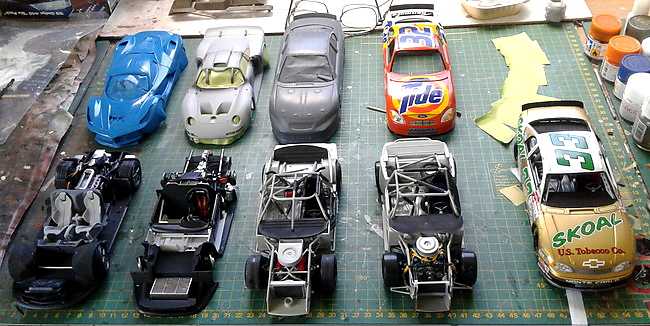
Ferrari - chassis done, interior started, body painted, needs wet sanding and clear coats..
Porsche - chassis done, interior done, body primed, needs rubbing back then paint.
2003 Chevy - chassis done, interior done, body primed and rubbed-back needs paint. This was the 'Wright Brothers' Chevy from a month or so back, stripped back to plastic to do a different car from the same season.
2001 Ford & 1999 Chevy - all done except the windows which will be finished tomorrow. Should be all finished on Tuesday
Ian.
Heavens Eagle
Well-known member
Those look NICE! 
Duke Maddog
Well-known member
Beautiful work Ian! What an awesome collection of cars.
Well, I had a very productive week on the workbench followed by a very productive Hobby Day weekend.
Brace yourselves people, this is going to be one long update with a ton of pics.
I'll start out at the Shipyards with my ship this time. This Russian carrier Baku got some additional detail parts on the island. I also added the ships boats and other detail parts to the main hull. I then assembled all the missile launch tubes and dry-fit them to the forward deck to see how they were going to look:

The "Cake Stand" radar is also just dry-fit. I still need to paint it first. Here's some more shots:


Moving back into the aircraft assembly line, I managed to get a lot done on a number of my aircraft. On the F-15E, I removed the masking to see how well the steel laid down. It was a bit rough as you can see here; this has since been buffed out to a smooth finish:


Now to add decals to this.
My next model was the P-51B Mustang I'm doing for another Group Build. I painted the pilot and placed him in the cockpit of the plane and then sealed him in under the canopy. This plane is now ready for masking and paint, along with the P-40 that came with it in the box:

Another aircraft I made progress on was my F-102 for the "Charlie Don't Surf" campaign. I masked off the areas I needed to so I could shoot the tan color:

I hope to fire up the airbrush this week to finish that camouflage pattern, along with a number of other models I have ready for paint.
One of the aircraft I did get primer on (again!) was my Boeing 737. After having sanded and buffed out the discrepancies, I shot it again to see how well I did on smoothing this out:

Not bad. I will need to buff this to a fine shine again before I attempt to shoot paint on this,
Another model I primed was this little USAF Jetstream I was working on. First though, I had to fill in and sand smooth all the sink holes all over this little plane. Here are some pics showing everything I had to fill and try to feather out:


I even had to fill a few places on the wing assembly:

After all that sanding and buffing, I added the main cockpit canopy and started to mask off the windows:

Finally, the primer went down:

If you look close, you can see where I have to try again to fill some of the sink marks. Still, it turned out better than I expected.
Moving on, I decided to get some more progress done on my two F-14 Tomcats for the review I'm doing. It's been too long and far too late so it was time to hustle on these. First off, I added the P/E additions to the inside of the canopy:


These were slightly difficult to glue in place, be sure to check the bottom edge of the P/E parts to make sure they don't fall below the edge of the canopy. Also, check the instruction sheet closely to insure that you glue them in right side up.
Again, I am doing one with the full P/E workup; here are the two canopies side by side:

In my haste to close the two cockpits sections up, I neglected to paint those inserts, but they aren't that easy to see anyway. What I did remember to do was to paint the yellow stripes on the ejection seat handles:

Finally, I closed these up:

The fit of the canopy pieces was very good. Despite the gap you see in the one; these fit exceptionally well. The gap was my own mistake, not due to any lack of quality in the kit parts.
After having closed everything up, I cemented the cockpit sections to the rear fuselage assemblies. These two aircraft are now ready for masking and paint:

I do know that the wings appear to be retracted too far; they are not glued in yet. I need to find out why they keep slipping into that position and set them properly.
Now that I made such significant progress on these two Tomcats, I decided to start another review kit I had gotten. This one is the Hasegawa A-10C Thunderbolt II.
As usual, I started to assembled the cockpit. It was a very easy and quick assembly. The parts fit very well and I was later able to paint them after assembly. Here in this pic, the seats are only dry-fit in place. The instructions have you add the seats after closing the cockpit tub inside the fuselage halves. I don't know why since there disn't appear to be any obstructions, but I decided to follow the instructions for the purposes of this review. Everything is shown here:

The decals for the instrument panels went in well. I always trim along the edge of each decal anyway to insure a good fit. The main instrument panel was glued under the cowl and then the decal was added after it dried:

I used Solvaset to help draw the decal into the detailed engraving on the IP. It hadn't quite finished yet when I took this pic.
The instructions then have you assemble the nose gear bay which will later be cemented up under the fuselage assembly:

They also give you a schematic showing where to add the nose weights to keep this model from being a tail sitter. So, I added my nose weights to the gear bay assembly:

Yes, it is probably too much, but I just wanted to be sure. Once this is closed up, it won't be opened again!
Moving on, they have you assemble the engines. The parts for these engines don't quite fit very well with lots of little 'steps' and misaligned parts. It's very slight, but if you try to adjust one side, you pull another section out of alignment. I did the best I could with these:

It's just going to take a bit of extra sanding on these.
After that, I assembled the main wings. These were a fairly good fit for the most part:

The roughness around the edges was me adding a slight amount of extra glue to squeeze out of the joint to seal it up better. The bottom however is where you find some of the fit issues that need to be dealt with:

Here's a close up of the worst part. Try as I might, I could not get these ends to lay down properly:

I'm not even sure how I'll sand that given the rectangular detail near that seam; I'll have to experiment.
Finally, the empennage went together exceptionally well. The vertical stabilizers went on at a perfect 90-degree angle on this:

NOTE: Be sure you cement the two vertical stabilizers in the proper direction! It's easy to cement them on upside down if you forget the opening for attaching this to the fuselage is on top, not the bottom of the horizontal part.
After all of that, I closed up the cockpit assembly inside the fuselage; added the forward gear bay, and the engine and empennage assemblies:


Everything fit well here. The only issues I really had were the forward gear bay assembly did not match up too well with the fuselage assembly. It took some judicious manipulating to get everything lined up. I'm happy enough with the results; I think my issues might have been caused by the nose weights inside. The other issue is the step on the engine assembly. I'm still debating whether I'll sand that down or not; it is in a difficult position with a difficult curvature to match.
Finally, I dry-fit the wings to see how this will look:

It is a nice looking aircraft!
With all that going on, I wanted to also start something quick and easy that I could just "throw" together (and hopefully not miss to often!) I pulled out an old Heller J-32 Lanssen aircraft and got started on the cockpit:

Afterward I painted it up. I had to guess at the colors. but when the cockpit is all closed up, no one will really notice. Besides, this is just a fun build for me.

You can see where I dry-brushed the instrument panels to bring out the detail.
I then added the engine intake strakes to the fuselage halves along with a few other bits and bobs:

While they were drying, I assembled the wings:

All that was left to do was to put everything together. But first I taped everything together to check and see if this plane needed nose weights:

It did. You can also see where the nose was going to give me a problem. No biggie.
I added the nose weight; cockpit, tail cone, tail 'feathers' and cemented everything together. Then I added the wings and canopy. This is now ready to sand, mask and paint:

This final one is not a fixed wing aircraft, but it's an aircraft nonetheless. I started my Special Hobby AH-1G Marine Corp Cobra by looking in the box. The first thing I saw made me say out loud: "SERIOUSLY? I have to do WHAT?" Yes, I have to assemble the entire cockpit canopy piece by piece when the time comes:

Well moving on, I started; once again, with the cockpit. The first thing I had to do was to cut off the back part and replace it with the one shown in place right here:

Then I added all the control sticks and targeting equipment along with the instrument panels:

Afterwards, I added the armor plate and then painted this up:

The instructions said to apply the decals to the instrument panel faces but there were no instrument panel decals on the decal sheet! So, I painted them too:

After that, I assembled the seat and set them aside to dry. While they were drying, I assembled the tail section that my particular version was supposed to have:

I then went through and put all the weapon pod halves together:


That's as far as I got so far on that. Hopefully this coming week I'll be able to get more done.
Okay, that completes my aircraft work. Now we can move on to my armor....
Starting with armor, I primed the Schturmtiger:

Now I can shoot a better coat of paint over this and then camouflage it.
Next, I assembled the pilot deck for the 'phib, starting with the pilot house controls and then adding the hatch and other bits and bobs:

Later I cemented the interior and the pilot house deck in place:

My next project was another simple one I wanted to do. I pulled out the Airfix RAF re-supply set to go with my USAAF re-supply set. I started with the Bedford truck doing the basic chassis and cab interior:

They give you an option to make the Bedford a tanker or a cargo truck. I opted for the tanker version and built the tank for it:

The tank is just dry-fit on there, but this is a neat little truck:

After that, I started on the Tilly. Three or four steps later, I had this:

The rest of the cab parts for both trucks are molded in clear so I'll paint these as they are along with the clear parts separately.
Finally, my last model to show is this Roden Ludwig Areo bus that I started for another Group Build elsewhere.
I assembled the basic chassis and engine first:

Since the engine wasn't going to be seen, I didn't do too much detail to it. What I did was enough to get it mounted on the chassis and also support any other parts that needed it for support. I also added the wheel hubs to the axles:

Later I cemented together the double wheels that go on the back axles:

After that, I built the body of this bus and started to sand the seams that I found:

Afterward I primed this bus to see what I had succeeded in doing. Not much apparently:


Oh well, I just have to keep at it.
Meanwhile, I mounted the floor of the bus and the dashboard; then I added all the seats and controls:


Looks like I need to straighten a seat. That'll happen.
Okay, that completes this very long tour of Maddog Manufacturing, showcasing the latest in-progress work. I appreciate you stopping in to look it over. Comments are always welcome.
Well, I had a very productive week on the workbench followed by a very productive Hobby Day weekend.
Brace yourselves people, this is going to be one long update with a ton of pics.
I'll start out at the Shipyards with my ship this time. This Russian carrier Baku got some additional detail parts on the island. I also added the ships boats and other detail parts to the main hull. I then assembled all the missile launch tubes and dry-fit them to the forward deck to see how they were going to look:

The "Cake Stand" radar is also just dry-fit. I still need to paint it first. Here's some more shots:


Moving back into the aircraft assembly line, I managed to get a lot done on a number of my aircraft. On the F-15E, I removed the masking to see how well the steel laid down. It was a bit rough as you can see here; this has since been buffed out to a smooth finish:


Now to add decals to this.
My next model was the P-51B Mustang I'm doing for another Group Build. I painted the pilot and placed him in the cockpit of the plane and then sealed him in under the canopy. This plane is now ready for masking and paint, along with the P-40 that came with it in the box:

Another aircraft I made progress on was my F-102 for the "Charlie Don't Surf" campaign. I masked off the areas I needed to so I could shoot the tan color:

I hope to fire up the airbrush this week to finish that camouflage pattern, along with a number of other models I have ready for paint.
One of the aircraft I did get primer on (again!) was my Boeing 737. After having sanded and buffed out the discrepancies, I shot it again to see how well I did on smoothing this out:

Not bad. I will need to buff this to a fine shine again before I attempt to shoot paint on this,
Another model I primed was this little USAF Jetstream I was working on. First though, I had to fill in and sand smooth all the sink holes all over this little plane. Here are some pics showing everything I had to fill and try to feather out:


I even had to fill a few places on the wing assembly:

After all that sanding and buffing, I added the main cockpit canopy and started to mask off the windows:

Finally, the primer went down:

If you look close, you can see where I have to try again to fill some of the sink marks. Still, it turned out better than I expected.
Moving on, I decided to get some more progress done on my two F-14 Tomcats for the review I'm doing. It's been too long and far too late so it was time to hustle on these. First off, I added the P/E additions to the inside of the canopy:


These were slightly difficult to glue in place, be sure to check the bottom edge of the P/E parts to make sure they don't fall below the edge of the canopy. Also, check the instruction sheet closely to insure that you glue them in right side up.
Again, I am doing one with the full P/E workup; here are the two canopies side by side:

In my haste to close the two cockpits sections up, I neglected to paint those inserts, but they aren't that easy to see anyway. What I did remember to do was to paint the yellow stripes on the ejection seat handles:

Finally, I closed these up:

The fit of the canopy pieces was very good. Despite the gap you see in the one; these fit exceptionally well. The gap was my own mistake, not due to any lack of quality in the kit parts.
After having closed everything up, I cemented the cockpit sections to the rear fuselage assemblies. These two aircraft are now ready for masking and paint:

I do know that the wings appear to be retracted too far; they are not glued in yet. I need to find out why they keep slipping into that position and set them properly.
Now that I made such significant progress on these two Tomcats, I decided to start another review kit I had gotten. This one is the Hasegawa A-10C Thunderbolt II.
As usual, I started to assembled the cockpit. It was a very easy and quick assembly. The parts fit very well and I was later able to paint them after assembly. Here in this pic, the seats are only dry-fit in place. The instructions have you add the seats after closing the cockpit tub inside the fuselage halves. I don't know why since there disn't appear to be any obstructions, but I decided to follow the instructions for the purposes of this review. Everything is shown here:

The decals for the instrument panels went in well. I always trim along the edge of each decal anyway to insure a good fit. The main instrument panel was glued under the cowl and then the decal was added after it dried:

I used Solvaset to help draw the decal into the detailed engraving on the IP. It hadn't quite finished yet when I took this pic.
The instructions then have you assemble the nose gear bay which will later be cemented up under the fuselage assembly:

They also give you a schematic showing where to add the nose weights to keep this model from being a tail sitter. So, I added my nose weights to the gear bay assembly:

Yes, it is probably too much, but I just wanted to be sure. Once this is closed up, it won't be opened again!
Moving on, they have you assemble the engines. The parts for these engines don't quite fit very well with lots of little 'steps' and misaligned parts. It's very slight, but if you try to adjust one side, you pull another section out of alignment. I did the best I could with these:

It's just going to take a bit of extra sanding on these.
After that, I assembled the main wings. These were a fairly good fit for the most part:

The roughness around the edges was me adding a slight amount of extra glue to squeeze out of the joint to seal it up better. The bottom however is where you find some of the fit issues that need to be dealt with:

Here's a close up of the worst part. Try as I might, I could not get these ends to lay down properly:

I'm not even sure how I'll sand that given the rectangular detail near that seam; I'll have to experiment.
Finally, the empennage went together exceptionally well. The vertical stabilizers went on at a perfect 90-degree angle on this:

NOTE: Be sure you cement the two vertical stabilizers in the proper direction! It's easy to cement them on upside down if you forget the opening for attaching this to the fuselage is on top, not the bottom of the horizontal part.
After all of that, I closed up the cockpit assembly inside the fuselage; added the forward gear bay, and the engine and empennage assemblies:


Everything fit well here. The only issues I really had were the forward gear bay assembly did not match up too well with the fuselage assembly. It took some judicious manipulating to get everything lined up. I'm happy enough with the results; I think my issues might have been caused by the nose weights inside. The other issue is the step on the engine assembly. I'm still debating whether I'll sand that down or not; it is in a difficult position with a difficult curvature to match.
Finally, I dry-fit the wings to see how this will look:

It is a nice looking aircraft!
With all that going on, I wanted to also start something quick and easy that I could just "throw" together (and hopefully not miss to often!) I pulled out an old Heller J-32 Lanssen aircraft and got started on the cockpit:

Afterward I painted it up. I had to guess at the colors. but when the cockpit is all closed up, no one will really notice. Besides, this is just a fun build for me.

You can see where I dry-brushed the instrument panels to bring out the detail.
I then added the engine intake strakes to the fuselage halves along with a few other bits and bobs:

While they were drying, I assembled the wings:

All that was left to do was to put everything together. But first I taped everything together to check and see if this plane needed nose weights:

It did. You can also see where the nose was going to give me a problem. No biggie.
I added the nose weight; cockpit, tail cone, tail 'feathers' and cemented everything together. Then I added the wings and canopy. This is now ready to sand, mask and paint:

This final one is not a fixed wing aircraft, but it's an aircraft nonetheless. I started my Special Hobby AH-1G Marine Corp Cobra by looking in the box. The first thing I saw made me say out loud: "SERIOUSLY? I have to do WHAT?" Yes, I have to assemble the entire cockpit canopy piece by piece when the time comes:

Well moving on, I started; once again, with the cockpit. The first thing I had to do was to cut off the back part and replace it with the one shown in place right here:

Then I added all the control sticks and targeting equipment along with the instrument panels:

Afterwards, I added the armor plate and then painted this up:

The instructions said to apply the decals to the instrument panel faces but there were no instrument panel decals on the decal sheet! So, I painted them too:

After that, I assembled the seat and set them aside to dry. While they were drying, I assembled the tail section that my particular version was supposed to have:

I then went through and put all the weapon pod halves together:


That's as far as I got so far on that. Hopefully this coming week I'll be able to get more done.
Okay, that completes my aircraft work. Now we can move on to my armor....
Starting with armor, I primed the Schturmtiger:

Now I can shoot a better coat of paint over this and then camouflage it.
Next, I assembled the pilot deck for the 'phib, starting with the pilot house controls and then adding the hatch and other bits and bobs:

Later I cemented the interior and the pilot house deck in place:

My next project was another simple one I wanted to do. I pulled out the Airfix RAF re-supply set to go with my USAAF re-supply set. I started with the Bedford truck doing the basic chassis and cab interior:

They give you an option to make the Bedford a tanker or a cargo truck. I opted for the tanker version and built the tank for it:

The tank is just dry-fit on there, but this is a neat little truck:

After that, I started on the Tilly. Three or four steps later, I had this:

The rest of the cab parts for both trucks are molded in clear so I'll paint these as they are along with the clear parts separately.
Finally, my last model to show is this Roden Ludwig Areo bus that I started for another Group Build elsewhere.
I assembled the basic chassis and engine first:

Since the engine wasn't going to be seen, I didn't do too much detail to it. What I did was enough to get it mounted on the chassis and also support any other parts that needed it for support. I also added the wheel hubs to the axles:

Later I cemented together the double wheels that go on the back axles:

After that, I built the body of this bus and started to sand the seams that I found:

Afterward I primed this bus to see what I had succeeded in doing. Not much apparently:


Oh well, I just have to keep at it.
Meanwhile, I mounted the floor of the bus and the dashboard; then I added all the seats and controls:


Looks like I need to straighten a seat. That'll happen.
Okay, that completes this very long tour of Maddog Manufacturing, showcasing the latest in-progress work. I appreciate you stopping in to look it over. Comments are always welcome.
jknaus
Administrator
Been working on the Hawk the past couple of days. Need to replace a cable that snapped into multiple pieces as I was removing it and try to figure out how to fix a shelf and cage for what looks like pegs. I took it off with a razor saw and dropped it onto the table where one half snapped off into space to remain unfound. The AFV plastic is definitely more brittle than Dragon or Trumpeter.


James
James
Tankbuilder
Active member
James.
For cables, ie. twisted wire ones, I find that thread soaked in diluted white or carpenters glue and then allowed to dry gives the thread-cable a realistic bending/draping ability.
Cheers
For cables, ie. twisted wire ones, I find that thread soaked in diluted white or carpenters glue and then allowed to dry gives the thread-cable a realistic bending/draping ability.
Cheers
Similar threads
- Replies
- 39
- Views
- 10K
- Replies
- 60
- Views
- 19K
