
-
Modelers Alliance has updated the forum software on our website. We have migrated all post, content and user accounts but we could not migrate the passwords.
This requires that you manually reset your password.
Please click here, http://modelersalliance.org/forums/login to go to logon page and use the "Forgot your Password" option.
You are using an out of date browser. It may not display this or other websites correctly.
You should upgrade or use an alternative browser.
You should upgrade or use an alternative browser.
All Righty ... What's on the bench today?
- Thread starter panzerace007
- Start date
Swordsman
Active member
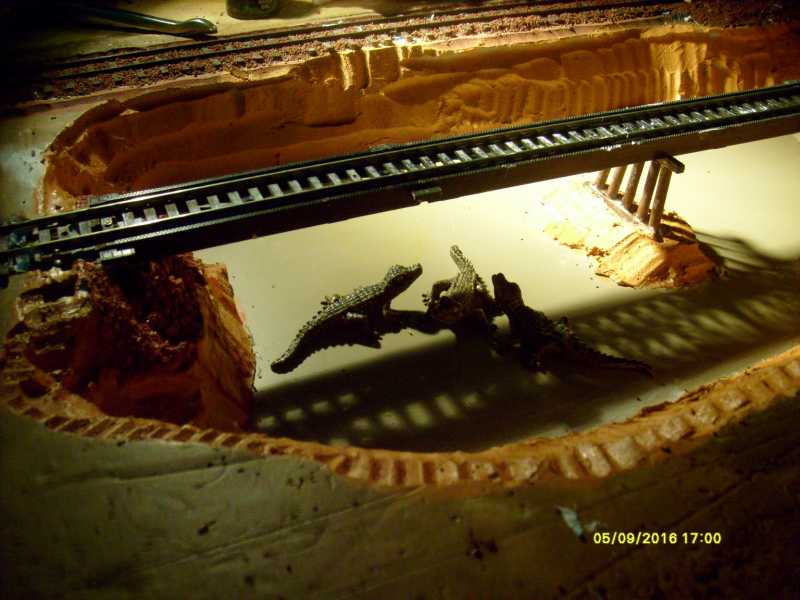
I finished the Pit the gators are Very happy ... Just A small bit of touch-up still
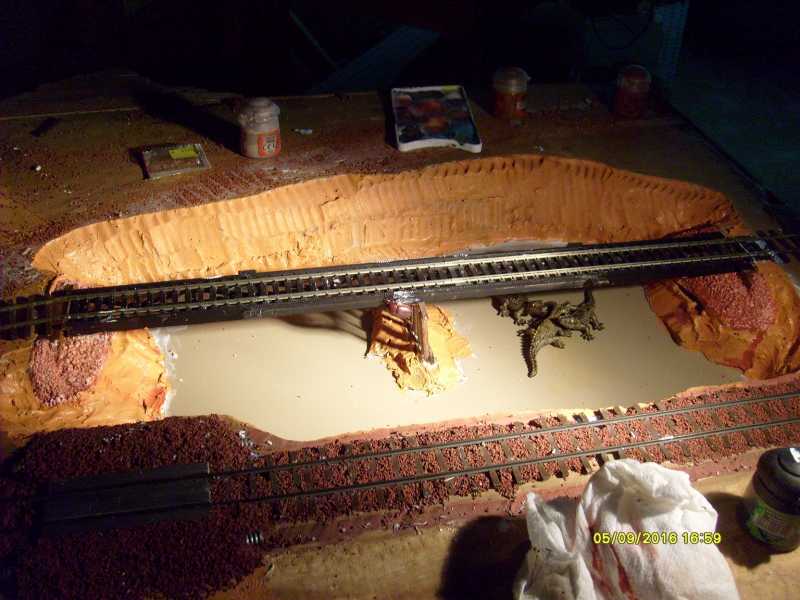
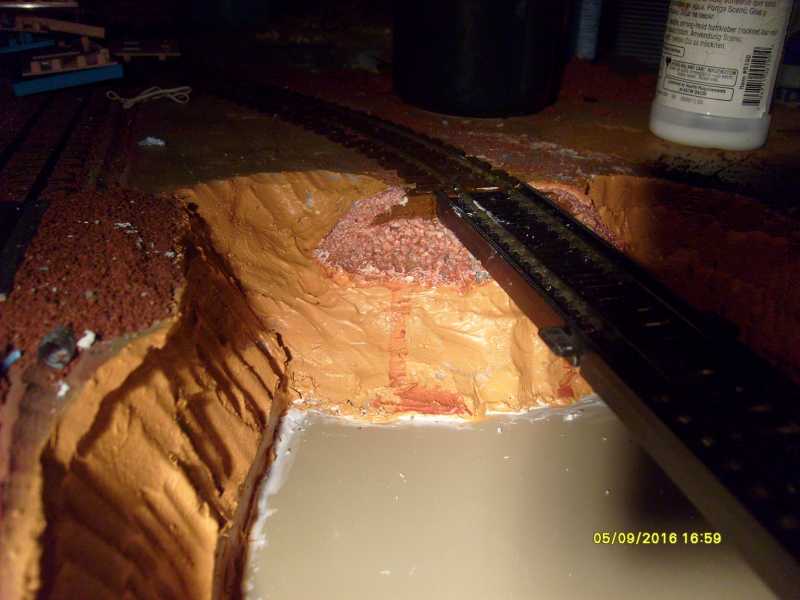
And a small Video for your viewing pleasure ... C&C welcome
https://youtu.be/9Jf4pzRNRCY
At the current moment the Gators are being manipulated via magnet in hand ... Future will be rotating disks with magnets under module ... more engineering necessary ...
And a small Video for your viewing pleasure ... C&C welcome
https://youtu.be/9Jf4pzRNRCY
At the current moment the Gators are being manipulated via magnet in hand ... Future will be rotating disks with magnets under module ... more engineering necessary ...
Swordsman
Active member


James
Thanks James I'm glad you like it ... :woohoo: :drinks
Gator
Well-known member
Funny, that's how Mrs. Gator gets me to move.At the current moment the Gators are being manipulated via magnet in hand ...
I KNEW IT!!!!!Funny, that's how Mrs. Gator gets me to move.At the current moment the Gators are being manipulated via magnet in hand ...
Duke Maddog
Well-known member
Okay, Hobby Day weekend is over and I have quite a bit to show. I hope I don't upset anyone with my long post.
I'll start with the one ship I worked on; or tried to. The USS Arthur Radford instructions called for me to paint the white stripes on the raised detail on the decks. Here are my very poor efforts...
First effort on the forecastle:

And the the helicopter landing pad:

Yeah, that's gonna take some serious touching up....
Moving on, I decided to focus on armor for awhile. They are relatively fast and easy compared to some of the aircraft and other models I've been working on.
I'll start with a model I began for a Group Build on the Missing Lynx Braille Scale Forums. This is a BRDM chassis with anti-tank rockets on it. I first assembled the chassis, which required me to add the two small wheels:

Later I added most of the detail parts and assembled the rocket launcher. Here they are all dry-fit together with the main wheels snapped on:


The next model I worked on was my German Boxer GTF. After I completed the suspension underneath; I only added the forward hull plate and front bumper/headlight bar, as well as assembled the machine gun turret:


After that, I decided to get the rest of the photo etch on one of the train cars that needs it. This thing has been sitting for far too long on the workbench:

This train is practically done with assembly. All it needs now is the quad Maxims and the last flatcar's photo etch and then I can paint this:

While I was on photo-etch 'duty'. I also decided to get the photo etch parts out of the way on the Modelcollect T-64BV model. The two side ERA panels have to be attached to the side fenders with these photo-etch parts:

Each one of those photo-etch parts was folded four times....
Here's the side ERA panel attached to the side skirt:

That puppy is just swinging in the wind, held on by those Photo-etch parts. Man what an ordeal that was!
Moving on, I finished adding all the detail parts to the turret of this tank to finish it:


That is an impressive looking turret!
After adding the extra parts to the main hull and snap-fitting the side skirts on the hull, I shot a couple pics of this tank ready for paint:


After all that, I needed a break from anything with photo etch. I pulled out the Japanese fuel truck and painted the interior and chassis:

I also painted the frames on the clear parts for this fuel truck:

Now I can start assembling this truck and get the decals on it.
The little Canadian truck was clearcoated in preparation for decals. It was also given a wash on the back bed sides:

After that, I wanted to start that newest T-90 tank I had so I pulled it out and started with step one, assembling the turret:

Later I completed the upper hull with all the detail parts. Here it is with the turret in place:

I just need to add the roadwheels and other parts to the lower metal hull and this will be ready for paint.
Finally, once I received the two buses that someone bought for me, I was very eager to get started on the VOMAG Bus. I was quite surprised how big this puppy is! The instructions called for assembling the engine first so I got it built up:

I added that and some of the suspension parts to the chassis:

Just to give you an idea of how long this bus is, here's a shot of this chassis next to my Exact Blade:

Next I assembled the interior and the hood for this bus, adding the side fenders on this as well:

You can see the first small issue I had; the two hood halves didn't cement together smoothly. I had to add a small strip of styrene to the center of the hood.
Moving on to assemble the body, I found my first 'major' issue. The two body halves when cemented together are too narrow to properly fit on the rear panel. When I pulled them apart and cemented them instead to the rear panel, flushing up the surfaces, I had a pretty serious gap in the center of the roof:

The only solution I could see was to add a strip of styrene to the gap, filling it in:

After this had dried a sufficient amount of time, I decided to dry-fit this to the main chassis and interior. This revealed the third 'major' issue:

This will be an easy fix once I'm ready to cement everything together, as you can see here. There will be some residual gaps to deal with, but nothing unmanageable:

Well, that's all the progress I have to show for now. Thanks for looking in, comments are welcome.
I'll start with the one ship I worked on; or tried to. The USS Arthur Radford instructions called for me to paint the white stripes on the raised detail on the decks. Here are my very poor efforts...
First effort on the forecastle:
And the the helicopter landing pad:
Yeah, that's gonna take some serious touching up....
Moving on, I decided to focus on armor for awhile. They are relatively fast and easy compared to some of the aircraft and other models I've been working on.
I'll start with a model I began for a Group Build on the Missing Lynx Braille Scale Forums. This is a BRDM chassis with anti-tank rockets on it. I first assembled the chassis, which required me to add the two small wheels:
Later I added most of the detail parts and assembled the rocket launcher. Here they are all dry-fit together with the main wheels snapped on:
The next model I worked on was my German Boxer GTF. After I completed the suspension underneath; I only added the forward hull plate and front bumper/headlight bar, as well as assembled the machine gun turret:
After that, I decided to get the rest of the photo etch on one of the train cars that needs it. This thing has been sitting for far too long on the workbench:
This train is practically done with assembly. All it needs now is the quad Maxims and the last flatcar's photo etch and then I can paint this:
While I was on photo-etch 'duty'. I also decided to get the photo etch parts out of the way on the Modelcollect T-64BV model. The two side ERA panels have to be attached to the side fenders with these photo-etch parts:
Each one of those photo-etch parts was folded four times....
Here's the side ERA panel attached to the side skirt:
That puppy is just swinging in the wind, held on by those Photo-etch parts. Man what an ordeal that was!
Moving on, I finished adding all the detail parts to the turret of this tank to finish it:
That is an impressive looking turret!
After adding the extra parts to the main hull and snap-fitting the side skirts on the hull, I shot a couple pics of this tank ready for paint:
After all that, I needed a break from anything with photo etch. I pulled out the Japanese fuel truck and painted the interior and chassis:
I also painted the frames on the clear parts for this fuel truck:
Now I can start assembling this truck and get the decals on it.
The little Canadian truck was clearcoated in preparation for decals. It was also given a wash on the back bed sides:
After that, I wanted to start that newest T-90 tank I had so I pulled it out and started with step one, assembling the turret:
Later I completed the upper hull with all the detail parts. Here it is with the turret in place:
I just need to add the roadwheels and other parts to the lower metal hull and this will be ready for paint.
Finally, once I received the two buses that someone bought for me, I was very eager to get started on the VOMAG Bus. I was quite surprised how big this puppy is! The instructions called for assembling the engine first so I got it built up:
I added that and some of the suspension parts to the chassis:
Just to give you an idea of how long this bus is, here's a shot of this chassis next to my Exact Blade:
Next I assembled the interior and the hood for this bus, adding the side fenders on this as well:
You can see the first small issue I had; the two hood halves didn't cement together smoothly. I had to add a small strip of styrene to the center of the hood.
Moving on to assemble the body, I found my first 'major' issue. The two body halves when cemented together are too narrow to properly fit on the rear panel. When I pulled them apart and cemented them instead to the rear panel, flushing up the surfaces, I had a pretty serious gap in the center of the roof:
The only solution I could see was to add a strip of styrene to the gap, filling it in:
After this had dried a sufficient amount of time, I decided to dry-fit this to the main chassis and interior. This revealed the third 'major' issue:
This will be an easy fix once I'm ready to cement everything together, as you can see here. There will be some residual gaps to deal with, but nothing unmanageable:
Well, that's all the progress I have to show for now. Thanks for looking in, comments are welcome.

Try white decal stripes Mark.
Gator
Well-known member
No need for them.The blue pills didn't work?

Been working on my first cosplay prop, a Star Trek Type II phaser from the Voyager/movies years. It's ABS plastic and 3D printed. Came in three pieces. Working on smoothing everything out and getting the panels crisp.


Just don't put it on overload Kenny!
Duke Maddog
Well-known member
Thanks Dave and Kenny. It felt good to get all that done and so quickly too.
MP, I'm out of those, and I'm not sure where I can find the curved ones to get the circle done. I'm gonna do some touch up soon.
Kenny, that Phaser looks great! I know someone who's doing the PPG from Babylon 5.
MP, I'm out of those, and I'm not sure where I can find the curved ones to get the circle done. I'm gonna do some touch up soon.
Kenny, that Phaser looks great! I know someone who's doing the PPG from Babylon 5.
jknaus
Administrator
A lot of stuff done there Mark. As an alternate sugestion could you just repaint the grey and then mask the other lines and spray them? And as another thought, maybe if you get a white watercolour pencil it would be easier to draw? If the line wavers you only need to wash off the offending section and redraw again. Since I learned of these pencils I am sold on their usefulness.
James
James
Duke Maddog
Well-known member
James, thanks! That is an excellent idea using a watercolor pencil. I'll have to stop by Michael's and see if I can pick some up.
Thanks Luiz! T\I agree, the T-64 is an impressive looking model.
Thanks Luiz! T\I agree, the T-64 is an impressive looking model.
Similar threads
- Replies
- 39
- Views
- 13K
- Replies
- 60
- Views
- 24K