-
Modelers Alliance has updated the forum software on our website. We have migrated all post, content and user accounts but we could not migrate the passwords.
This requires that you manually reset your password.
Please click here, http://modelersalliance.org/forums/login to go to logon page and use the "Forgot your Password" option.
You are using an out of date browser. It may not display this or other websites correctly.
You should upgrade or use an alternative browser.
You should upgrade or use an alternative browser.
All Righty ... What's on the bench today?
- Thread starter panzerace007
- Start date
Cool! Hope you feel better.
Duke Maddog
Well-known member
Very nice boats Mark ... Great job ... Good luck on all your edivers ...
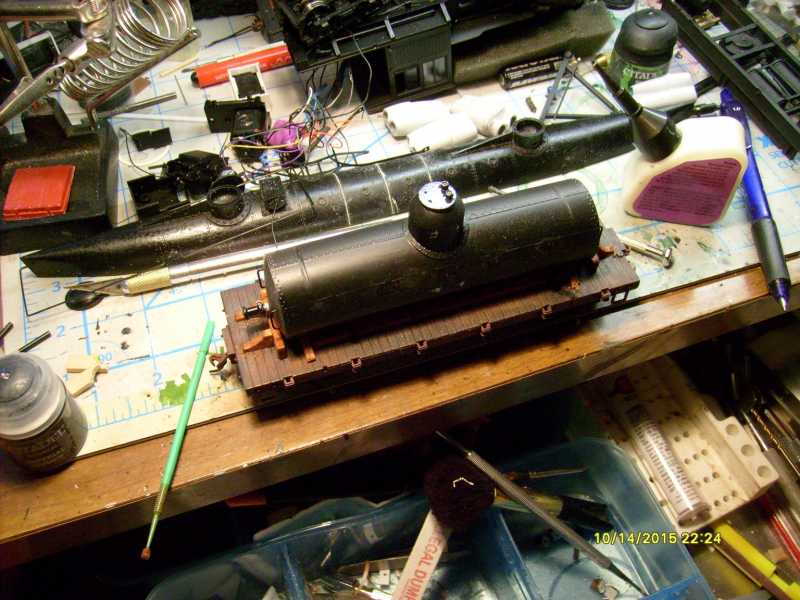
I'll. Post pictures tomorrow morning ... I think some of you liked my catfish fry wagon ... I'm getting back on it soon ... It just wasn't received to well here at MA ... Don't get me wrong some liked it ... So I ordered some Ork stuff so I can make a Ork fry wagon like it that will have some Ork Bikers dragging Space Marines by the feet with chains ... To the fry Wagon to be fried for dinner guests ... Their will some grecthen ... Skining them and prepping them and maybe waiting tables ...
Thanks Gerry! Actually I love your catfish fry wagon the way it is and I for one would hate to see it become what you proposed. I may not have posted much in the way of a response, but I certainly followed your build very closely. The train is looking good too. Glad to see some progress on it.
Thanks Ed! I'm hoping to get these ships done soon. I'm actually enjoying them so much I may add more projects to the slipways at my Shipyards.
Piet, looking good. I'm glad you're feeling better as well. As one who has fought off the flu and several other illnesses, I feel your pain.
Swordsman
Active member
Very nice boats Mark ... Great job ... Good luck on all your edivers ...
I'll. Post pictures tomorrow morning ... I think some of you liked my catfish fry wagon ... I'm getting back on it soon ... It just wasn't received to well here at MA ... Don't get me wrong some liked it ... So I ordered some Ork stuff so I can make a Ork fry wagon like it that will have some Ork Bikers dragging Space Marines by the feet with chains ... To the fry Wagon to be fried for dinner guests ... Their will some grecthen ... Skining them and prepping them and maybe waiting tables ...
Thanks Gerry! Actually I love your catfish fry wagon the way it is and I for one would hate to see it become what you proposed. I may not have posted much in the way of a response, but I certainly followed your build very closely. The train is looking good too. Glad to see some progress on it.
Thanks Ed! I'm hoping to get these ships done soon. I'm actually enjoying them so much I may add more projects to the slipways at my Shipyards.
Piet, looking good. I'm glad you're feeling better as well. As one who has fought off the flu and several other illnesses, I feel your pain.
No Mark the original Catfish truck was a big hit at the train show ... So I will be finishing it ... I was going to do this other thing as a 40K Dio for a saw as when I went to Eagle Quest ... there were some 40k entered ... Don't worry the Catfish fry truck is safe ... I hope the Orks cook there food ... 1st ...
Duke Maddog
Well-known member
Good to know Gerry. Thanks!
Today was a day of two steps forward one-and-a-half steps backward.
Today, I was able to fire up the compressor and get some paint shot on some models.
First off, I shot clear coats on all the models that are ready for decals. This was the Atomic Annie, the little Czech plane, the 1/35th scale F-5E Tiger II, and the USS Virginia. These got set aside to dry...
...while I cleaned up a Lacquer Thinner spill which affected two models. One was my little 1/72 scale Airfix F-51 Mustang which got some on the wing:

You actually can't see the damage here in this pic, despite my best efforts to edit it to show. Basically, it roughened and discolored the plastic. The other model affected was the Atomic Annie. Fortunately, it was only this part that was damaged:
Today was a day of two steps forward one-and-a-half steps backward.
Today, I was able to fire up the compressor and get some paint shot on some models.
First off, I shot clear coats on all the models that are ready for decals. This was the Atomic Annie, the little Czech plane, the 1/35th scale F-5E Tiger II, and the USS Virginia. These got set aside to dry...
...while I cleaned up a Lacquer Thinner spill which affected two models. One was my little 1/72 scale Airfix F-51 Mustang which got some on the wing:

You actually can't see the damage here in this pic, despite my best efforts to edit it to show. Basically, it roughened and discolored the plastic. The other model affected was the Atomic Annie. Fortunately, it was only this part that was damaged:
Duke Maddog
Well-known member
Thanks Gerry. Fortunately, I didn't need to use putty or anything; the damage wasn't that serious. That would have been revealed if the REST of my post had been added. Here is the rest of it in it's entirety:
The other model affected was the Atomic Annie. Fortunately, it was only this part that was damaged:

Easy fix... again. This is the third time I've had to repaint that particular part.
Moving forward, I shot paint on the F/A-18 Hornet in grey on the top:

Then I shot some paint on another modern aircraft I started months ago. This is the F-35 I shot a basecoat of gunship grey on:

Next I shot some green since I had three models that needed that color. This first one was the little BS-3 Russian gun:

You can see another of the steps back: I broke off the little lower shield on that gun.
Next I did the T-90 in a basecoat of green. Amazingly enough, no issues here:

For the next model; I was told that the opening I plated over on the turret was supposed to remain open, so I had to remove the plate I'd put on the turret. After that, I shot the green on the LAV as well:


Finally, I shot some white paint on my Aurora Jet Commando:

It was about this time that I spilled the Lacquer Thinner a second time...
After all this time, I figured I could mask off the F/A-18 for the second coat of paint underneath, so I pulled out my trusty blue tape and went to work:


Then I shot the lighter color on the bottom:

While that was drying; I pulled out the little F-51 again and spent a couple hours buffing out the damage on the wing of this plane. I started with the 2400-grit pad and worked my way all the way up to the 12000-grit pad. After all that, I finally got this wing smooth again:

Now that it was completed and ready for paint, I shot a coat of gloss black over it in preparation for the Alclad:

There's still some orange peel on this so I'll be buffing it out again and then shooting some Aqua Clear over it before I shoot the Alclad.
Finally, I pulled the tape off the F/A-18 and realized why I don't normally use acrylics. This was the result:


Yep! Pulled the paint right off the sides and the wings.
I just cannot catch a break....
On that disappointing note, I pulled down the little Spru-can again and sanded the Mr. Surfacer I'd put on the day before. Then I painted up the superstructure, weapons and other bits and bobs. After some additional touch-up, I got it to this point:


Yes, I know the antennas are crooked again, and one is even missing. I will replace it later and straighten the rest after I mask and paint the lower hull. Then I can paint the little white parts and do some other detail painting before I clearcoat this to complete the decals.
Until then, I'm done for the day. I hope you enjoyed my less than satisfactory day. It would have been more satisfactory if I could have gotten more done instead of chasing broken parts; cleaning up two chemical spills and dealing with airbrush issues.
Anyway, thanks for looking in, comments are always welcome. I hope to have more to show soon so stay tuned.
The other model affected was the Atomic Annie. Fortunately, it was only this part that was damaged:

Easy fix... again. This is the third time I've had to repaint that particular part.
Moving forward, I shot paint on the F/A-18 Hornet in grey on the top:

Then I shot some paint on another modern aircraft I started months ago. This is the F-35 I shot a basecoat of gunship grey on:

Next I shot some green since I had three models that needed that color. This first one was the little BS-3 Russian gun:

You can see another of the steps back: I broke off the little lower shield on that gun.
Next I did the T-90 in a basecoat of green. Amazingly enough, no issues here:

For the next model; I was told that the opening I plated over on the turret was supposed to remain open, so I had to remove the plate I'd put on the turret. After that, I shot the green on the LAV as well:


Finally, I shot some white paint on my Aurora Jet Commando:

It was about this time that I spilled the Lacquer Thinner a second time...
After all this time, I figured I could mask off the F/A-18 for the second coat of paint underneath, so I pulled out my trusty blue tape and went to work:


Then I shot the lighter color on the bottom:

While that was drying; I pulled out the little F-51 again and spent a couple hours buffing out the damage on the wing of this plane. I started with the 2400-grit pad and worked my way all the way up to the 12000-grit pad. After all that, I finally got this wing smooth again:

Now that it was completed and ready for paint, I shot a coat of gloss black over it in preparation for the Alclad:

There's still some orange peel on this so I'll be buffing it out again and then shooting some Aqua Clear over it before I shoot the Alclad.
Finally, I pulled the tape off the F/A-18 and realized why I don't normally use acrylics. This was the result:


Yep! Pulled the paint right off the sides and the wings.
I just cannot catch a break....
On that disappointing note, I pulled down the little Spru-can again and sanded the Mr. Surfacer I'd put on the day before. Then I painted up the superstructure, weapons and other bits and bobs. After some additional touch-up, I got it to this point:


Yes, I know the antennas are crooked again, and one is even missing. I will replace it later and straighten the rest after I mask and paint the lower hull. Then I can paint the little white parts and do some other detail painting before I clearcoat this to complete the decals.
Until then, I'm done for the day. I hope you enjoyed my less than satisfactory day. It would have been more satisfactory if I could have gotten more done instead of chasing broken parts; cleaning up two chemical spills and dealing with airbrush issues.
Anyway, thanks for looking in, comments are always welcome. I hope to have more to show soon so stay tuned.
Hawkwrench
Active member
Goodness, how many models are you working on at once?
I love the commando jet by the way! What scale is it?
Tim
I love the commando jet by the way! What scale is it?
Tim
135engineer
Active member
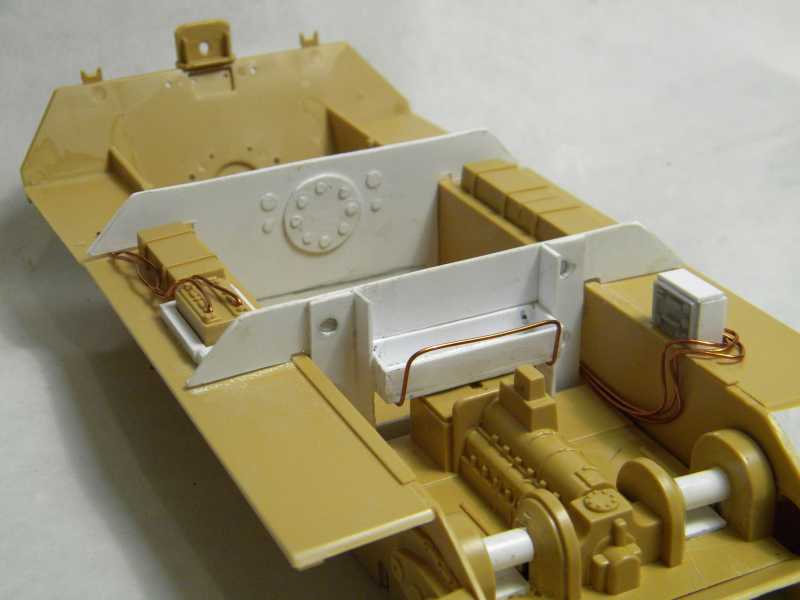
Those look amazing . For me today its more of the berge panther scratch rework

135engineer
Active member
Thanks . there will still be a lot seen
Thanks . there will still be a lot seen
I'm watchin' the build. Mighty fine work so far
Duke Maddog
Well-known member
Well done engineer. That is looking good.
Tim, I've got close to twenty, if not more; that I'm working on altogether. The Jet Commando is in 1/72 scale. I build all my aircraft in 1/72 scale unless I'm building a 1/48 scale plane for someone else. All my armor is also only in 1/72 scale.
Goodness, how many models are you working on at once?
I love the commando jet by the way! What scale is it?
Tim
Tim, I've got close to twenty, if not more; that I'm working on altogether. The Jet Commando is in 1/72 scale. I build all my aircraft in 1/72 scale unless I'm building a 1/48 scale plane for someone else. All my armor is also only in 1/72 scale.
:hmmm Well, let's see... I have sprayed Yeller paint on the SNJ-5 Texan's stabilizers & hit the tail again. Tossed in a few drops of white & hit the Buffalo in the rear so, she's sportin' a light yeller tail & stabilizers :dance Now I'm gitton' ready ta hit the F7F-3 with some Humbrol Gloss Sea Blue :hmmm So, stay tuned fer some pics a lil later 
:hmmm Well, let's see... I have sprayed Yeller paint on the SNJ-5 Texan's stabilizers & hit the tail again. Tossed in a few drops of white & hit the Buffalo in the rear so, she's sportin' a light yeller tail & stabilizers :dance Now I'm gitton' ready ta hit the F7F-3 with some Humbrol Gloss Sea Blue :hmmm So, stay tuned fer some pics a lil later
135engineer
Active member
That's a funny looking mbt where are the treads and the main gun.......loljust kidding looks good
Heavens Eagle
Well-known member
This weekend I worked on my Ju87A. Have the engine assembled in sub assemblies as well as the oil cooler, firewall and the cowling halves. It seems that the Trumpeter kit "almost" fits together. Everything is just about a half-bubble off plum on fit. Which means check, tweak, check, and adjust. THEN glue it together.
I have also noticed that the instructions are only so-so on a lot of things. There was one part on the firwall that I only picked up on because I saw it on the sprue. In looking it over there are a lot of marginal alignment points on things. It's also good that I am closing up the engine as it isn't real accurate.
Sunday I did a tiny bit on the Stuka and spent most of the day working up the tweezer lesson. I don't want to hear anyone complaining about how they are always launching parts to the carpet monster now. The whole point of the TOOL TIME Tweezer thread was to show you how to stop doing that. :smack
Similar threads
- Replies
- 39
- Views
- 10K
- Replies
- 60
- Views
- 19K



 :captain