• Modelers Alliance has updated the forum software on our website. We have migrated all post, content and user accounts but we could not migrate the passwords.
    This requires that you manually reset your password.
    Please click here, http://modelersalliance.org/forums/login to go to logon page and use the "Forgot your Password" option.

1926 Mack AC

Sherman 18

Master at Arms
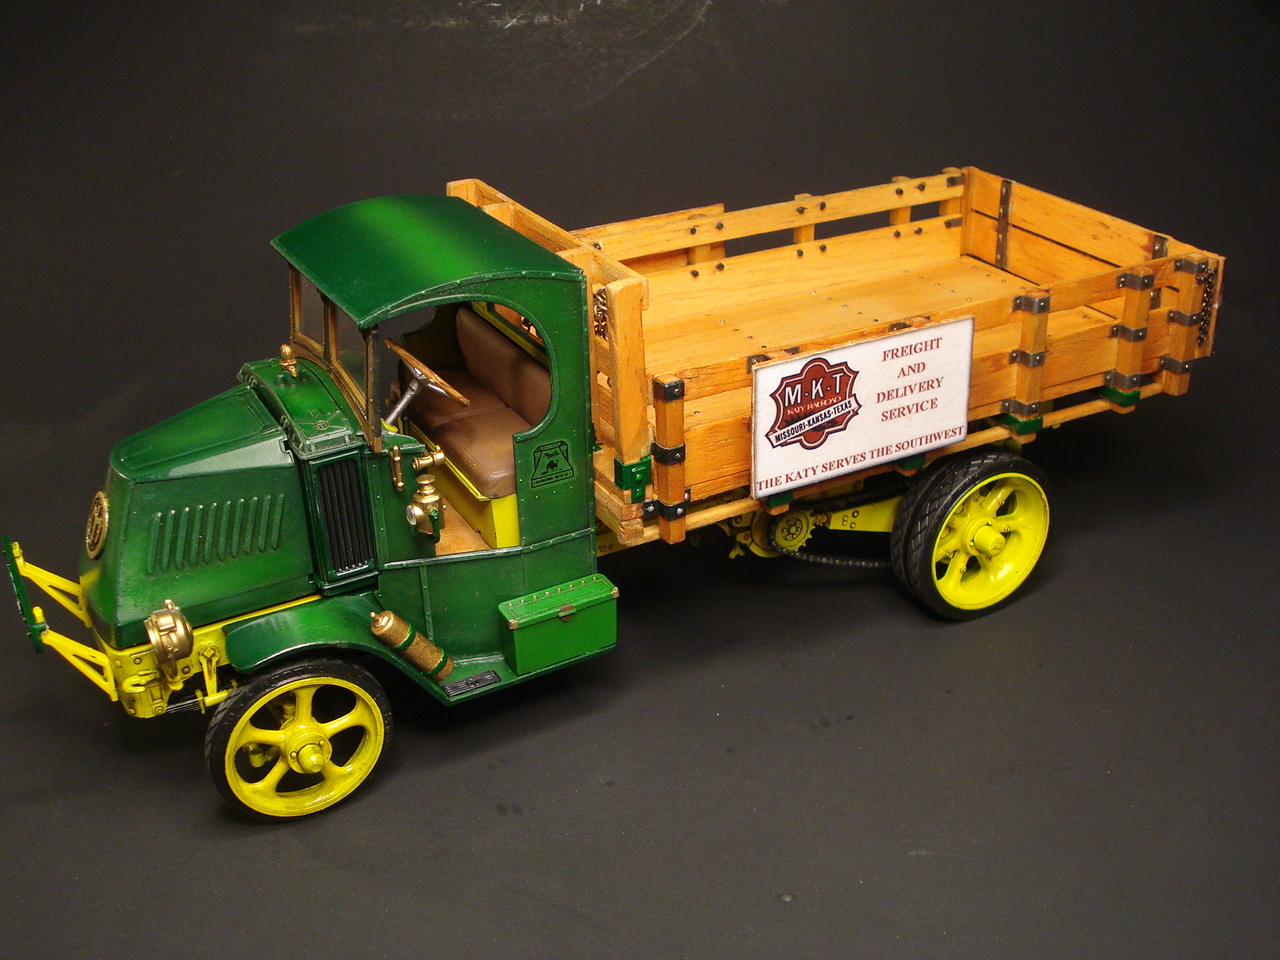
I've been goofing around (again) with the old Monogram Mack kit. I keep changing on what kind of truck it will be. To give you an idea, this was going to be a plain flat bed. Then a lift dump bed, then a crane, then a Bell Telephone truck, then a cattle hauler, then back to tanker truck, then a road oiler, and then a grain truck. As of now it's a Railroad service truck.

IMG_0236.JPG


A look at some of the kit, for the early '70's this must have been state of art in molding. It's really not that bad at all. Better that some of the stuff out now.

IMG_0237.JPG


IMG_0238.JPG


IMG_0239.JPG


IMG_0240.JPG

IMG_0242.JPG
 
I first try and put together all the parts in a kit that will need some putty.

Transaxle

IMG_0243.JPG


IMG_0244.JPG


The engine

IMG_0245.JPG


IMG_0246.JPG


The exhaust

IMG_0254.JPG


IMG_0255.JPG
 
Now thats cool. I dimly remember doing one or something like many many moons ago. (y) (y) (y) (y) (y)
James
 
I remember that kit. I built it for my dad. When he was a kid, there was an old version of a water tanker that looked approximately like this, and it would drive around the streets of the Mill Village in Moorseville NC (this would have been the mid-30's), hosing the kids...of which he was one.

Going to interesting as to what you do with it.
 
Making plastic look like cast metal

Back on the engine

Casting texture done with Testors liquid cement and old brush. I did the cylinders/heads with a mix of 3M spot putty and Testors liquid cement
IMG_0256.JPG


IMG_0257.JPG


IMG_0258.JPG


IMG_0259.JPG


IMG_0260.JPG


Front axle given the same treatment, on this I left a hint of a mold line as it should be there.

IMG_0262.JPG


IMG_0263.JPG


IMG_0264.JPG


Transaxle I did the same with textures. The blue is the putty mix.
IMG_0266.JPG
 
Thanks guys


I went and did the casting texture on the wheels

IMG_0305.JPG


IMG_0306.JPG


IMG_0307.JPG


IMG_0308.JPG


The front of the motor didn't square up right. I added styrene to correct that

IMG_0309.JPG


The water pump and magneto on this kit were short molded so I scratched the magneto and the mounting plate from styrene

IMG_0312.JPG


Started to add missing bolts to the engine

IMG_0313.JPG


Added the separation line between the transaxle case and differential case

IMG_0316.JPG
 
I did one of those way back when they first came out, the tanker version, always wanted to do one agian and your just making it harder :woohoo: Nice work :D
:drinks
 
Thanks guys

I removed the leaf spring brackets. Then scratched some from styrene rod and strip. Also added some bolt heads from hexagon rod. Thinking I probably should have scratched the leaf springs too.

IMG_0351.JPG


IMG_0352.JPG


Maybe I should have titled this update "How to turn 3 kit parts into 35 parts" :facepalm
 
Back
Top