• Modelers Alliance has updated the forum software on our website. We have migrated all post, content and user accounts but we could not migrate the passwords.
    This requires that you manually reset your password.
    Please click here, http://modelersalliance.org/forums/login to go to logon page and use the "Forgot your Password" option.

Trumpeter 1/35 M-1078 FMTV w/ Softside cab

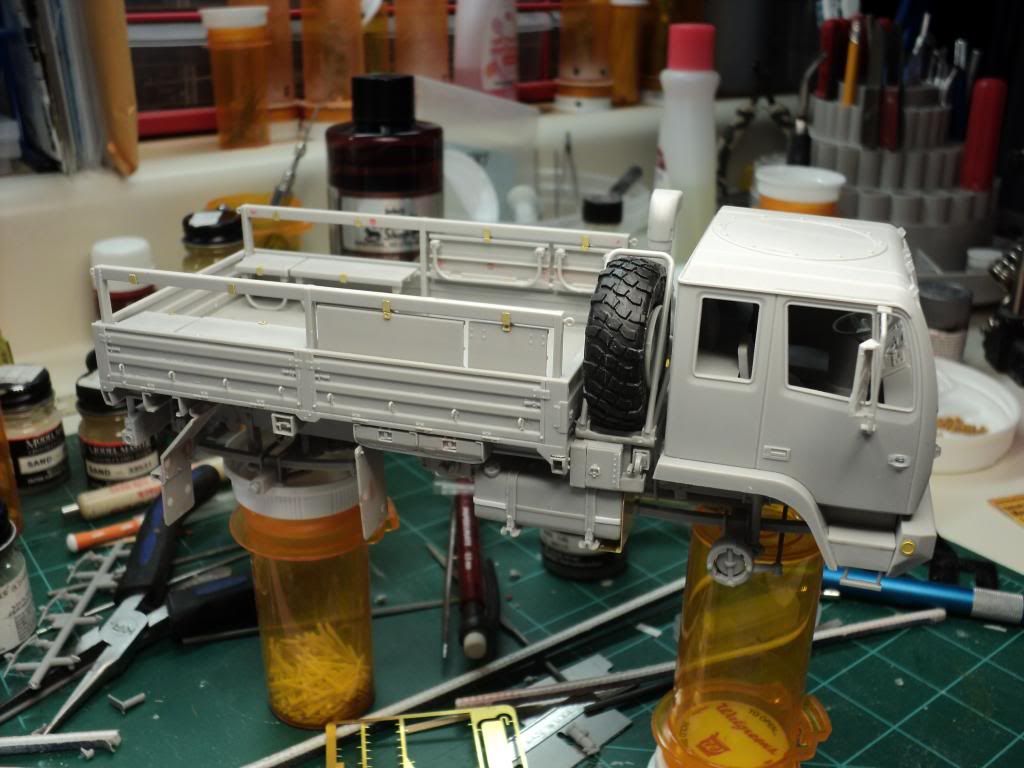
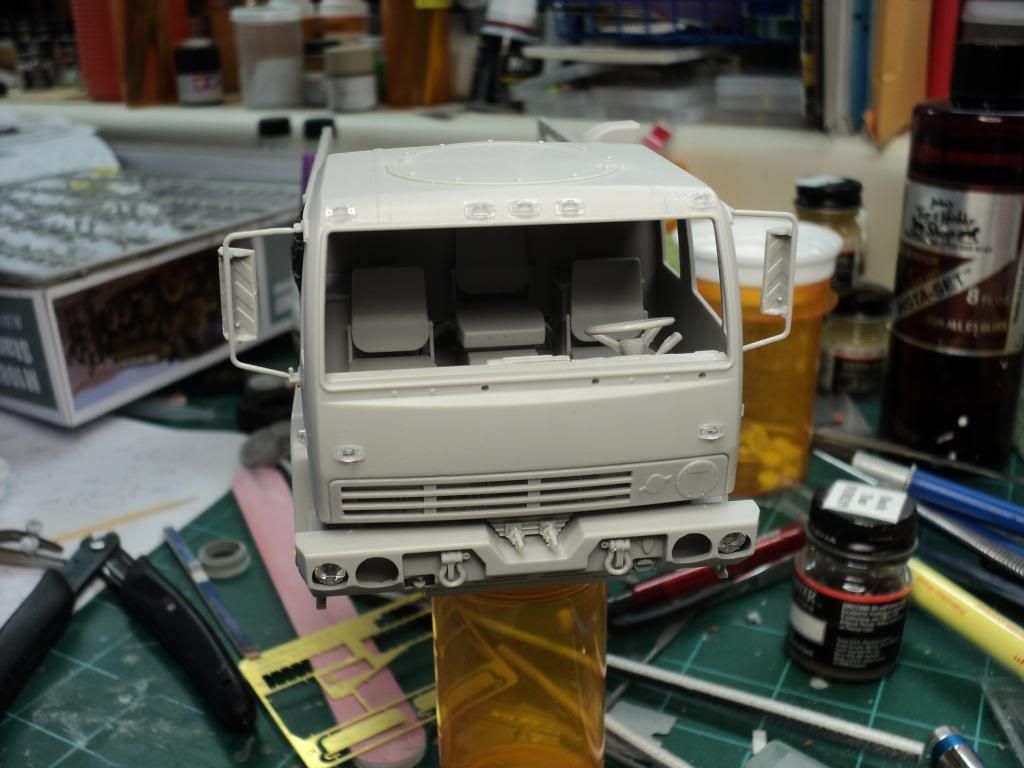
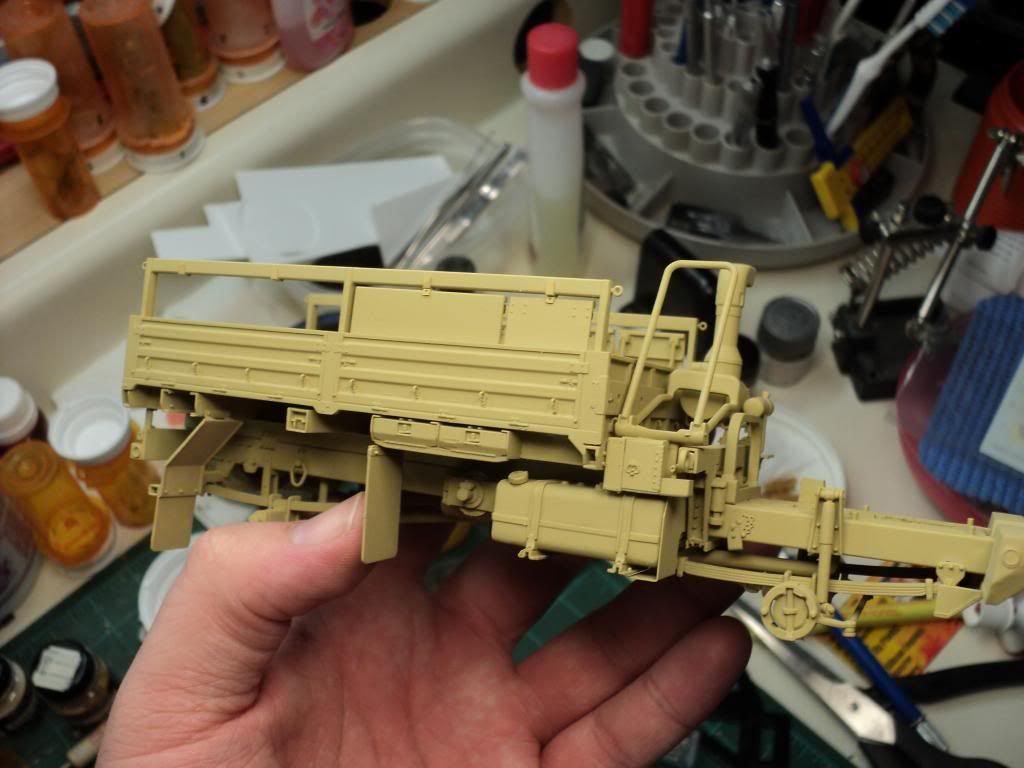
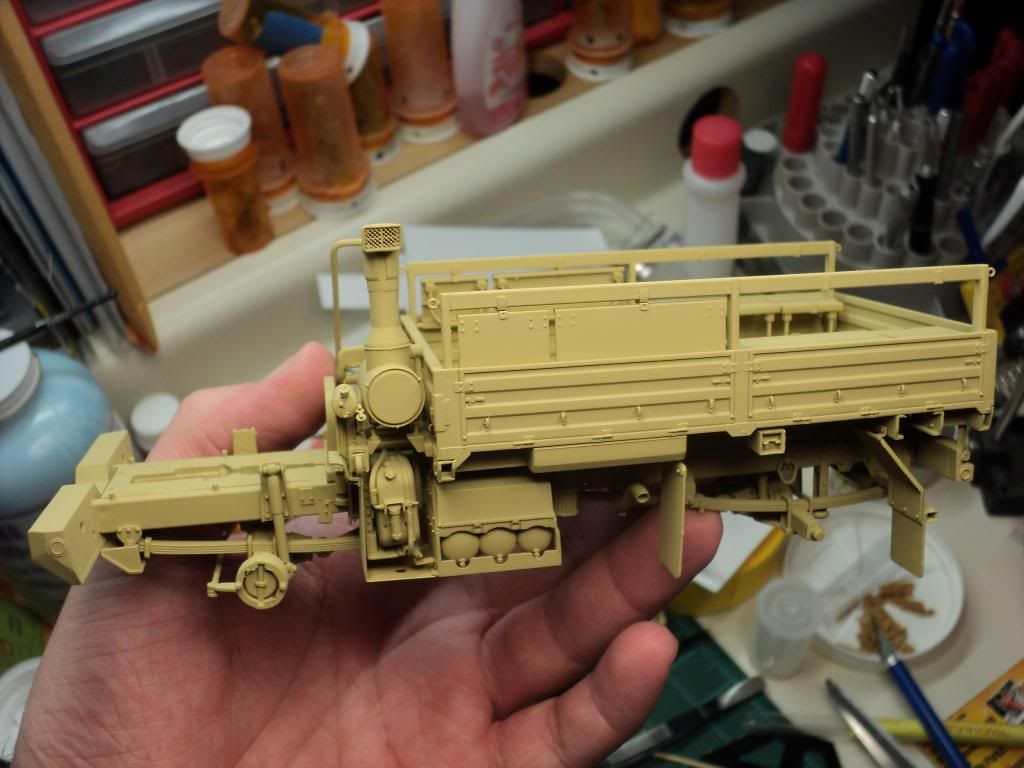
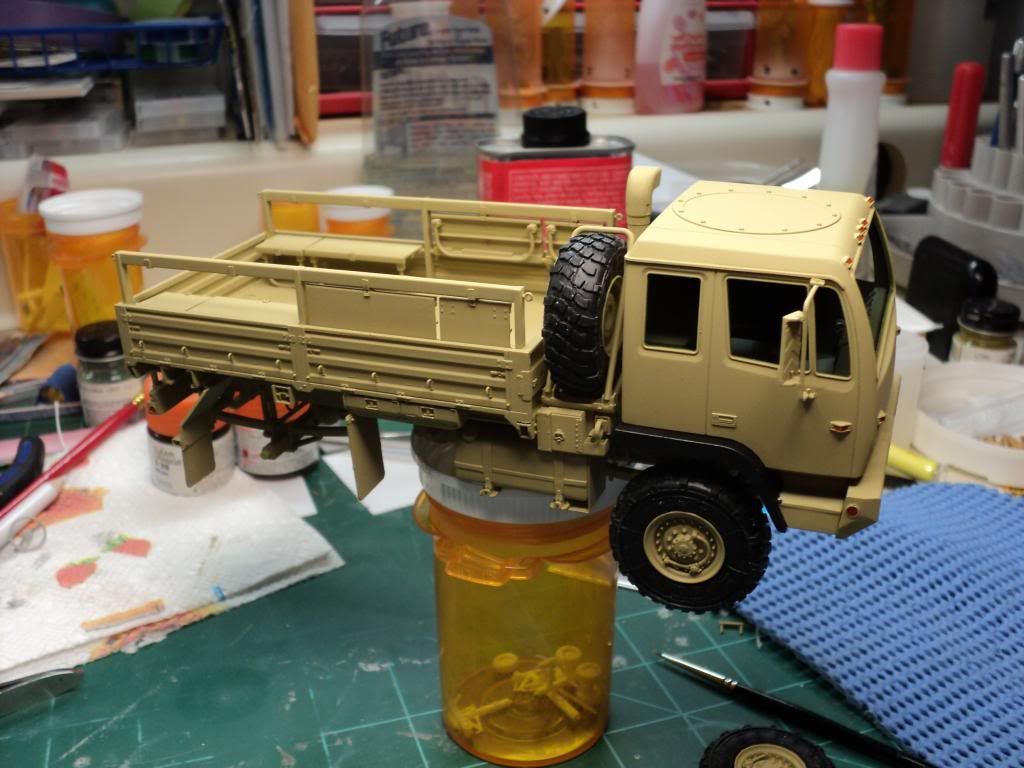
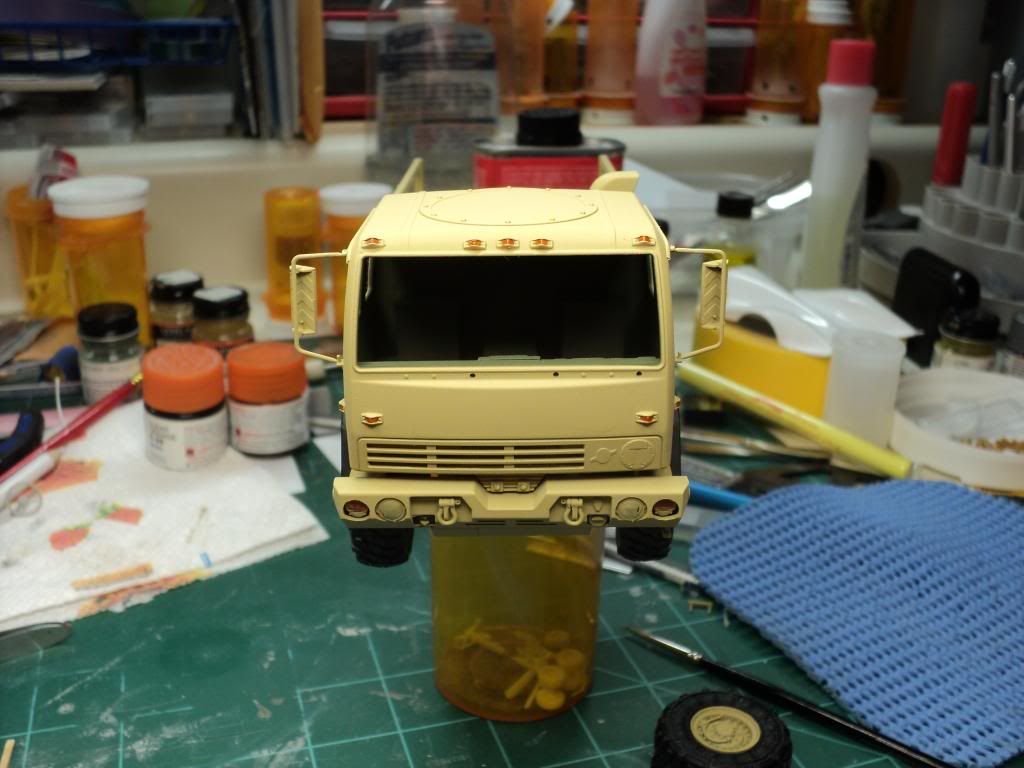
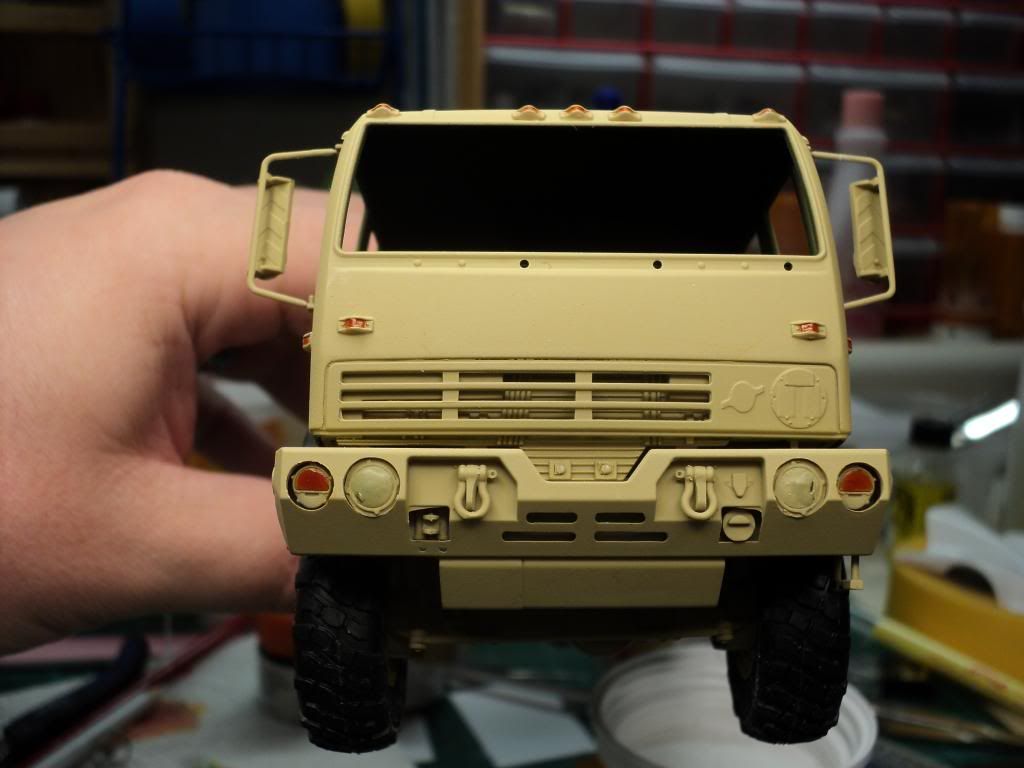
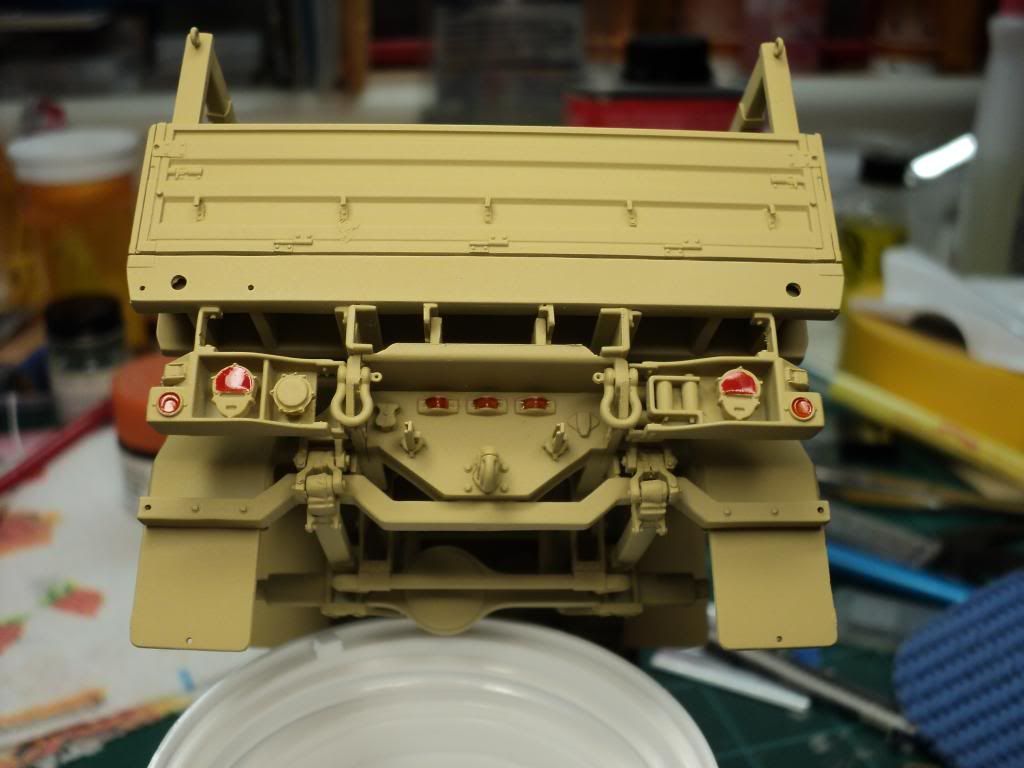
Construction is finished!! Now its on to painting.

M1078-075_zps6c225e7e.jpg


M1078-077_zps942468f5.jpg


M1078-076_zpsd0863e54.jpg


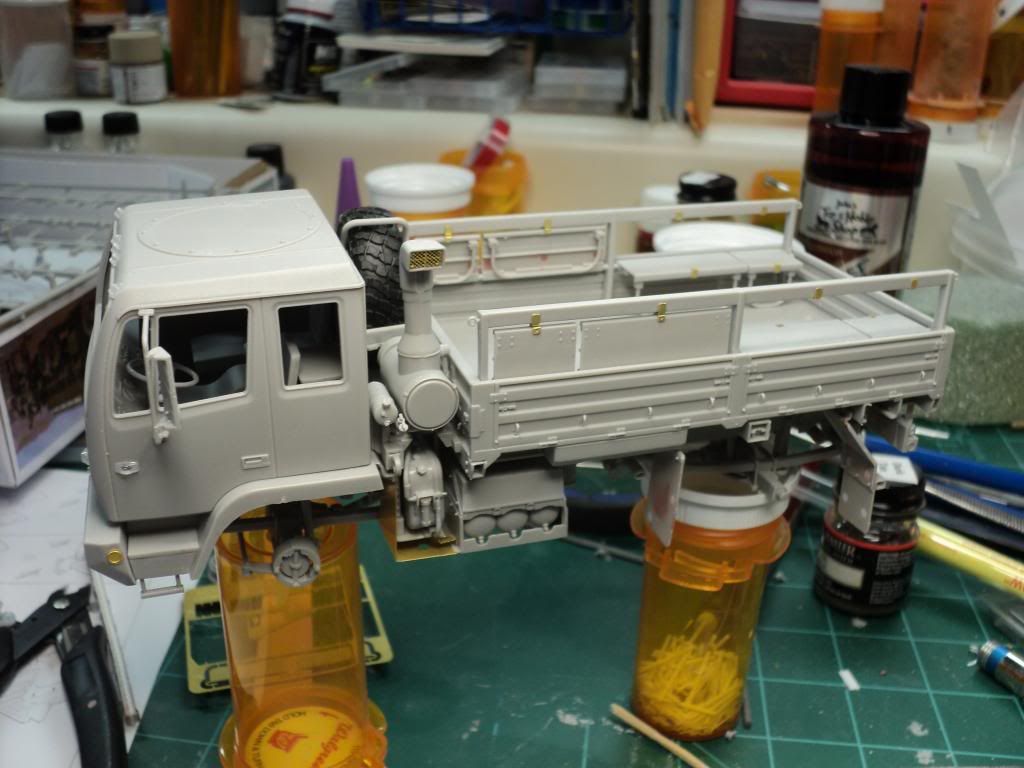
Dont have any pictures of it at the moment, but I had a hell of a time getting the engine air cleaner assembly mounted in place. There's what I'm assuming is a vent line or something that comes off the main transfer case between the front & rear axles, that runs to the air cleaner. I ended up having to clip the tube right next to the frame rail where its not visible, in order to get the tube where it could be attached to the air cleaner.

Once I had the vent tube in place, then I had all kinds of trouble getting the mounting pegs for the air cleaner to go into the corresponding holes in the mounting brackets on hte frame & the bed. It was almost like the mounting brackets were too close together b/c once I finally got the air cleaner in, the mounting pins are at a bit of an angle to each other instead of parallel like I'm thinking they probably should be. So somewhere I goofed something up when I was attaching the mounting brackets, but I'm not overly concerned about it at this point b/c its in, and its not going anywhere.

For paint, I had a bottle of Model Master US Army/Marine Sand that I will use as the base coat. I have a couple bottles of regular Model Master Sand, but its quite a bit lighter than the A/M Sand, so I figured I could base coat w/ the A/M Sand, and then use the Sand for drybrushing highlights, and then I can tint the A/M sand or find something a bit darker, to use for the detail washing.


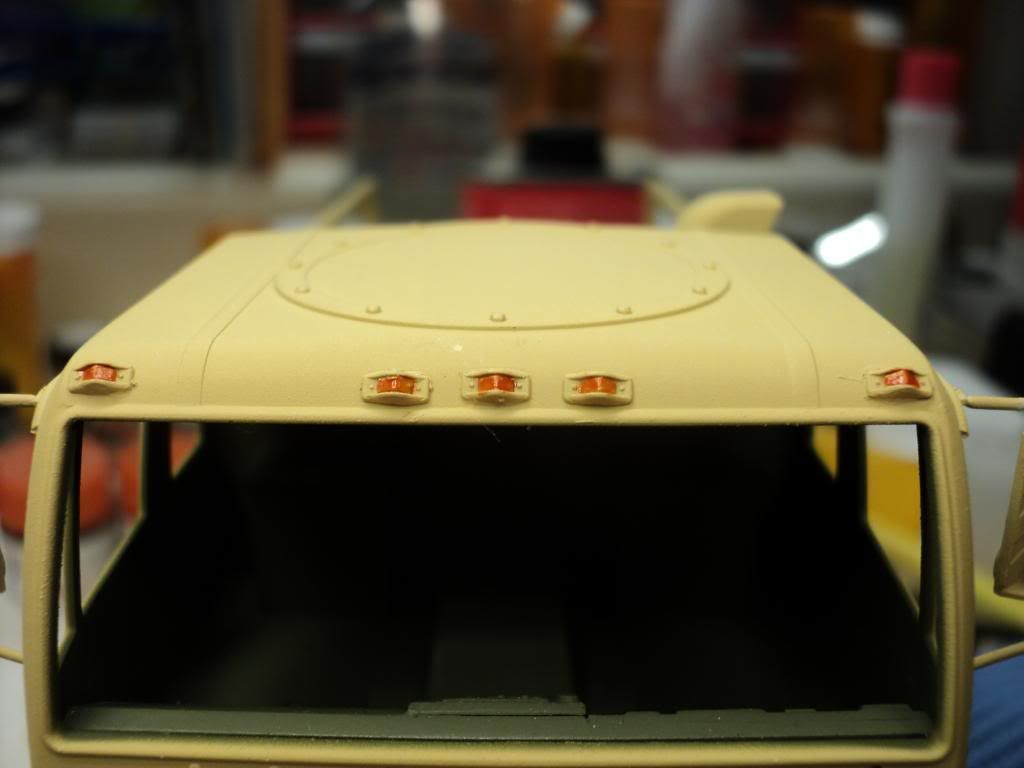
I still have to figure out what color to use for the drivers cab interior. I picked up a bottle of Model Master Pale Green from the Hobby Town yesterday, but when I got home and was comparing the color to pictures, I see its just way too light, and I'm not sure what I've got in my collection to use, so we'll see, might have to make another trip to the hobby shop for paint.

Painting will probably start here in the next hour or so, after I get a few things done around the apartment.
 
How will you handle the mirrors? While Echelon Fine Transfers offer a set, it is simple enough (and delicious to get) to use the wrapper from a Nestle Crunch bar. Of course, eat the chocolate and the Mylar wrapper is used.

Bare Metal Foil can also be used.

White glue (I prefer Gators' Grip) is placed on the plastic part, the over sized piece of wrapper is then attached and a cotton swap (Q-tip brand is one) used to squeegee out any wrinkles. Trim with a sharp knife.

Regards,
 
I actually hadn't thought that far ahead. I've thought about it, but just hadn't figured out how to deal w/ it.

I think I like the idea of your Nestle Bar the best, haha. I do have a new sheet of BMF, that I may try, but those mirror arms are so incredibly fragile, I'm not really sure. They were broken on the sprue before pulling them loose, and I've already broken one of them once since putting them on the cab, so what ever method i use, I'll have to be extremely careful.

It would probably almost be best to leave the mirrors off until after painting, just so that you don't have to worry about breaking them.
 
Got paint down! Paint looks like it might be a bit dark and kind of on the yellow side, but I think once I do some light weathering and detailing, it should look fine.

M1078-081_zps07ee25ee.jpg


M1078-080_zps5ae06cd9.jpg
 
Yea, it is, was just expecting it to not be quite as yellow as it came out, but I like how it came out. I'll put it in my dehydrator for a couple of days to let the enamel paint get good & dry. Tomorrow I'll try to get the interior parts painted and then let it all dry for a few days before moving on to the sealing & weathering. It will only get light weathering, just to make it appear dusty and dirty, like you'd expect in the desert.
 
Not a huge update since last time, but I wanted to share where I've made it to in the last week.

Got the interior of the cab painted w/ Tamiya NATO Green, which looks really good to me. Unfortunately dont have any pic's of just the interior at the moment, I'll snap some tomorrow and get it posted up.

M1078-082_zps763883b8.jpg


Biggest thing I've done over the last couple of days is working on painting all the marker lights, and there are a lot of 'em. 9 on the cab, 2 on the front bumper, 4 on the rear light assemblies and then 3 located above the rear hitch & glad hand hookups. All the marker lights have been painted by hand w/ Tamiya Clear Orange, and I"m extremely happy w/ the outcome. Right now I have the front headlights covered w/ liquid mask, so that I could paint the housings w/o getting paint on the clear lenses. Now that they're installed and ready for future, I'll pick off the mask so that they can get covered w/ future.

M1078-083_zps29712e73.jpg


M1078-084_zpsc09e34fd.jpg


M1078-085_zps6c276fdc.jpg


M1078-086_zpsbe103f6f.jpg


When I get done w/ all the weathering, and put the clear coat down, I'll go back w/ a paint brush and put future back over all of the lights, so that they are glossy again. I just wanted to get these painted prior to weathering, to try to protect the color when I start the weathering.

A couple of things I did learn over the last couple of days, that I wish I'd thought of during construction. Several parts should be left off until the very end once all painting and weathering is finished. On the front of the cab, above the front bumper, are 2 glad hand hookups. They are extremely fragile and should definitely be left off until the very end. I've broken both of them off, so now I'll have to glue them back on at the end. The side view mirrors are a big thing that should be left off until the end. They stick out from the cab and are very easy to hit when trying to paint and during handling. The 2 glad hands on the rear bumper would probably be good to leave off as well, but they are a lot more protected than the glad hands on the front bumper, so its not as big a deal w/ those.

And then there are a couple things I've found that while not completely necessary to leave loose but would help, are the front fender skirts that go under the cab. Both of them are painted completely black, and w/ them glued in place, it makes it a lot harder to paint them.

Not looking like I'm going to get much, if anything, done tomorrow, so hopefully on Sunday I'll be able to start getting future down and then early next week I can start the weathering. I've already decided that I'm going to use Model Master Sand for my dry brushing. Its a fair bit lighter than the Army/Marine Sand I used for my base color, so it should work real good for dry brushing & highlights. For my detail wash, I've got a bottle of Dark Tan, that I think I might try mixing 50/50 w/ the A/M Sand to see what it looks like, and use that for my detail wash. If its not dark enough, I might try a different ratio w/ more Dark Tan, or I might try going w/ just straight Dark Tan, but Im thinking the straight Dark Tan might be too dark, but we'll see.
 
Thanks guys! Like I figured, wont be making any progress on it tonight, but definitely hoping to get on it tomorrow.
 
Adam it's a nice work out there! :ro:
The building and the paint job are great! Tamiya it's Tamiya. (y)

Cheers

Art
 
Yikes, didnt realize it had been over a week since my last update.

Was finally able to work on the FMTV again last night. No pic's to show, but I was able to get the wheels & tires glued on last night and then started to Future the whole thing in prep for weathering. Unfortunately had issues clearing the cab, so I'm probably going to have to strip the future and try again, but in the mean time I"ll start weathering the rest of the vehicle.

Hope to have pictures tonight of the start of the weathering.
 
Does anyone know where to get decals to reproduce the numbers on hte front of this truck? The kit doesnt come w/ decals for this truck, so I'm going to have to make my own. Dry transfers would be an option too. Would probably do the try transfers onto decal sheet and then transfer them onto the model that way.

M-1078withEyes_zps0a35b05d.jpg
 
These might work.

http://www.archertransfers.com/AR35143B.html
http://www.archertransfers.com/AR35108B.html
James
 
Yikes, didnt realize it had been so long since the last update.

No pic's to show at the moment, but the weathering has started. Got on it late last week, but what I was putting down for the detail wash just didnt look right. After tips & suggestions here & elsewhere, I'll be darkening what I'm using for wash and then wil go back w/ a dusting of the base color if it gets too dark.

Going to be ordering the Archer transfers, but just gotta wait for the money to roll in first.
 
Back
Top