• Modelers Alliance has updated the forum software on our website. We have migrated all post, content and user accounts but we could not migrate the passwords.
    This requires that you manually reset your password.
    Please click here, http://modelersalliance.org/forums/login to go to logon page and use the "Forgot your Password" option.

The new 1/350 Scale K'tinga kit build

Heavens Eagle

Well-known member
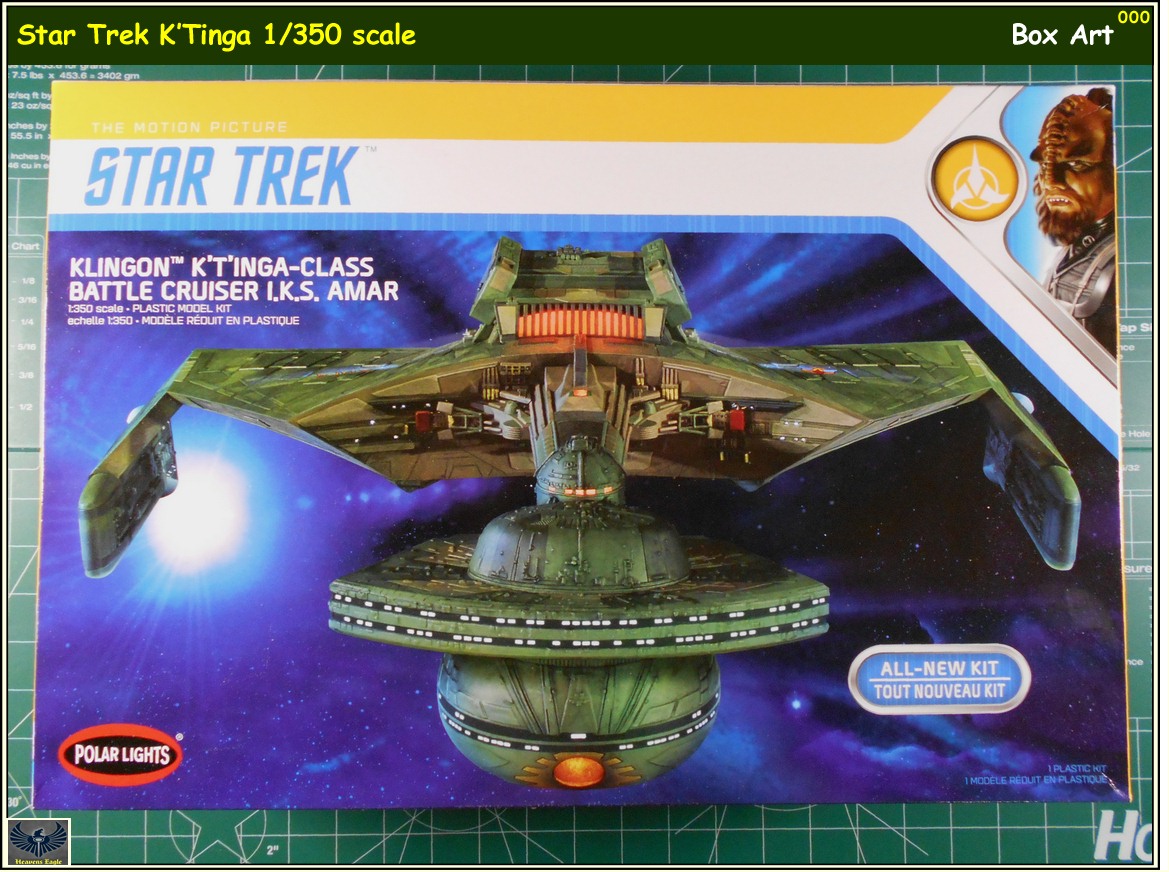
I picked up the new Star Trek K'Tinga kit from FreeTime, and was probably one of the first folks to get the kit. (Never forget the old saying
quote.gif
"Those on the cutting edge sometimes bleed"
quote.gif
)

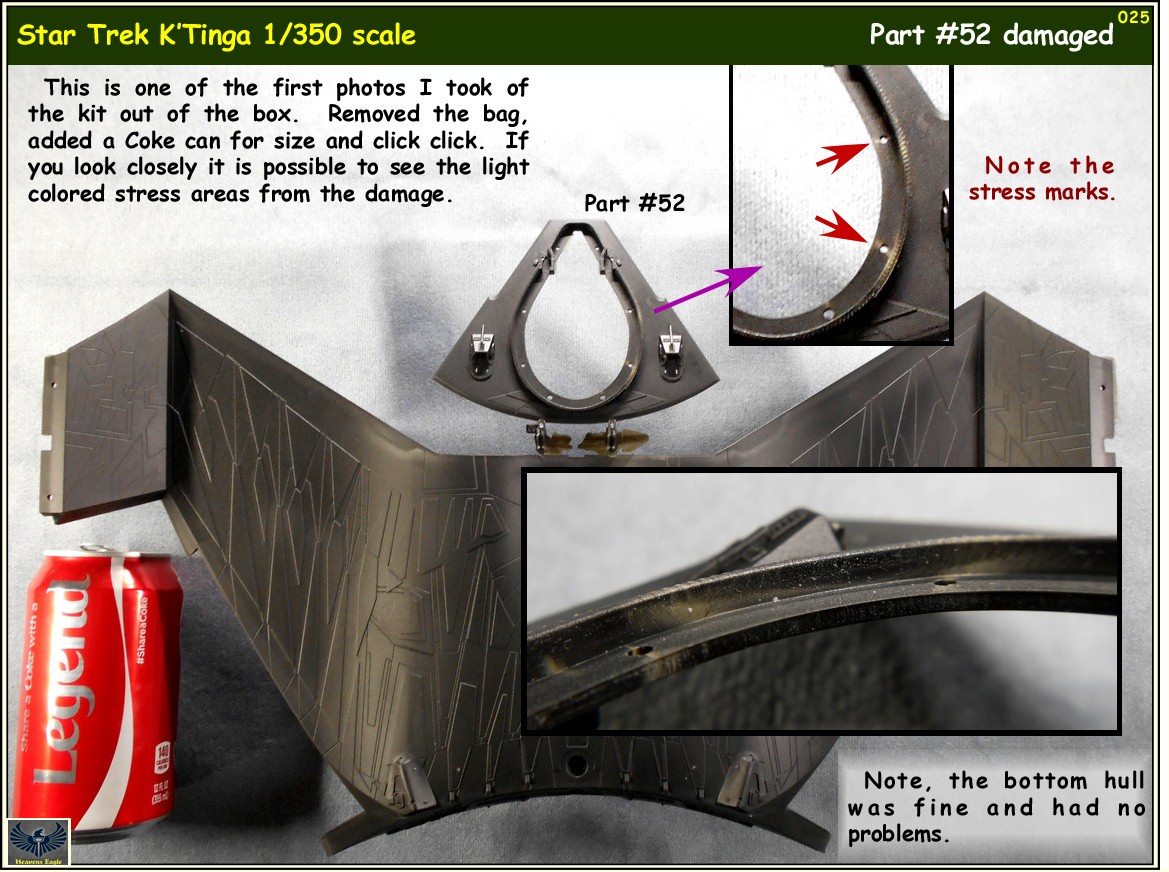
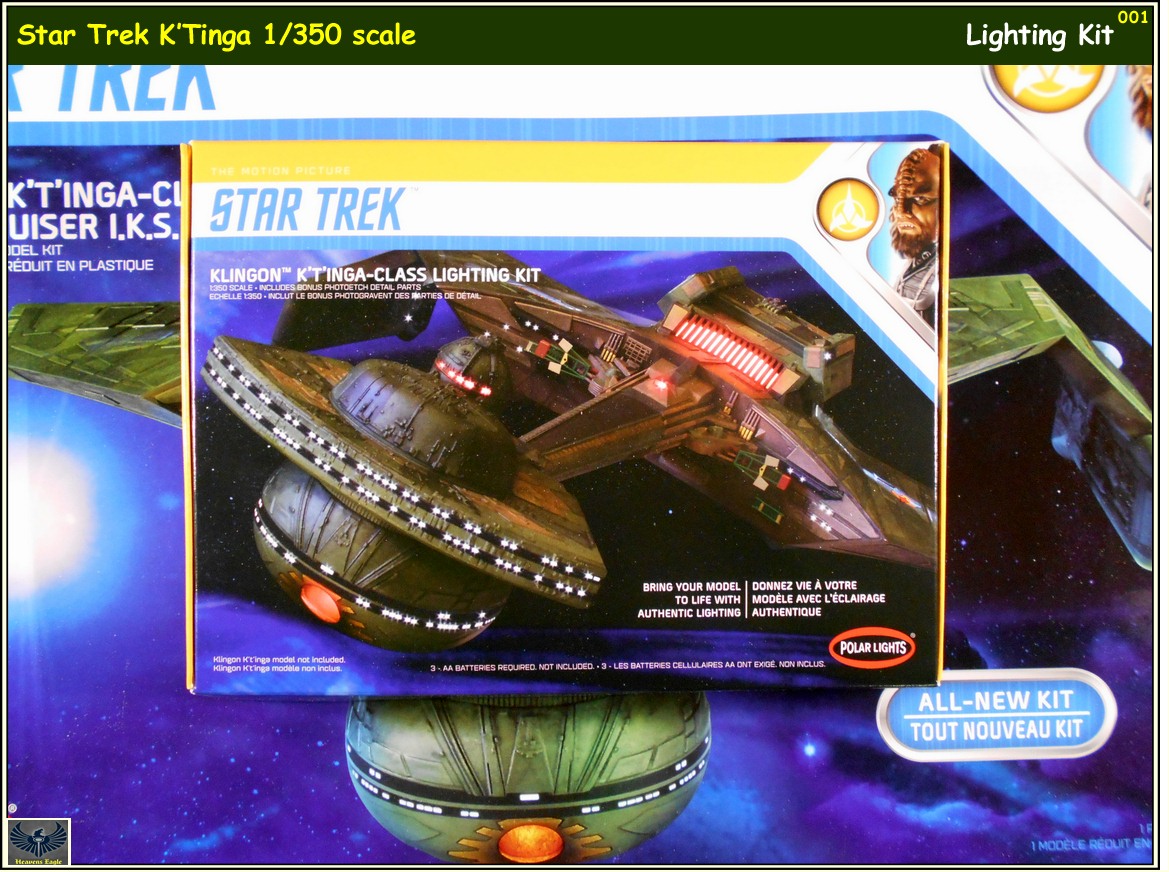
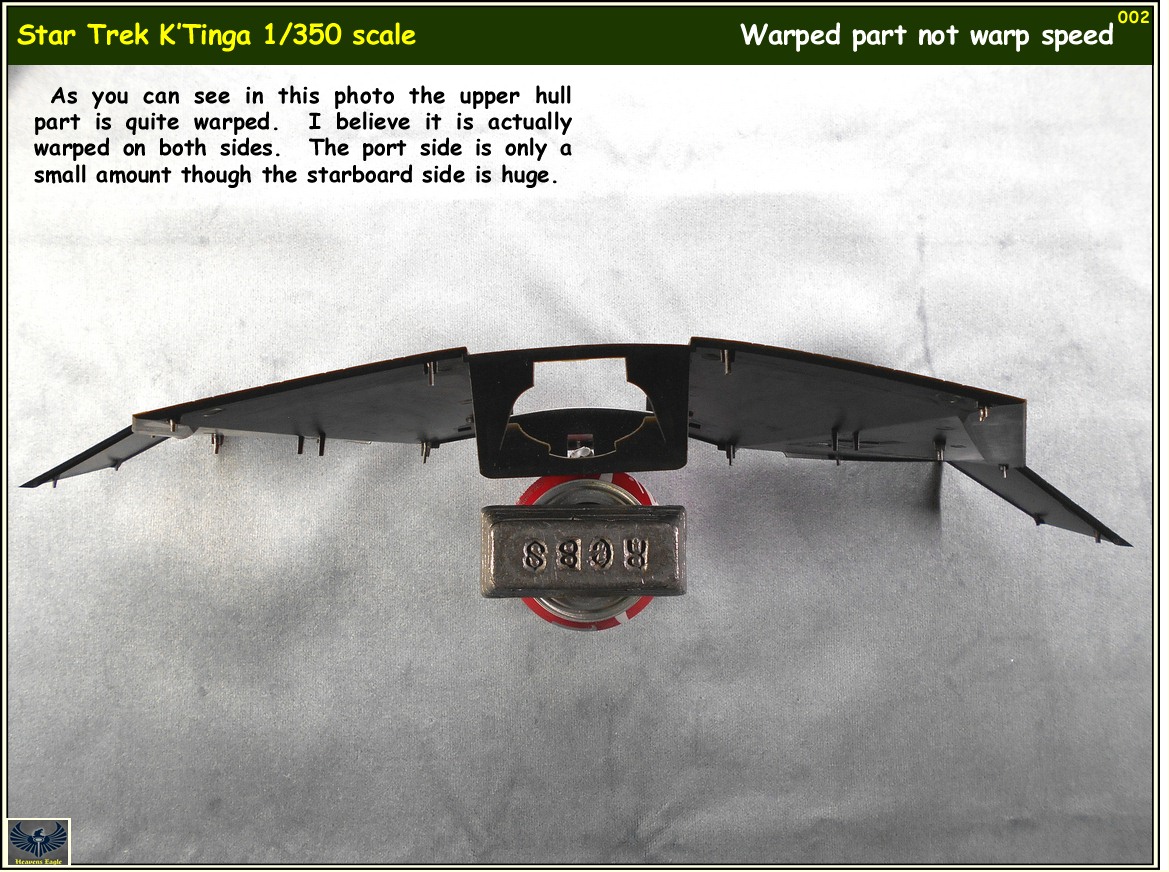
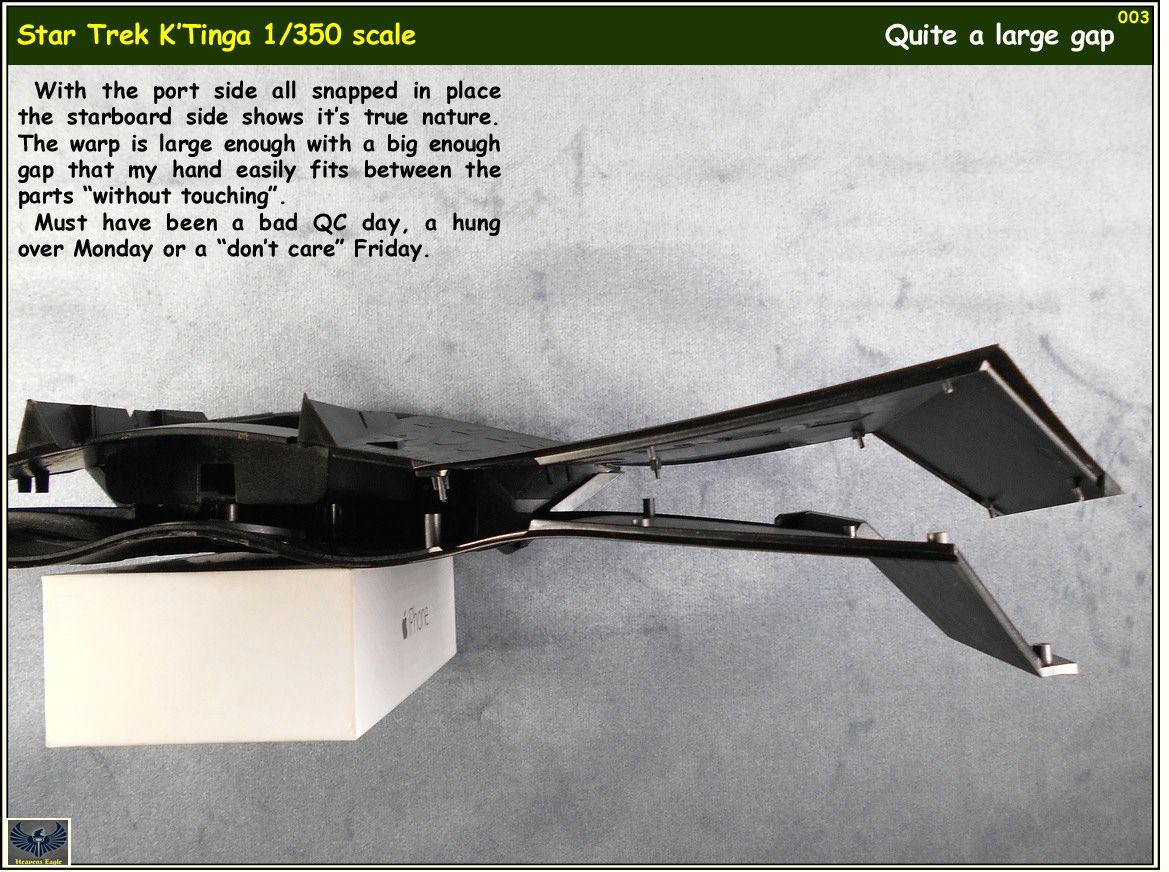
I finally broke it out Friday night to take photos for a "new release" post and discovered a BIG PROBLEM!
Then my back went out and I have had to take it easy :bang head

Yesterday I managed to become mostly mobile again and got the photos I wanted. And, The BIG PROBLEM kept nagging at me.

So, I started the kit and here we go. As it isn't for a formal build I am forgoing the usual start time thing though if anyone is wondering, the kit was released and I got mine just before Thanksgiving. The start is December 01 of 2018.

Here we go.

K-Tinga-000.jpg


K-Tinga-001.jpg


K-Tinga-002.jpg


K-Tinga-003.jpg


K-Tinga-004.jpg


K-Tinga-005.jpg


K-Tinga-006.jpg


K-Tinga-007.jpg


1696864023564.png


K-Tinga-009.jpg


1696864047596.png


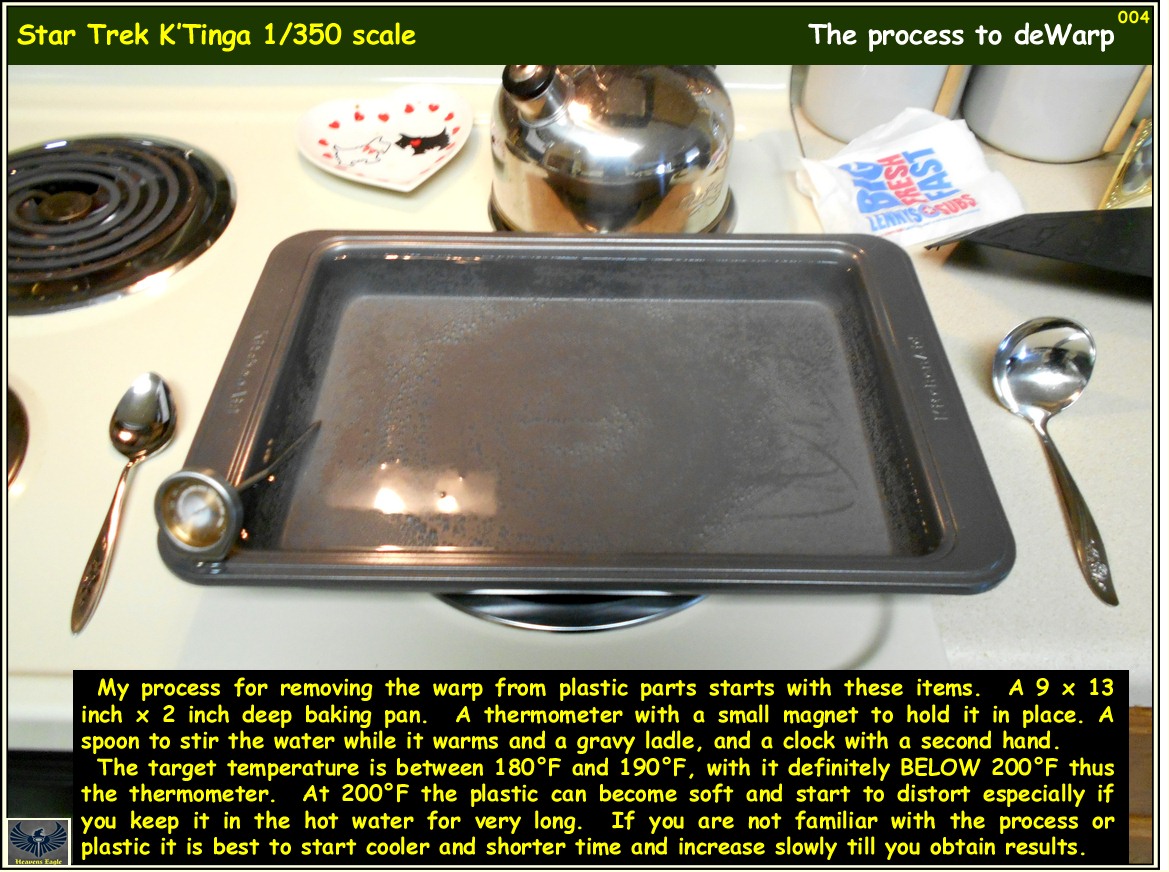
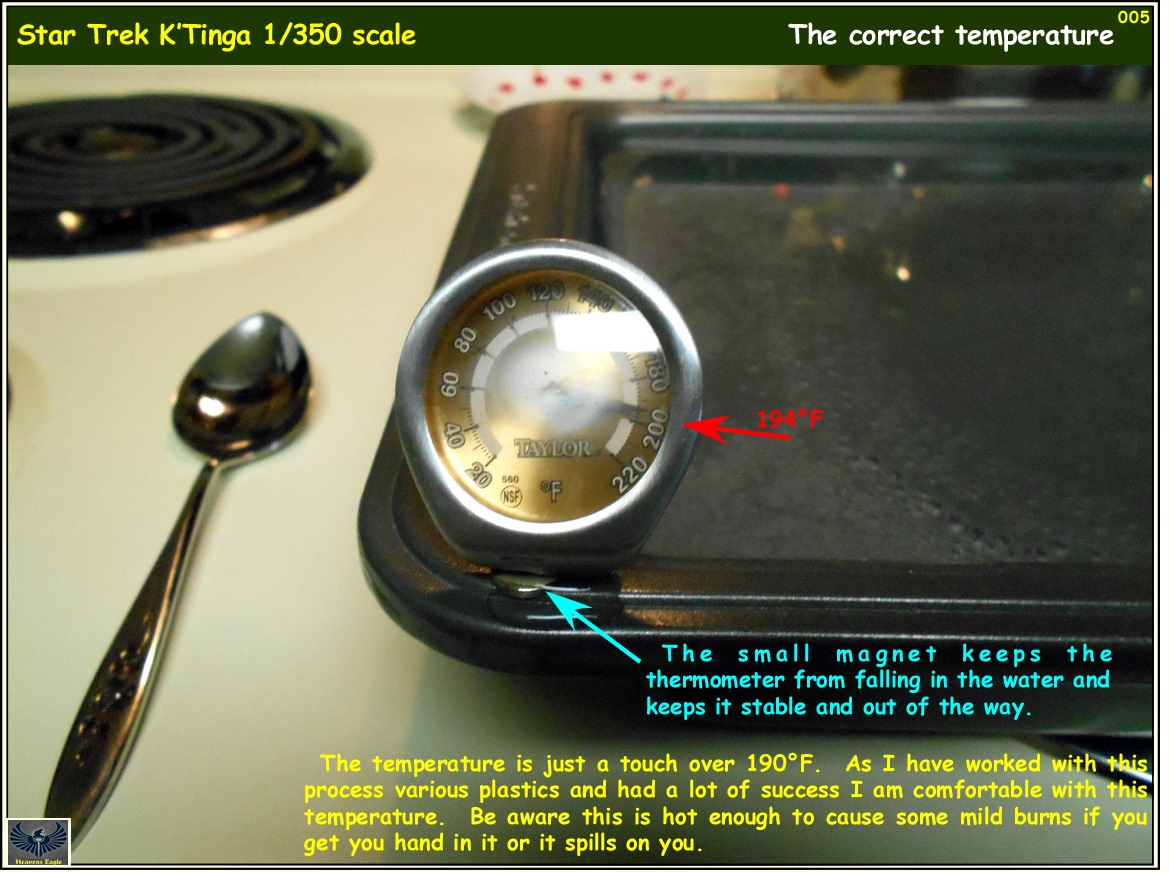
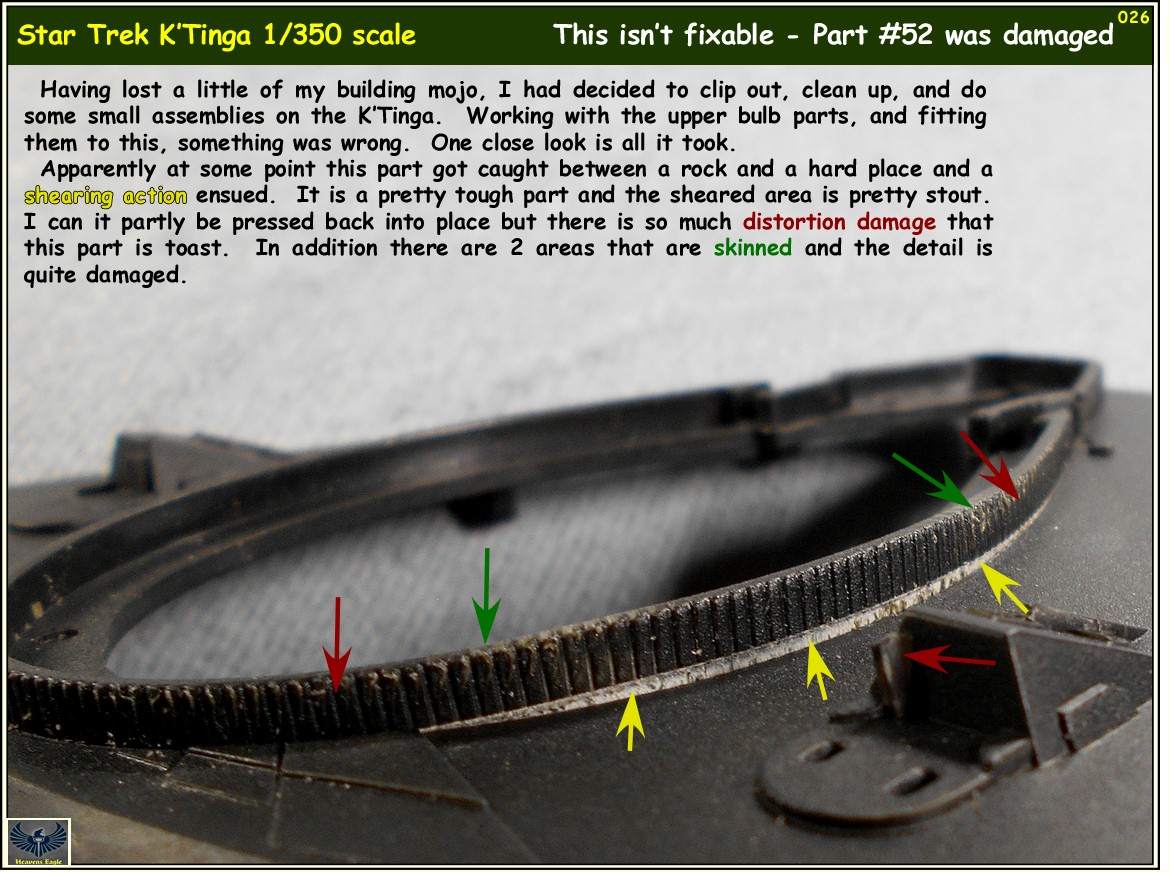
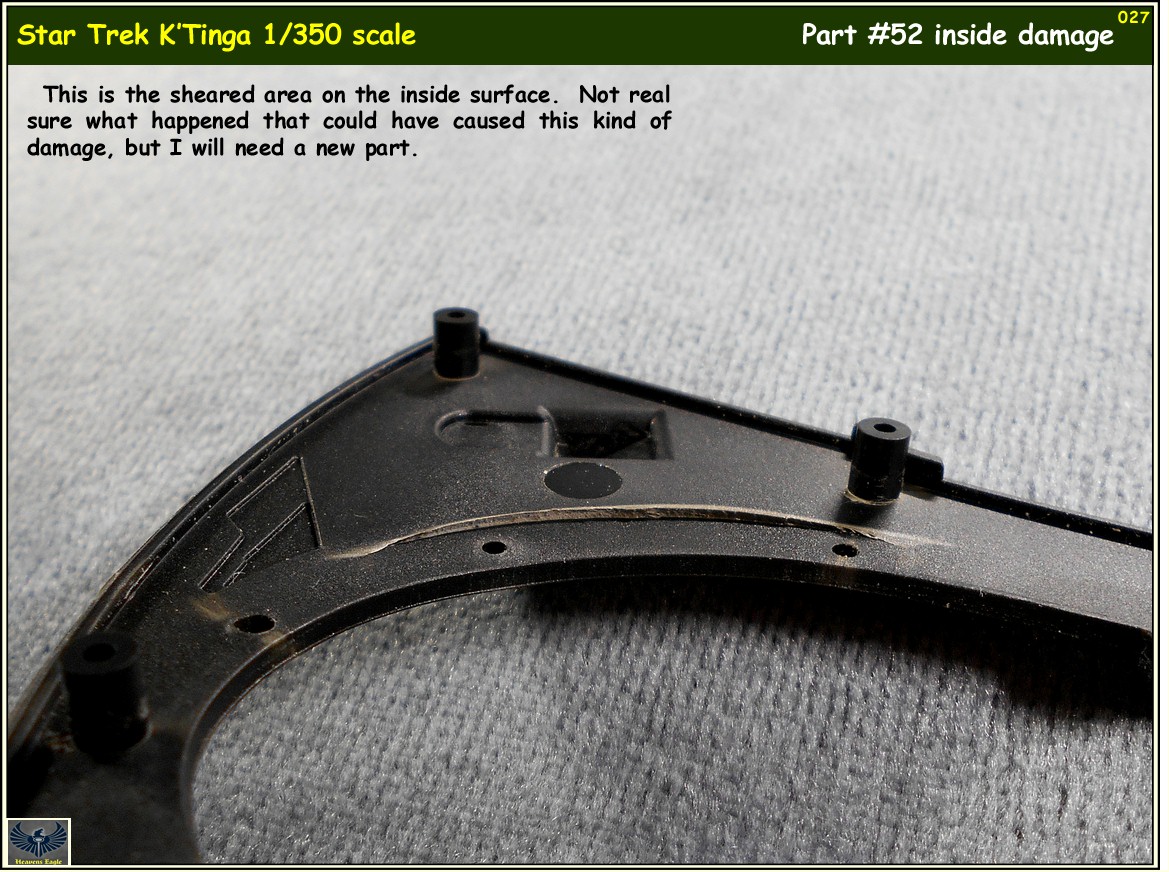
Now I am going to try and finish up something I already have in process. The messed up part was just nagging at me and I had to see if it could actually be fixed.
 
Thanks Bob! It actually went a lot easier than I had expected. Having done the process a few times made it a lot easier as I knew what pliability on the plastic I was looking for and pretty much hit right on first try. Also I got the majority of the warp out on the first try so the rest was just minor tweaks.

Now that the problem is solved I really want to finish up on the 222 build before starting something new.
 
Thanks Kenny. It is a really good looking kit, too bad it is having teething difficulties.

I was asked last night about the twist problem in the neck parts. This is the section between the head and the main hull. Apparently some folks are having no trouble with these and others there is a lot of twist to the parts. Since I was asked I went ahead and looked into it.

And....

Mine had a little twist warpage. Not much and most folks probably wouldn't notice, but it was easy for me to see. (too many years as a draftsman) So here is a batch of photos showing how I figured out what was bent and what was straight.

I know, I know, most of you think I am a little bent at times too don't ya. :geek

K-Tinga-011.jpg


K-Tinga-012.jpg


K-Tinga-013.jpg


K-Tinga-014.jpg


K-Tinga-015.jpg


K-Tinga-016.jpg


K-Tinga-017.jpg


To fix it I will use a little of my "hot water" method. As I am doing this for a bunch of newbie modelers on FB. There will be some more on it with detailed instructions on how.

Since both the top and bottom parts have plastic that is a bit on the thinner side and not much internal support I will have to take it easy, but that is part of the challenge as well.

In addition TenaControls is about to release an initial electronics lighting kit for this. It will be $95 and work with the Round 2 lighting kit for the initial release. Apparently he is planning on a full blown kit right after that.
 
Getting some prodding from folks on the FB K'Tinga build site has had me going a little more on this. Have had some input on the TenaControls lighting board effects as well on there.

Yes I
quote.gif
HATE
quote.gif
the whole FB format but sometimes you just have to deal to get any info. Might be a good thing in the long run as I got the attention of the Round2/PolarLights guy on there and he asked for a copy of my photos to his work e-mail. :idonno

Anyway, I have fixed the twist problem with the neck parts now and here is the process for that.

K-Tinga-018.jpg


K-Tinga-019.jpg


K-Tinga-020.jpg


K-Tinga-021.jpg


K-Tinga-022.jpg


K-Tinga-023.jpg


K-Tinga-024.jpg


As I stated there is enough flex in the neck parts where it is possible to introduce twist to the assembly. Thing to do is assemble, check, add solvent glue, check, adjust as needed, set aside to dry fully. While the instructions have the assembly of the neck going with other parts first I believe that these 2 parts need to go together first then add the other parts.

This kit is definitely one of the best detailed Star Trek kits I have seen, it is having some teething problems. I believe most of that will be ironed out with the next shipment batch and some folks are really unhappy with what is going on with the first batch, it is by far one of their best kits once you get past the little problems. The detailing is really quite crisp on the parts and with a little work it should turn into an excellent build.

I had not really intended on jumping on it so soon, but it just sort of jumped up and bit me in the hind quarters.
 
Actually it appears that most of the folks that got the kit have had little trouble with it. The fact that I just fixed it, showed how in a positive way and didn't raise a big stink over it got his attention.

Catch more flys with honey than vinegar.

Actually the detail on this kit is some of the best, crispest, and seemingly accurate I have seen on about any of their kits. Once I straightened the parts they also seem to fit pretty good too.

In my book Italieri and Academy kits are the worst. Trumpeter kits have a lot of trouble with inaccuracies. :bang head
 
Fantastic save and pretty good attitude towards the issues, Paul.


Following with interest, hope your back is doing better.
 
Thanks Jeff, have dealt with the back problems for about 40 years. It goes great for a while then I get a reminder. Can usually get it realigned within a day and 2 or 3 to get the twinges worked out. I learned.

As to the kit, I had more fun fixing the warps and doing up the fix process than I would have if it had been perfectly straight. Probably will be a win/win situation all the way around. (y)

Also had a thought today on a mod that I want to do. There is a view port right at the front of the neck facing to the rear. On the movie prop, it was just painted in place. The kit actually has some really crisp window frames in the area for it but is intended to be painted.

Guess what I am thinking of doing. :D

GOT_to_be_Kidding.jpg
 
As I have been fighting lack of building mojo the last couple of weeks and since I had K'Tinga all over one of my benches, I thought I would just clip some parts out and do some fitting, cleaning and build some small sub assemblies.

Yeah, Right!

Part of this was going to be figuring out a way to make the windows more viewable without enlarging them. I was also thinking that I would pass on using the PE for the windows. Several concepts are going through my head on this and I believe that it shouldn't be all that difficult to do, but more on that at some later time. For now I am shut down as one of the main parts was FUBARED from the box.
face-plant.gif

I should have caught it a week ago but have never seen this type of damage before. I also then discovered a new level of WARP drive.
duh.gif


(sigh)

Anyway, I sent some more info to the Round 2 guy and here is the next installment such as it is.

K-Tinga-025.jpg


K-Tinga-026.jpg


K-Tinga-027.jpg


K-Tinga-028.jpg


K-Tinga-029.jpg


K-Tinga-030.jpg
 
Hey Paul, really enjoyed dinner with you the other night and thank you for the gifts, hope I do them justice!

Looks like you need a good hammer or this thing. :popcorn
 
Thanks Bob! Really enjoyed getting to meet you in person and enjoyed dinner as well. Still planning on going to Chattenooga in August. Wish they had a little more info on when it actually starts and ends. At this point there should be at least a tentative schedule for the start and finish. Looks like the hotel I will be at is a couple blocks away if I haven't waited too long for that one.

As to the kit for the most part I think I got a bit of a lemon. There are a number that are already mostly built by folks out there. I have plans though so it is going to be an on and off build until I get some info and some new PE is done by ParaGrafix.
med3d-ennuye.gif
 
Just a little update. I have been working on this as of late. The kit is reasonably accurate aside from the warped parts. In this update I have some fixes that are from mold problems. the first is a flaw the second is just how the mold has to be made. Too many curves and edges. Finally a little thing that I chose to rework as it is something fairly simple.

K-Tinga-031.jpg


K-Tinga-032.jpg


K-Tinga-033.jpg


K-Tinga-034.jpg


K-Tinga-035.jpg


I have been dragging my feet a little as I have needed to get the PE sets from ParaGrafix. They just released their shuttle hanger mod and the other is one I wanted for the engine grills and a few other little bits.

Then I also finally ordered an Arduino beginner kit with a book on programming. The K'Tinga has fairly basic lighting unless you really want to get crazy with the fading up and down. While TenaControls has a new lighting set out, there are some things about it I want to improve and change. Plus there are a number of other kits I want to go crazy with lighting up so it is time to learn the programming aspects of this so I can do my own thing.

Aq-275.jpg


Aq-276.jpg


Aq-277.jpg


The hardware aspects of this are going to be fairly easy for me. I already have located a source for chip LED's at costs of about $0.23 each in 100 qty. Chip resistors even cheaper. Yes I can hand solder that stuff quite easily, had LOTS of practice. Just need to get the programming down to get things to do what I want. :D

Puter_head_bash.gif
 
Wow, what tremendous progress! Nice fix on the irregularities. This is going to be most impressive when done; watching it come together is even more fun! Keep it coming Paul!
 
Sweet.

In my experience with Arduino, the frustration comes from there being quite a few different ways to go about anything. Mostly surrounding timing. The easiest way is to copy and paste code that works, over and over. Don't worry about having super long scrolls.

I really got into the weeds with individual servo movements, defining distance and speed. I was doing the Derelict model and needed to individually adjust each servo so they all closed at the same time. There are a lot of issues with that, I ended up going with the analog way: physically adjusting the control rods instead of getting fancy with code. I can get it to do want I want in the straight forward Arduino way, a series of commands in order. I can't seem to wrap my head around the nanosecond timing thing which is what is needed for simultaneous movements that are independent of eachother. :frantic
 
Back
Top