• Modelers Alliance has updated the forum software on our website. We have migrated all post, content and user accounts but we could not migrate the passwords.
    This requires that you manually reset your password.
    Please click here, http://modelersalliance.org/forums/login to go to logon page and use the "Forgot your Password" option.

The last stop.

Le2

Member
I show what I'm progressing slowly in recent weeks between one thing and another .... The story goes back to the old Russian project The experience of the years....this proyect its frezze at this moment because i not very happy whit the idea and i try to do something bigger and with a Panzer IV N. So after this first fail tray I began to research on the subject: wedgie.

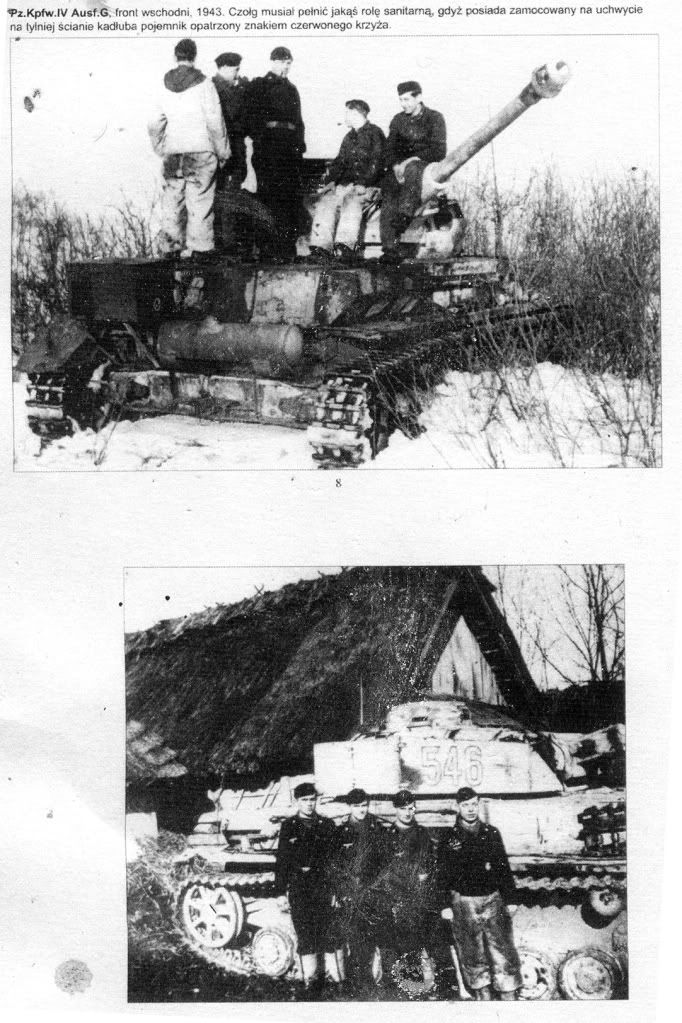
Dariusminiature references are a delight to the eye but ..... there is always a but ... do not bring anyone to Argentina.
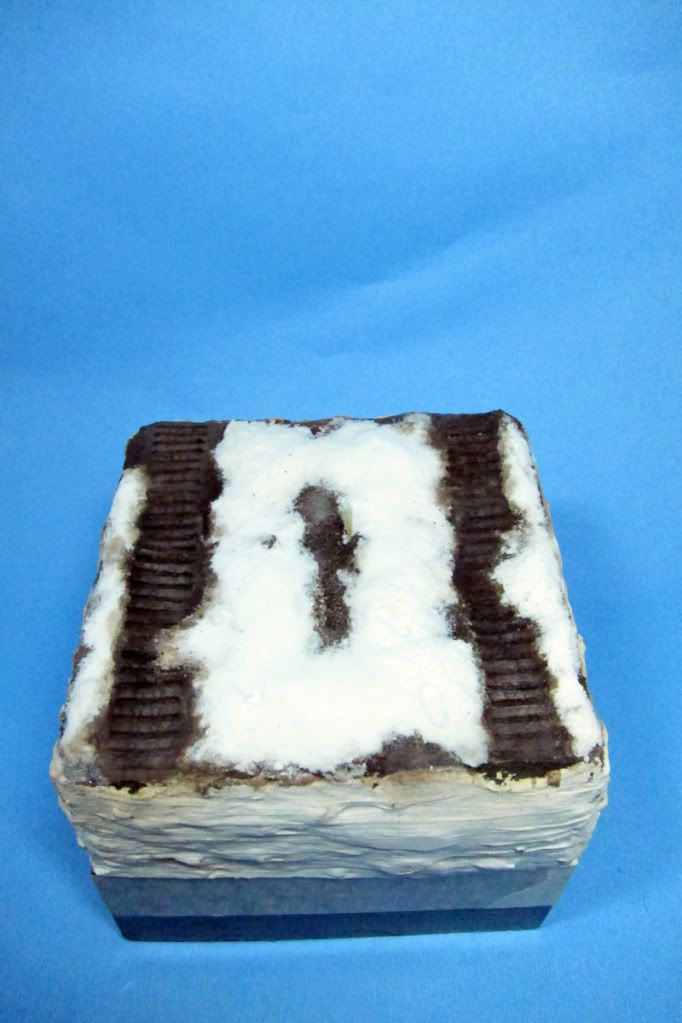
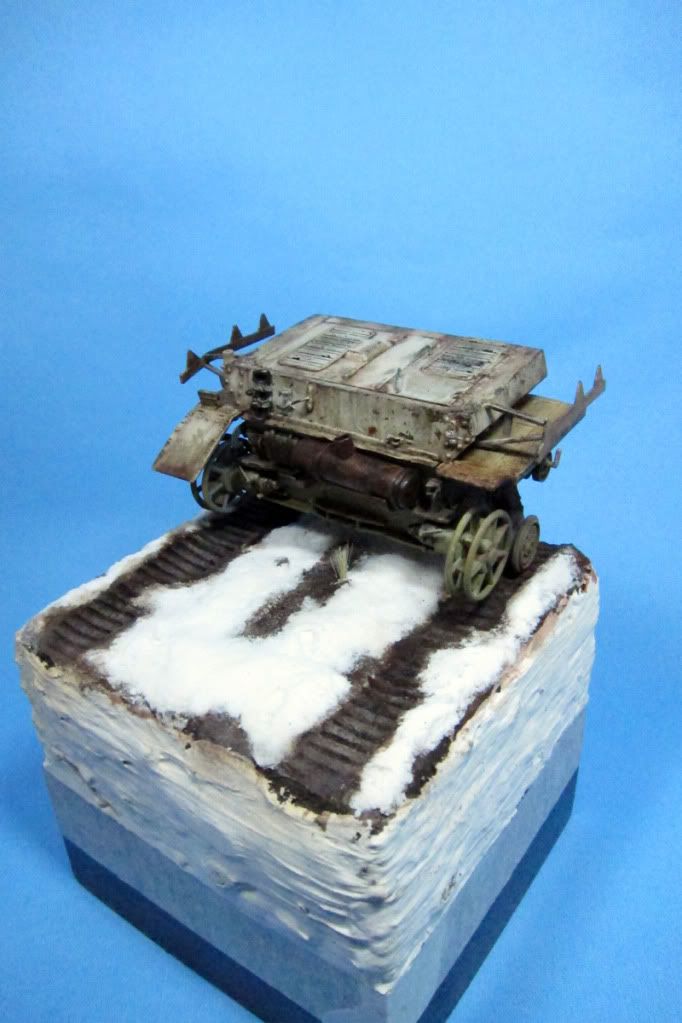
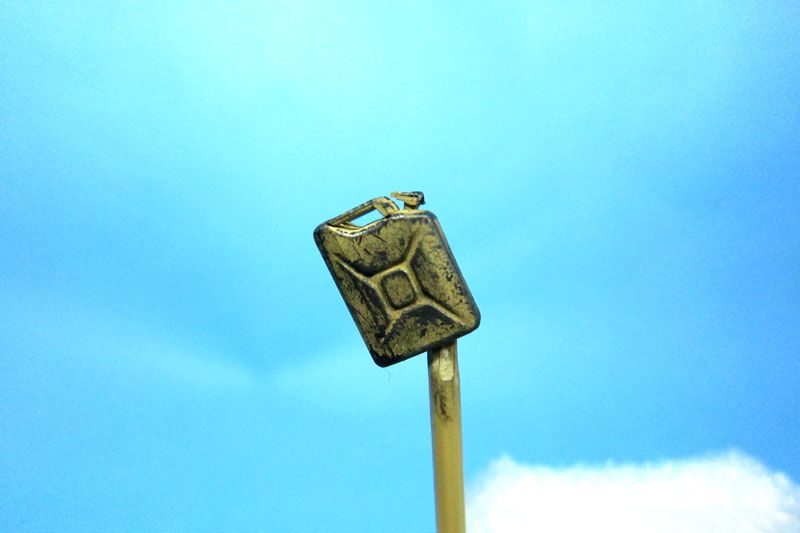
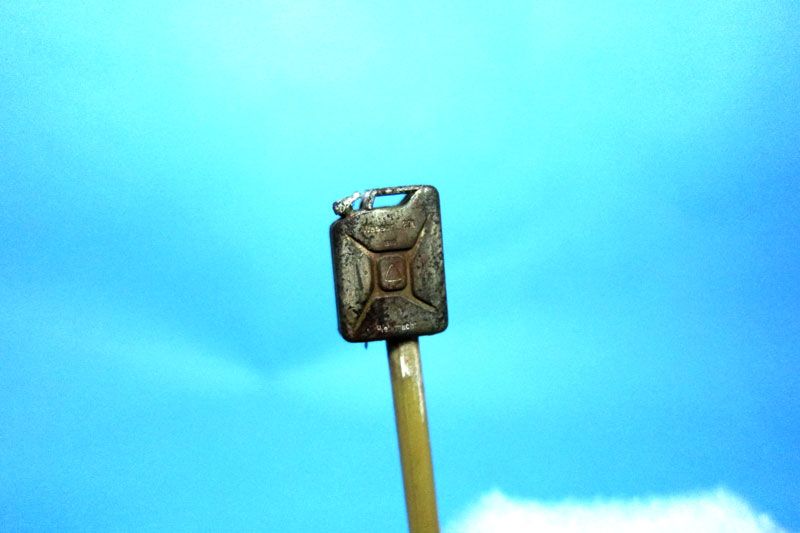
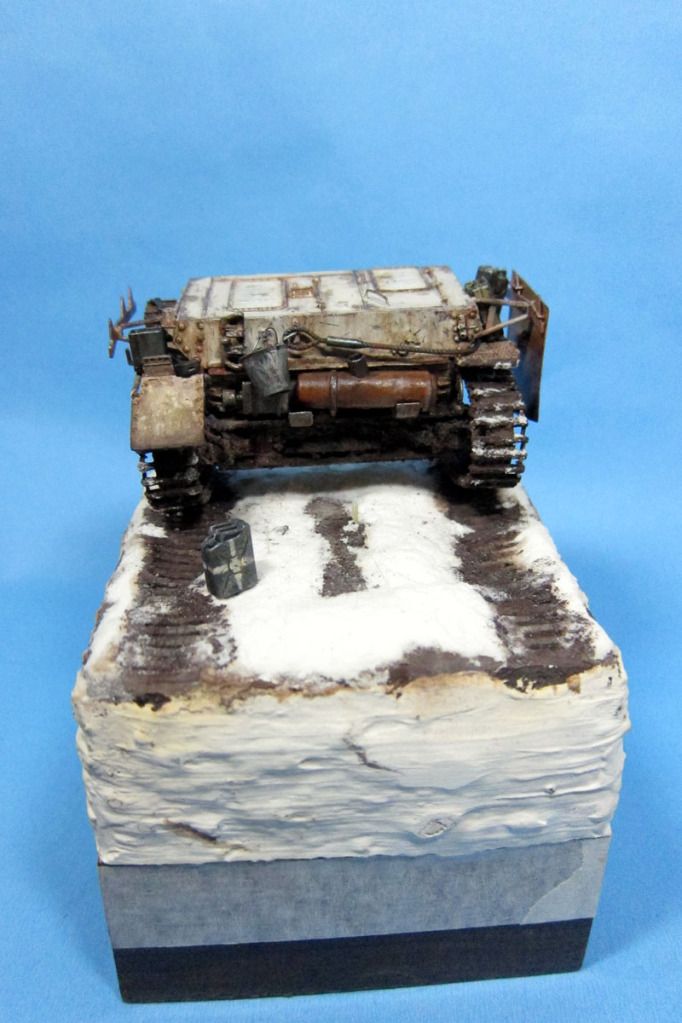
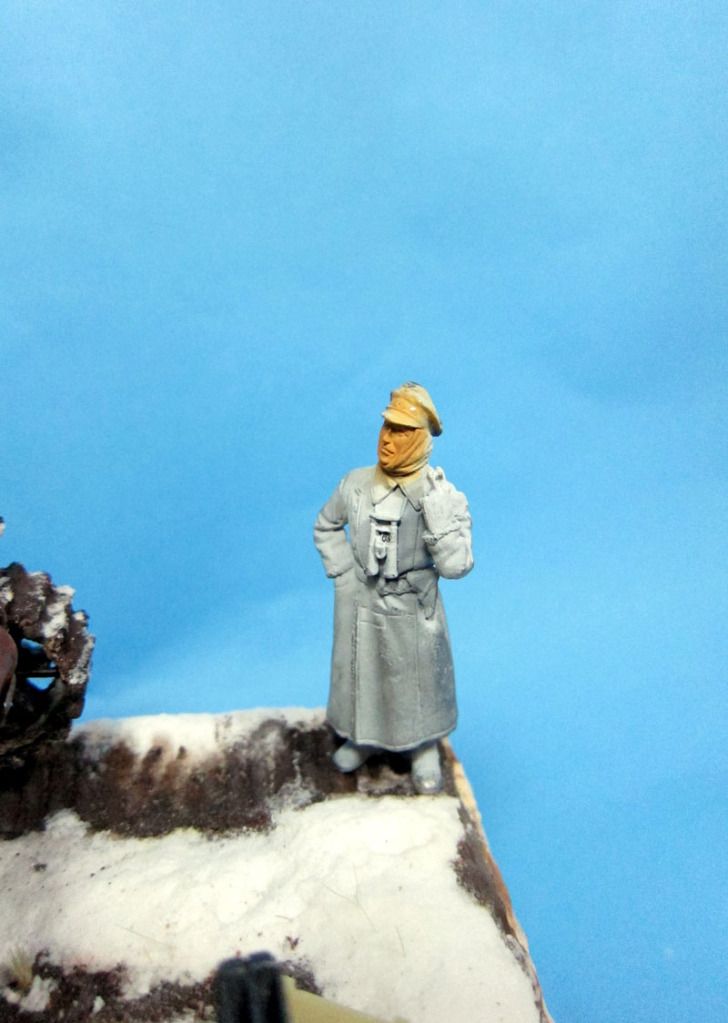
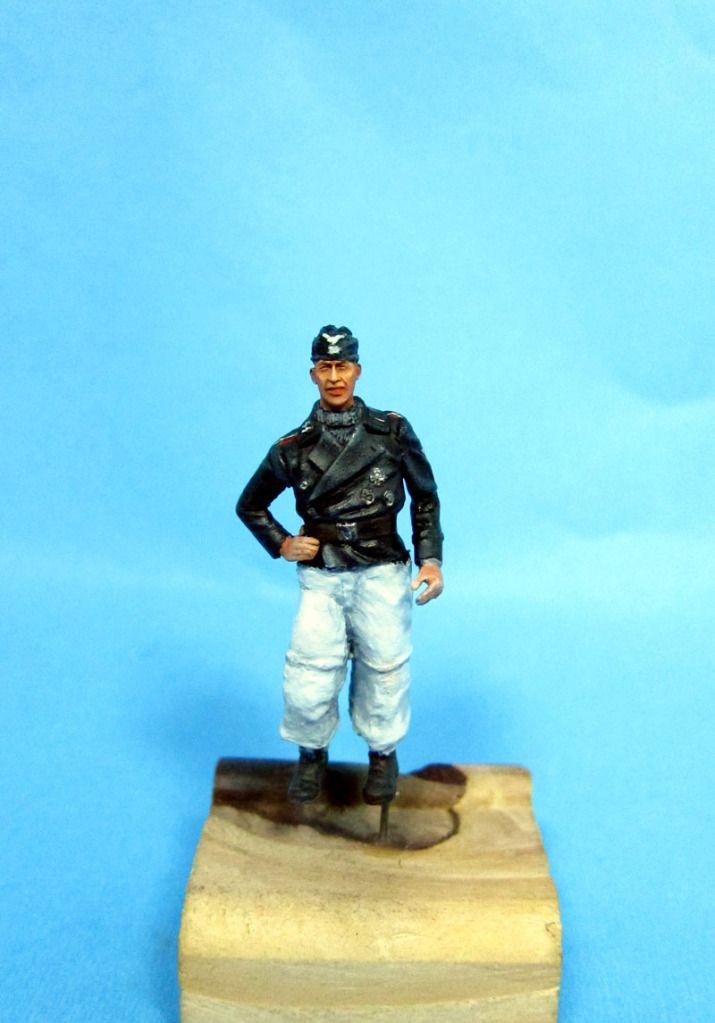
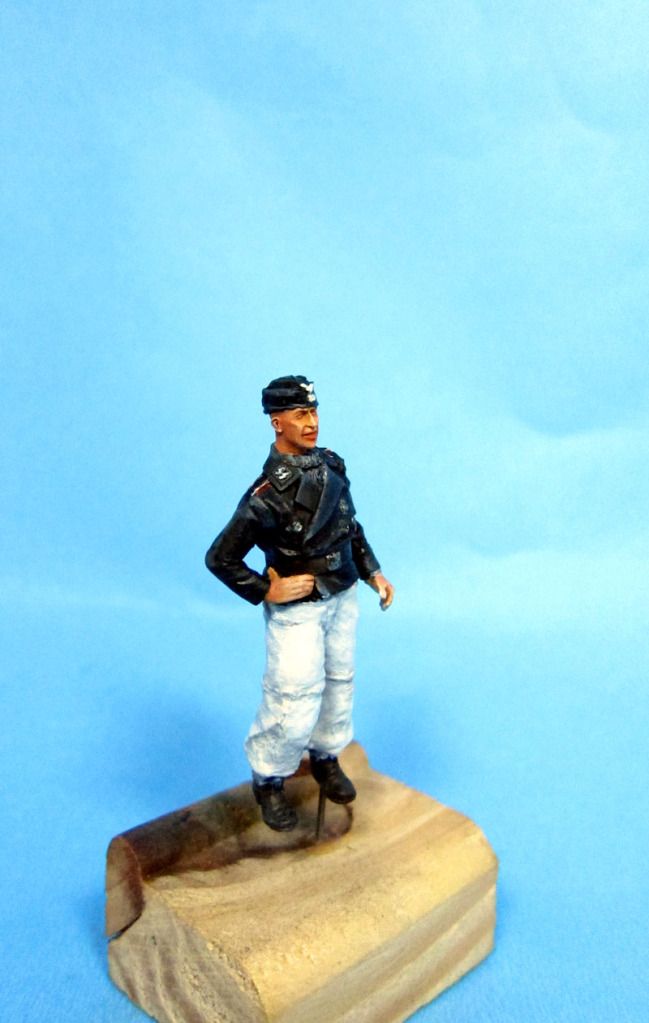
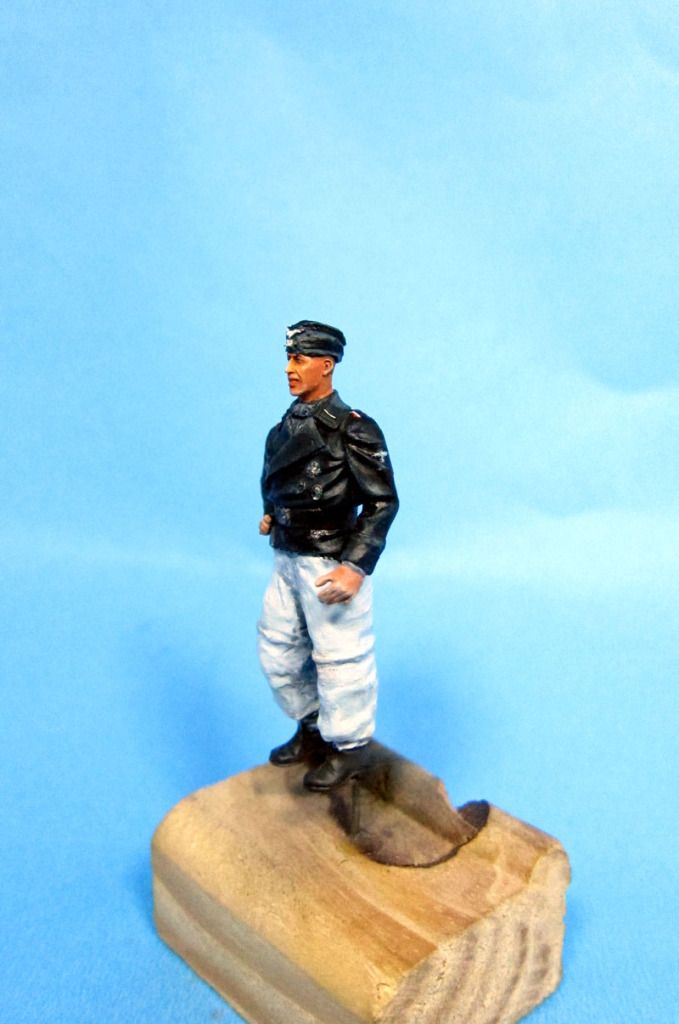
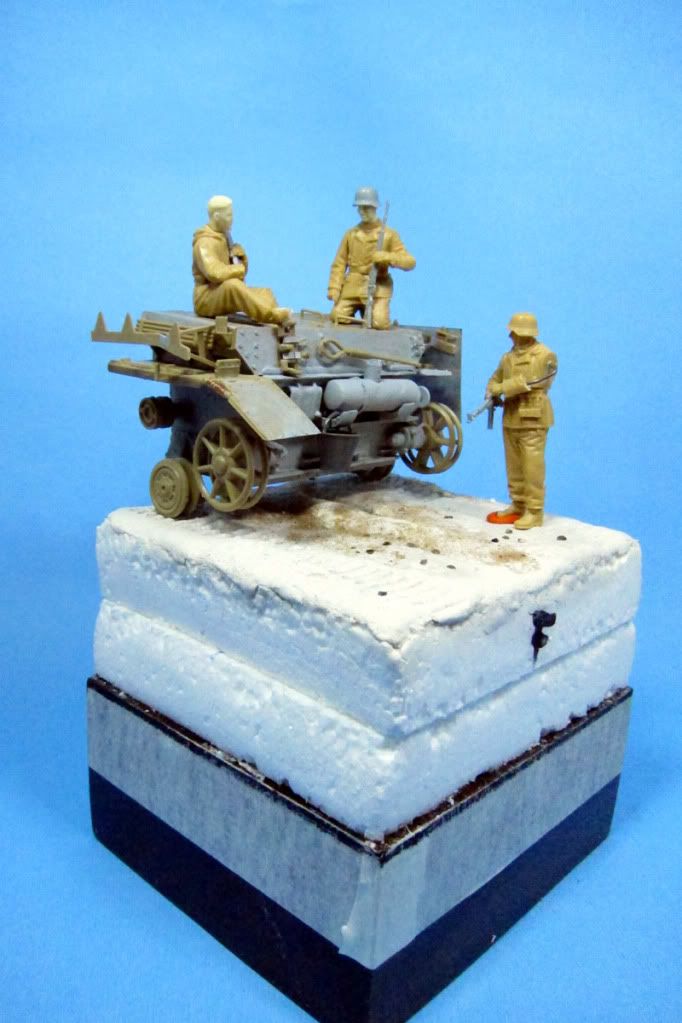
I also wanted to try several things. To learn some techniques on a vehicle before painting 250-1, trying to generate some interesting history in small space, try a semi snowy ground, keep hammering away with figures and i have the little pedestal 10 x 10 cm I was out of use after the project aside from the old Russian..

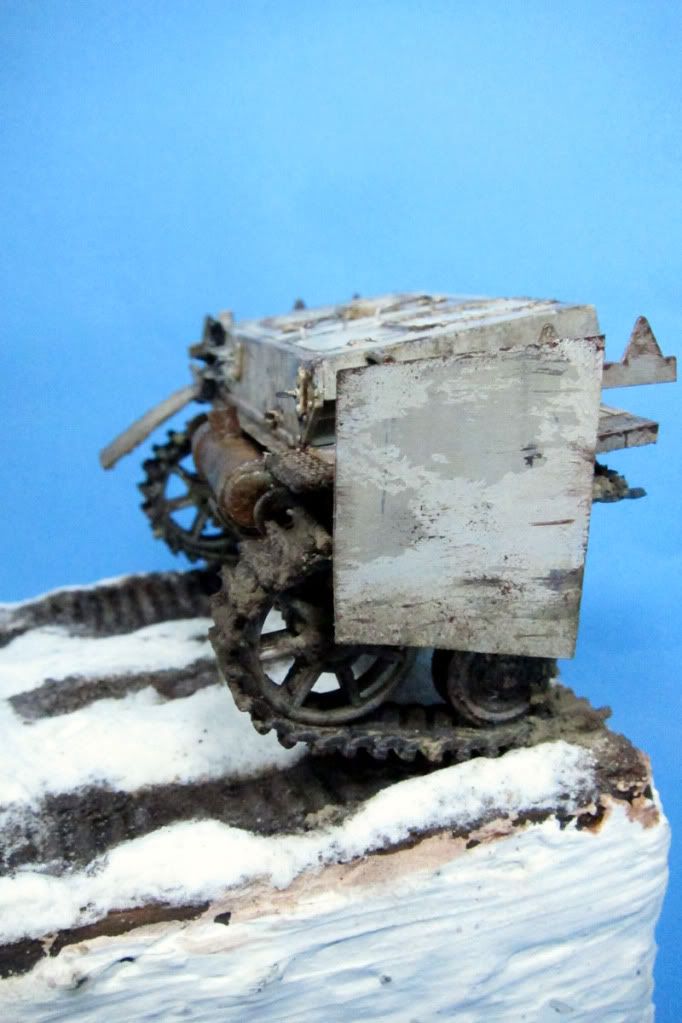
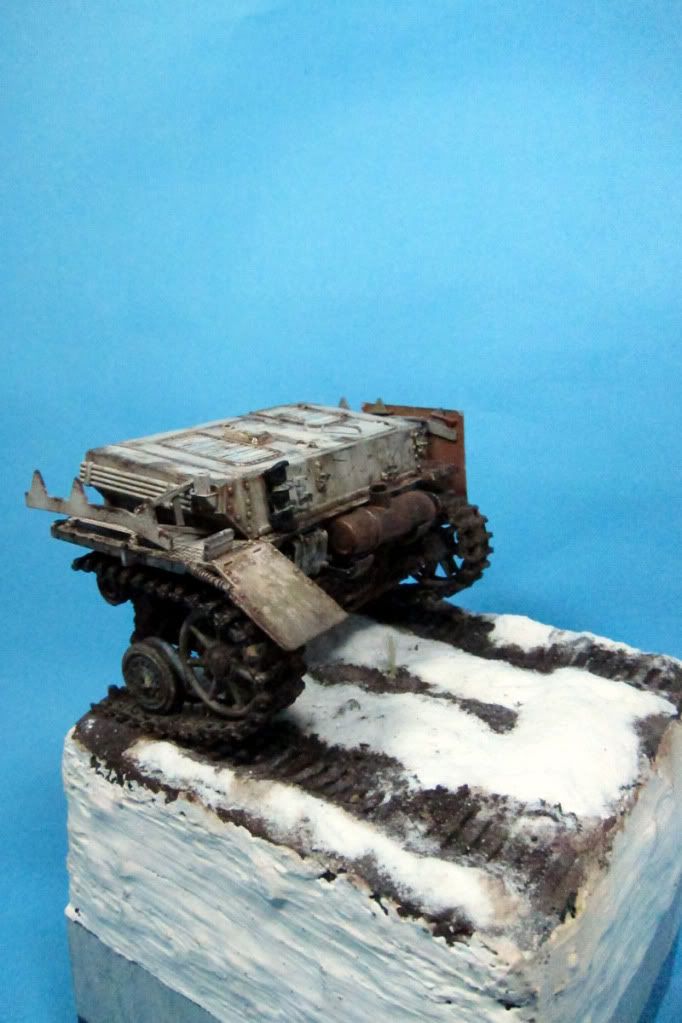
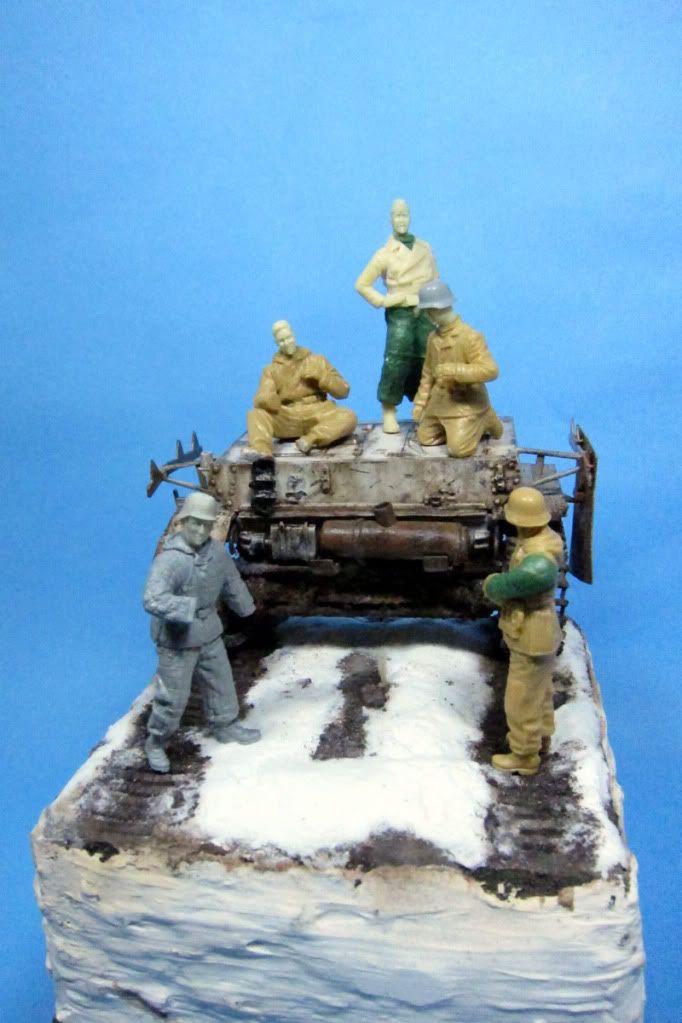
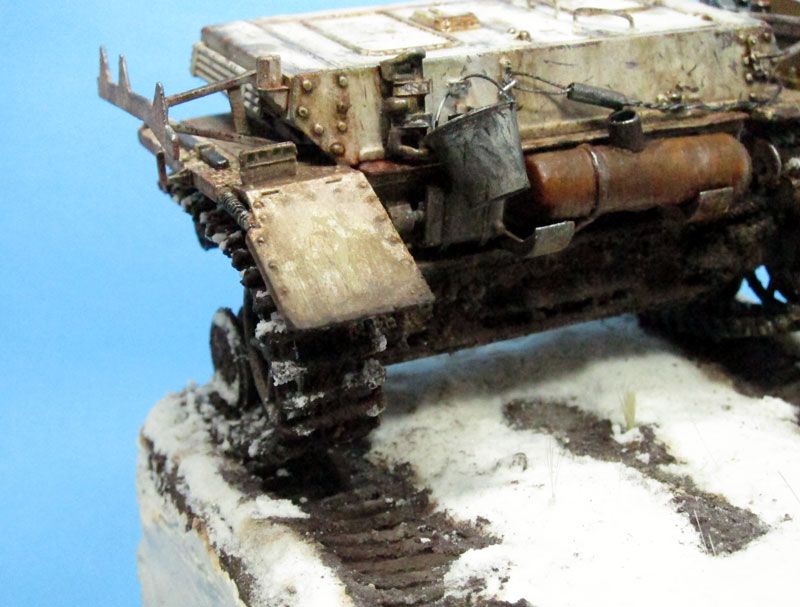
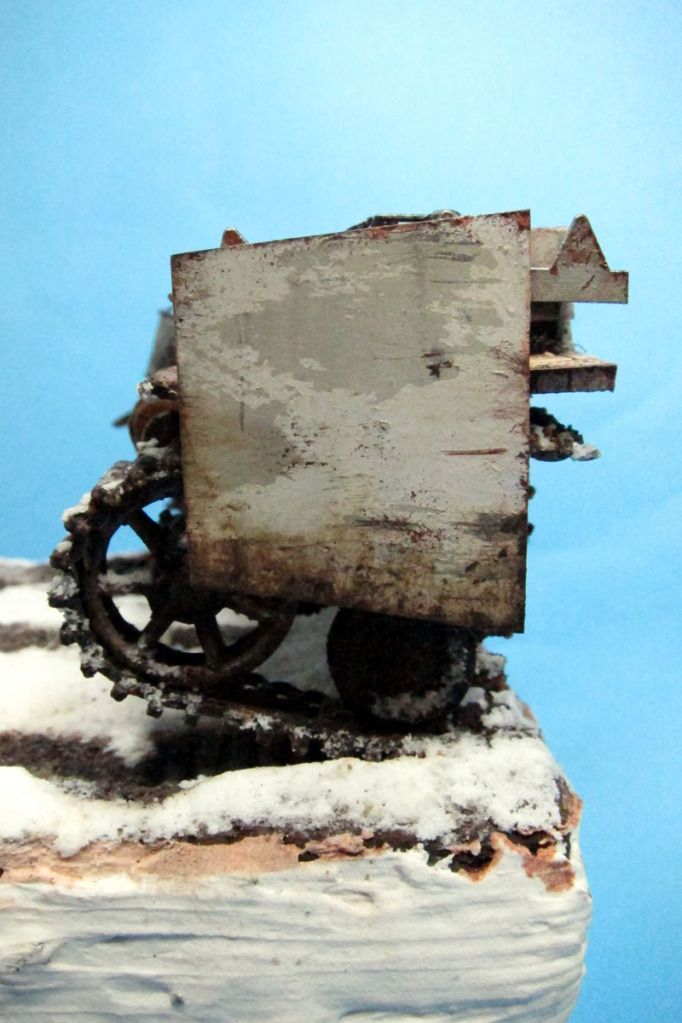
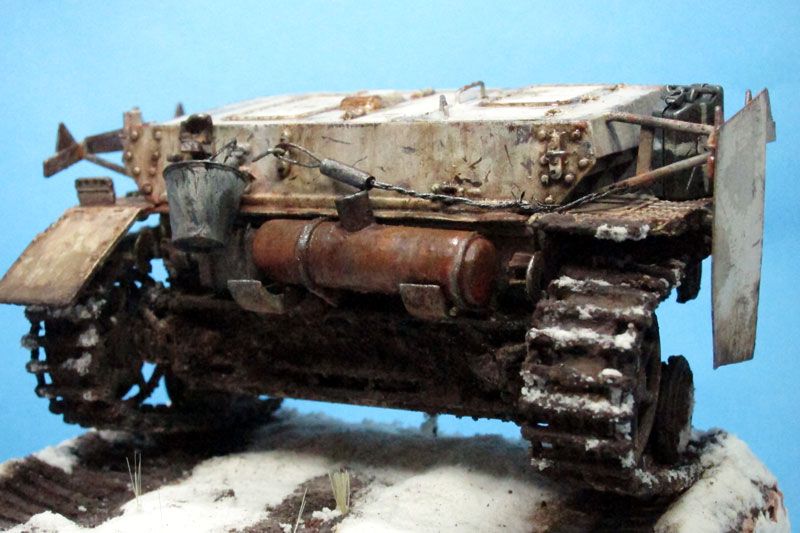
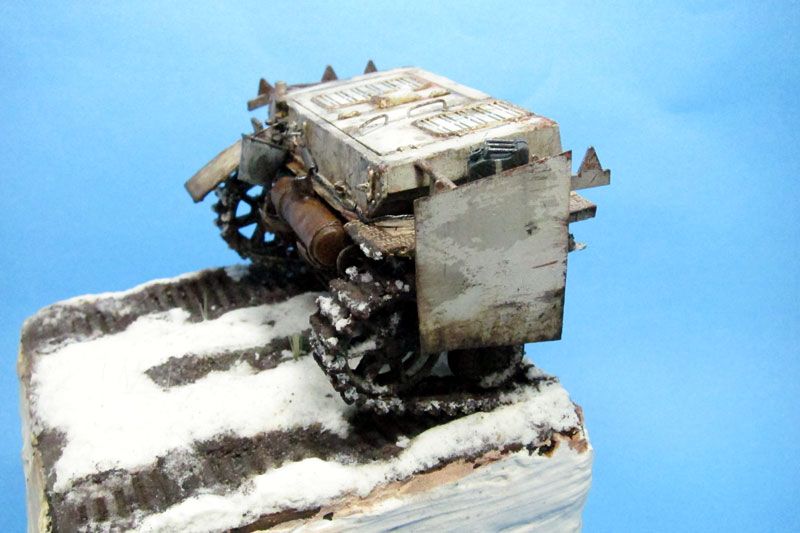
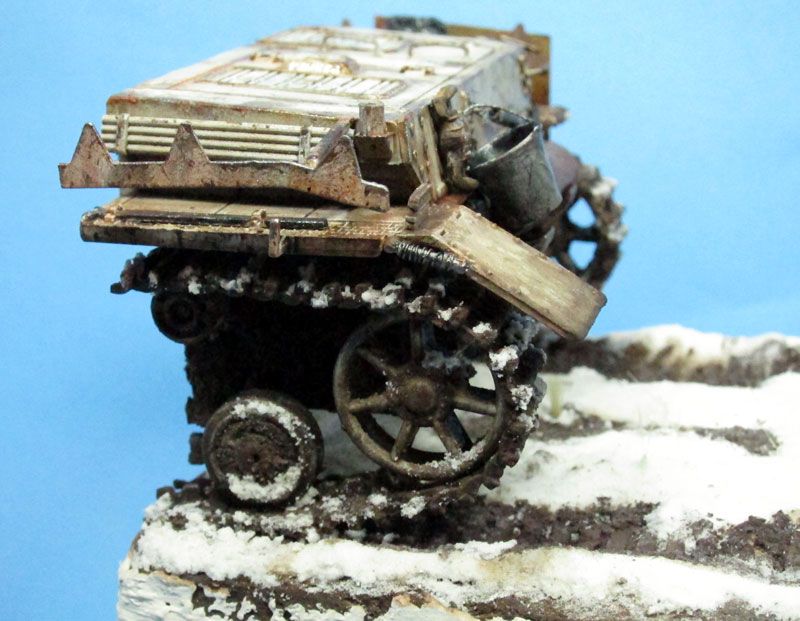
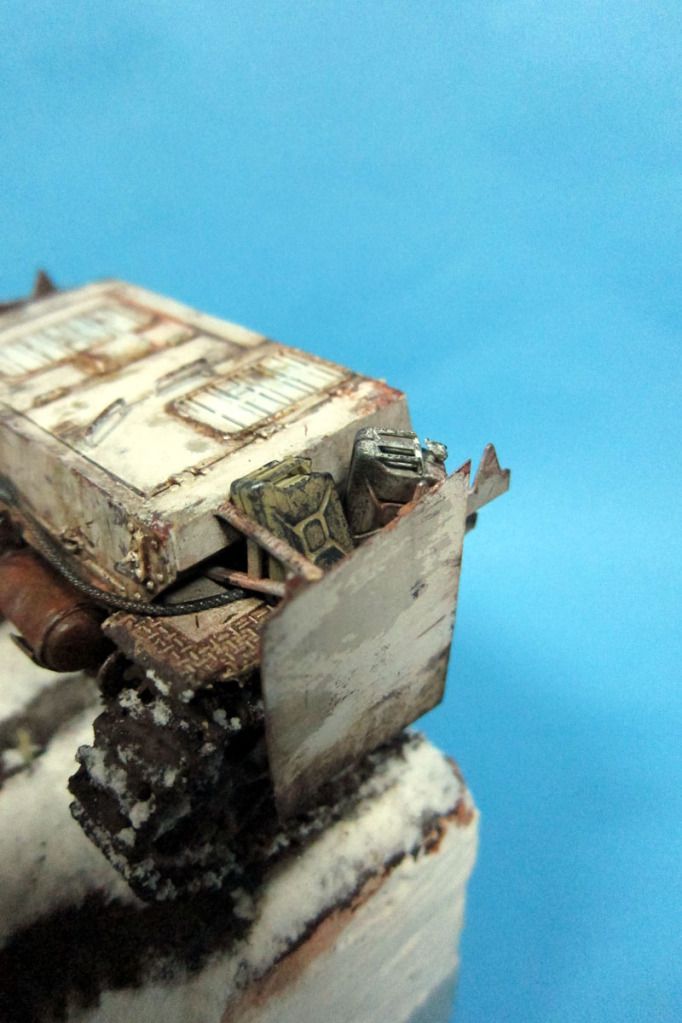
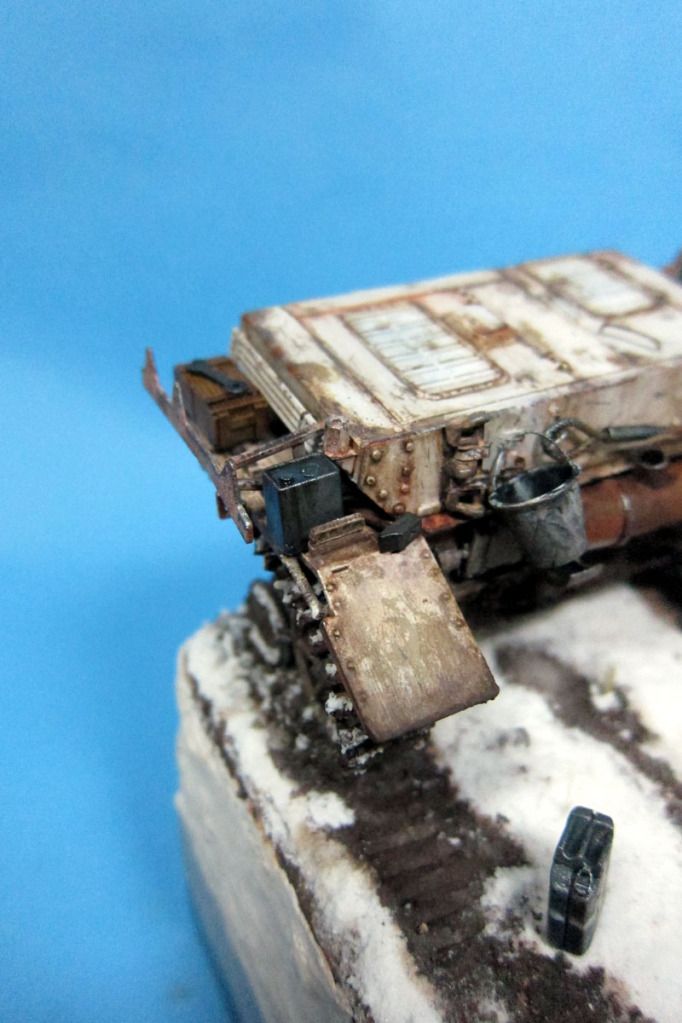
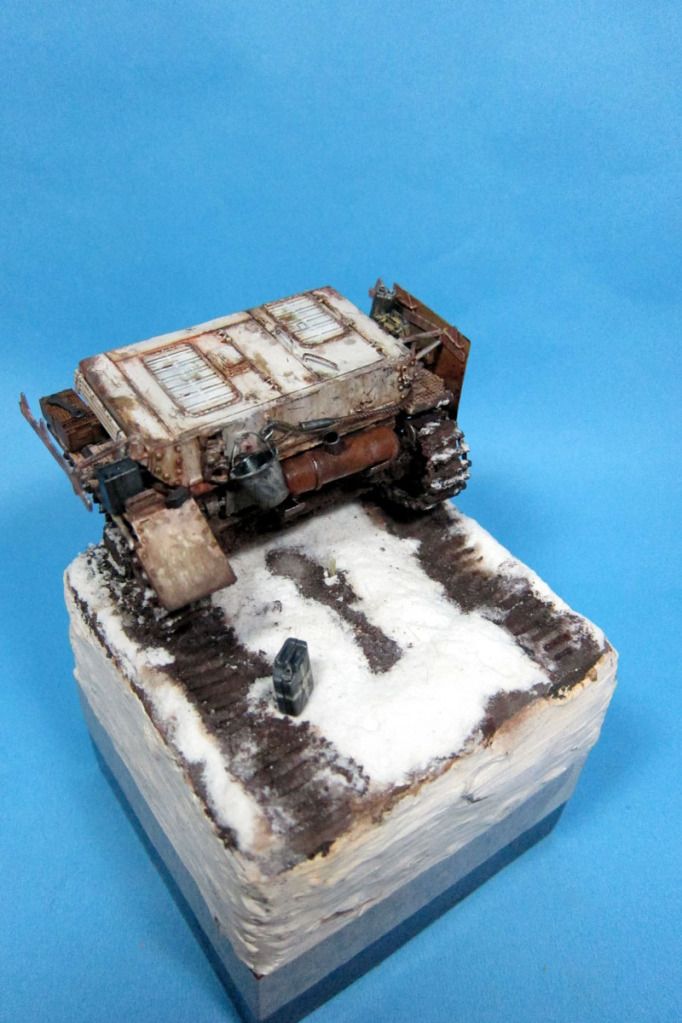
So after much thought and much to look at the references I decided to cut the Panzer IV at the Academy I found most useful and less complicated measuring the turret on the scene not to let me have a scene in pedestal.

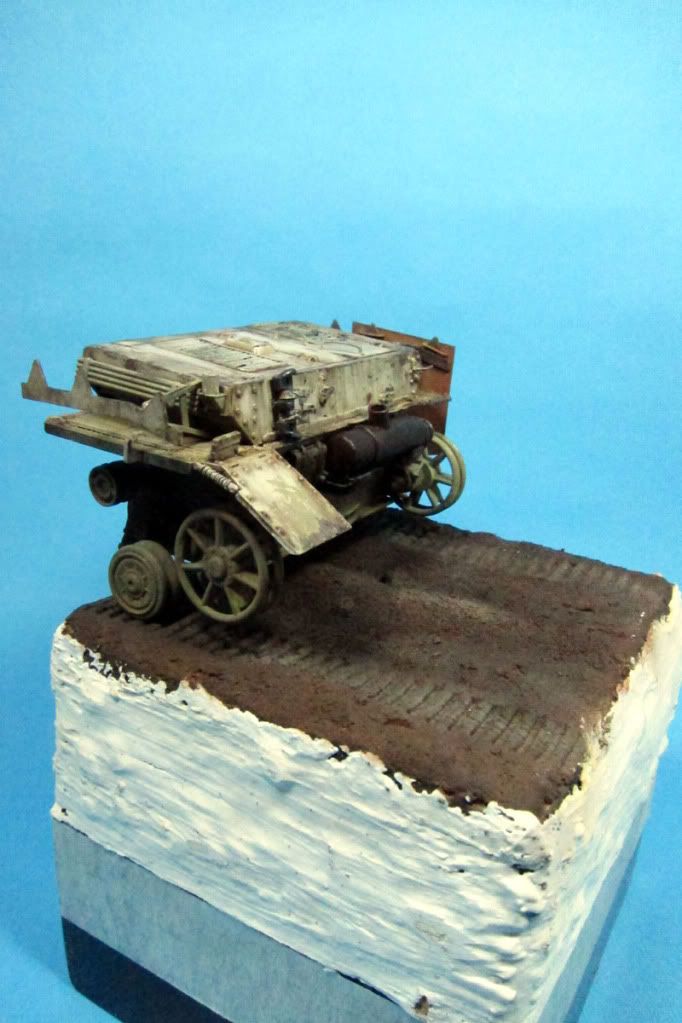
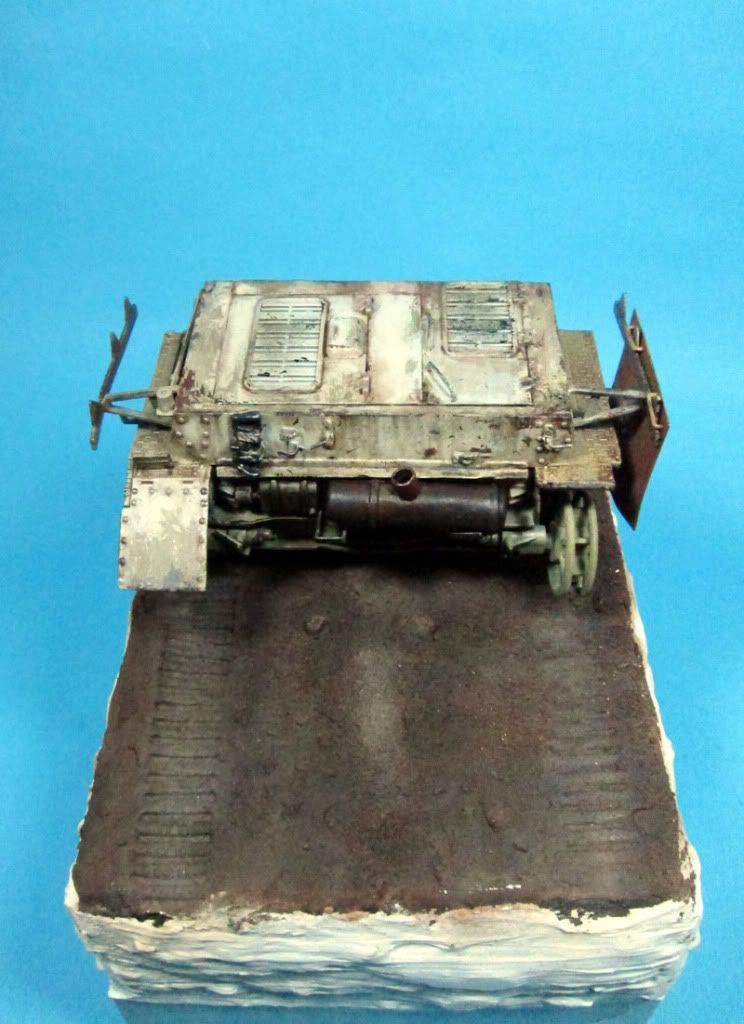
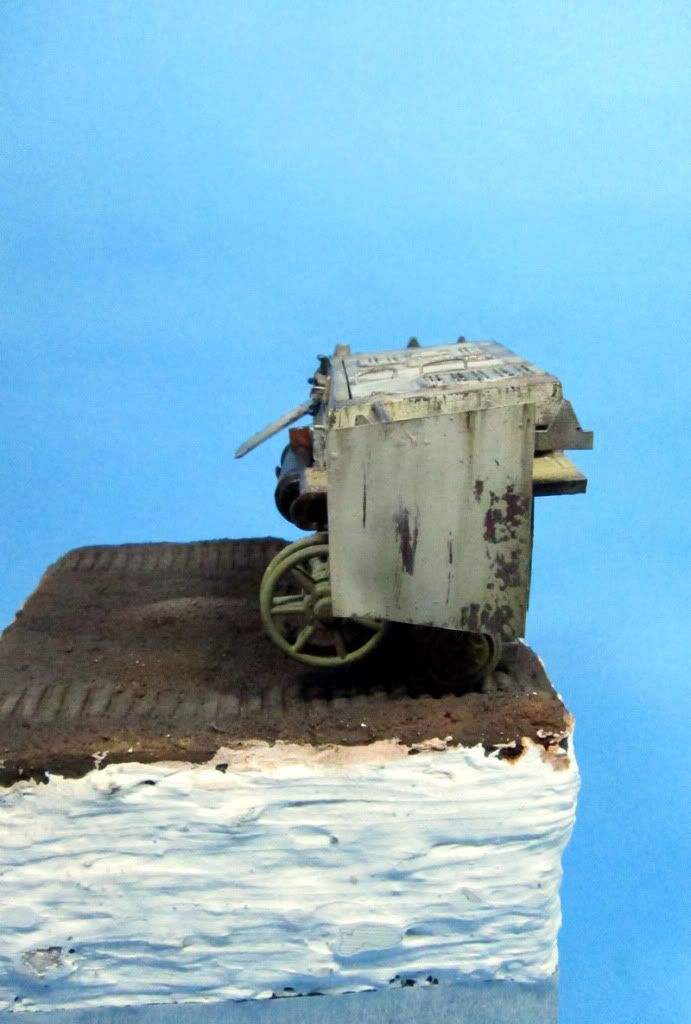
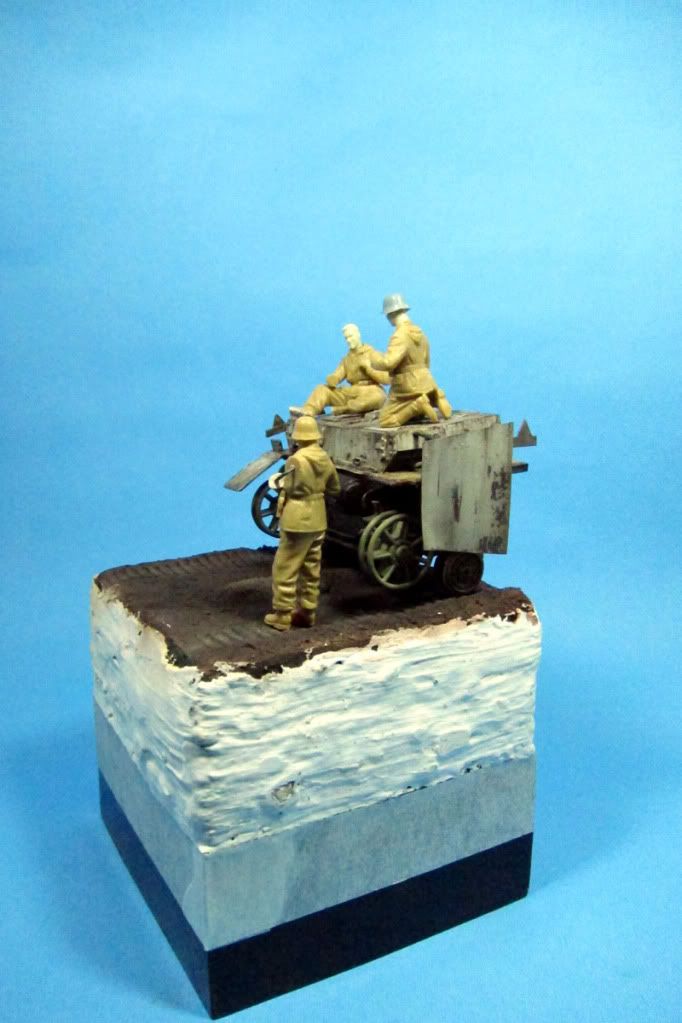
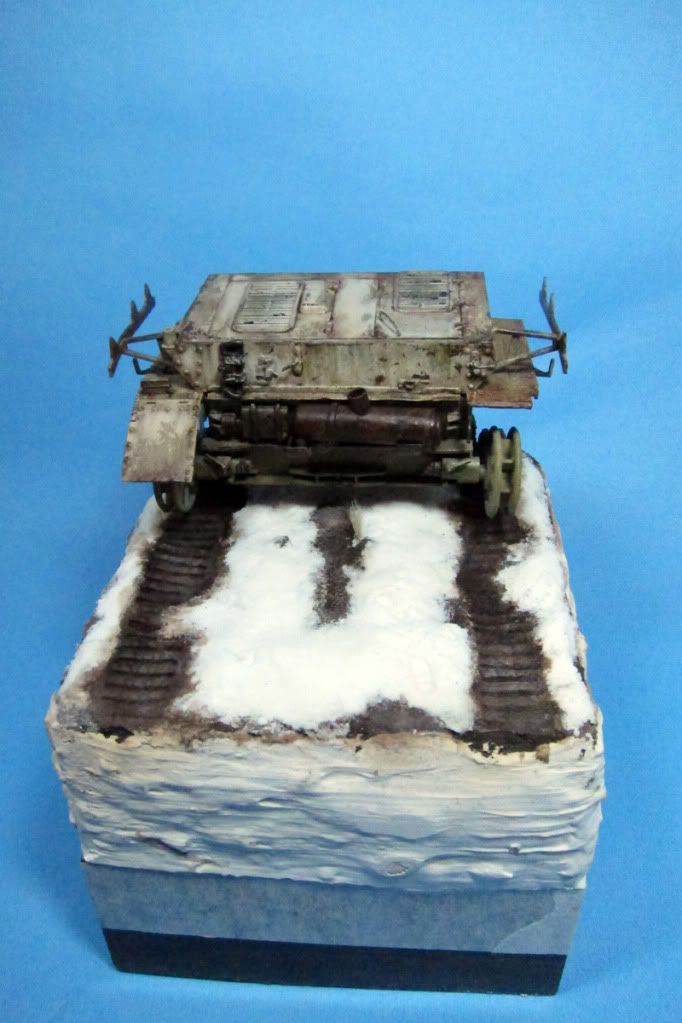
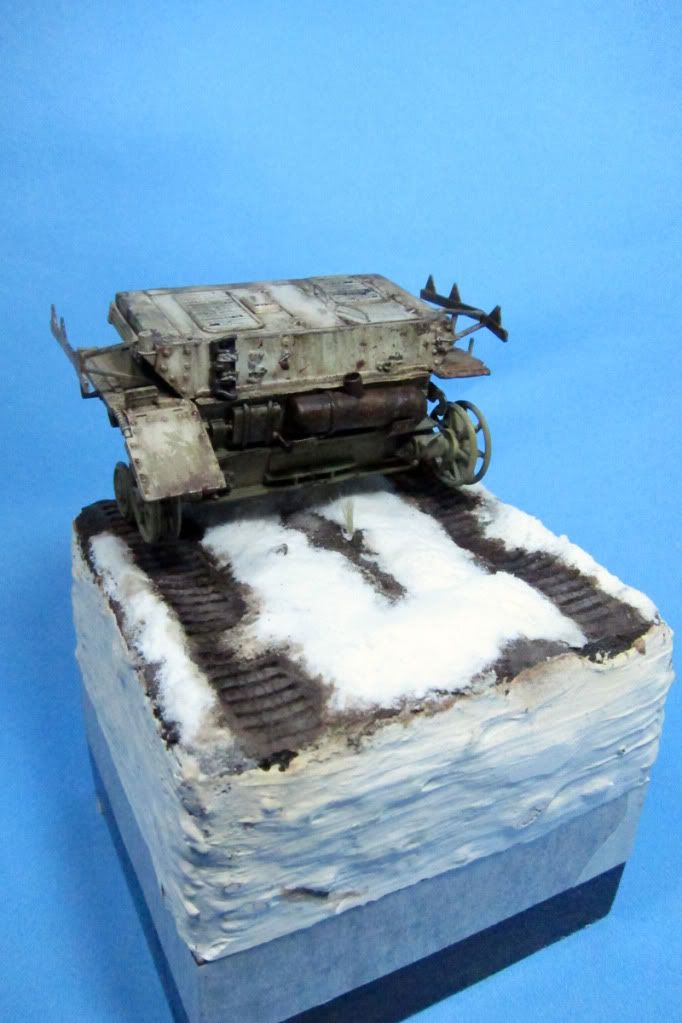
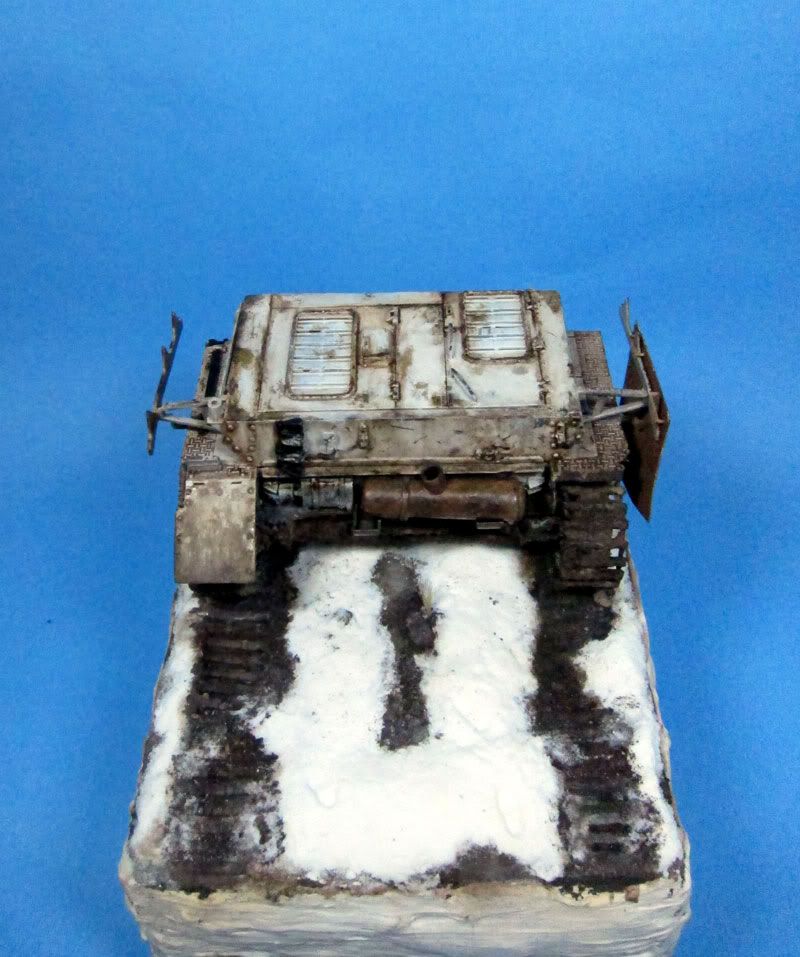
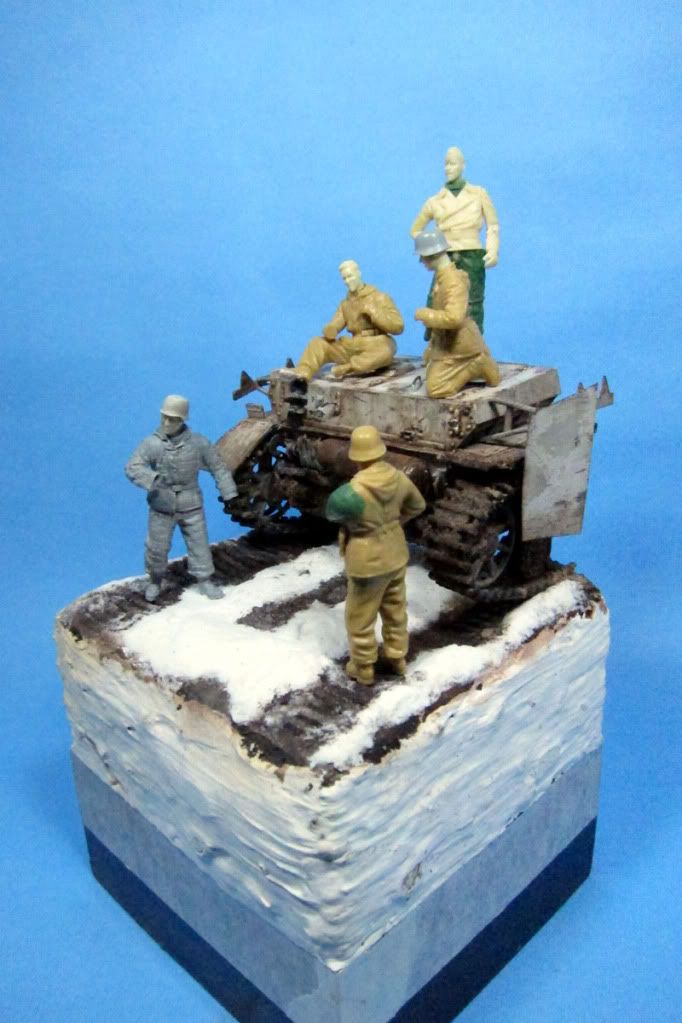
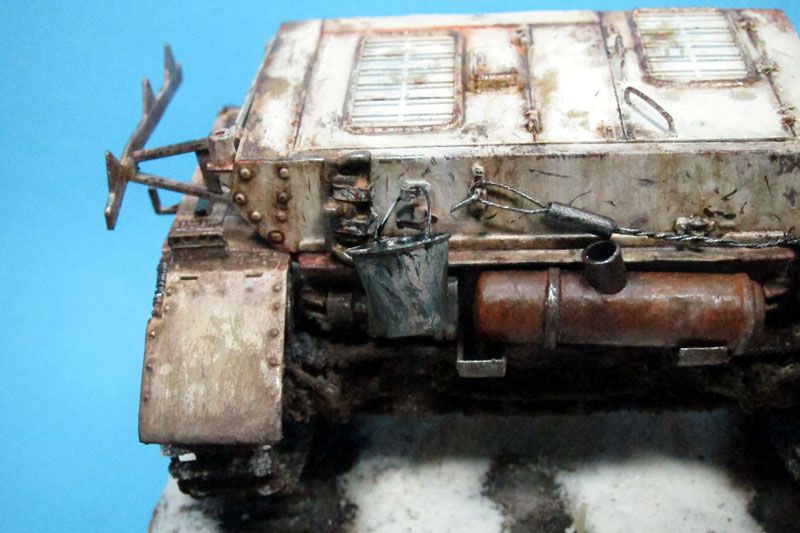
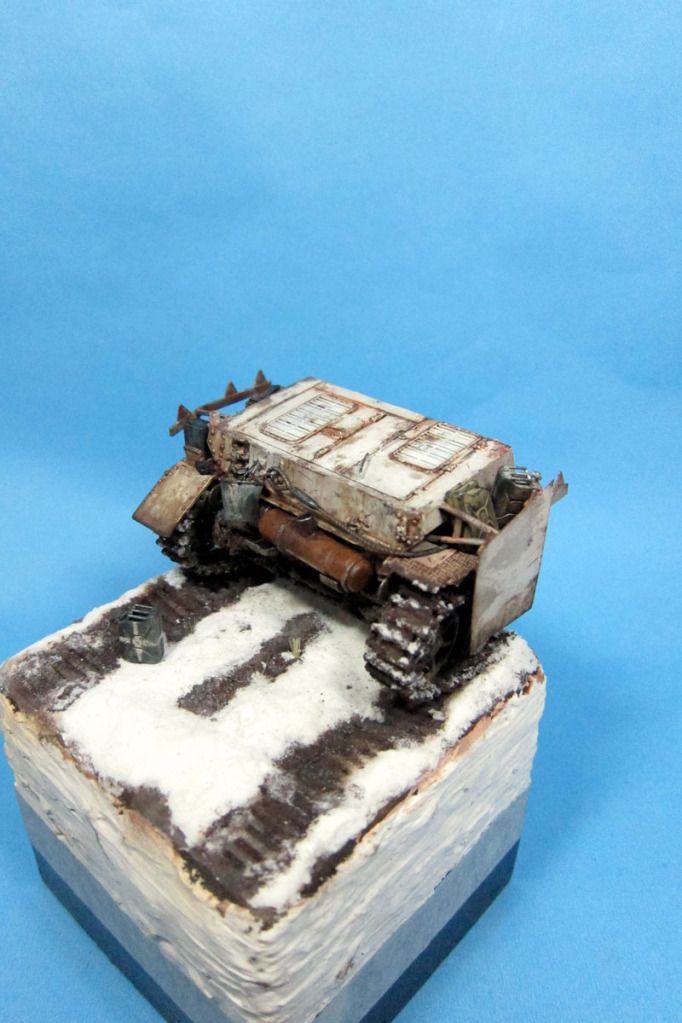
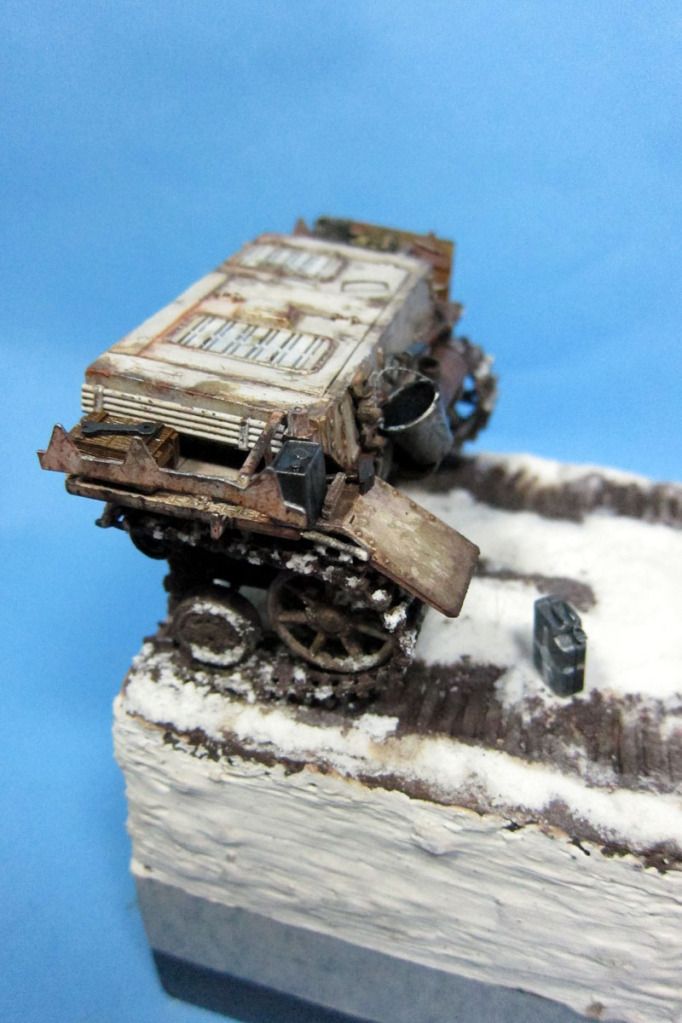
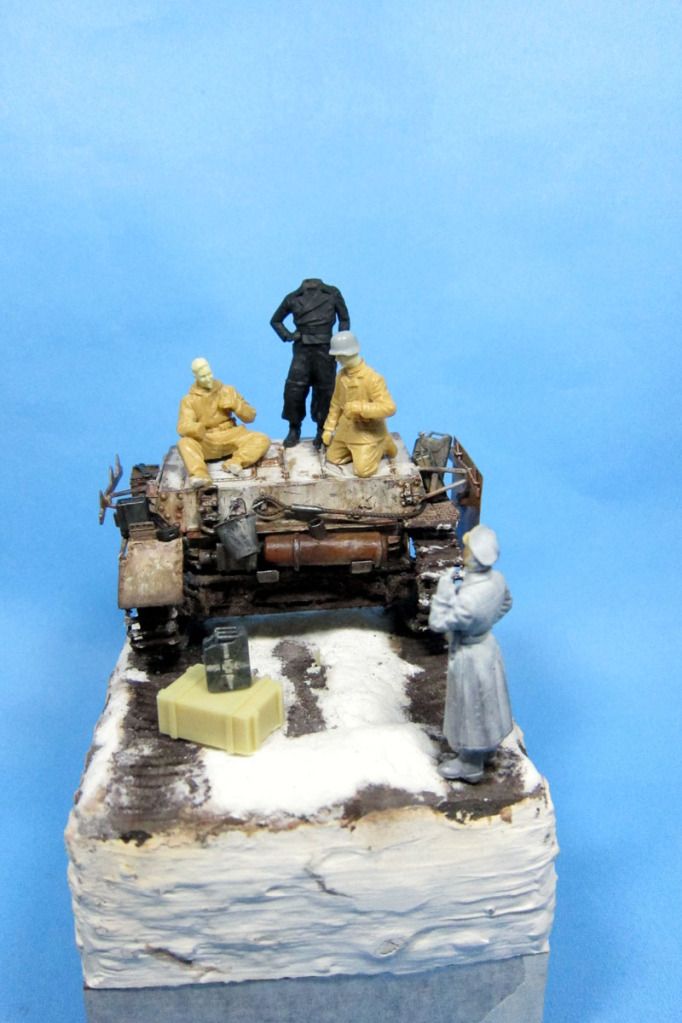
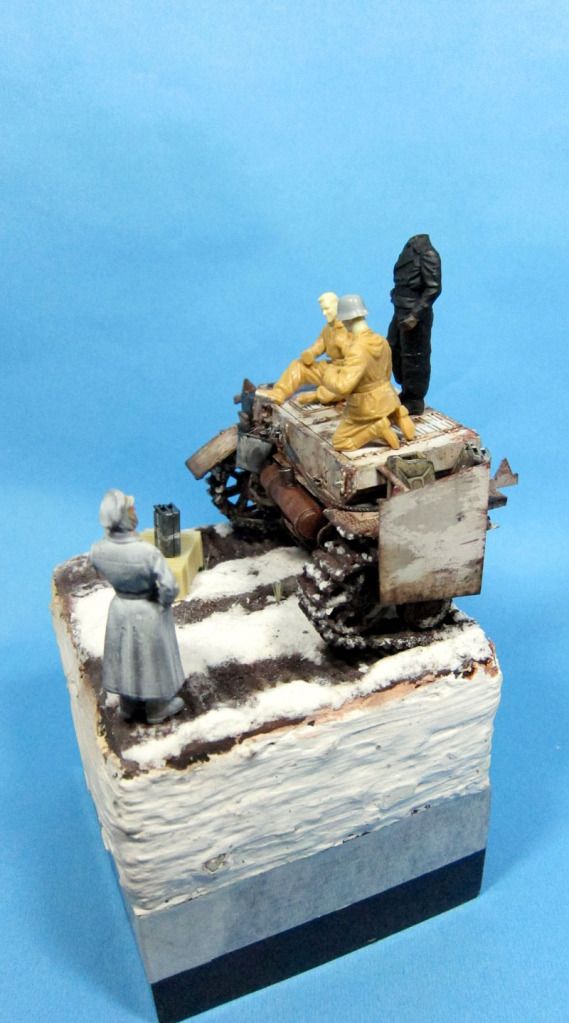
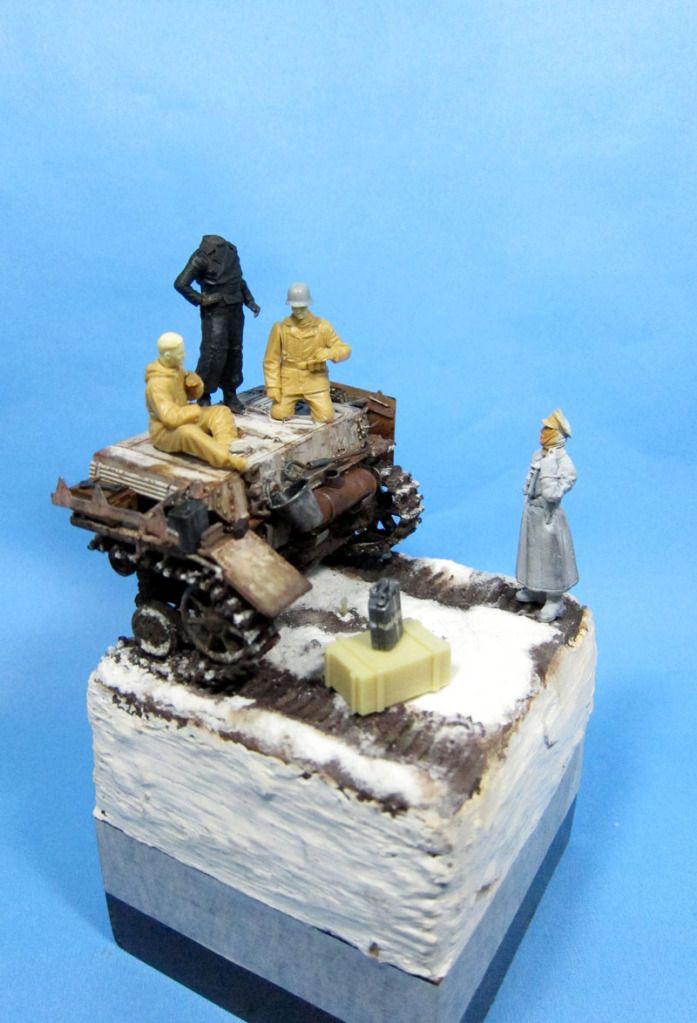
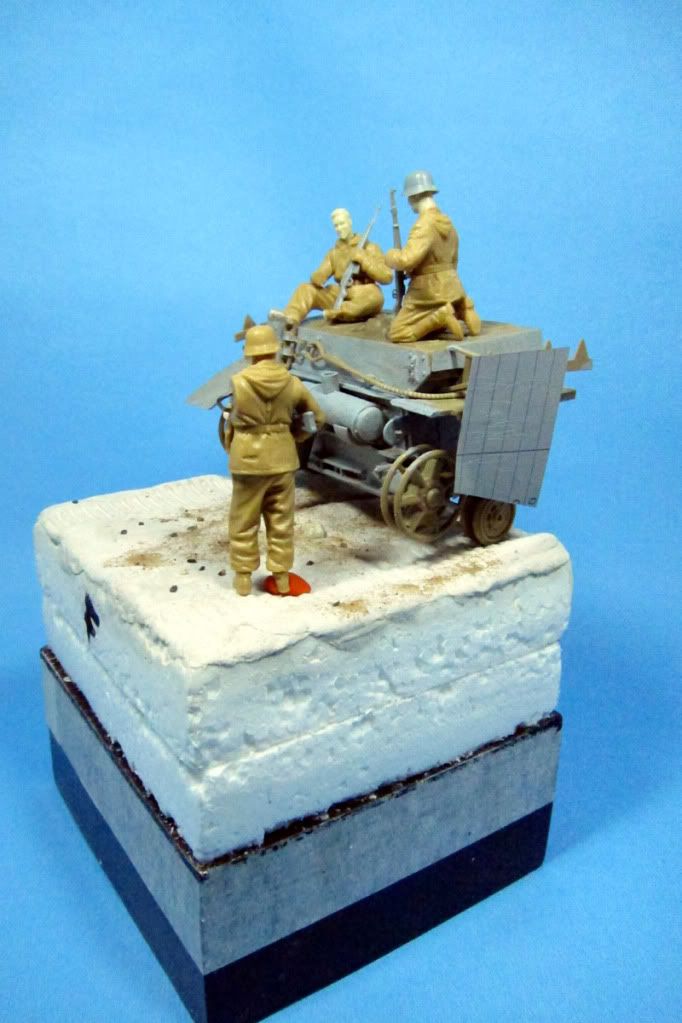
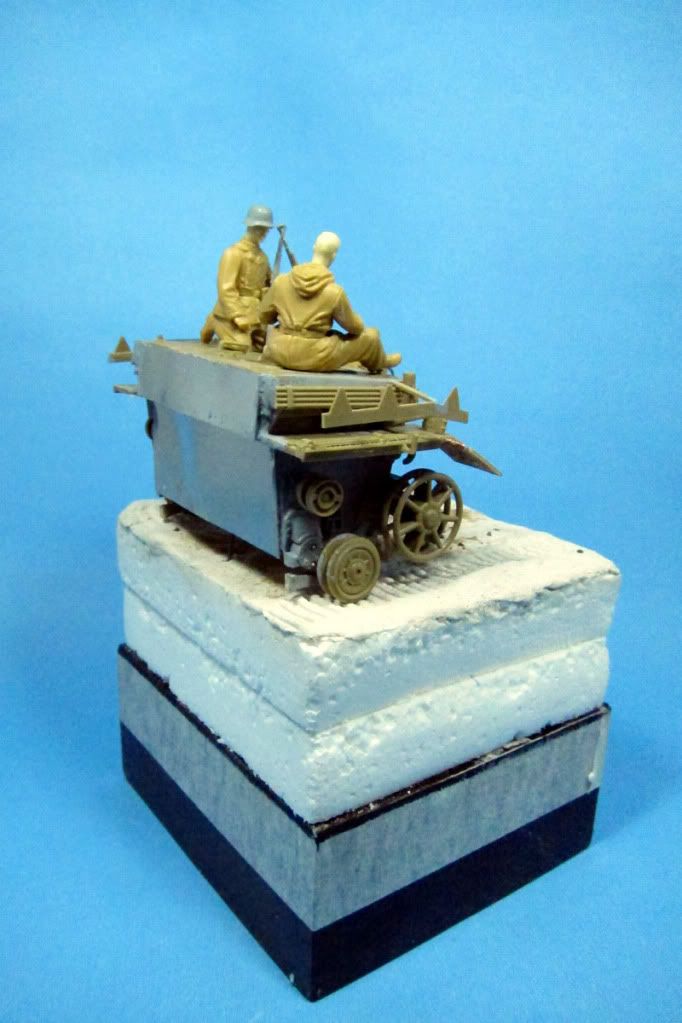
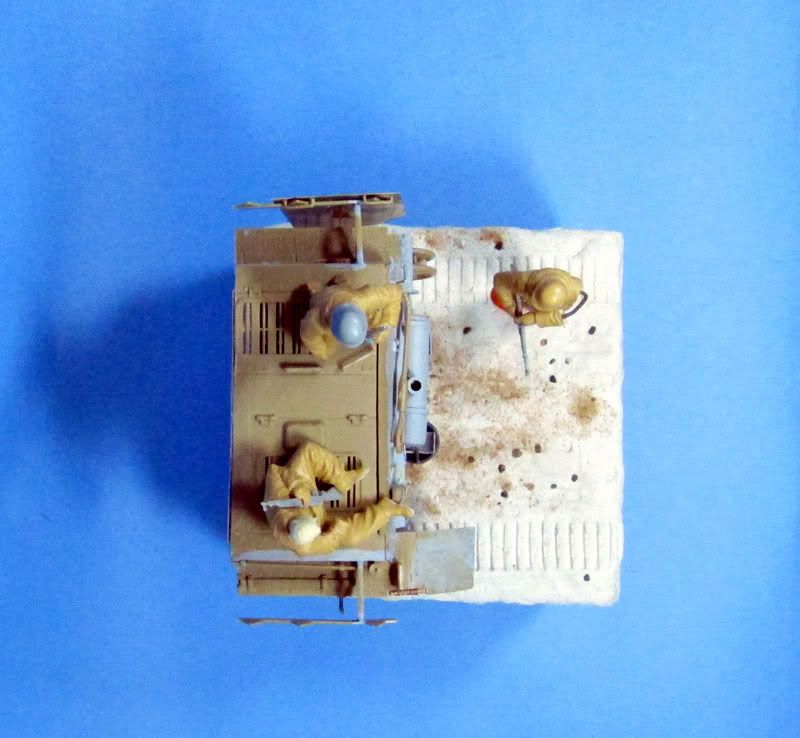
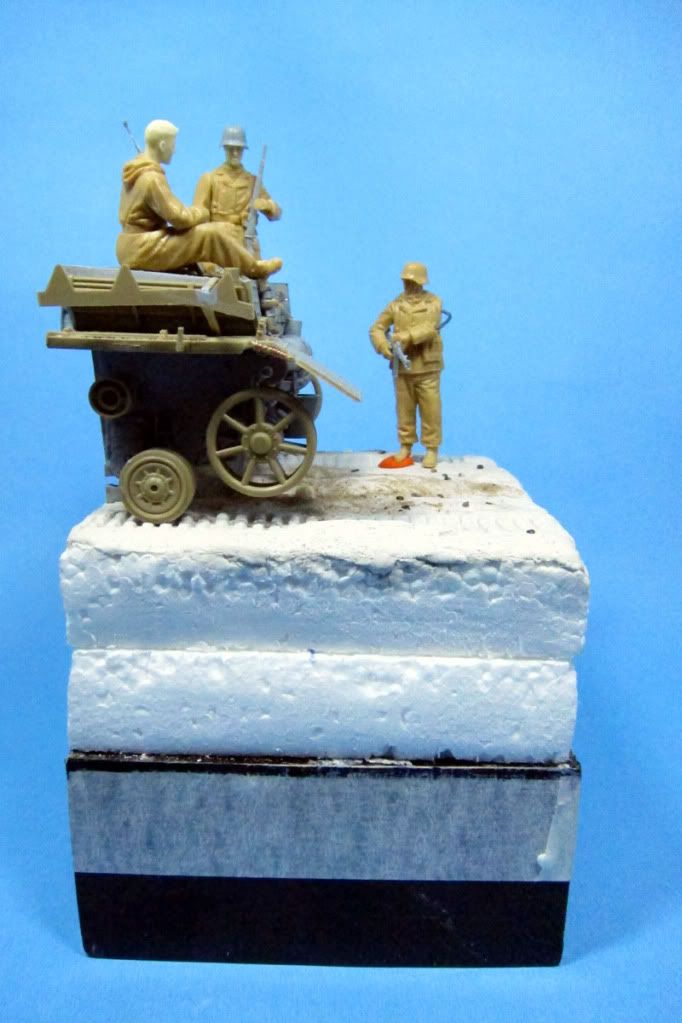
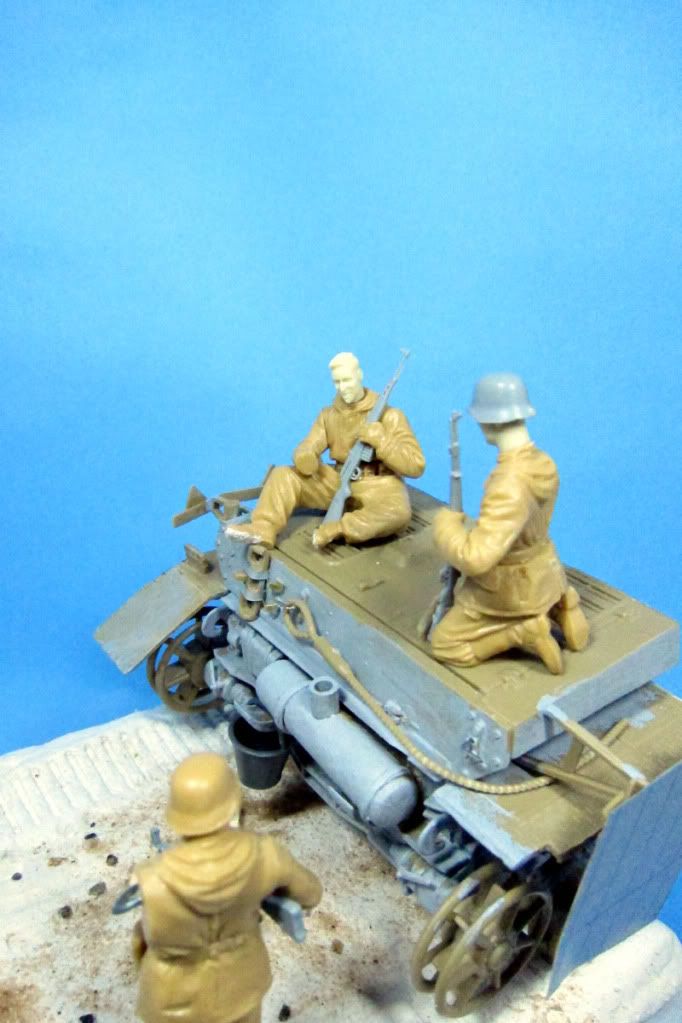
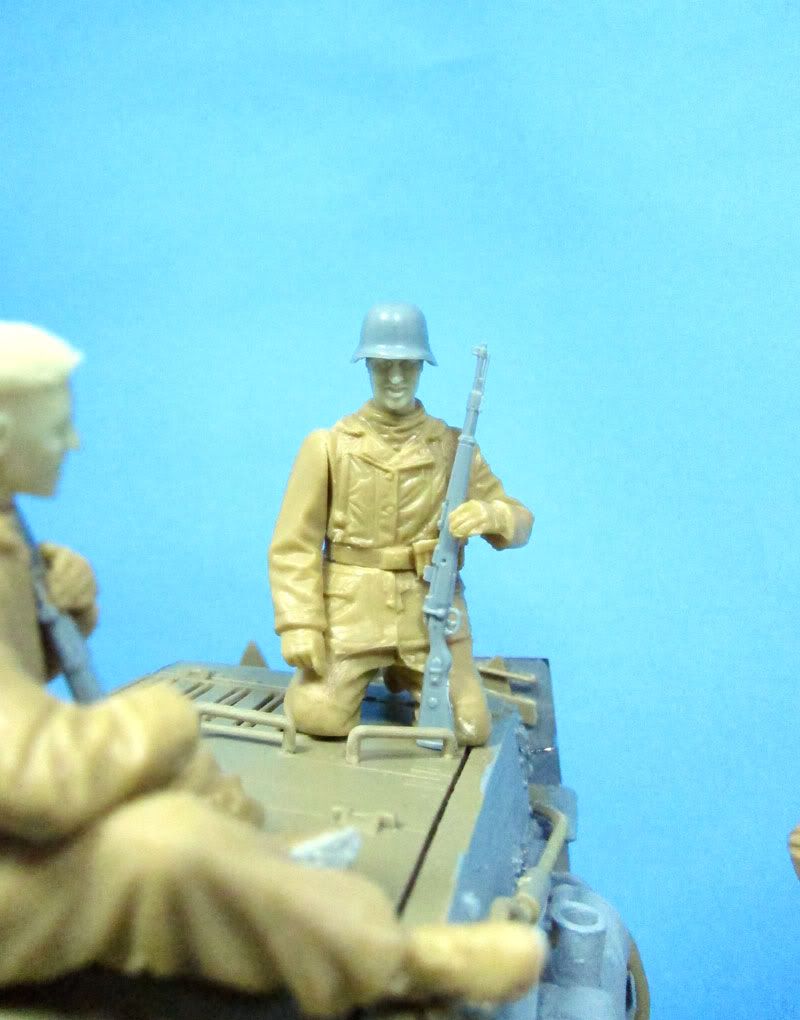
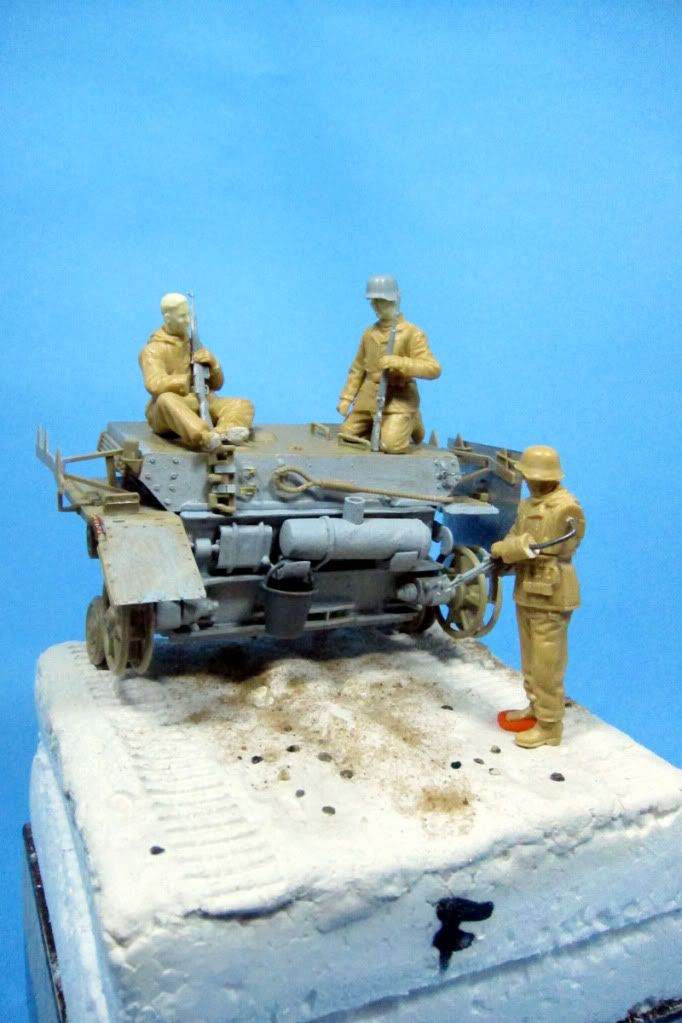
I leave a little initial approach to the scene.

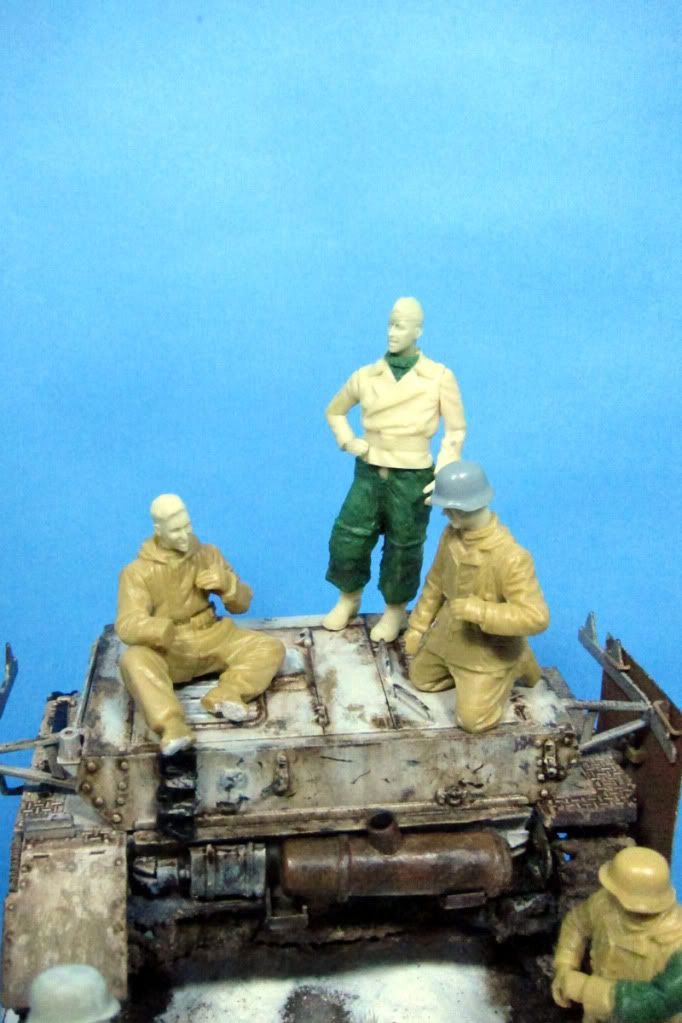
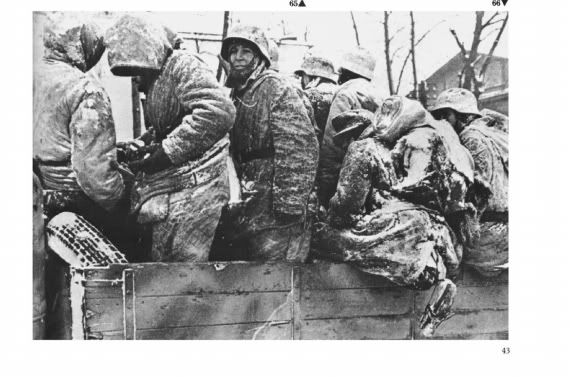
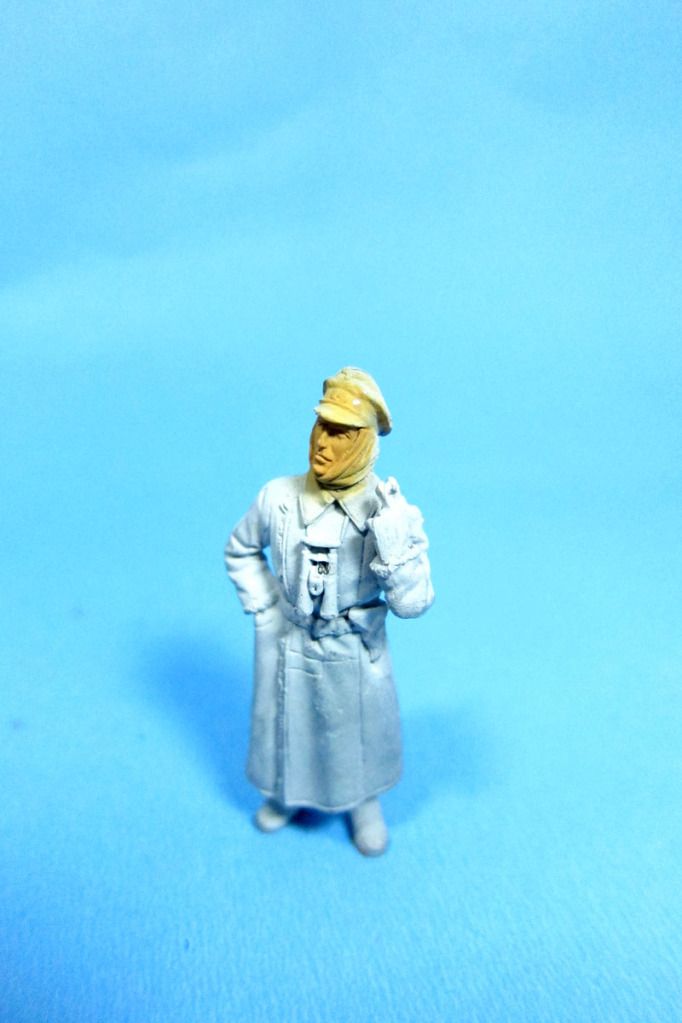
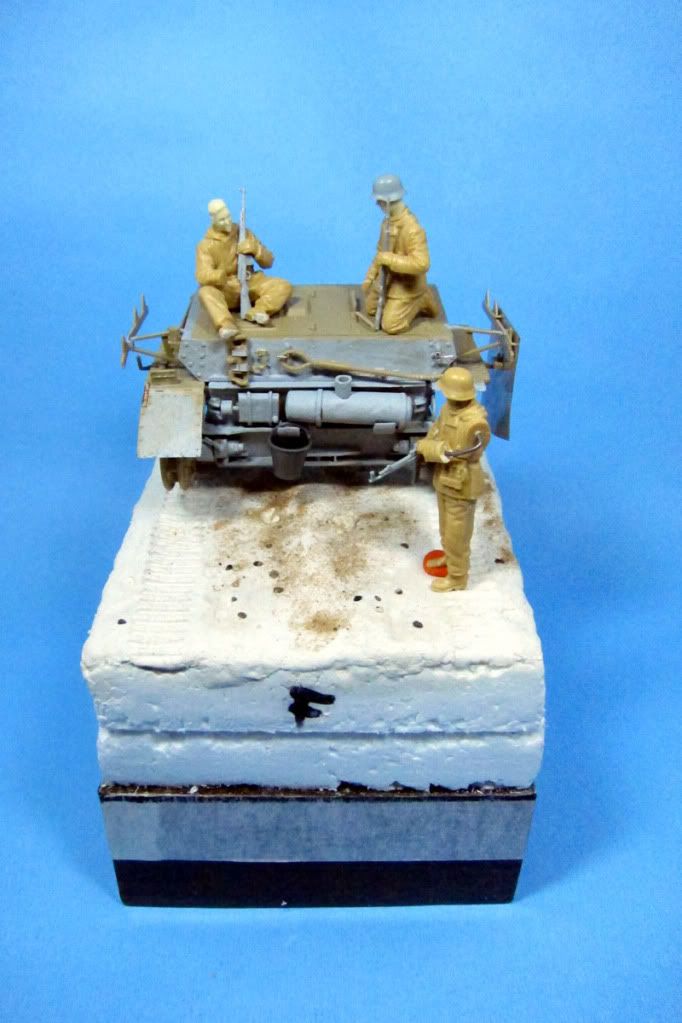
The simple and straightforward the story is about a few panzergranadiers smoked a cigarette in a stop on the way to your next destination.

IMG_0303.jpg


IMG_0304.jpg


IMG_0311.jpg


IMG_0314.jpg


IMG_0307.jpg


IMG_0306.jpg


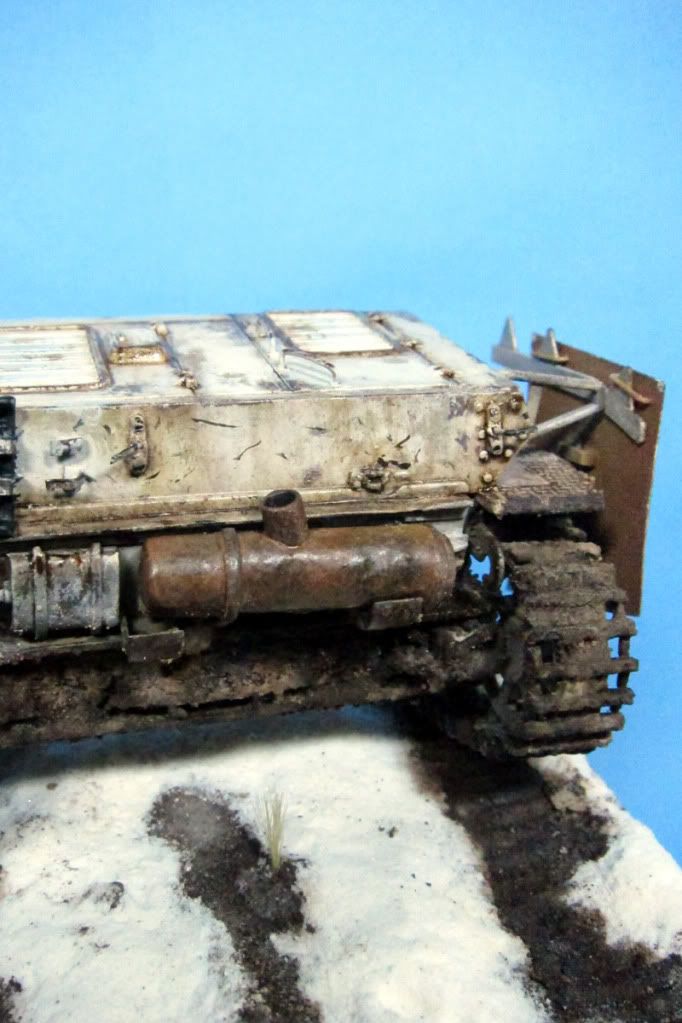
The cable is cut off but is an element introduced because I'm not convinced a lot of plastic cable surely rearmare
copper.

IMG_0305.jpg


IMG_0308.jpg


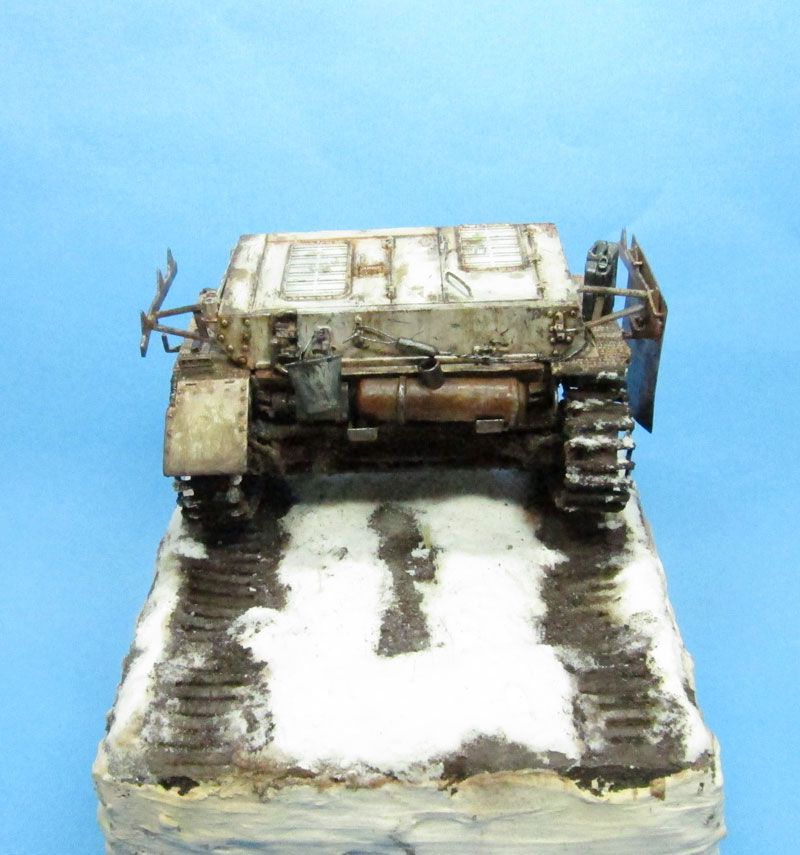
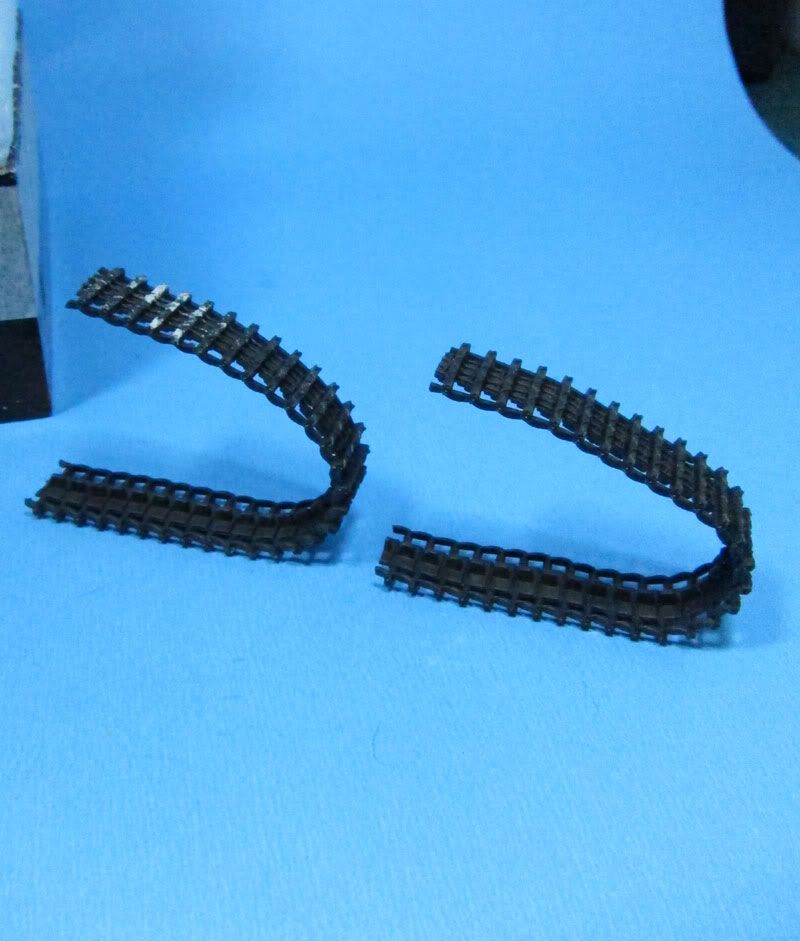
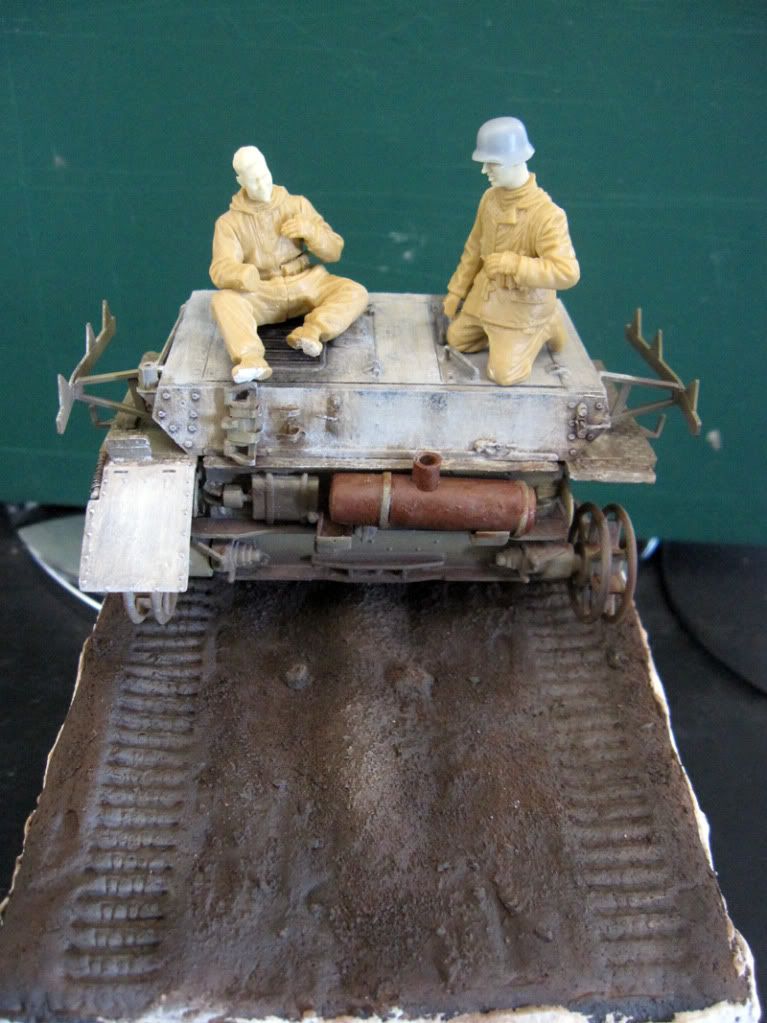
Obviously the tank will have their chains but now it makes sense to present them. Here already cut to size.

IMG_0316.jpg


IMG_0320.jpg


IMG_0312.jpg


/////////

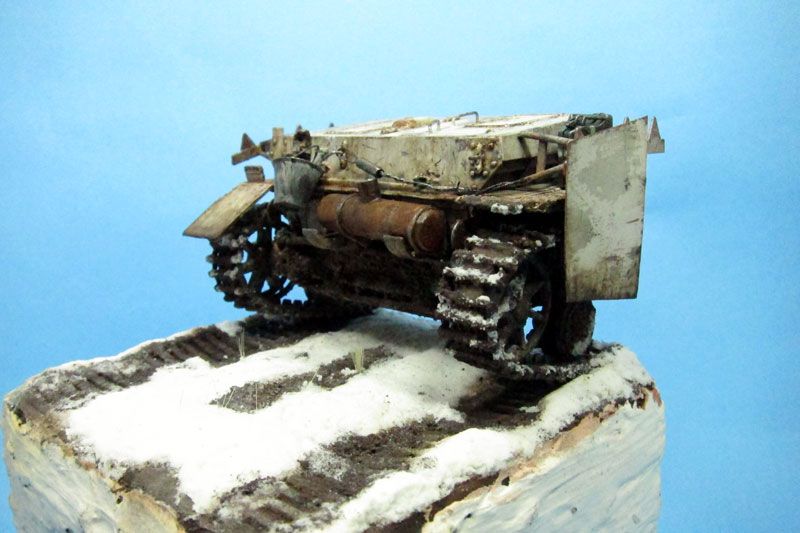
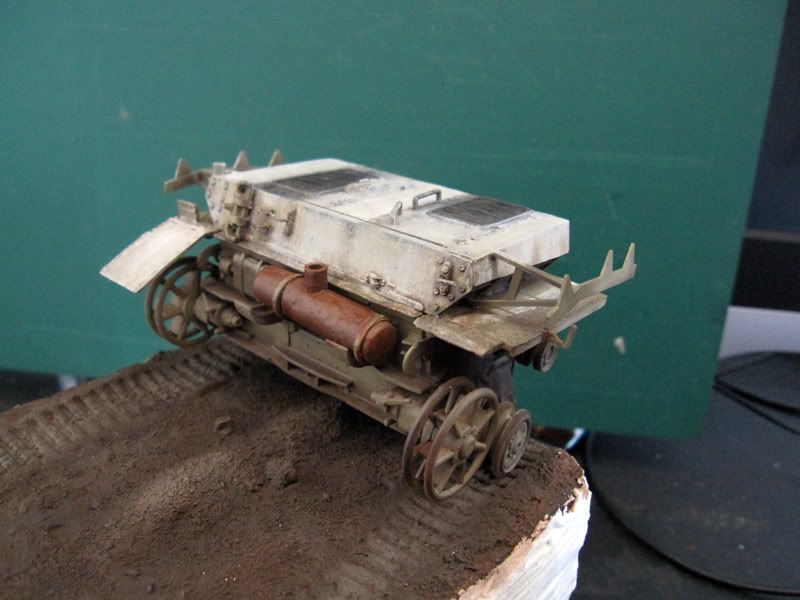
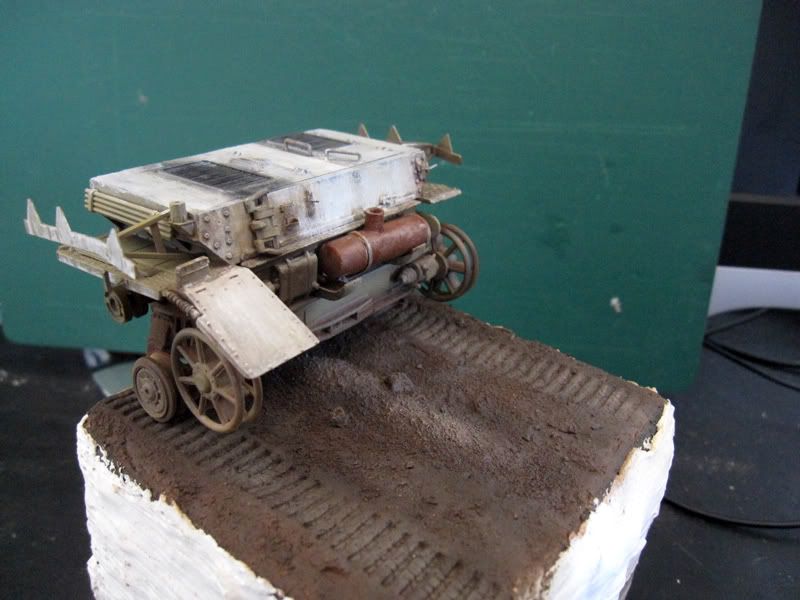
The idea is to work on the technique of liming on base Dark Yellow.

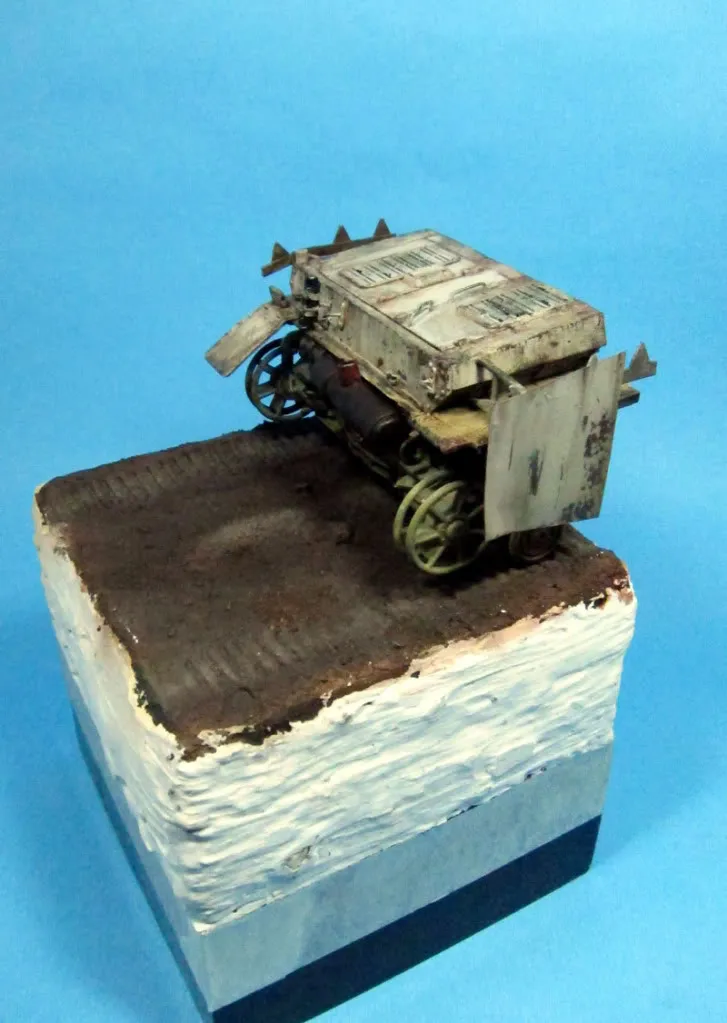
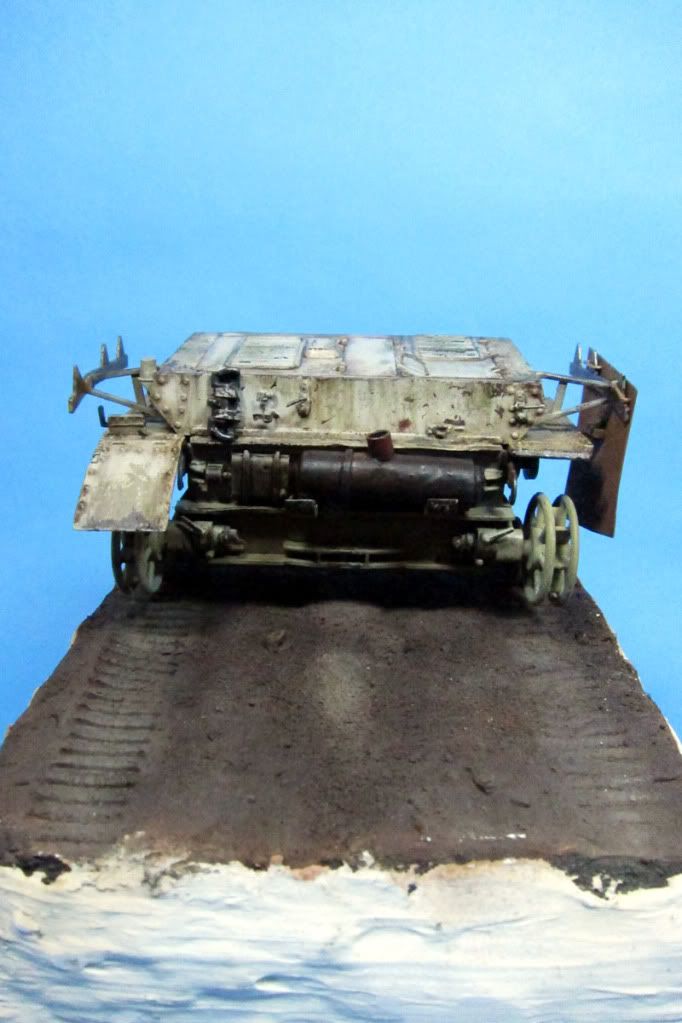
I leave the 1-step process. There is still chipping, mapping and other details, muffler only with the base color. The land with some form as well.


IMG_3778.jpg


IMG_3772.jpg


IMG_3773.jpg


IMG_3773.jpg


IMG_3780.jpg


Opinions welcome.
Greetings and thanks for watch.
 
Wow Lechu!

This already looks good,especially the white washed Panzer IV! (y)

So what's the problem with bringing DARIUS stuff to Argentina?


[By the way,be carefull on using THE F WORD,....I don't mind,but there is a chance others DO!]

Soldier on,Lechu! (y)

Greetings,Ron.
 
I think something is lost in translation here. I think Lechu's native language is spanish, can someone assist and let me know what he's trying to say there? :mpup
 
Thanks friends and sorry about my english. I edit de F word sorry for that too.

Reconron thanks for your word. Dariusminiatures is not bring to Argentina about the cost and customs issues or because there is less demand in the local market I guess. I can buy in e bay resseller but i like more do myself.

Gene thanks for your word. The track in the mud I make if you mean the marks on the way the did with the vinyl chains of the academy set I made it deep because it will be a wet spot.

Moon thanks its just hard explain a lot in english i try edit now into a more compresible way. Just let me know what part of this you do not understand to see if I can explain it better.

Thanks and regards.
 
Well it had not been very happy with the paint job so after 3 attempts I have come to this.
Notes: Ground floor with 0 jobs, muffler and other aspects in the process.
So far more work with spray technique chips, washed, and some chipping mapping x sectors.
Missing a lot but I think that here is the thing.

I leave the photos.

IMG_3716.jpg


IMG_0341.jpg


IMG_0349.jpg


IMG_0335.jpg


IMG_0342.jpg


IMG_0347.jpg


Thanks for watch!
 
I don't know,Lechu....it looks more dirty but in another way,guess it is a matter of taste. :unsure:
[it's not so that I don't like it,but it looks different]

What I really like is the chipping on the side-skirt! (y)


Greetings,Ron.
 
Thank for watch Reconron.

Well friends after seeing and reading many tutorials on snow I try the baking and the colorless autobrillo Blem (is floor wax) and table salt in this case very little. And sprinkled on it. As preliminary tests as they let me show you how to stay on the table. The mark of the tracks I was working with the dry brush with very little white oil and then dialing shaded Oil burnt earth in the depths of the same the idea is to give a wet look (I have not used gloss varnish, matt or semi or mate) estimate that this will end up giving the field the wet look I want. I still need to put snow spotted small clusters within the track marks on the ground. As if lifted by the passage of the vehicle.

IMG_0359.jpg


IMG_0354.jpg


IMG_0355.jpg


IMG_0356.jpg


Thanks for watch.
 
I love the snow-effect! looks like a late winterday when the sun starts to melt the snow, wonderful work Lechu! :)
 
Nice attention to detail, love how we can see the edge of the snow melting in the muddy tracks. Once again Lechu, Outstanding! :notworthy
 
First of all congratulations for the first year of life on the forum.

I leave a Partial Progress: snow on the ground and the vehicle with chains settled on the ground. There is still work in low and muddy.

IMG_0362.jpg


IMG_0393.jpg


IMG_0384.jpg


IMG_0375.jpg


On the set, I decided to add a tanker which was reworked to make a white shirt and pants and another figure who is looking out and waiting for others to arrive.

Some references.

Reference for the forum.

tankwinter.jpg


IMG_0395.jpg


And a figure instead of the bike this figure is looking out and waiting for others to arrive.

Reference for the forum.

wsol.jpg


Perhaps the two figures on the floor to change their position. It always held each other and avoiding the straight line formed between the two. But basically the idea is to work with these characters.

IMG_0407.jpg


IMG_0408.jpg


Thnak for watch!
 
Well friends I leave some progress on this project over the snow on the tracks and various details. Items such as the bucket, the tow cable and the drum presented. As I mounted the full light box amused myself trying to make some more detailed pictures that reflect the work if you will.

IMG_0439.jpg


IMG_0429.jpg


IMG_0432.jpg


IMG_0443.jpg


IMG_0423.jpg


IMG_0422.jpg


IMG_0428.jpg


IMG_0442.jpg


IMG_0431.jpg


I guess I'll go now slowly getting to the figures.

Thank for watch.
 
Thanks a lot friends. Well December is a month long complicated. Parties, toast, friends, modeling contest but just to keep pace with some details I have advanced on this bullet.

To add multiple items to begin to give more life to the history and panzer room.

Drums and a few elements more.


IMG_0079.jpg


IMG_0080.jpg


Los bidones presentados al igual que todo lo que detallaré a continuación.

IMG_0083.jpg


IMG_0082.jpg


Wooden box, long hammer, wrench and oil drums or whatever on this side.

IMG_0091.jpg


IMG_0088.jpg


The cable has been replaced by another more appropriate.

IMG_0094.jpg


IMG_0092.jpg


I found this lead figure that I liked a lot.
This smoke and warm, what I like is that he looks up.

IMG_0096.jpg


So I decided to refocus once again the scene as see. Leaving an angle if you want cleaner input
to what happens on the tank. On the floor may have a box and a drum or a barrel or other components which serve to fill the
space without obstructing the view as happened with the other figure. The new figure brings more to the moment and has a look that is directed toward those who
are above anything that happened with the other two. Drums and other gadgets help me have a moment of rest while they repair
any vehicle or the same or while you refuel.

IMG_0098.jpg


IMG_0101.jpg


IMG_0100.jpg


IMG_0103.jpg


On the other hand I leave a breakthrough with a figure of this bullet. The tanker's stopped. Clarifications. While I was working in the shadows in his pants I think it still lacks some depth and some soiling. The pants are crafted with oils so before proceeding I must let it dry a week or more to not mix it.

IMG_0116.jpg


IMG_0118.jpg


IMG_0117.jpg


Thanks for watch!
 
Back
Top